Building a greenhouse stove yourself is the optimal solution to the heating issue.
Content
- 1 Types of Furnaces + Comparison of Fuel Options
- 2 Step-by-step instructions on how to build a greenhouse oven yourself: 10 projects
- 3 Review of ovens from the manufacturer
Types of Furnaces + Comparison of Fuel Options
The design features of the stoves depend on the dimensions of the room.
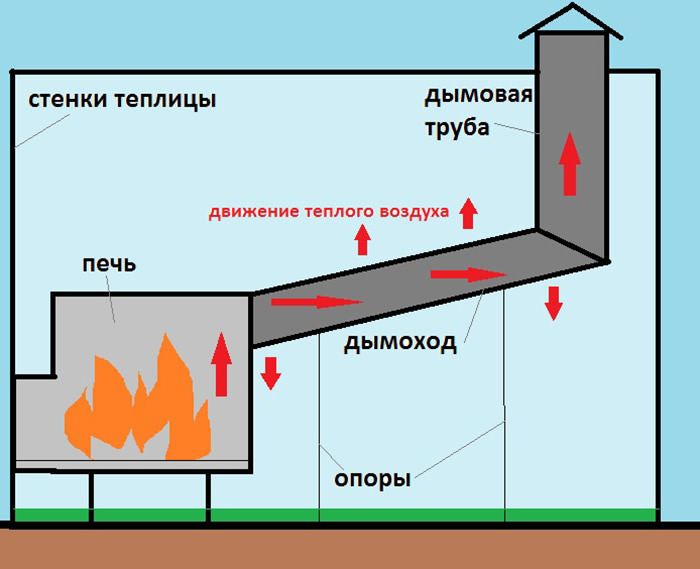
The devices differ in the dominant criteria of the thermal effect they produce, which include:
- infrared radiation;
- heat transfer;
- convection.
In the oven it is customary to distinguish:
- fuel combustion chamber;
- air flow channels;
- convection jacket;
- additional components.
The following can be used as fuel:
- electricity;
- wood chips (pressed sawdust);
- peat;
- coal;
- firewood;
- oil-based fuel.
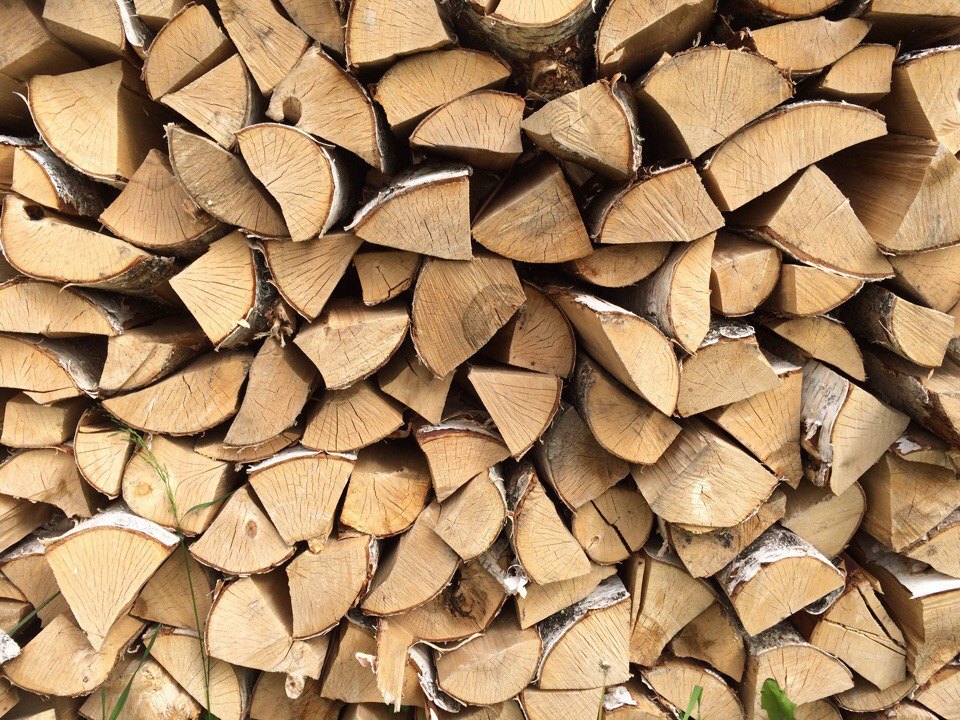
Firewood is readily available and is a slow-burning fuel option.
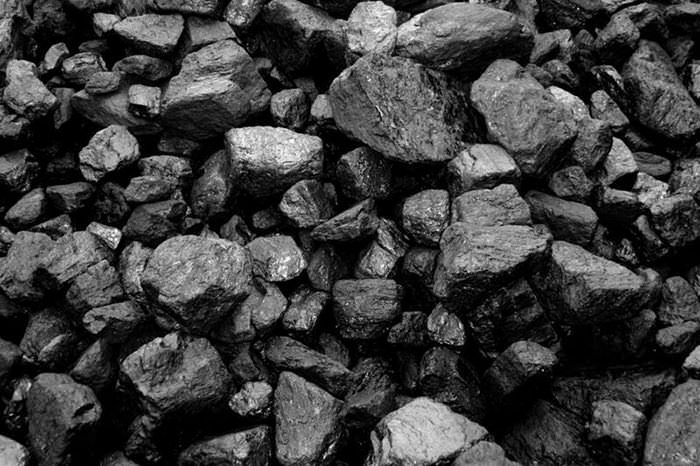
Coal has a high calorific value. However, its use is limited due to its large waste stream, the formation of potentially hazardous substances during use, and its tendency to spontaneous combustion.
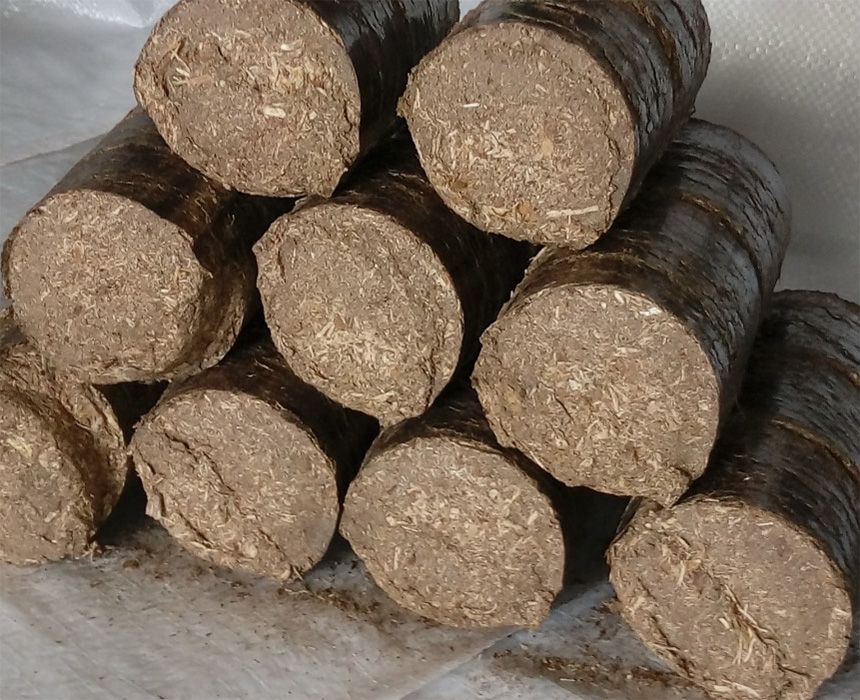
The use of sawdust is justified by its low cost, environmental friendliness, rapid combustion, minimal smoke, and high efficiency. Its use is based on its slow smoldering, allowing the greenhouse to be heated for a long time.
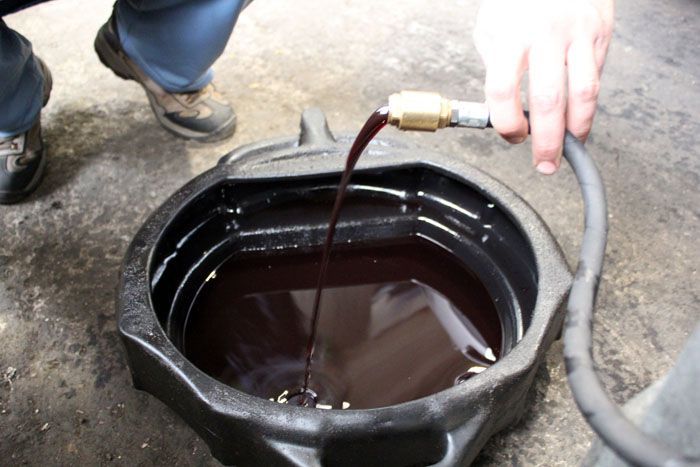
Burning waste oil for heating is attractive due to its low cost, but is limited by the toxicity of the compounds formed during its combustion.
The use of electricity is limited by its high cost. Consequently, the adoption of electric furnaces is limited.
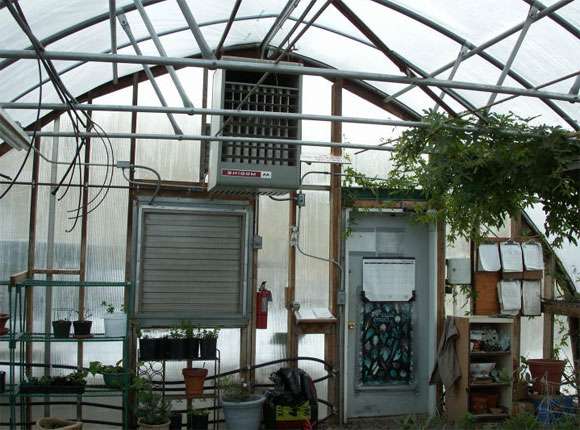
Step-by-step instructions on how to build a greenhouse oven yourself: 10 projects
There are five main methods of handicraft production:
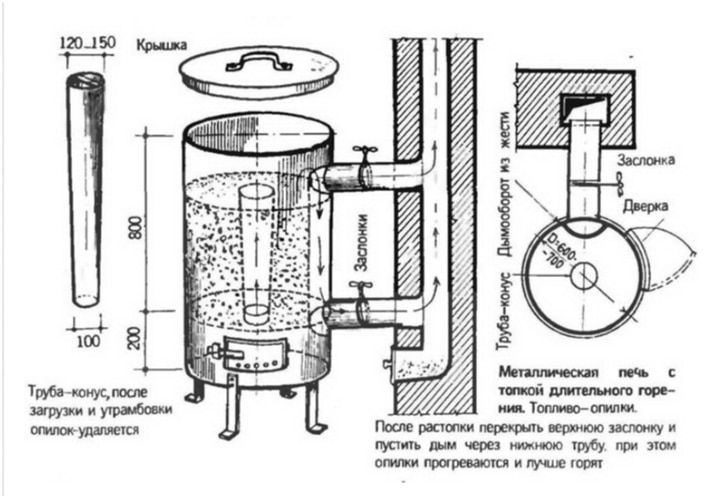
For long burning from a barrel
Perhaps the most common method.
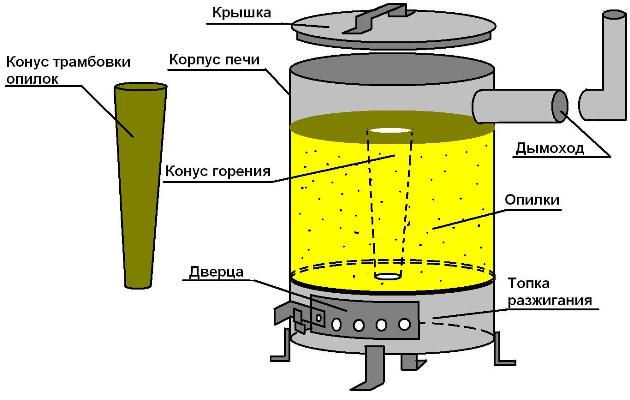
Suitable fuels include firewood, wood chips, peat, and coal. Burning time is up to 16 hours. Efficiency is 85% or higher.
Source materials: barrel, smoke exhaust pipe, steel strip.
Necessary tool: welding machine, metal working disc, marker, tape measure.
The process of making such a stove looks like this:
| Illustration | Manufacturing algorithm |
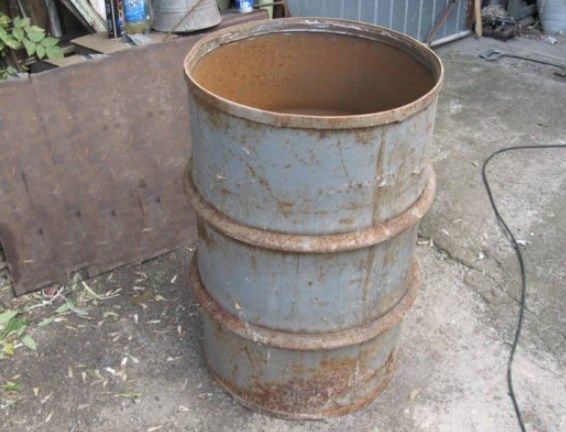 |
Remove the lid from the barrel or cut off its top. |
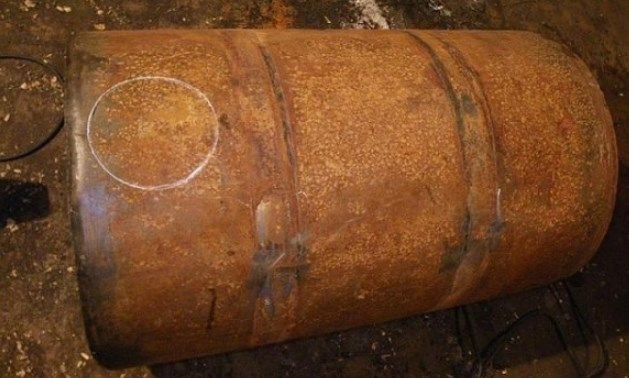 |
Make a hole in the top side for the chimney. Paint the barrel. |
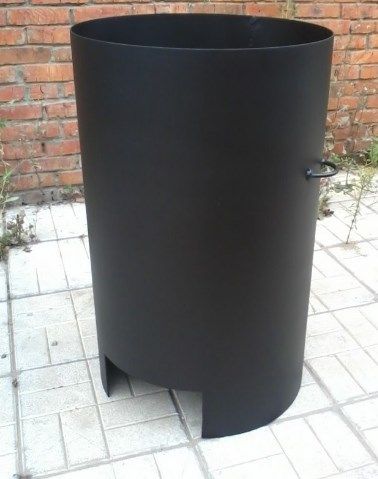 |
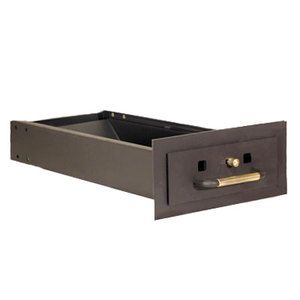
At the bottom of the barrel, cut a rectangular hole for the ash; it should be closed with a sealed door. |
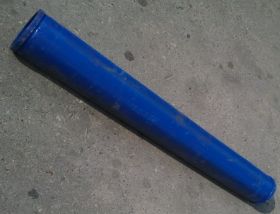 |
Weld a cone-shaped metal pipe. It should be relatively small in diameter; a wider pipe will cause the firewood to burn faster. The top diameter should be approximately 12-15 cm, the bottom diameter 7-8 cm. |
 |
You can make a retractable structure to make it convenient to collect ash. |
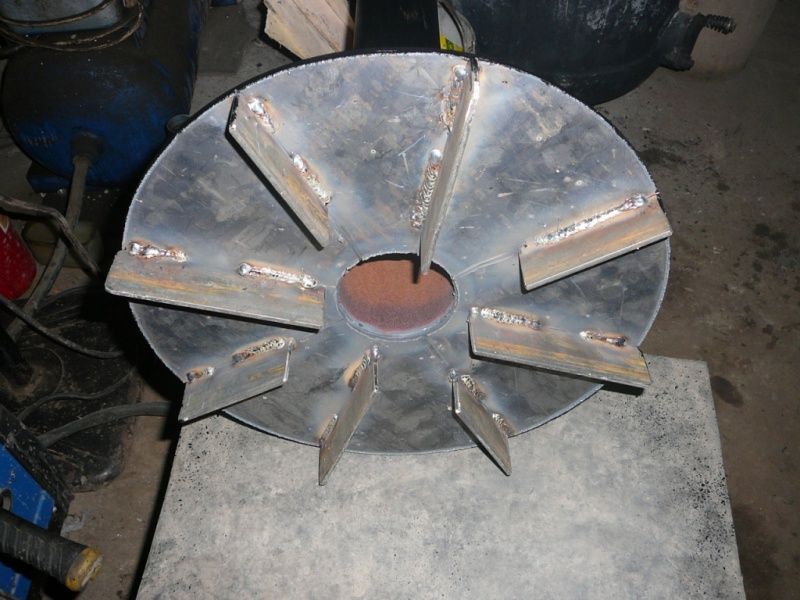 |
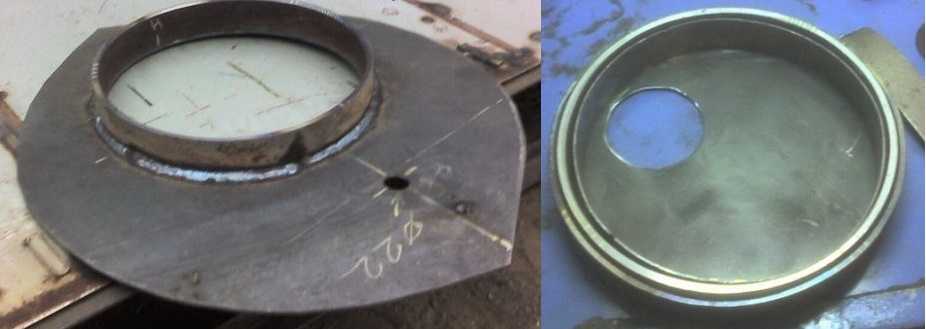
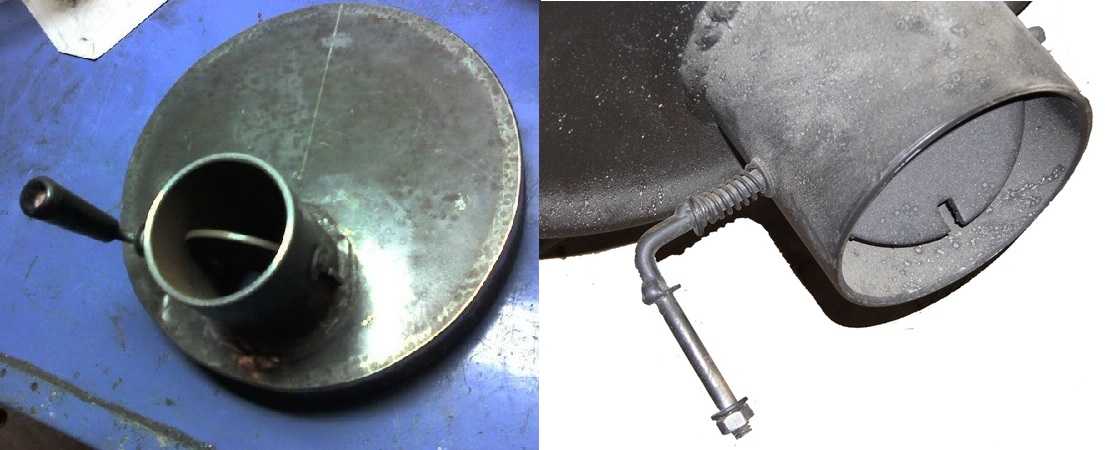
Separately make a lid to cover the stove with a hole for the pipe. Carefully trim it to fit easily into the barrel. Make a hole in the center of the lid - a blower - and weld the manufactured cone-shaped pipe to it. Weld steel strips to the bottom of the lid to increase pressure. |
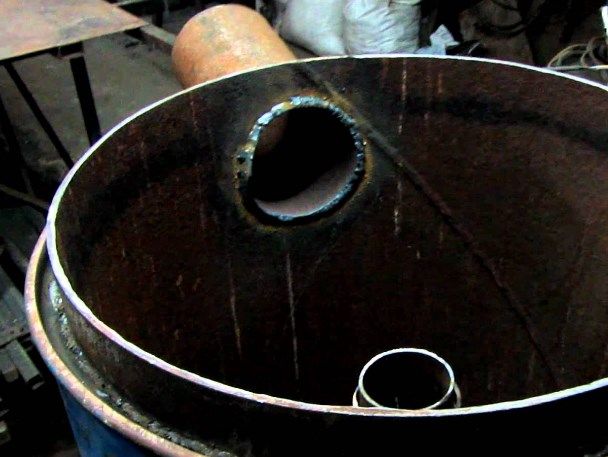 |
Weld the chimney pipe. |
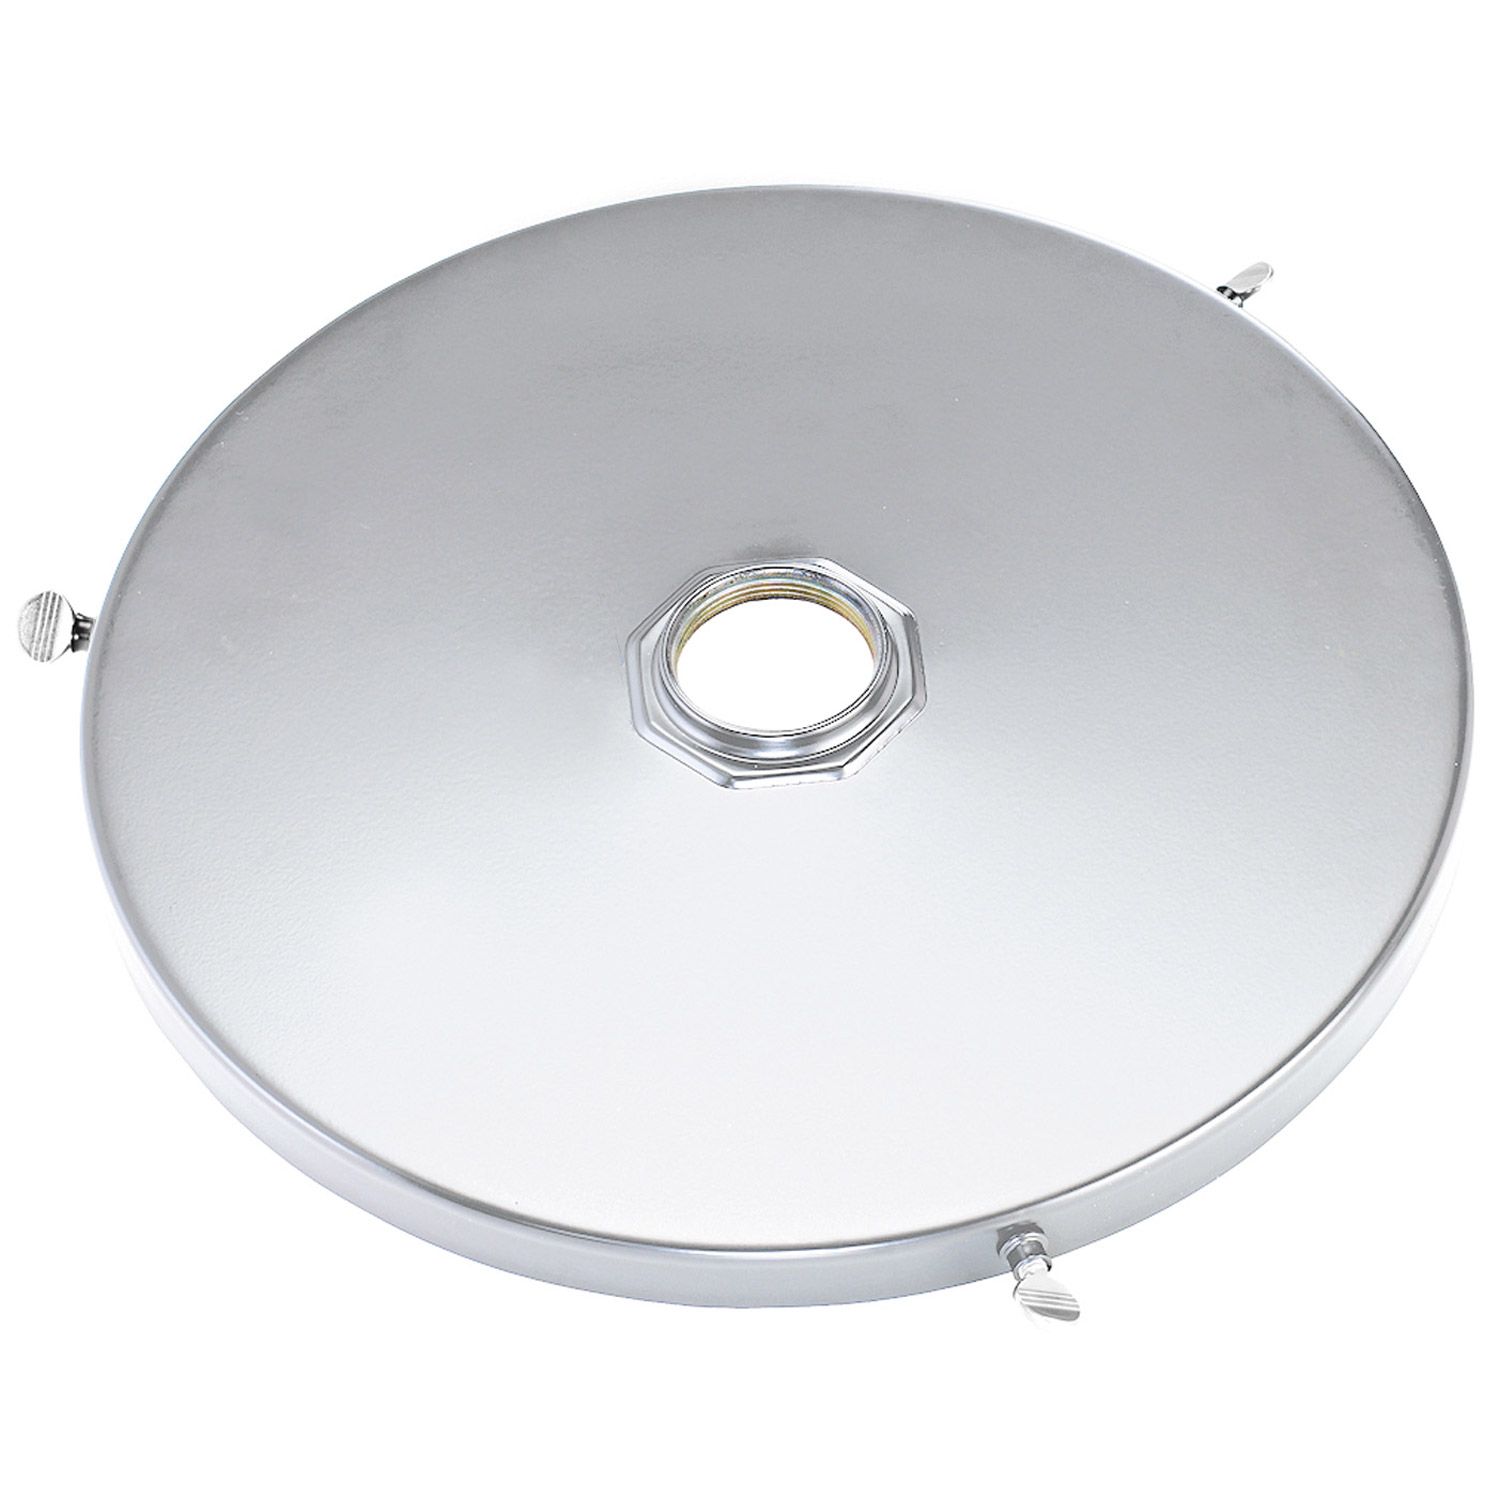 |
Separately make a lid to cover the barrel with a hole for the pipe to pass through. |
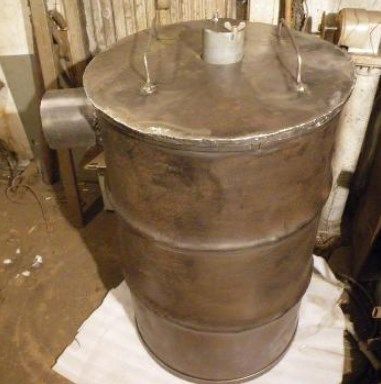 |
To increase stability, it is recommended to attach legs to the bottom. |
During operation, the firewood or sawdust in the firebox smolder and fall under the pressure of the lid. Once the ash reaches the bottom, the barrel is cleared of ash and a new batch of fuel is added, sufficient for heating for 8-24 hours.
Construction of two metal barrels
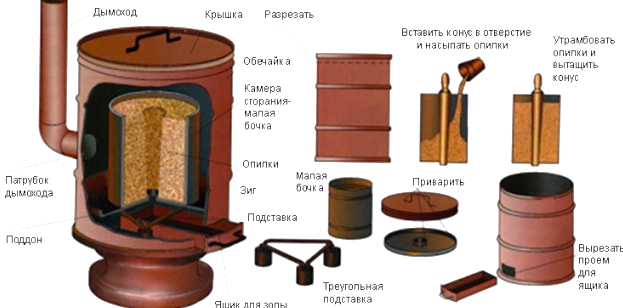
Runs on sawdust.
To create it you will need: two barrels and a steel pipe, reinforcement or metal corners (for the legs).
Step-by-step manufacturing instructions:
- Install a chimney pipe into the top of 1 barrel and cut out a circle 10 cm in diameter at the bottom.
- Cut the second barrel in half, attach legs, and cut a hole in the bottom for the door. Use the remaining pieces to make a lid.
- Weld the pipe and firebox to the stove.
A steel cone is used to load sawdust. It is recommended that its diameter be 15 cm at the top and 7-8 cm at the bottom. After the furnace is filled, the cone is removed.
DIY potbelly stove
The potbelly stove is also quite common and easier to manufacture than the buleryan.
To create it, you will need:
- tools: chisel, welding machine, hammer, sandpaper;
- materials: wiping textile, body, firebrick, steel pipes, grate, branch pipe, steel wire, door hinges.
The structural elements include: a firebox, an air supply and distribution channel, and a convection jacket.
A potbelly stove can be made from improvised means:
- old gas cylinder;
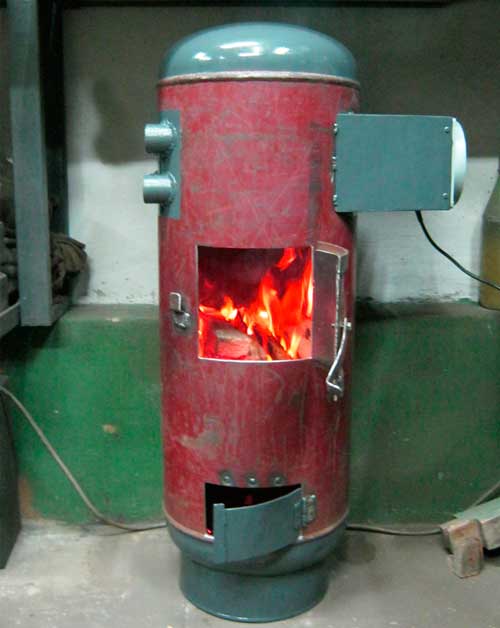
- a stray metal flask;
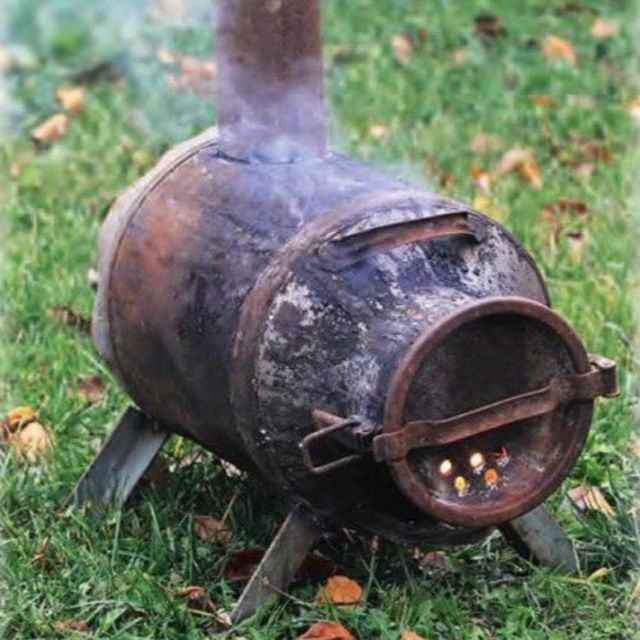
- old barrel;
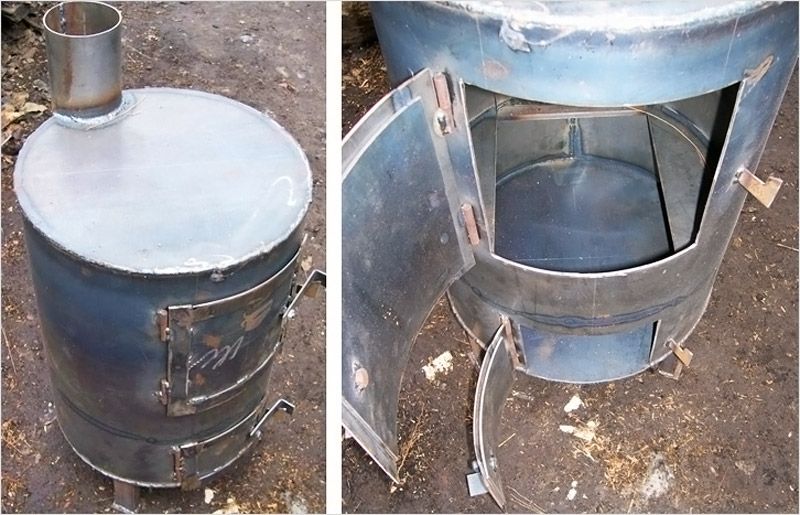
- metal safe.
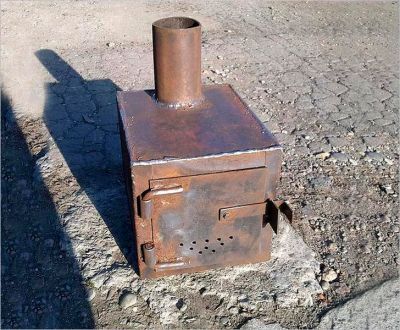
Let's consider several options.
A DIY potbelly stove made from a barrel, gas cylinder, or flask
Making a potbelly stove from a 150-200 liter barrel, a gas cylinder, or a flask of at least 40 liters won't take much time or money.
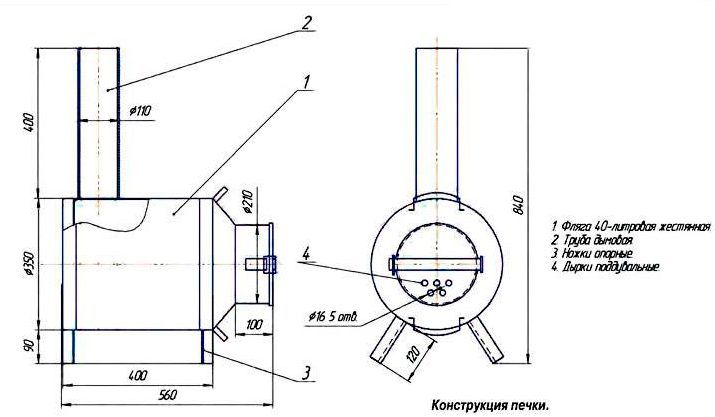
Once a suitable container has been selected, you can begin laying the brick foundation. This is where the stove will be placed. This stage will take 2-3 days. After this period, you must:
- Use a jigsaw to cut out the loading door. The opening for it should be rectangular;
- attach hinges, a latch and a handle to the door;
- weld a metal loop to the barrel for locking;
- Make an ash compartment. It should be equipped with a door 4 to 5 cm high;
- cut the lid off the container.
The final step is to make the grate. A circle is made from sections of metal tubing. The finished piece is attached to the inside of the barrel. The grate is placed between the two doors.
DIY potbelly stove from sheet metal
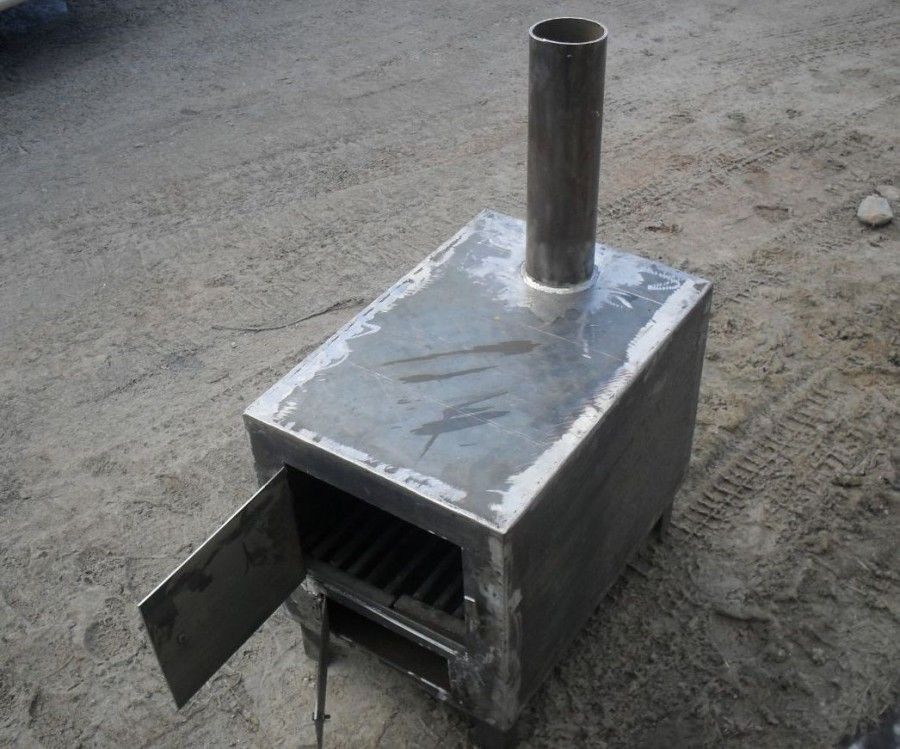
A pyrolysis stove generates significantly more heat for heating a room than one made from a barrel. The optimal sheet metal thickness is 3-5 mm. If the stove is made from thinner sheets, its service life will be significantly reduced. The parameters used to cut each of the 7 pieces are determined based on its location and intended use. All required dimensions are listed in the table.
| Part name | Number of pieces | Parameters, mm |
| Side walls | 2 | 450*450 |
| Front wall | 1 | 450*250 |
| Bottom wall | ||
| Upper wall | ||
| Back wall | ||
| grate | 440*240 | |
| Internal partitions | 2 | 244*350 |
The order of actions after cutting out the details should be as follows:
- Making two doors.
- Welding of metal structure (without cover).
- Creating and securing the grate. A sheet of paper with holes 10 to 15 mm in diameter is placed on the inside of the box (at a height of 8 cm from the base of the stove).
- Welding of internal partitions (at a height of 6 and 12 cm from the lid).
- Insert and weld thin metal tubes into the holes drilled in the rear wall. The optimal length of each tube is 15 cm. These parts are needed to provide secondary air intake.
- Preparing the lid. The diameter of the chimney opening is 10 cm. The height of this pipe is 1.5 to 2 m. The horizontal elbow becomes the reference point in this case.
- Attaching the top cover to the metal structure.
It should be noted that the base of the stove made of sheet metal must be made of non-combustible material.
DIY Buleryan stove
Buleryan solid fuel heating stoves are particularly popular due to their appearance and heat output. The Buleryan is economical, capable of burning for 9-11 hours with a full load of wood.
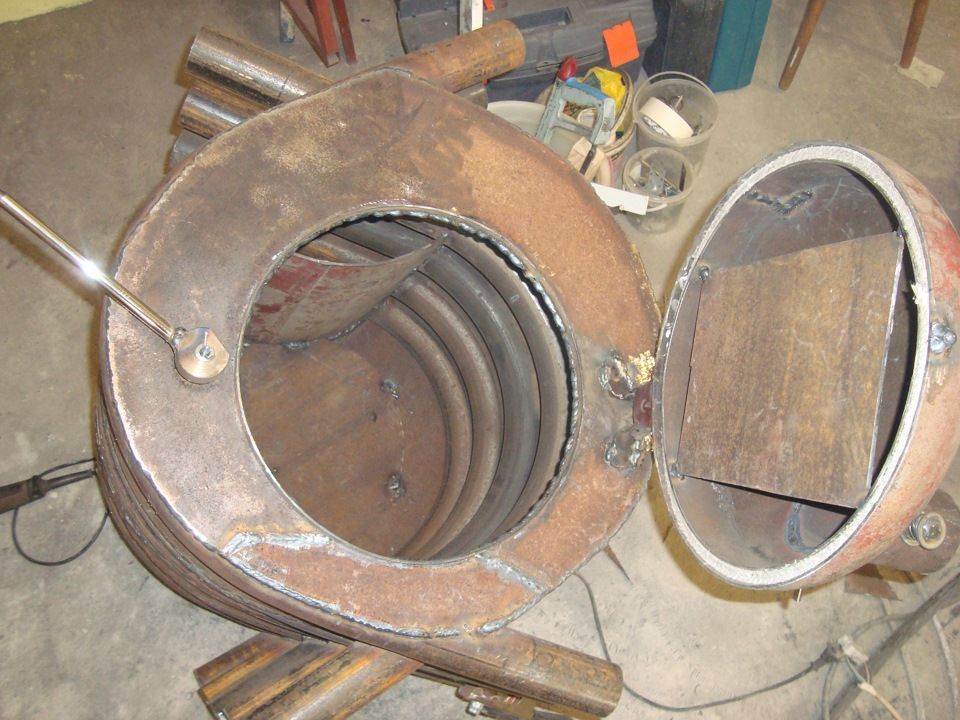
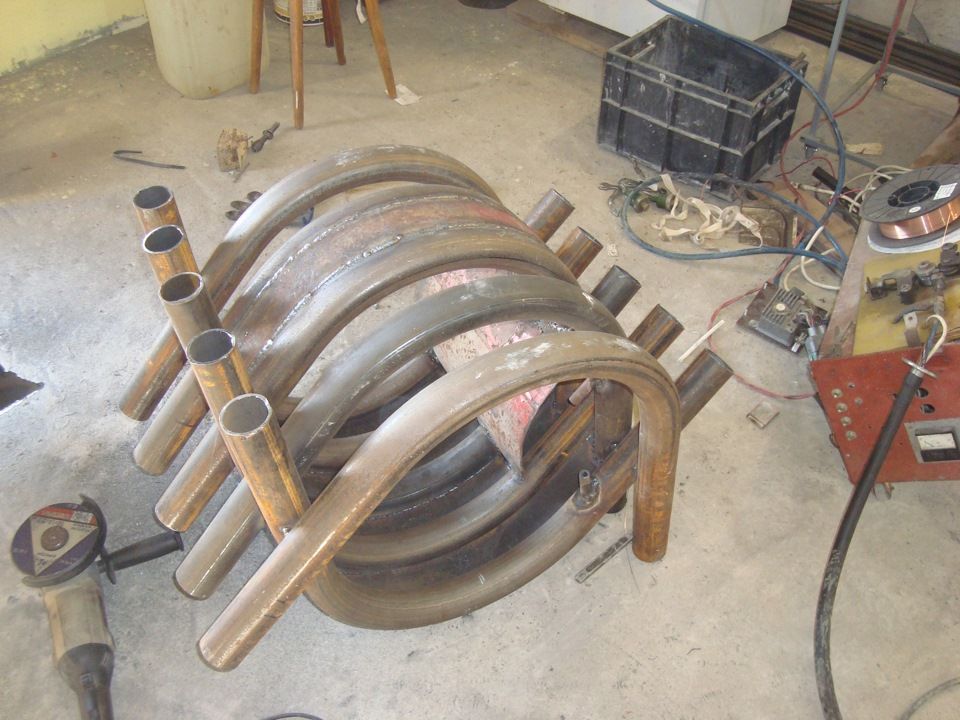
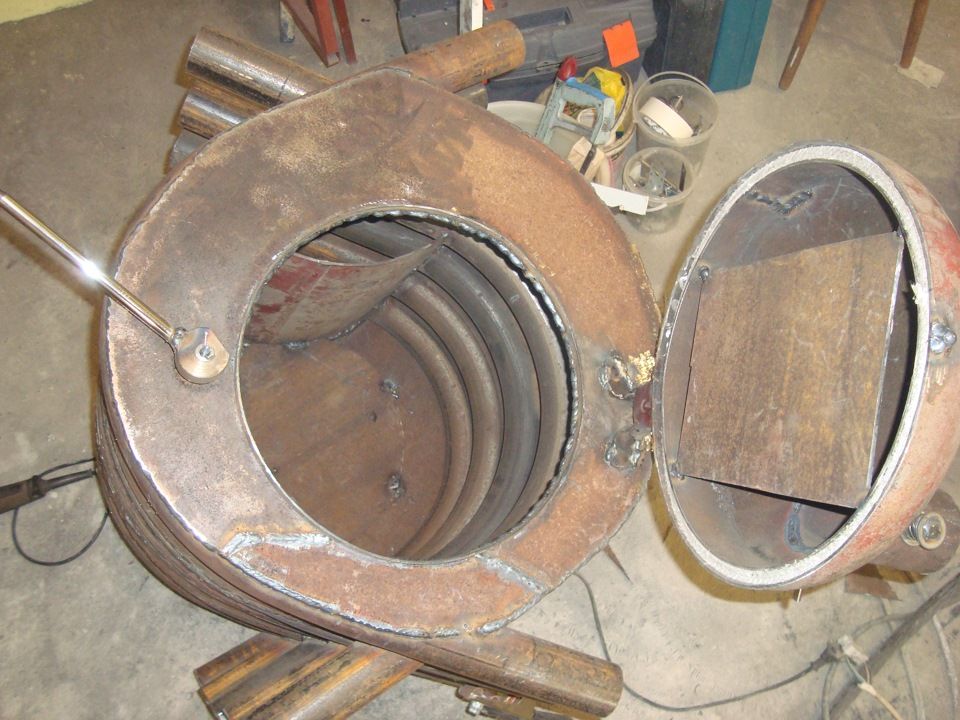
A stove of this type consists of a spacious combustion chamber, an afterburning chamber, a chimney equipped with a damper, and a convector made of curved pipes.
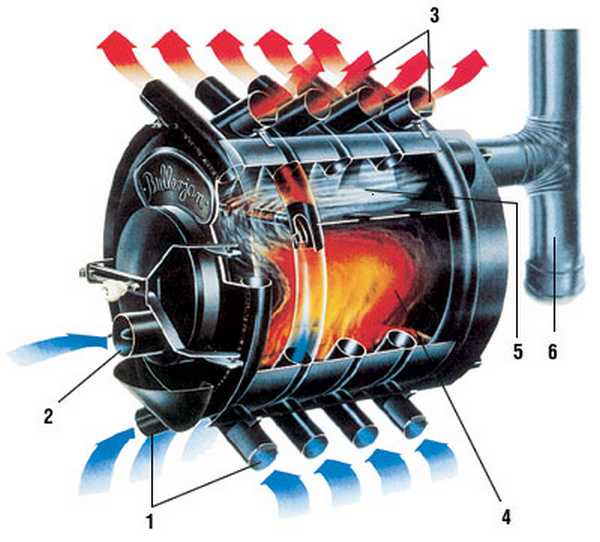
Firewood is loaded through a special door, which is also used to ensure a timely supply of air to the unit.
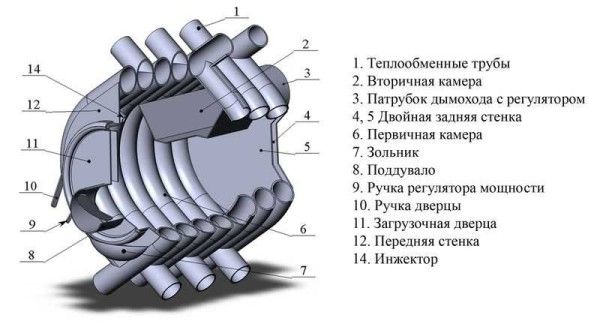
Necessary materials and tools To make a Bulryan stove yourself: pipes and sheet metal, a welding machine and a pipe bender.
It all starts with preparation. To avoid problems during production, you should not only be patient, but also:
- steel sheets with a thickness greater than 4 mm. These are used to make dampers;
- Pipes. They are selected based on their diameter. For a convector – 4 cm, for a chimney – 10 to 12 cm, for installing injector pipes – 1.5 cm. Another metal pipe will be needed to create a throttle. It is recommended that the pipe height exceed 4 meters;
- asbestos cord, welding electrodes;
- handles, bolts, steel hinges;
The stove contains heat exchange pipes, a door for adding fuel, a smoke damper and a draft regulator.
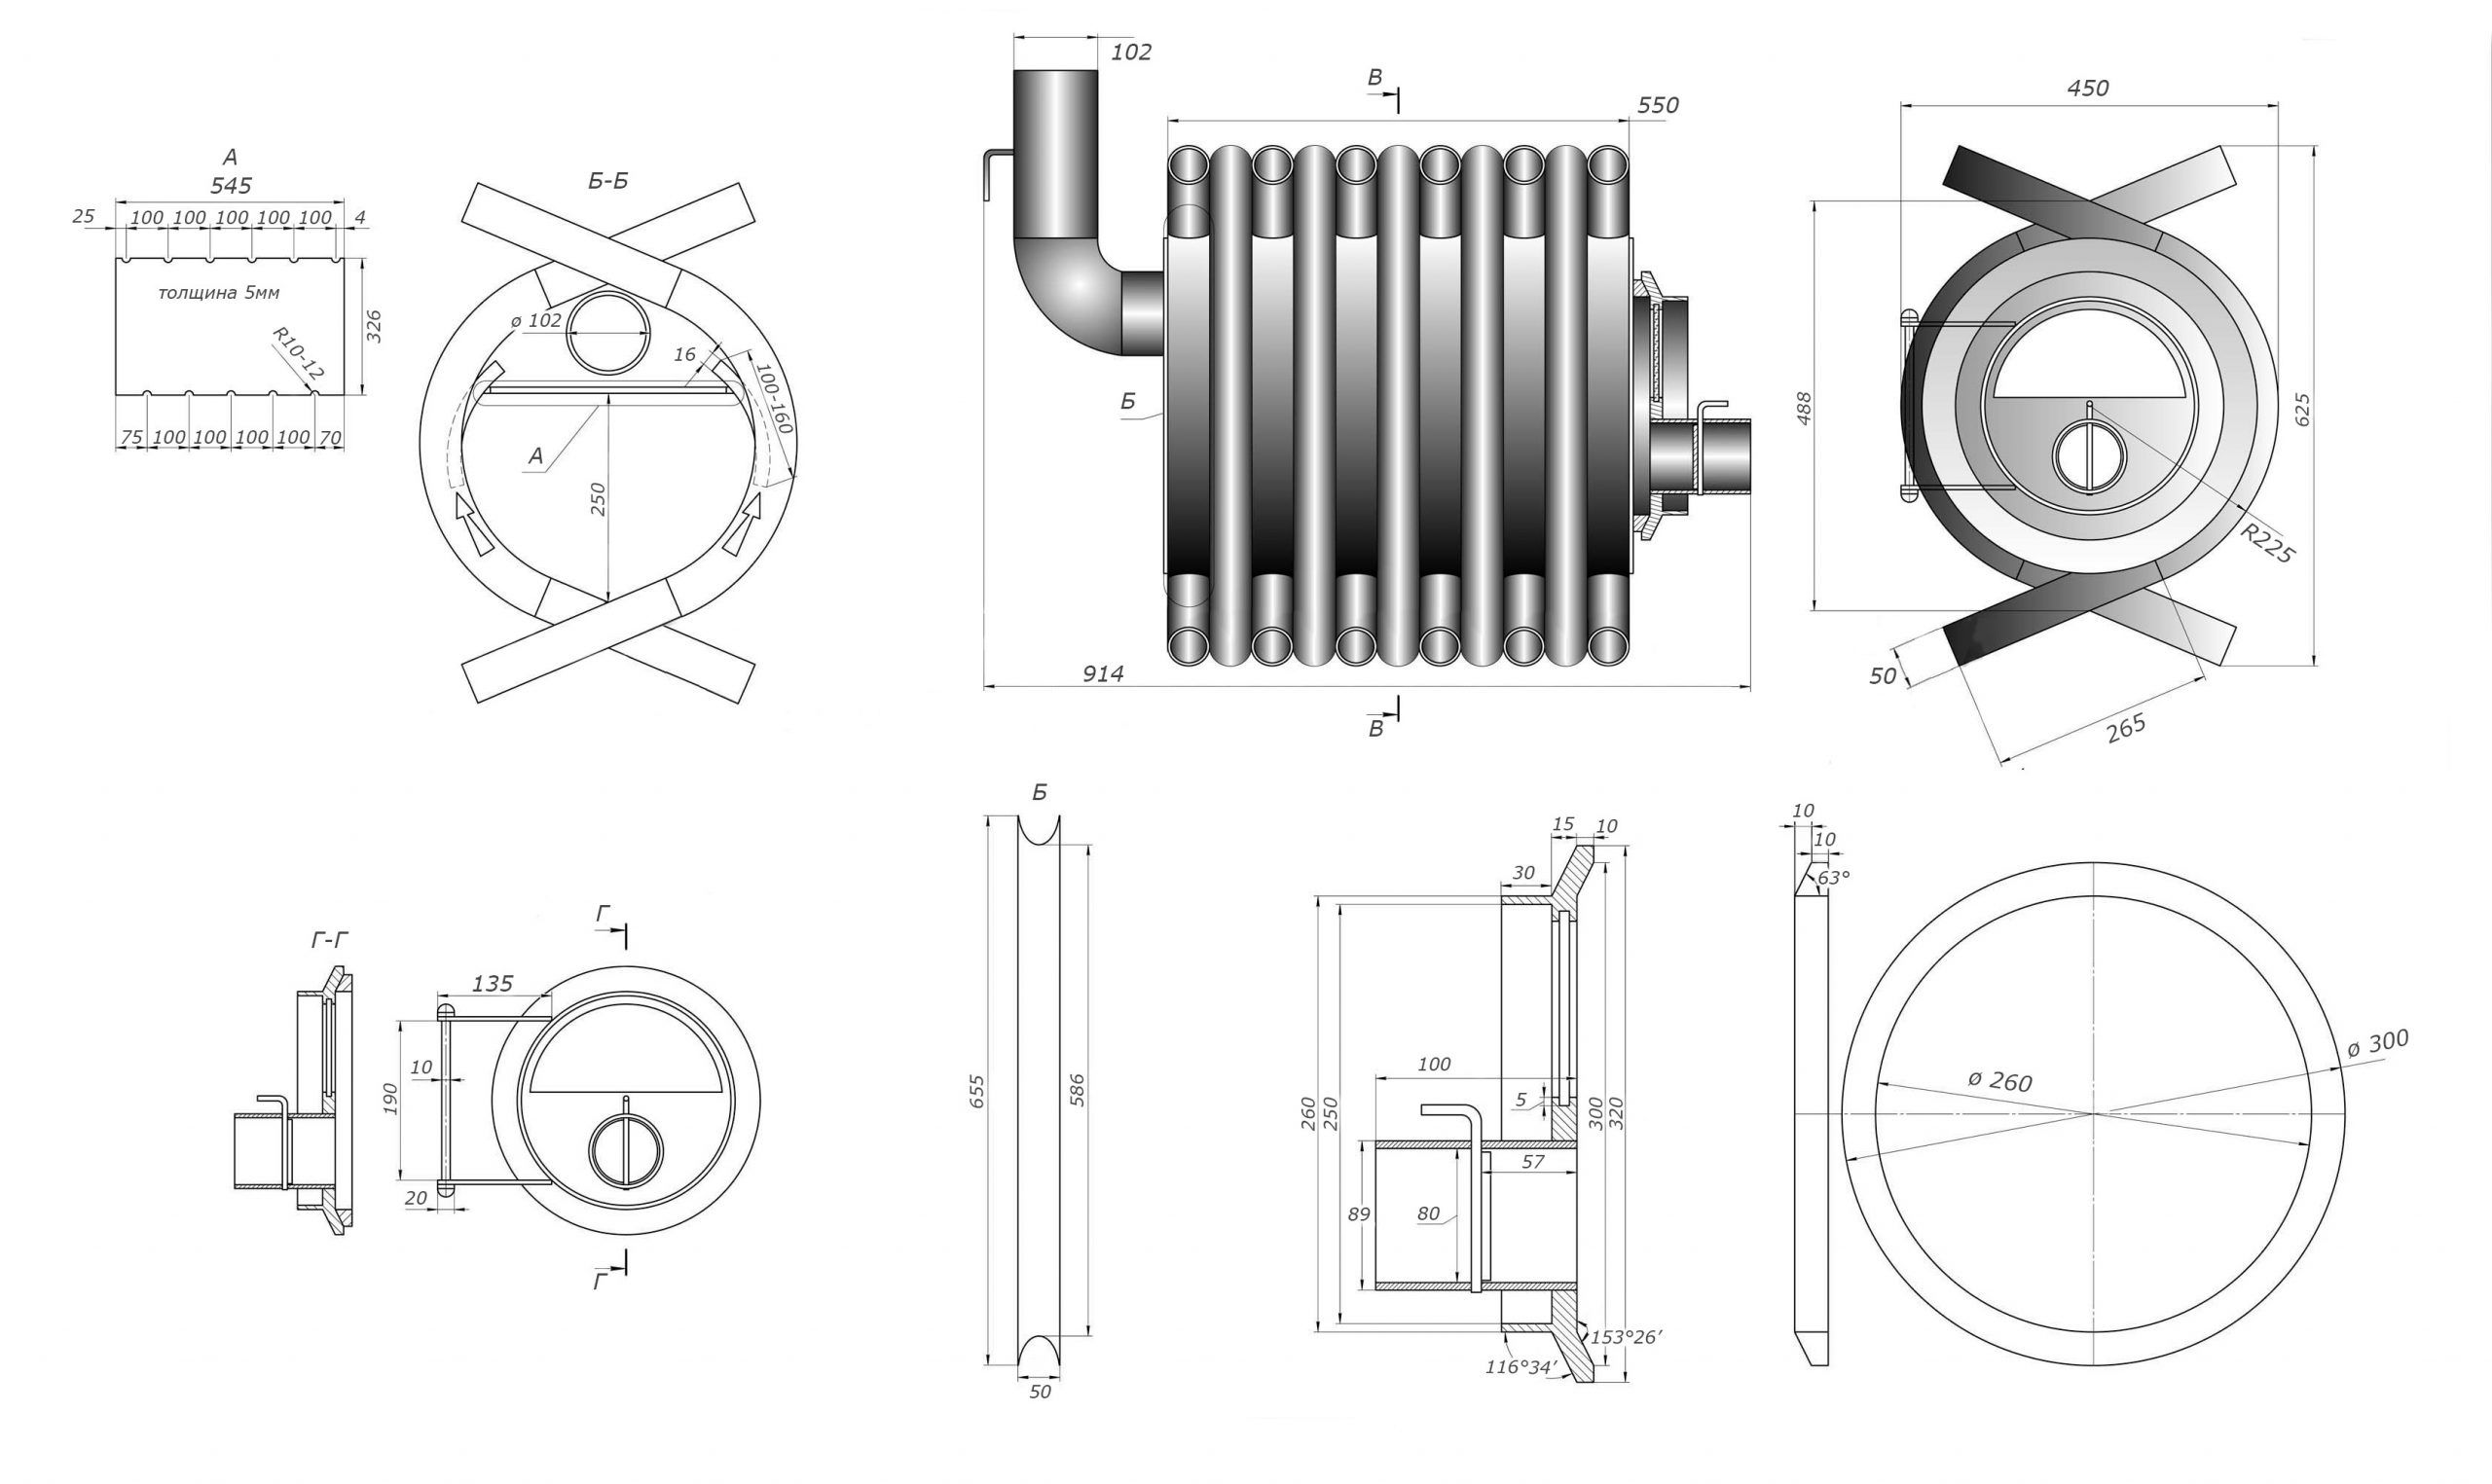
After that, all that's left to do is follow the step-by-step instructions. First, review the drawings and cut out the pieces. Install them in the following order:
- Form a frame from curved pipes. The length should be 1.2 m, with a radius of curvature of approximately 22.5 cm;
- attach metal strips to the structure;
- assemble the afterburning chamber;
- cut and weld internal partitions;
- equip a compartment for waste pyrolysis products;
- check and sand the welds;
- install the back and front walls;
- cut holes for the chimney, door and throttle;
- Make a chimney pipe. Attach it and other elements to the body.
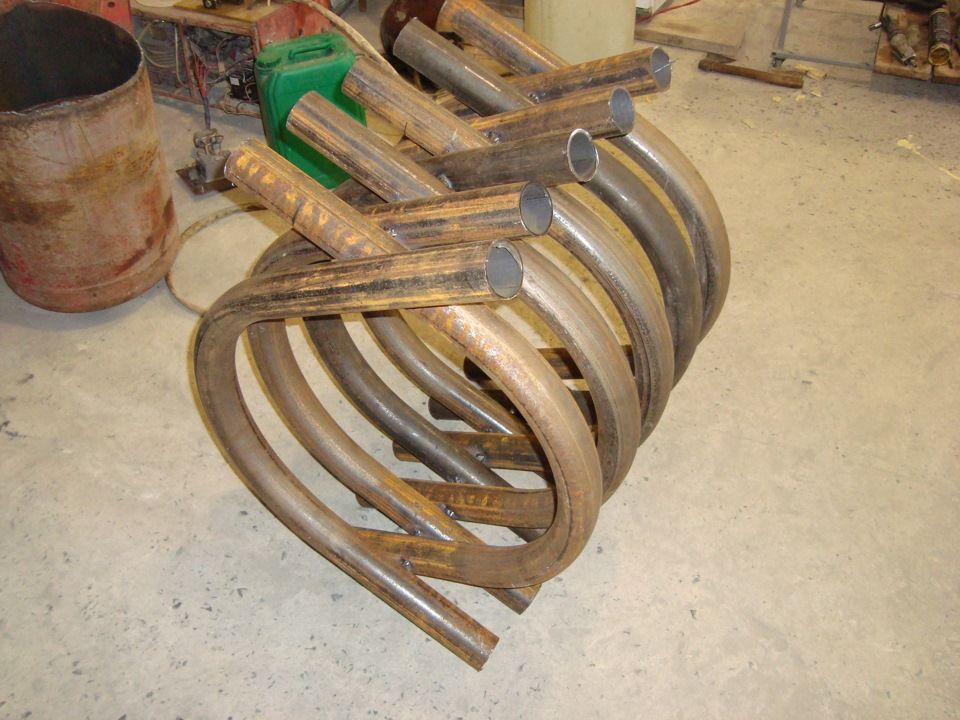
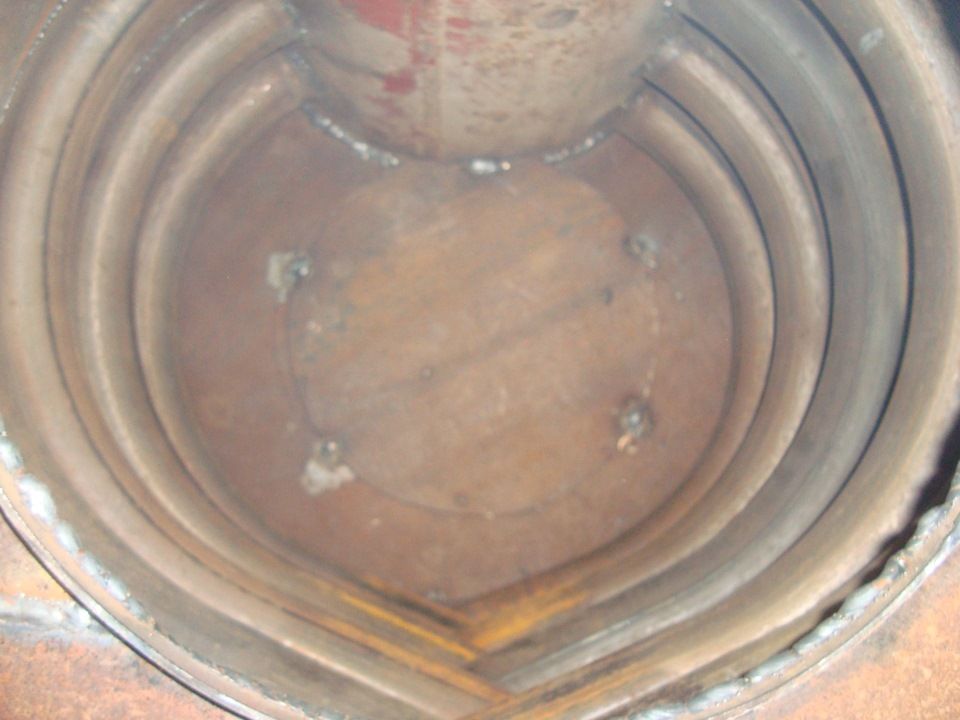
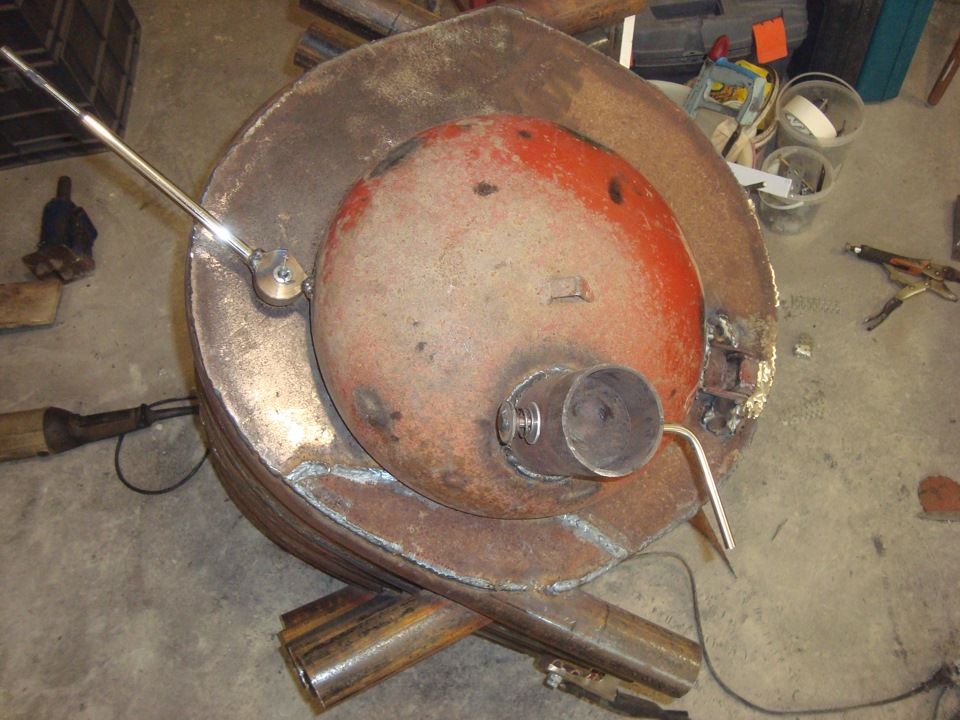
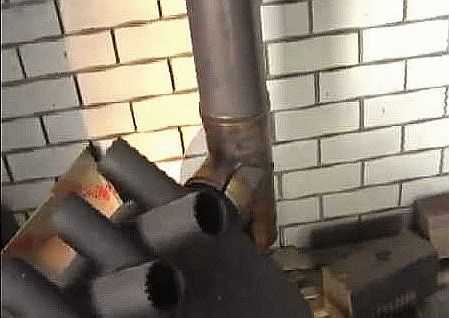
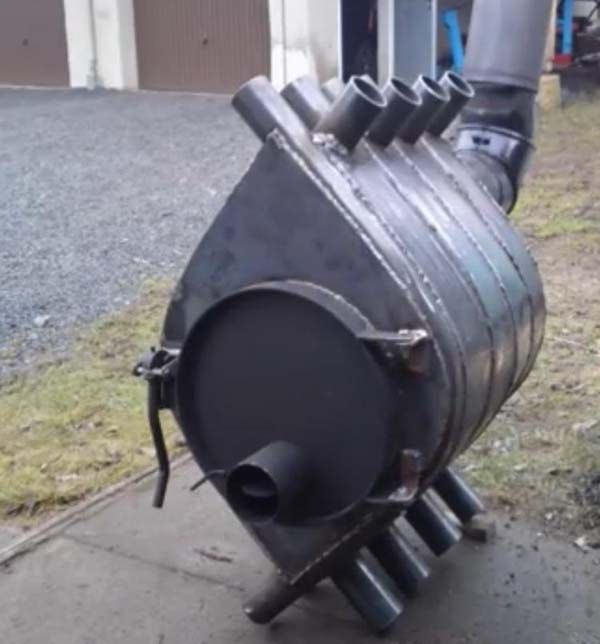
Then install the finished stove on the pre-laid base.
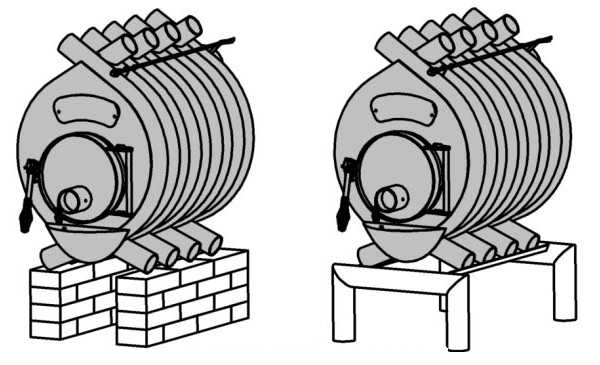
It can be made of brick or metal. Afterwards, all that remains is to test the unit.
Furnace operating on waste fuels and lubricants
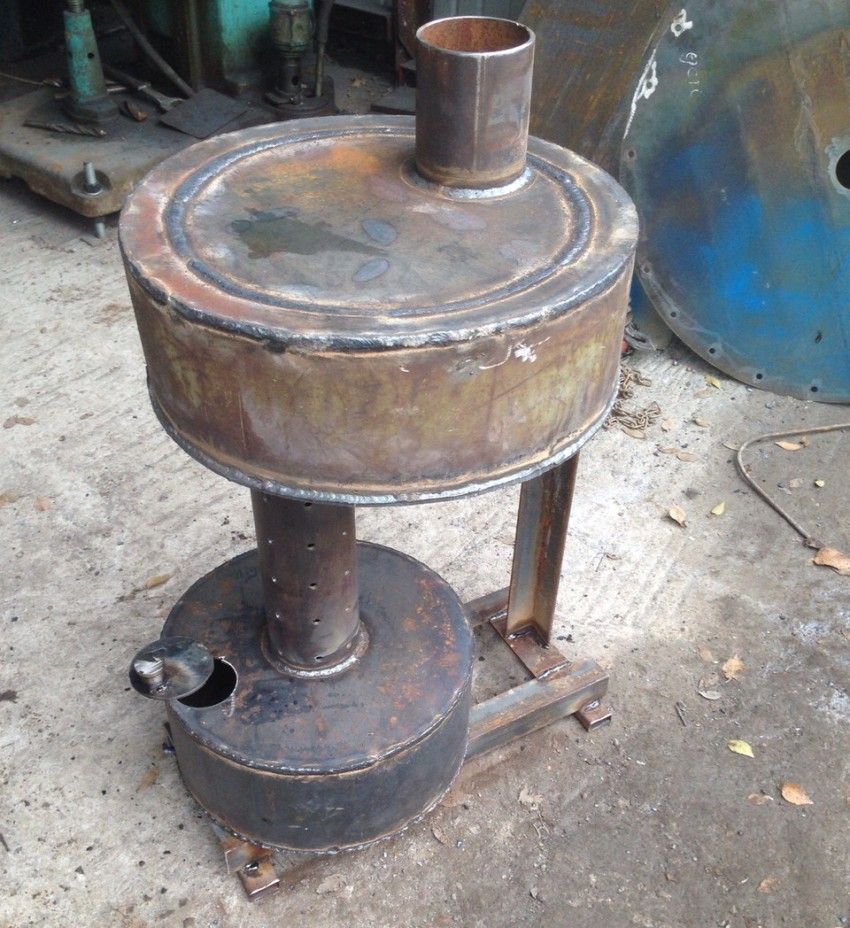
The structural elements include:
- a tank for used fuels and lubricants, which are fuel;
- fuel supply hole;
- pressure regulating valve;
- chimney (vertical pipe).
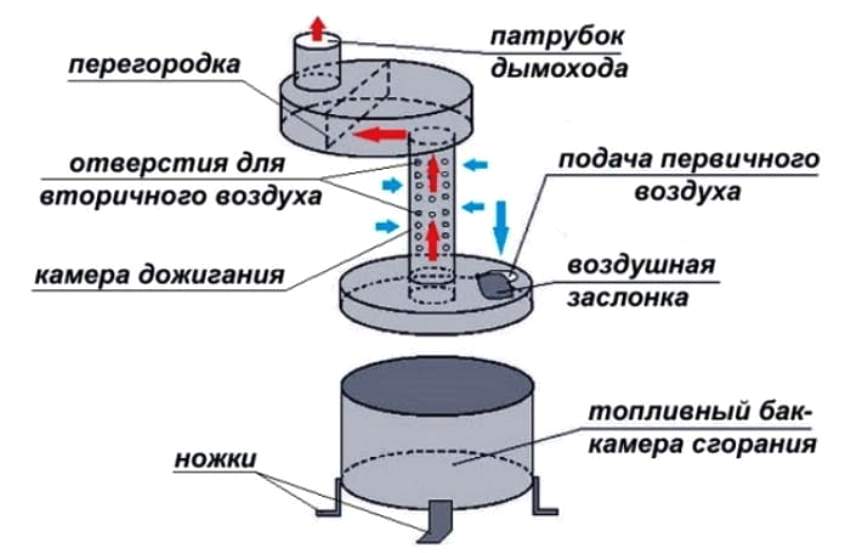
The operating principle involves:
- loading of 2-2.5 liters of fuel and lubricants (diesel fuel);
- lighting the wick installed in the stove hole (it should be covered
- damper, leaving a gap of about 2 cm - the combustion intensity is regulated by the position of the damper).
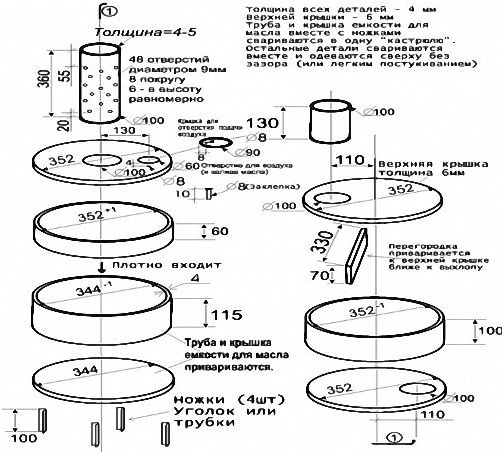
Examples of waste fuel furnaces
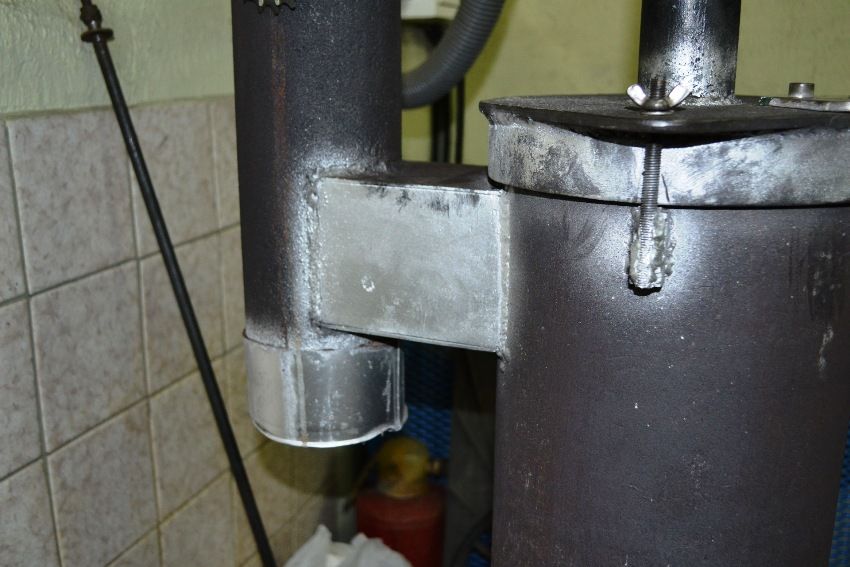
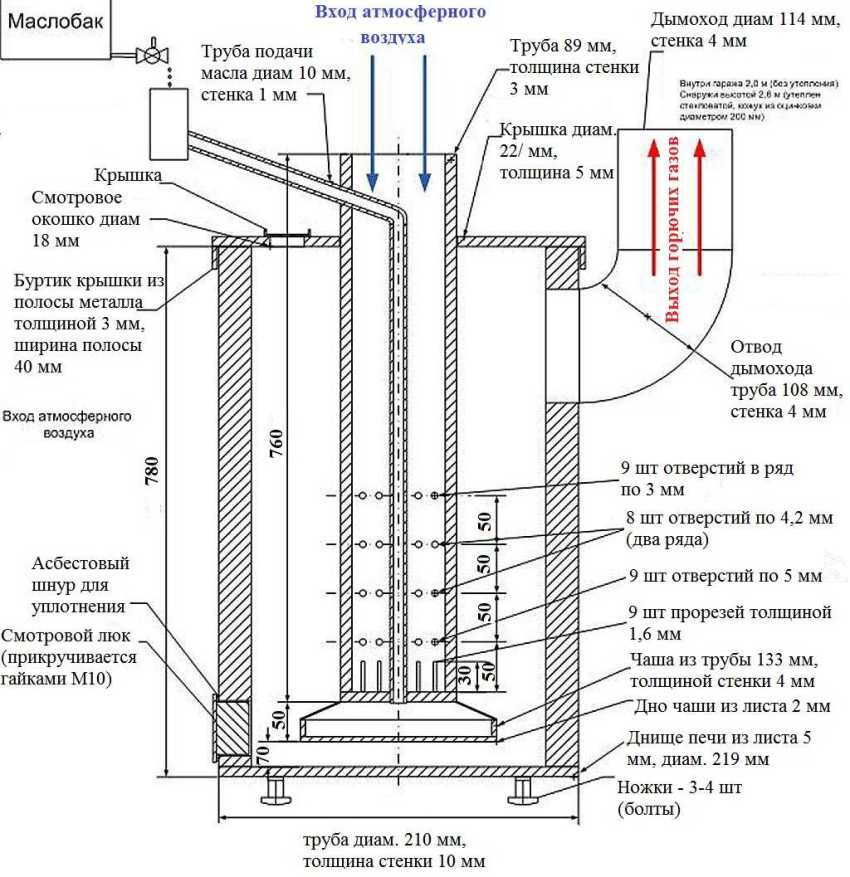
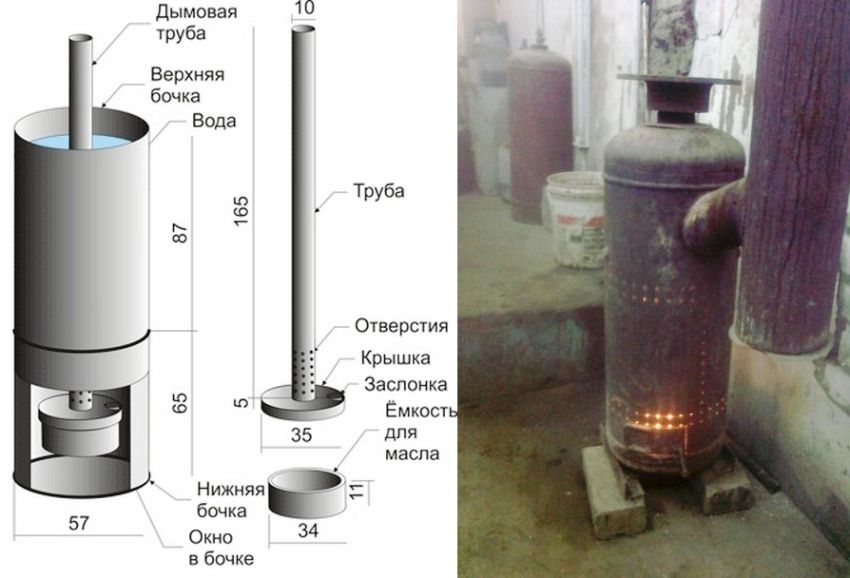
DIY Bubafonya
The design is a long-burning furnace.
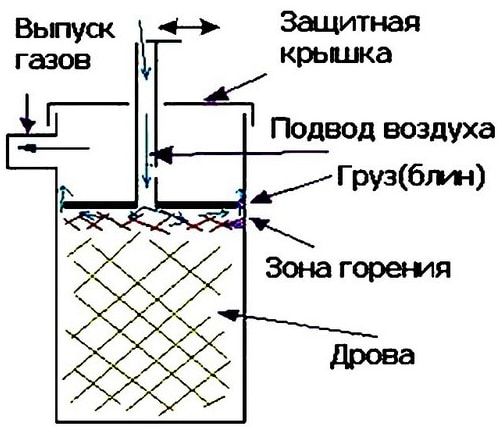
The amount of firewood required lasts for an average of 9 hours.
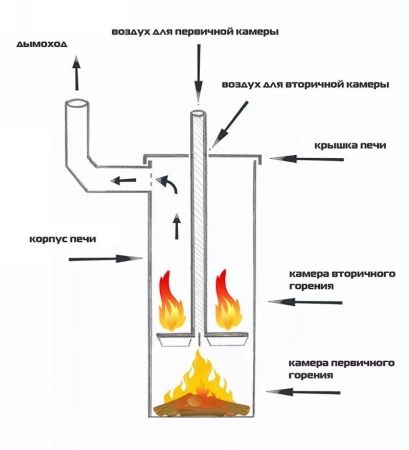
Source materials: two pipes (for air supply and chimney), an empty gas cylinder and a thick metal sheet.
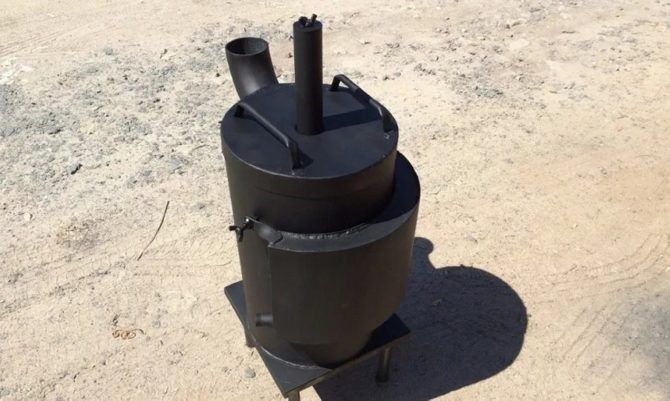
From tools You will need a welding machine and a grinder.
Step-by-step instructions:
- cut off the top part of the cylinder, which will become the lid of the stove;
- cut a hole in the lid equal to the diameter of the air pipe, then attach handles for convenience;
- cut a hole at the top of the cylinder for the chimney pipe;
- make a piston: cut a circle out of a steel sheet that allows it to move inside the cylinder;
- Make a hole in the center of the circle with the diameter of the air duct pipe, then weld it to the disk.
- Make a hole at the bottom of the cylinder for easy cleaning.
The stove is ready. Next, we need to attach the legs.
DIY brick oven
It is considered one of the best.
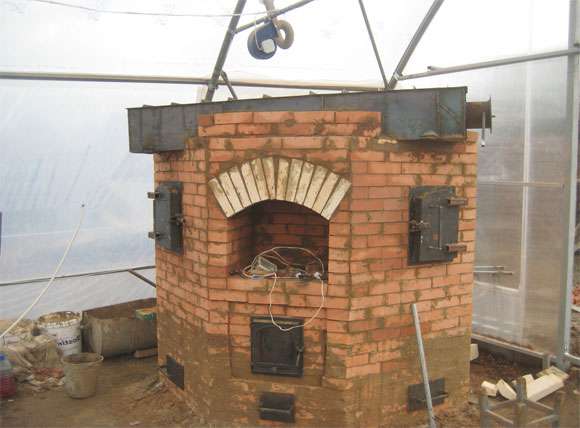
Source materials: 220 ceramic and 80 fireclay bricks, 80 liters of clay masonry mortar and 30 liters of fireclay mortar, 0.25 m3 of concrete for the foundation, a cast-iron grate for the grate, a firebox door, a smoke damper, and waterproofing material.
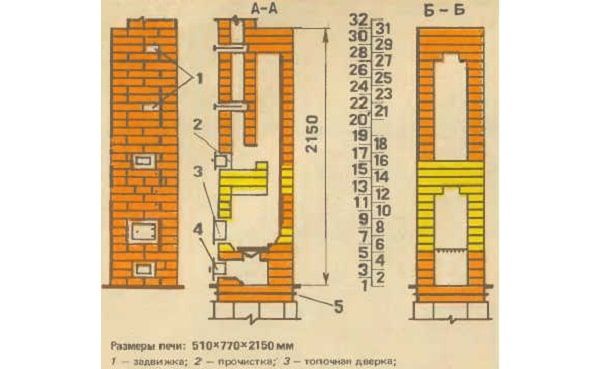
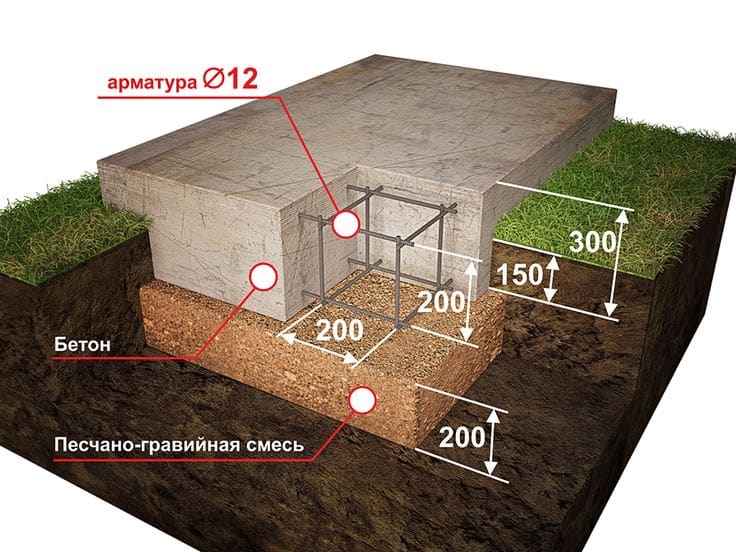
Construction begins with laying a foundation 25-35 cm high and measuring 70 x 100 cm. A trench of similar size and 40-45 cm deep is dug for this purpose. Formwork is recommended around the periphery. Reinforcement is used to strengthen the foundation, after which the structure is poured with concrete.
Next, the firebox and ash pan are formed:
- Red brick is needed for the first four rows. Clay mortar is used as a binder. A cast-iron ash pan door is installed.
- Rows 5 through 12 are made of fireclay bricks set with heat-resistant mortar. The grate is installed in row 5, and the firebox door is installed in rows 6 through 8.
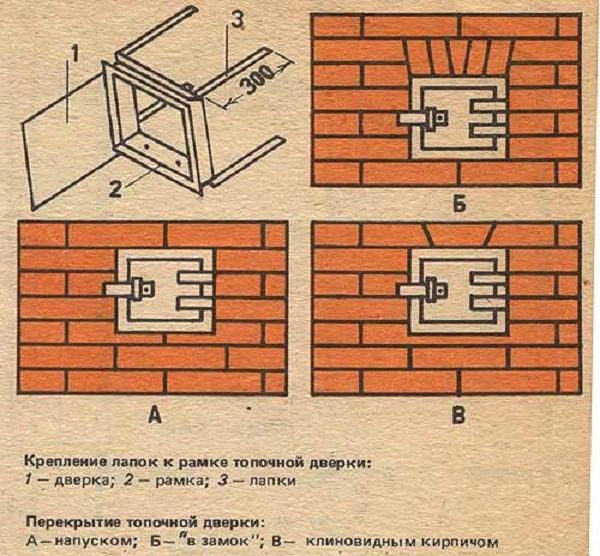
- In rows 9 to 12 the arch is formed.
- Rows 13-15 are made of firebrick, with rows 14-15 intended for the vault ceiling. It is recommended to install one cleanout door in rows 15 and 16. Regular brick is used from row 16 onward.
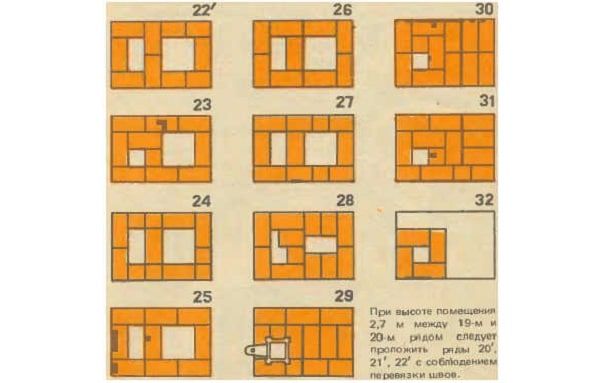
- Rows 17 through 27 form the flue duct; from 28 onward, the duct gradually narrows. Rows 19 and 22 each contain one smoke damper.
- Rows 30 and 31 represent the vault of the stove.
- From the 32nd row, a chimney is made from 4 bricks.
The oven is ready.
DIY horizontal chimney design
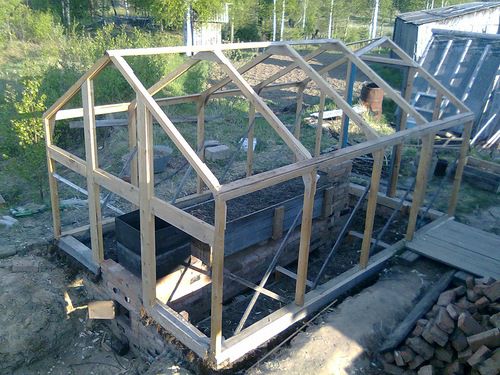
Chimney installation is dictated by safety regulations: to avoid thermal burns, the pipe is installed at a height above human height. The advantage of this pipe placement is uniform heat transfer, but the disadvantage is an increased risk of fire due to the accumulation of combustion products. Regular cleaning of the pipe is difficult with this type of installation.
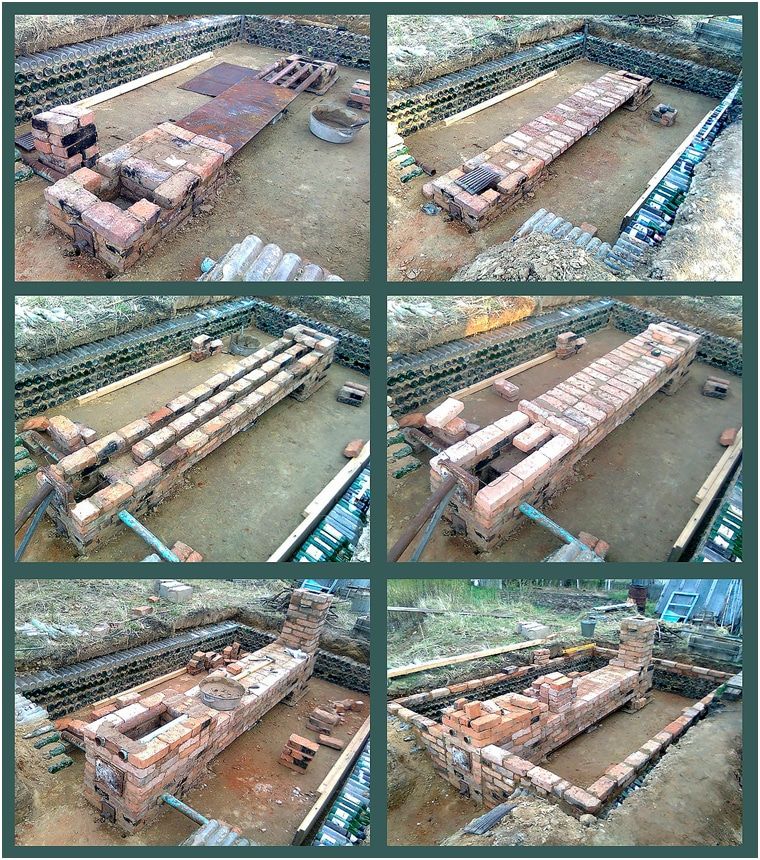
The risk of spontaneous combustion can be significantly reduced by placing the firebox below the greenhouse and running the chimney under the soil. This placement of the chimney allows for heating of both the air and the soil, increasing the heating efficiency of the structure.
Stove with water heating
Heating the space using water pipes is preferable due to the reduced risk of spontaneous combustion. The firebox is placed outside the building or in its vestibule. Heating is provided by hot water circulating in a closed circuit of pipes.
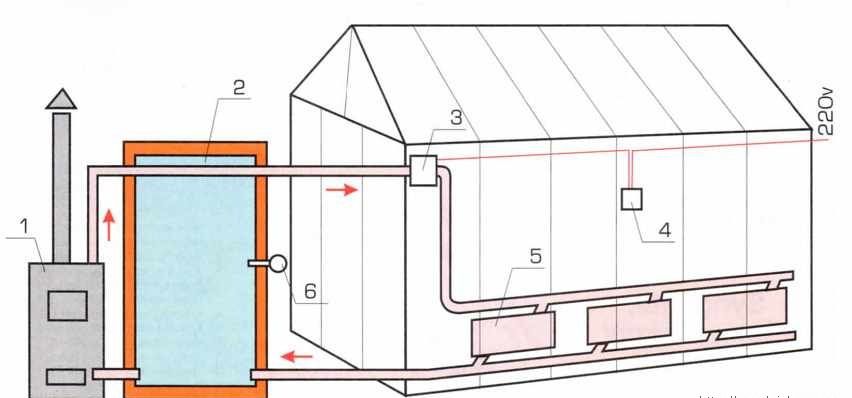
First, a stove is made from a metal barrel:
- To avoid corrosion, paint is applied to it in two layers.
- Then make several holes for the chimney, tap and expansion tank.
- A firebox is welded from sheet metal and inserted into the barrel.
- The pipe is welded to the opening in the barrel intended for the chimney. The smoke exhaust structure must be at least 5 meters long.
- An expansion tank is mounted on the barrel. The optimal capacity is 20-30 liters.
- Pipes are placed throughout the greenhouse. They can be laid directly on the ground, spaced 1.2 meters apart.
- A pump is installed to ensure the movement of water in the system.
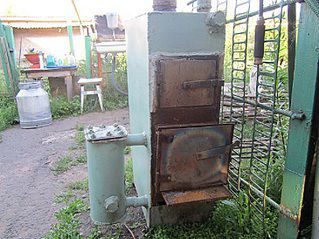
Once the entire piping system is assembled, the water is turned on to check the joints for leaks. Leaks are repaired. Then, the stove's operation is tested.
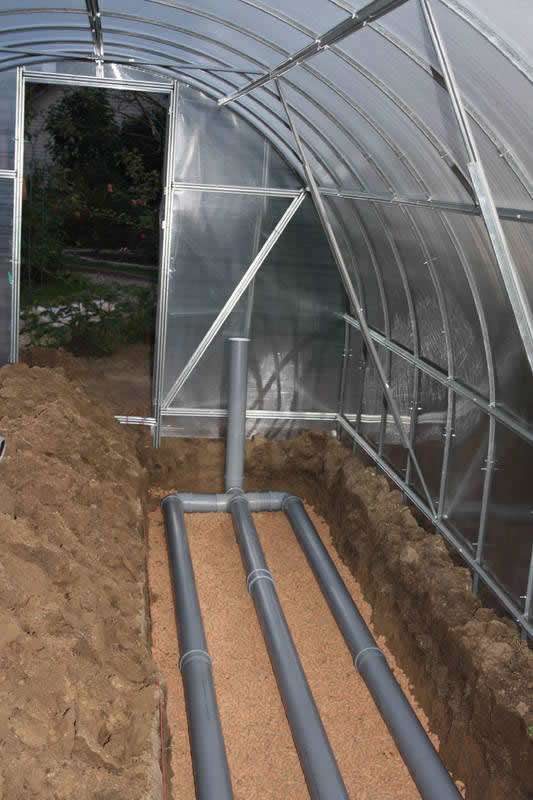
The preferred location for pipes is the perimeter of the greenhouse. This ensures even heat distribution within the greenhouse, neutralizing cold air from the periphery. Given the specific needs of the plants being grown, pipes are placed under a layer of soil or concrete.
Therefore, the advantages of water heating include:
- the ability to change fuel with the greenhouse doors closed;
- no need to store organic fuel (firewood and sawdust) inside the greenhouse;
- no risk of CO poisoning;
- high heat-saving effect;
- uniform heating of the room.
The only drawback is the relatively high cost of materials and installation work.
Review of ovens from the manufacturer
A comparative analysis of popular models of long-burning stoves is provided in the table below:
| Model | Fuel | Characteristics | Price, RUB | Note |
| Buleryan
|
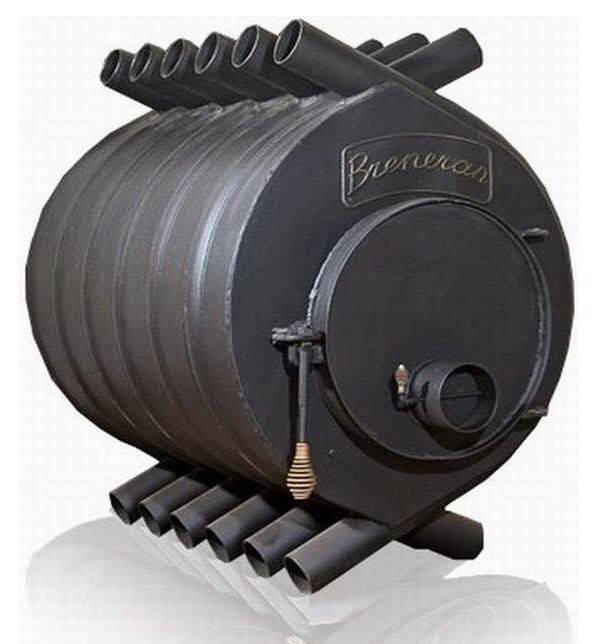
Firewood | Convection type. Heat exchange occurs through infrared radiation, convection, and heat transfer. | 8000-25000 | The patent for the product belongs to the German company Energetec GmbH. In Russia, it is manufactured by Laoterm CJSC under the name Breneran. |
| Butakova
|
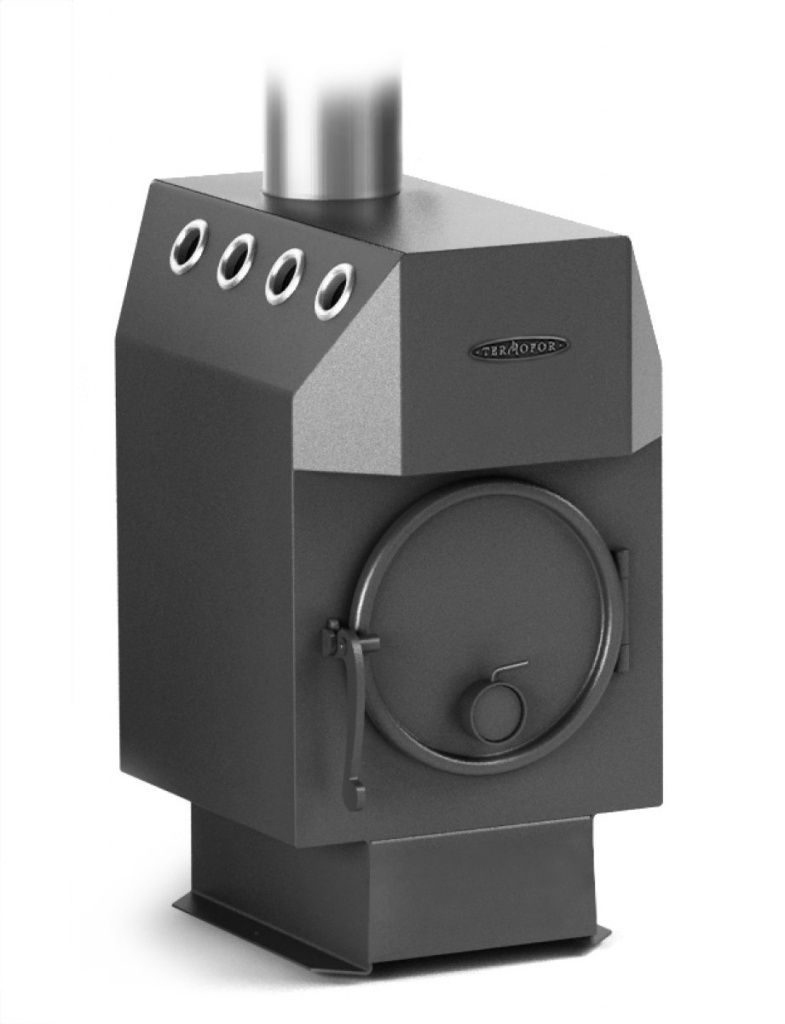
Its shape resembles a parallelepiped. Its operating principle is similar to that of a Buleryan-type furnace. | 10,000-35,000 | Named after the product's designer. | |
| Slobozhanka (“super potbelly stove”)
|
Firewood, cones | Combustion chambers vary depending on the type of air supply. | 8000-12000 | The models are convenient due to the possibility of connecting a water circuit and radiators. |
| Vologda
|
Firewood | Fuel is added several times per day; efficiency is 80-90%. Flexible hoses are used for water supply. Heating time to 60°C is 35-40 minutes. | 4000-6000 |