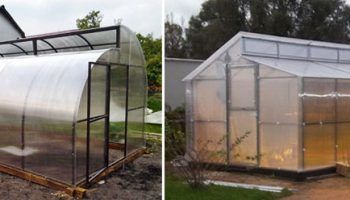
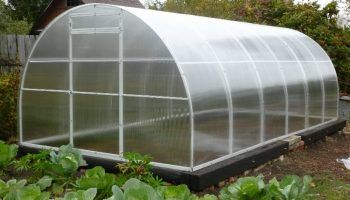
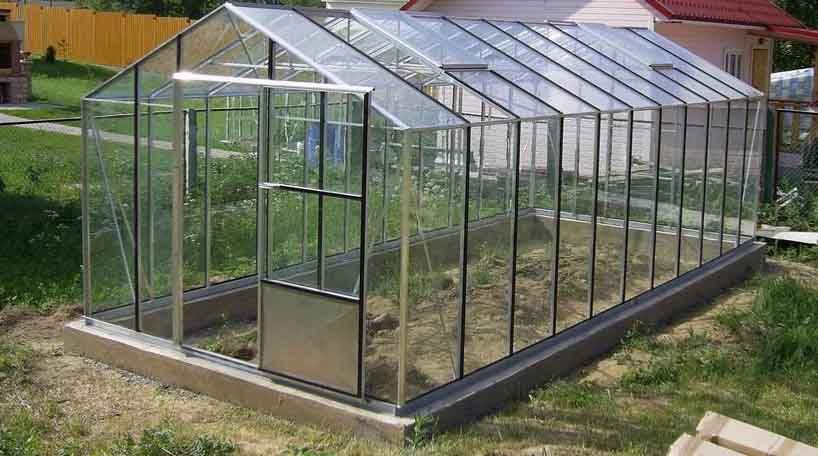
A greenhouse is a great way to increase the yield of various crops. In this article, we'll explain how to build a glass greenhouse yourself, provide step-by-step instructions with photos, and discuss the approximate cost of the finished structure.
Content
- 1 Glass as a greenhouse material – pros and cons
- 2 Building a glass greenhouse yourself: dimensions, drawings, and what to consider
- 3 Step-by-step instructions for building a glass greenhouse yourself
- 4 Interior design of a glass greenhouse
- 5 Ready-made glass greenhouse options: tips for choosing + photo gallery
- 6 How to care for a glass greenhouse
- 7 Comparison of glass and polycarbonate greenhouses
Glass as a greenhouse material – pros and cons
The advantages of glass coatings include:
- almost complete transparency and light transmittance of the material;
the ability to maintain optical properties for a long time (the transparency of polycarbonate is 10% lower than that of glass, and in addition, every year due to microcracks it decreases by an average of 4%); - chemical inertness;
- easy to care for, can be used with a wide range of detergents;
- comparative resistance to abrasive influences;
- low coefficient of thermal expansion;
- the possibility of recycling old windows and doors containing glass elements, which has a positive impact on construction costs;
- easy replacement of damaged glass elements;
- High aesthetic qualities and cost-effectiveness of the structure – a greenhouse lasts on average 25-30 years, and the investment costs usually begin to pay off after 4-6 years of operation.
However, one cannot fail to note a number of vulnerabilities of the material:
- fragility – heavy hail can damage the coating;
- higher thermal conductivity compared to other materials (for example, polycarbonate);
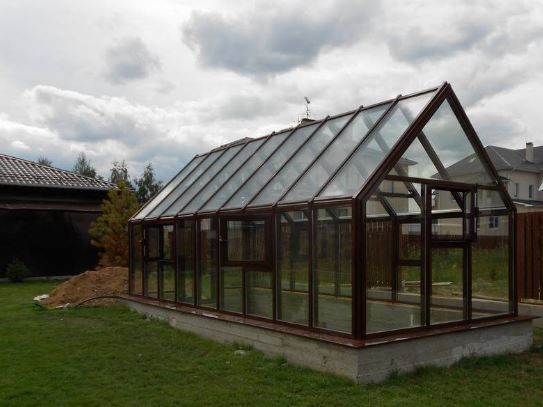
- comparatively high weight (exceeds the weight of a polycarbonate sheet with similar parameters by 2-3 times), which makes working with glass difficult and requires the installation of a strong frame and a reliable foundation.
Building a glass greenhouse yourself: dimensions, drawings, and what to consider
When installing, it's important to remember that mineral glass cannot withstand alternating or bending loads. The greenhouse design also requires a rigid frame and foundation. Even with gusts of wind and significant snow cover, frame deformation should be minimal.
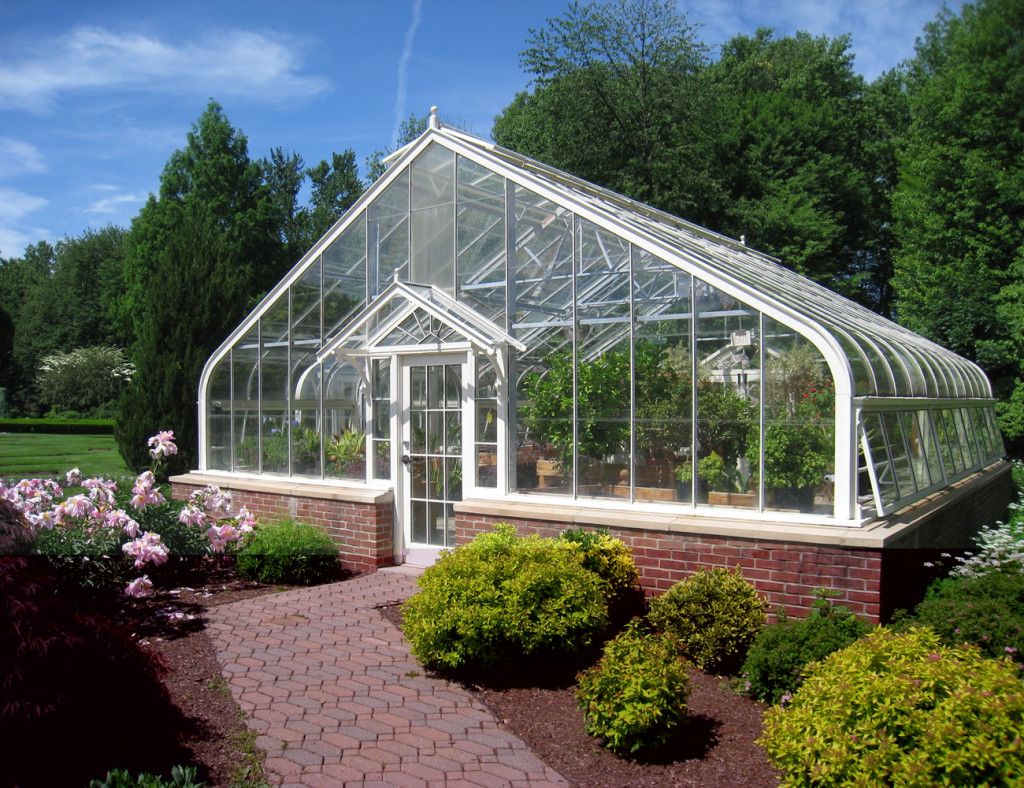
When choosing a design, it should be taken into account that the simple rectangular shape of the greenhouse simplifies the installation of the frame, while diagonal braces, overlays, and steel corners are used to strengthen the roof and walls.
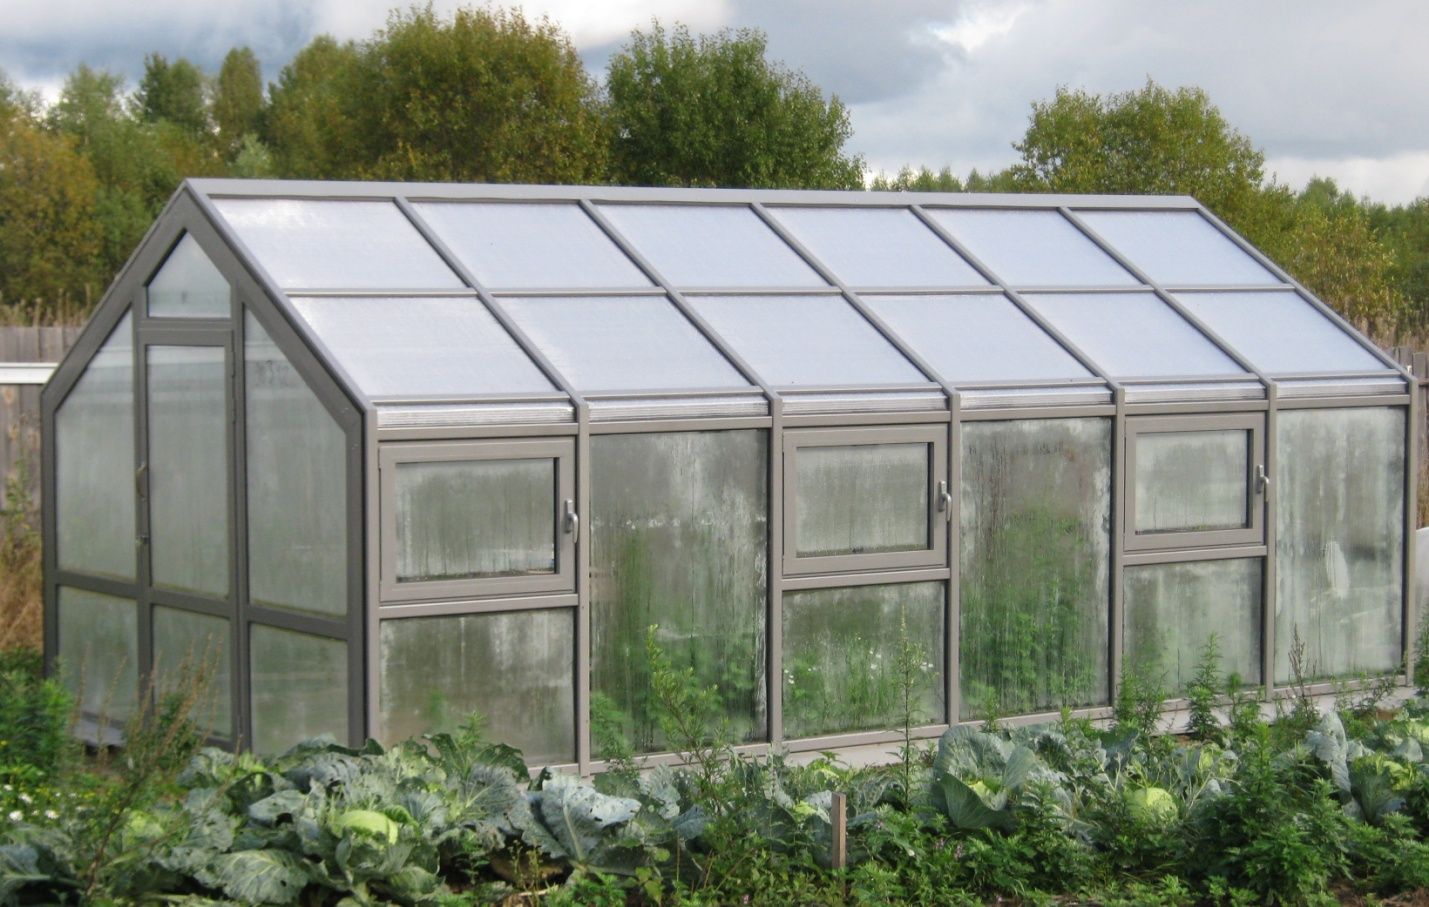
In some cases, it's preferable to assemble the frame from various sections made in a home workshop. This method simplifies installation, allowing the greenhouse to be assembled from prefabricated components within 24 hours on a pre-prepared foundation.
The methods for attaching mineral glass vary depending on the characteristics of the frame material:
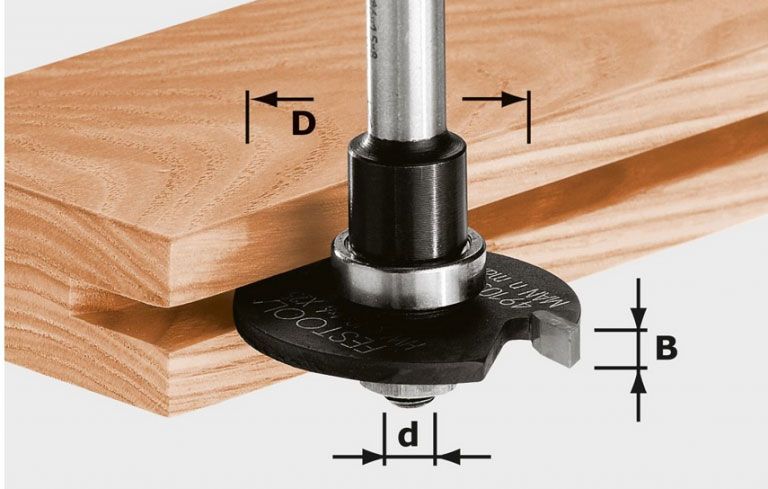
If the frame is made of woodThe glass is secured with a silicone sealant adhesive. Silicone can also be used as a sealant, in which case it is secured with screws and a glazing bead. The glass is installed into a specially prepared groove (made with a milling cutter).
If the frame is metal, the glass is placed inside a steel frame, sealed with sealant and secured with a spring clip.
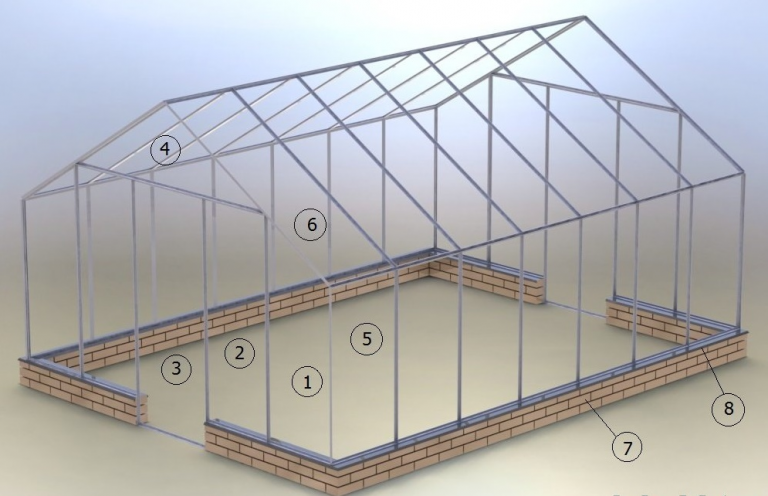
All greenhouses are made using mineral glass, it is recommended to install on a strip foundation.
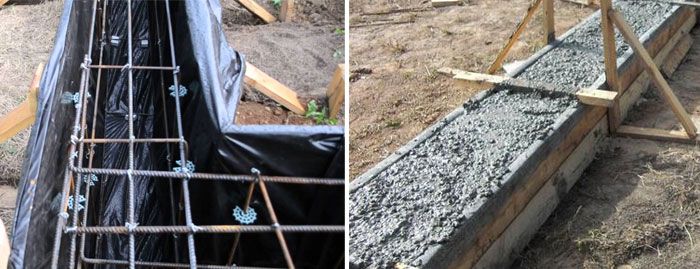
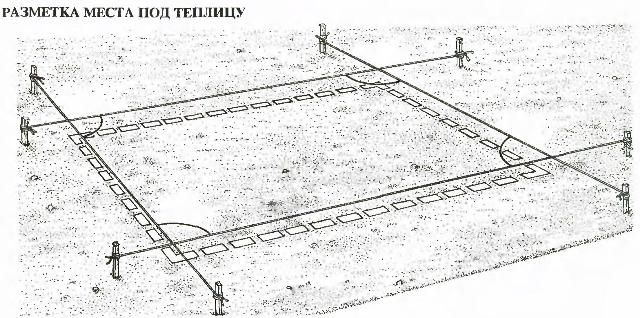
Preliminary markings are made using stakes and ropes. Next, a trench 30 cm deep is dug and compacted. The bottom is filled with sand (to form a sand cushion), 8 mm thick steel reinforcement bars (usually at least 3 mm) are laid on the bottom, and the trench is filled with concrete.
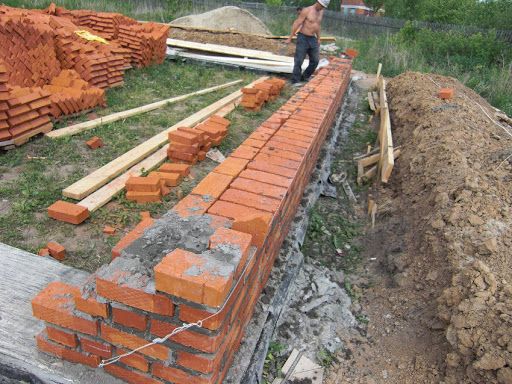
After five days, the base of the red brick foundation is laid. The upper part of the brickwork is sealed with resin and covered with roofing felt.
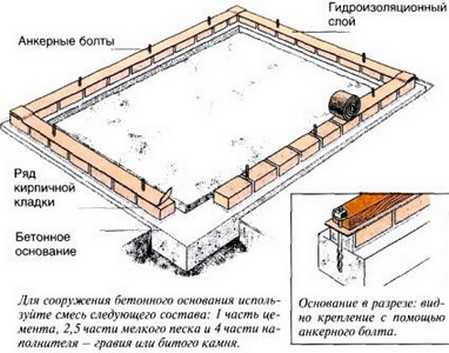
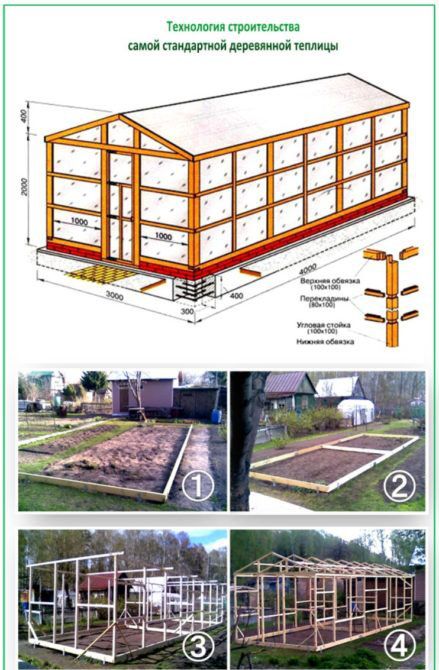
After 24 hours, we begin assembling the frame:
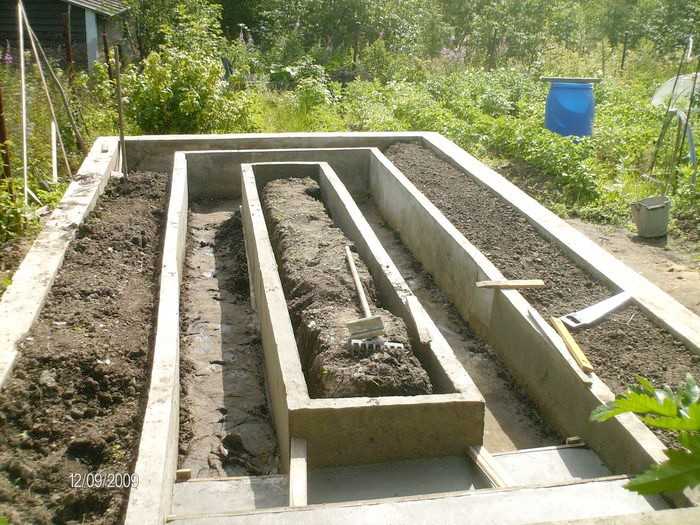
- they carry out work on installing permanent beds and also forming paths;
- the lower support beam is assembled (beams with a cross-section of 6*6 cm are used);
- a frame is installed under the side walls;
- vertical posts are installed.
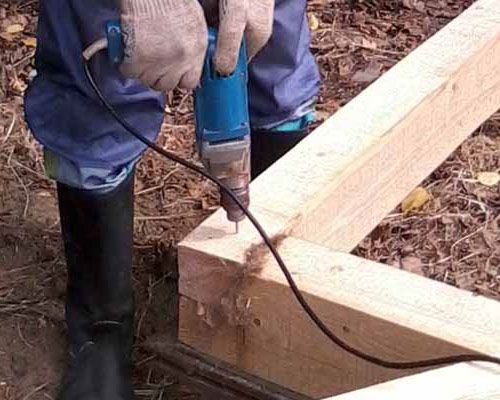
The timber is secured to the brickwork using dowels. Reinforcement at the corners is provided using L-shaped metal profiles.
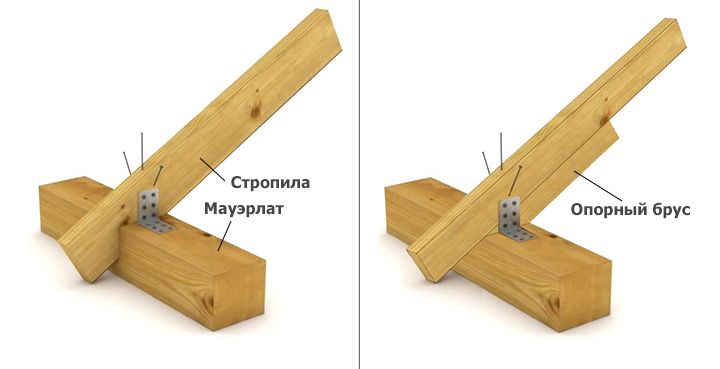
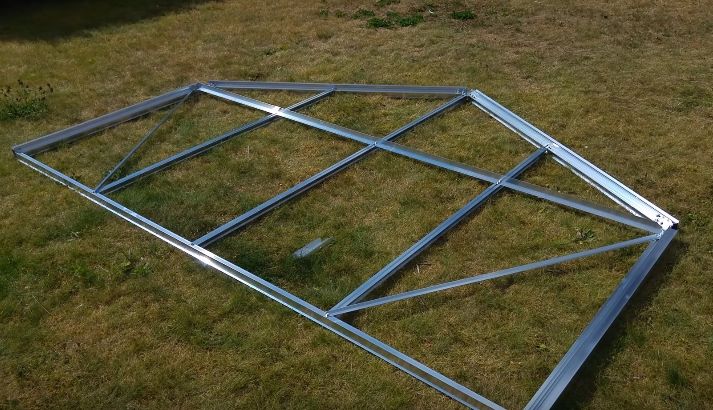
Roof components (rafter triangles) are assembled on the ground according to a pre-prepared drawing. Installation begins with the triangles being installed on the walls. The building's façade is completed first, followed by the rear roof and entrance. The posts and crossbars are secured with braces and spacers.
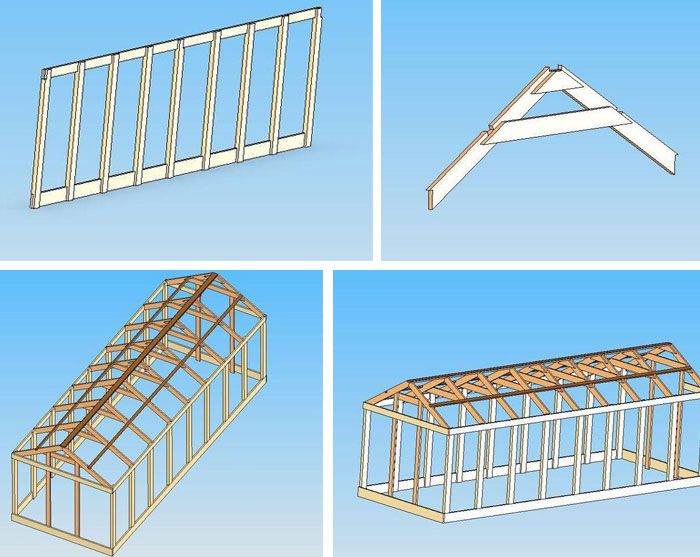
Next, begin installing the glass. It's recommended to start with the roof, inserting the glass into the cut-out grooves and ensuring that it follows the contours of the silicone sealant.
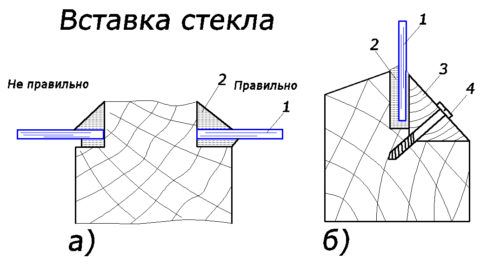
Once the cladding is complete, the side and bottom rails are installed. To prevent the mineral glass from breaking, a 2 mm gap must be left between the inner surface of the wooden frame and the ends of the sheet.
If the frame is planned to be made of metal, it is recommended to use hot-rolled steel angle with a shelf size of 20*3 mm.
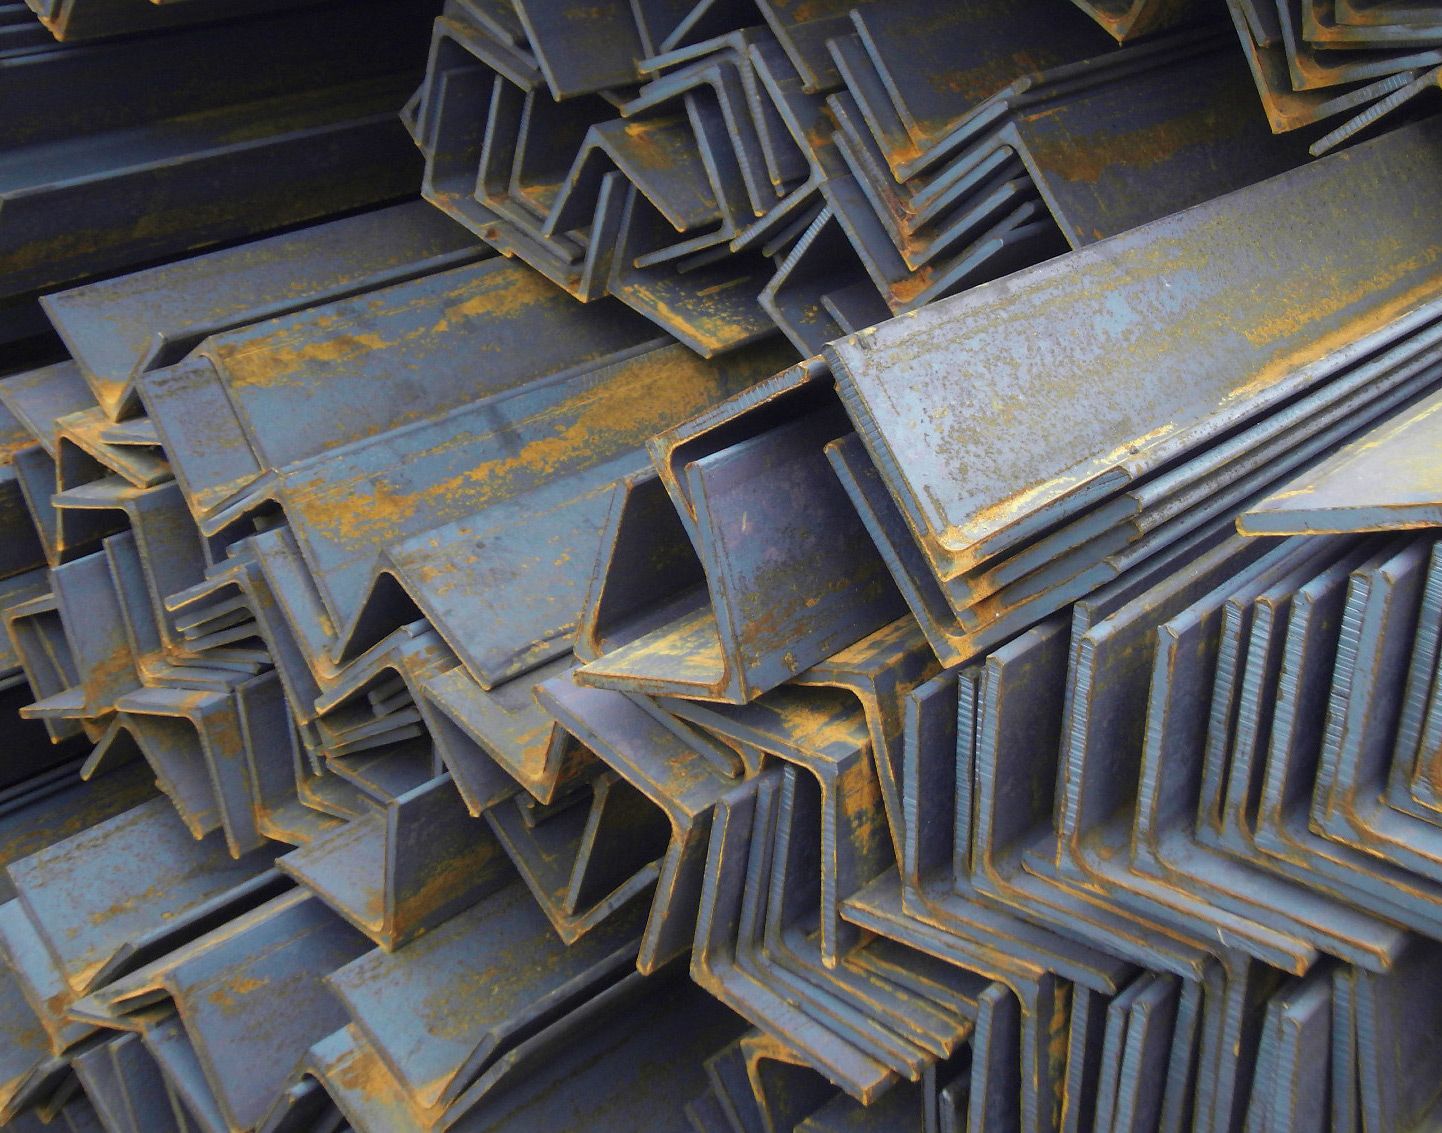
For cladding, mineral glass with dimensions of 2000 x 1300 x 3.5 mm is suitable. Often, a pre-fabricated package of glass sheets is purchased for this purpose. The pieces of each section are cut on a cutting machine, then welded and cleaned of scale and metal deposits. The prepared sections are phosphated and painted. Powder coating is the preferred coating.
The metal sections are assembled manually using clamps. The components are joined with spot welds, and the joints are welded along the entire height. The completed frame is secured to the foundation with dowels. Glass installation is similar to that on a timber frame.
On average, it takes 2-3 days to assemble a greenhouse. The foundation must be in place, and the wood components or steel sections must be pre-assembled.
When developing a greenhouse project, designers and engineers pay attention to the shape, frame, and type of glazing.
Greenhouse shapes
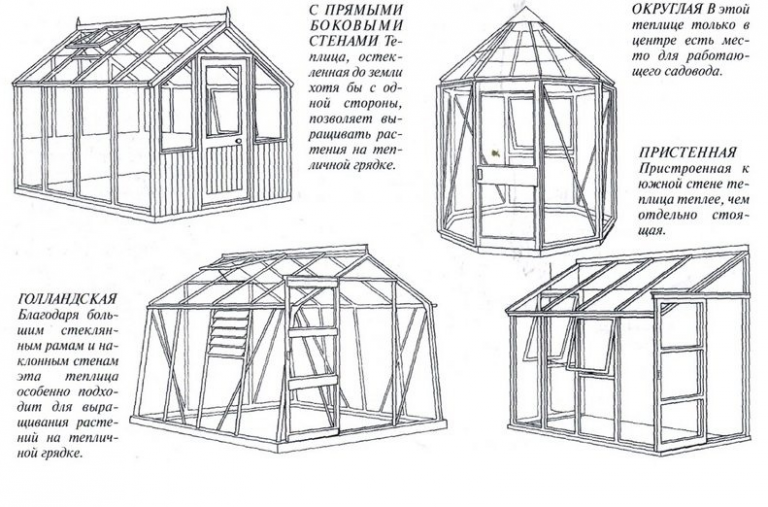
A glass greenhouse is an elegant structure. Perhaps for this reason, designers have created several variations of its shape:
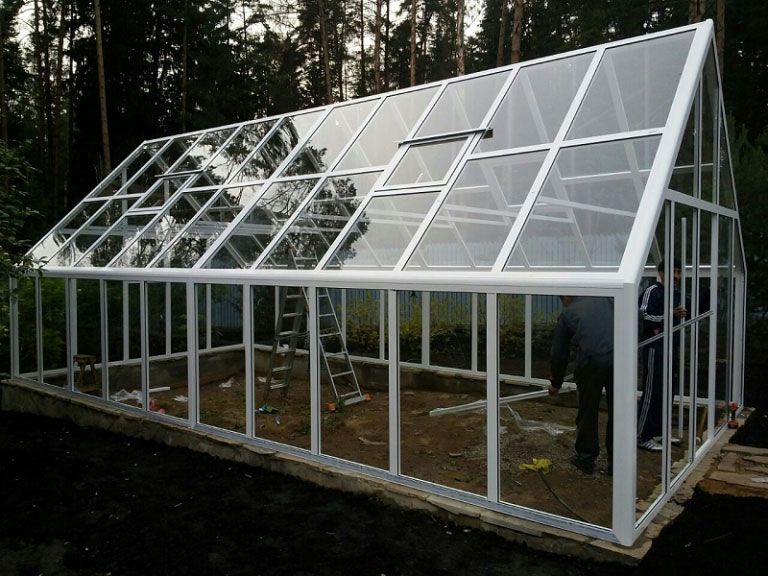
- classic with a gable roof;
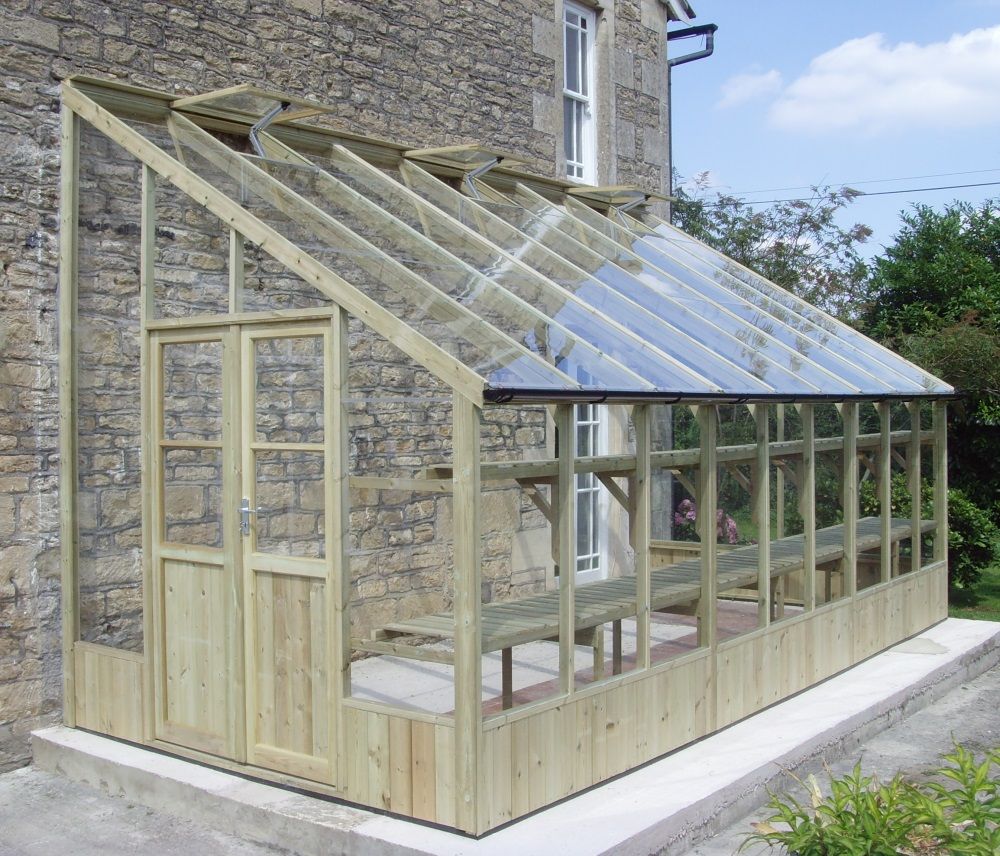
- as an extension to a building (it is recommended to build it on its southern side);
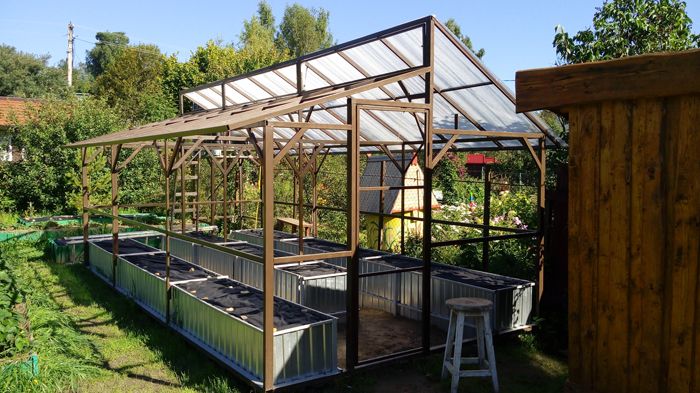
- Mittlider;
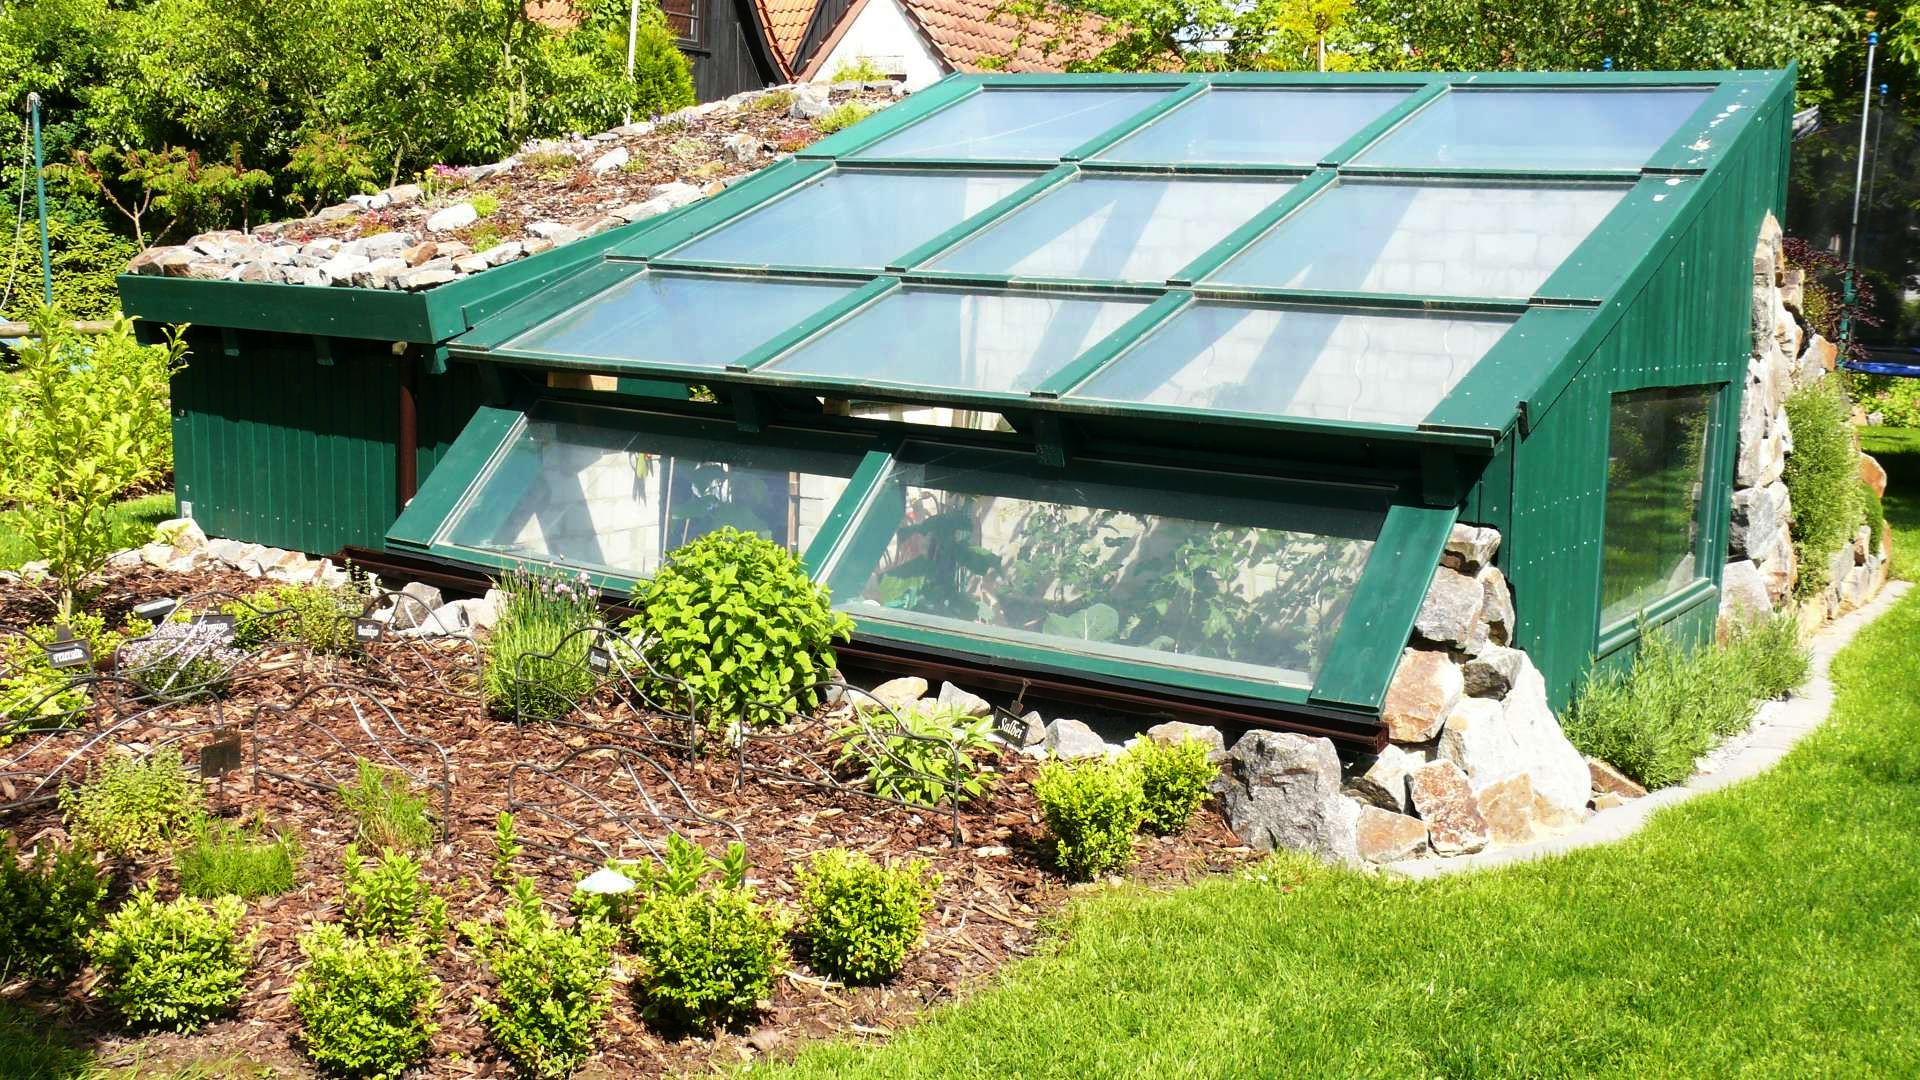
- Thermos - a significant part of the structure is located below ground level, representing a brick or concrete wall; it is characterized by very good thermal insulation;
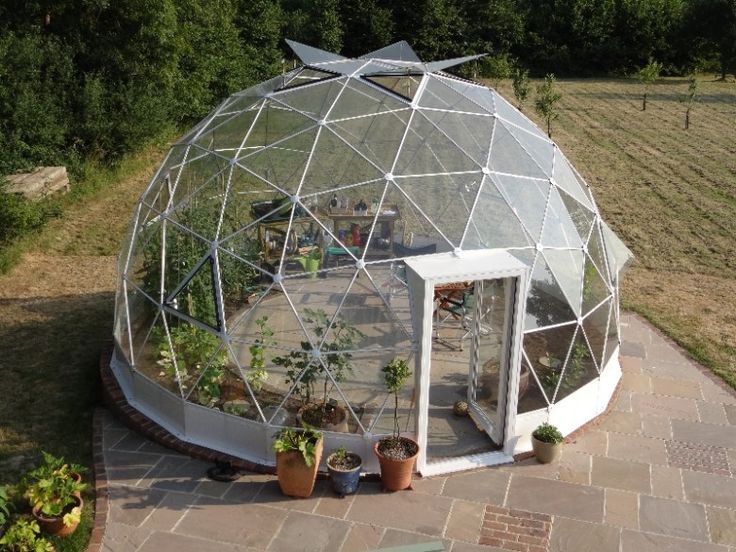
- Dome - ideal for lighting, highly resistant to wind gusts from any direction; the design requires the installation of a strong and complex frame;
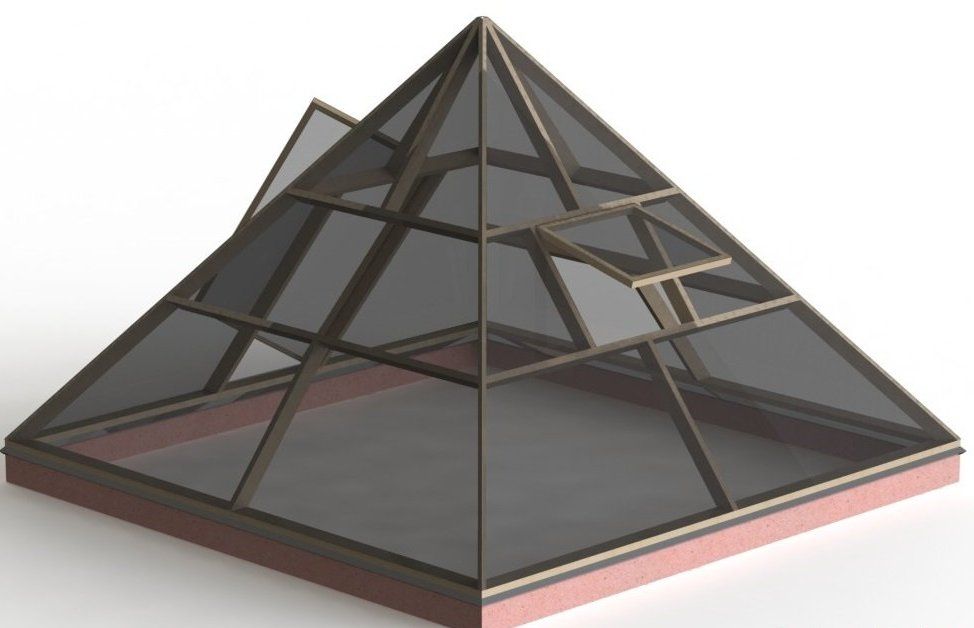
- Pyramidal - in terms of complexity, it is an intermediate version between the gable and domed version.
Types of frame
There are also several variations when it comes to metal frames:
- from metal corners welded to each other (the glass is fixed using clamps);
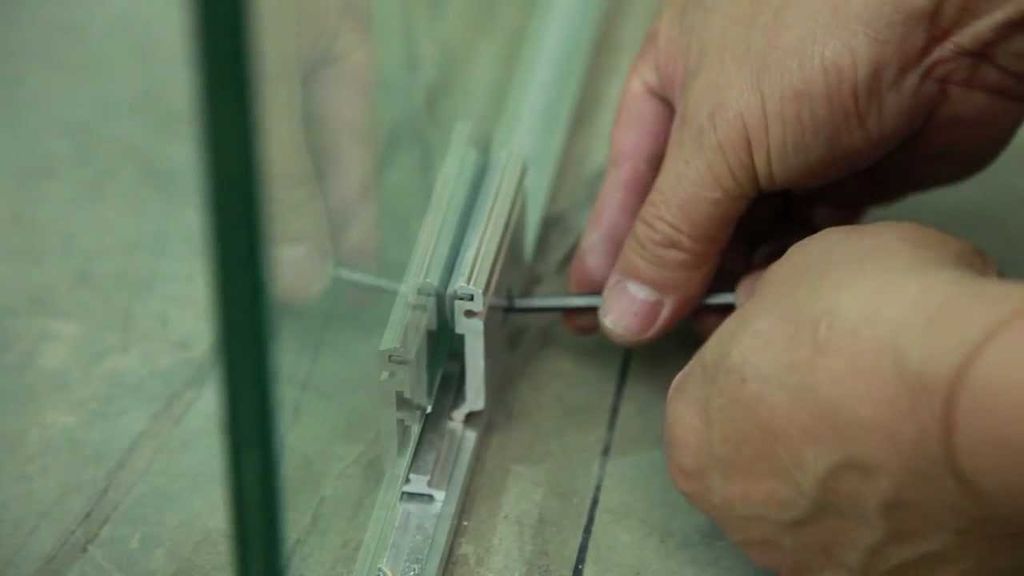
- by creating a metal profile with glass puzzles (rubber seals and sealant are used for fastening);
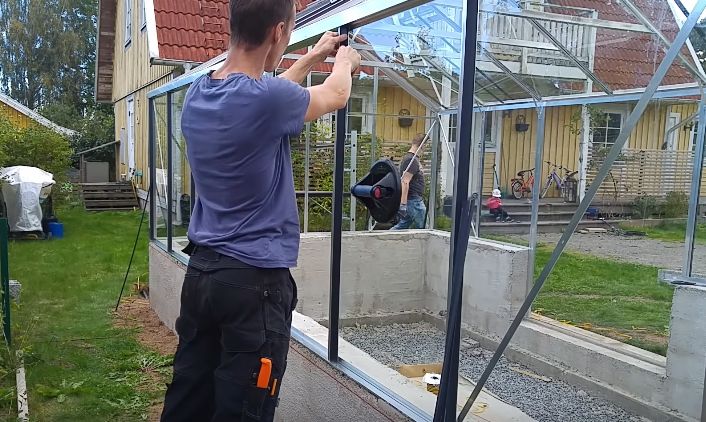
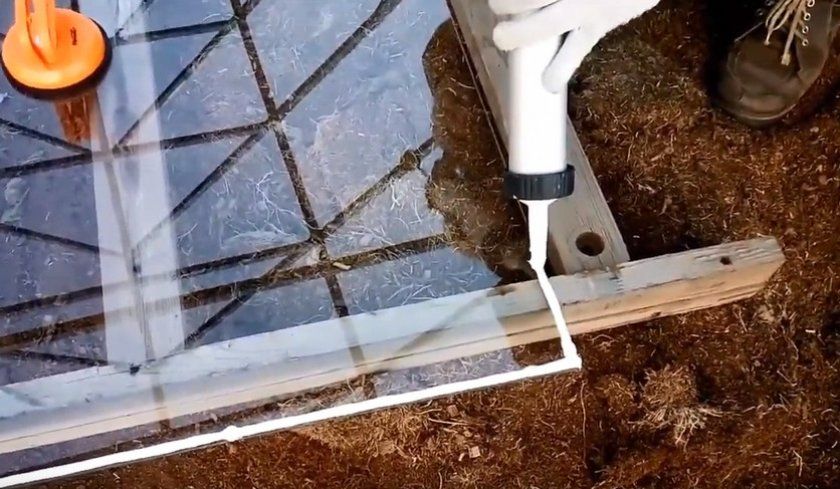
- from galvanized profiled pipes by connecting them using bolts, welding or self-tapping screws (the glass is fixed with glue or an aluminum clamping profile).
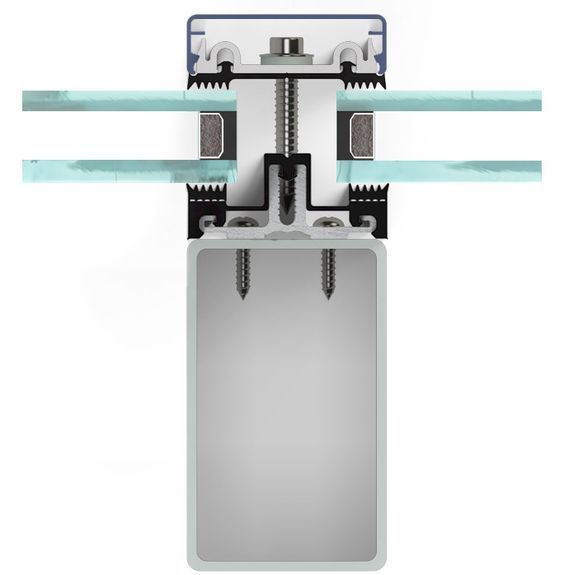
Type of glazing
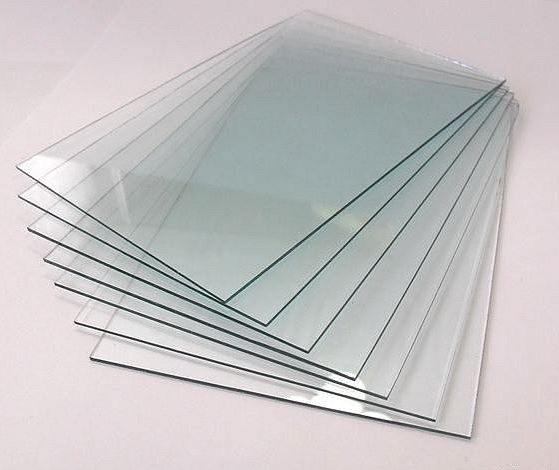
As for glass cladding, the most economical option is 4 mm thick material (window glass), secured to the frame with glazing beads, clips, or clamping profiles. A greenhouse with this type of cladding is intended for seasonal use only.
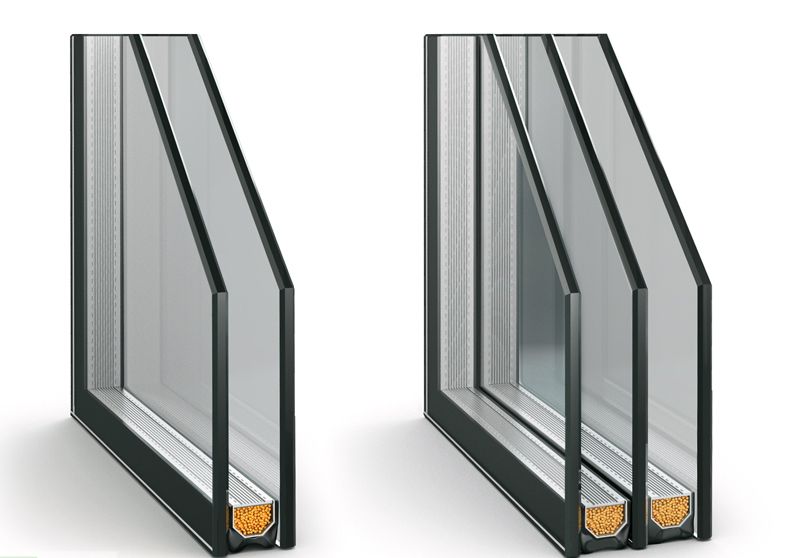
To achieve higher thermal insulation performance, it is recommended to use single-chamber or double-chamber glass units.
Selecting a location
When selecting a site, consider lighting, landscape, wind conditions, and proximity to utilities. The best location for a greenhouse is on a relatively flat, well-lit, and poorly ventilated surface, located near power lines and pipelines.
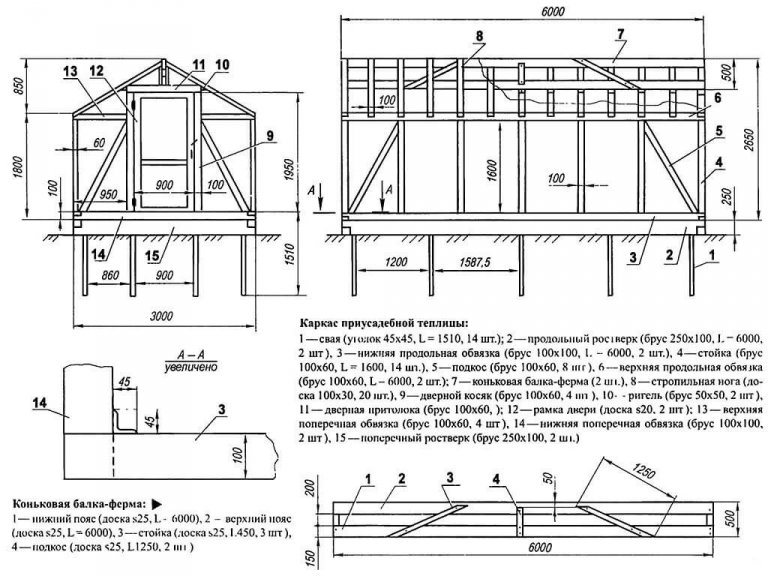
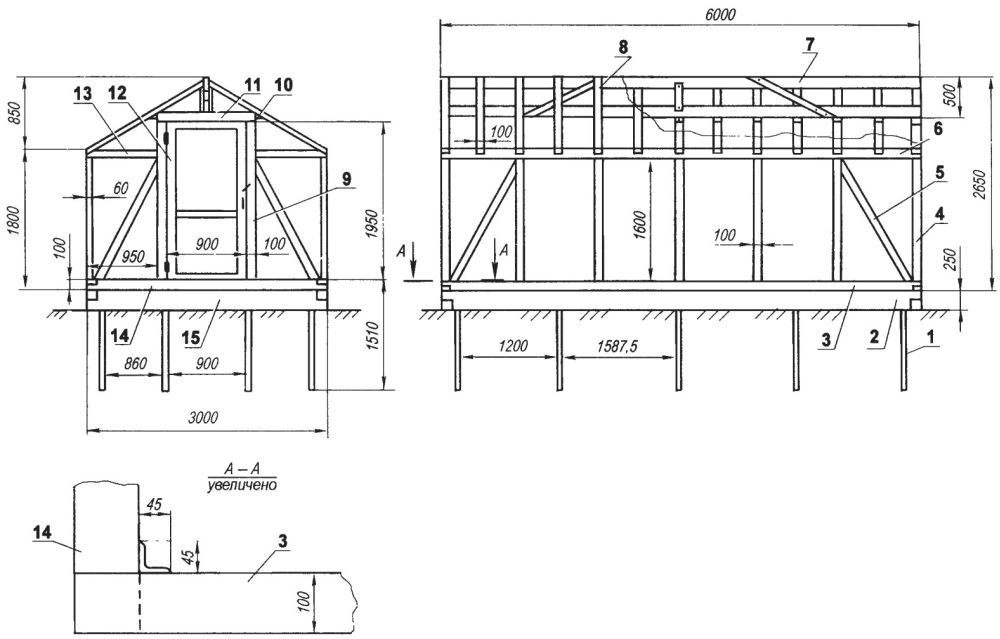
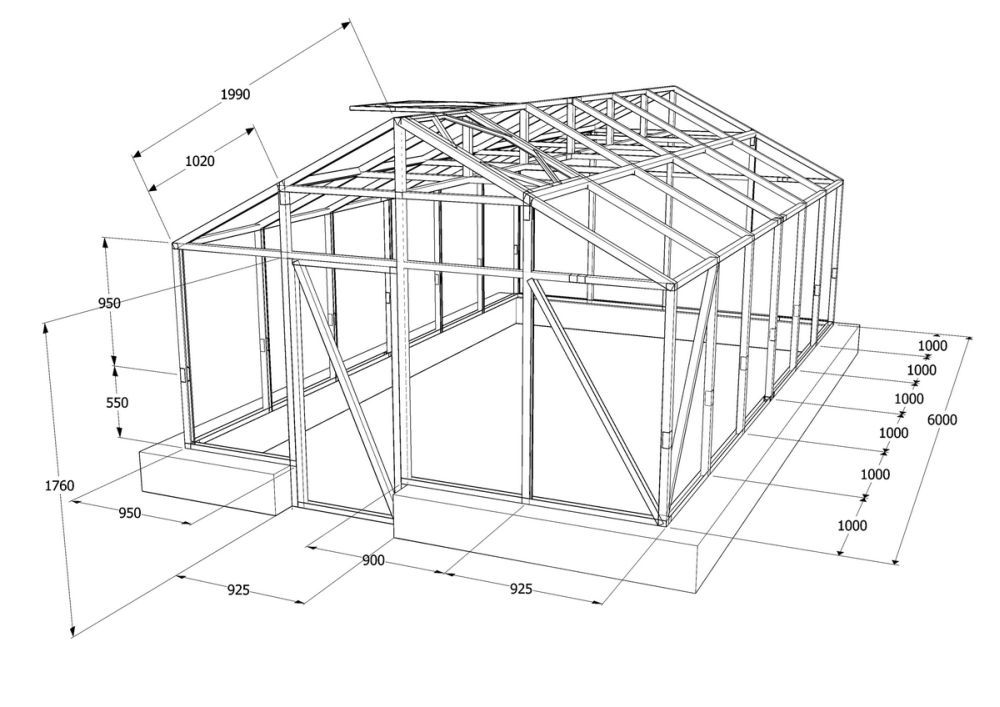
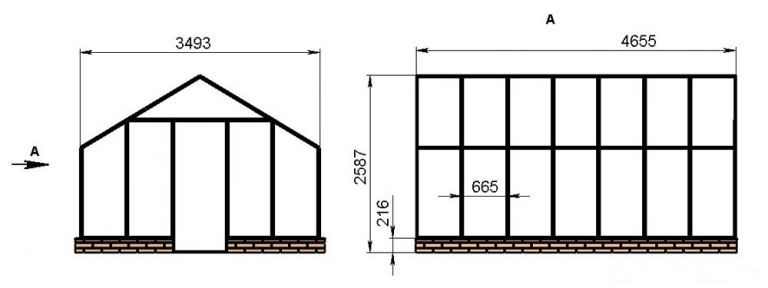
Drawing up a drawing of a glass greenhouse
This is the final stage of preparation for greenhouse construction. The drawing can be created on paper or on a personal computer using graphics editing software.
The recommended order is:
- the glass parameters are determined (for example, 1.6*2.2 m);
- the type of foundation is selected (for example, with a base height of 0.5 m);
- a beam and a strapping board are selected (with a cross-section of 1*1 m and 0.25*1.5 m);
- calculations are made of the parameters of the glazing element, as well as the length, width and height of the structure;
- a sketch of the structure is drawn up, on which the design parameters are applied;
- the locations of the transom windows are highlighted;
- Calculations of the required quantity of consumables are made.
The most common frame shape is a rectangular one, largely because it allows you to quickly assemble a greenhouse with your own hands.
Location
When choosing the location of the future greenhouse, take into account:
- possibility of connection to water supply and electricity networks;
- comfortable localization;
- local landscape - slopes should be avoided;
- wind rose - when constructing a structure, the wind tunnel effect (location between two capital buildings) should be avoided;
- illumination of the selected area - the greenhouse should not be built near a fence, or under roof slopes or large trees - there is a risk of it being shaded, flooded by rain or covered by snow.
Possible foundations for glass greenhouses
The choice of foundation for a glass greenhouse is dictated by the characteristics of the material from which the frame is made, as well as the soil.
The following types of foundations are distinguished:
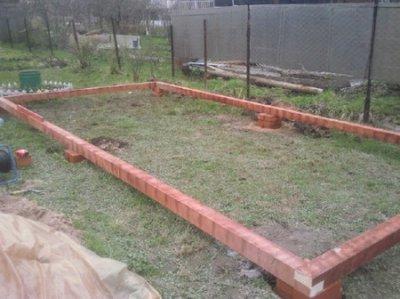
- On stable, non-heaving soils and a relatively low groundwater level, a monolithic strip made of concrete, blocks and bricks is used.
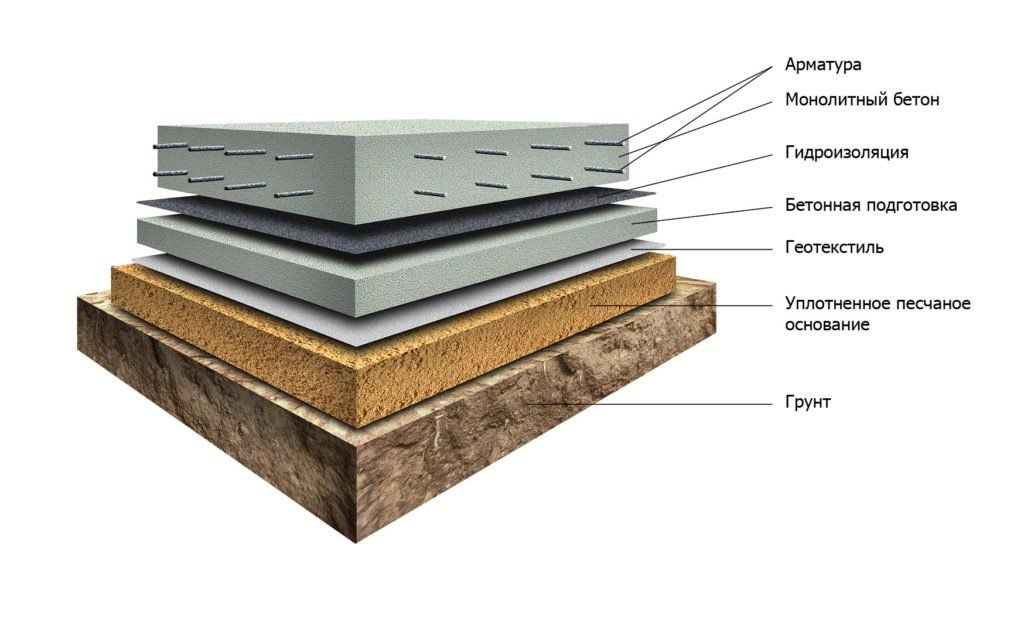
- On clay soils prone to heaving and movement, when constructing a massive structure, a foundation made as a monolithic slab is required.
- On very stable soil and low greenhouse weight, pillars made of blocks, concrete and bricks are used.
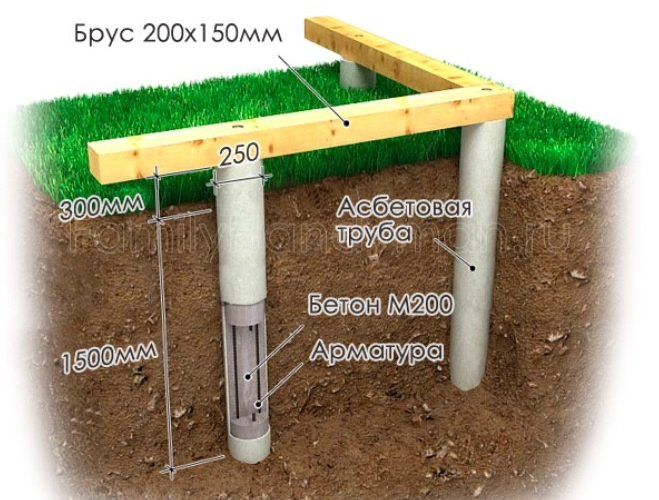
- On clay soil that is impermeable to precipitation, piles made of wood, concrete, metal, plastic or asbestos-cement pipes are used.
- When constructing a low-weight structure on a summer cottage site, the choice is often limited to solid timber beams treated with hydrophobic compounds and antiseptics.
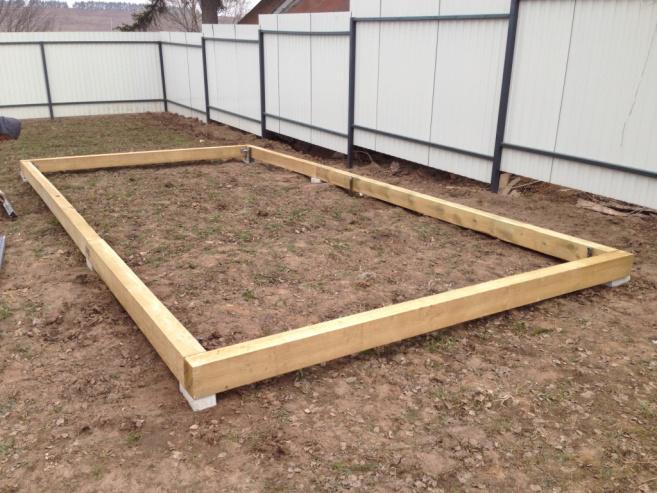
The beam, attached to the ground with rods, is installed on a drainage pad and waterproofing made of roofing felt.
Recommendations for choosing glass
Most often, glazing materials with a tensile strength of 7.5 kg/m² are used. Low-quality glass can cause damage due to increased fragility, low transparency, and a lensing effect that can damage plants.
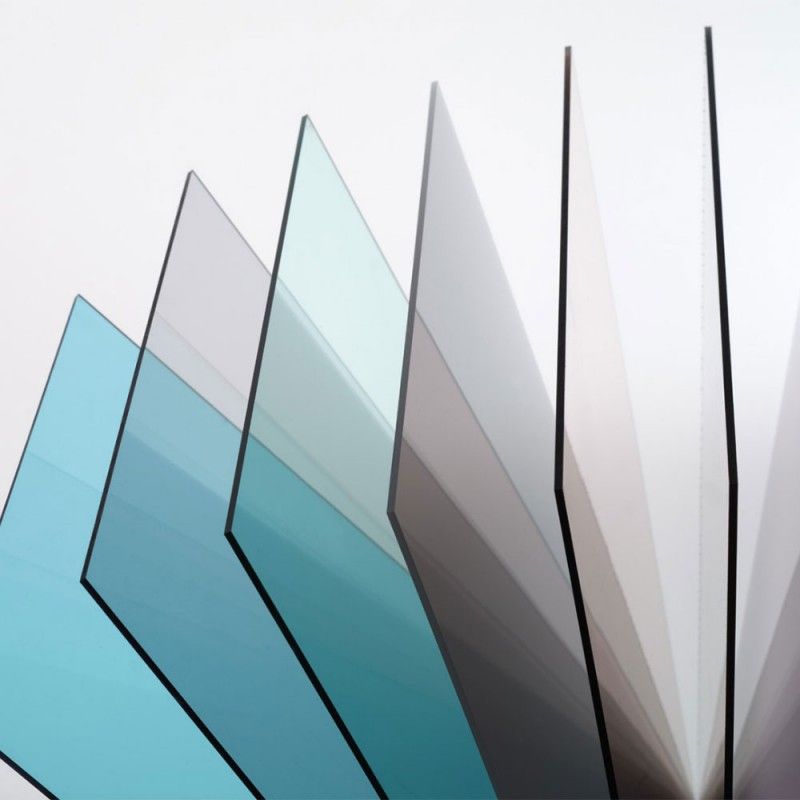
The best glass grades for greenhouses are considered to be those in GOST standards M4-M6 (with the quality decreasing as the grade increases). M4 is considered polished, while M5 and M6 are unpolished.
It is recommended that the glass thickness be equal to or greater than 4 mm. For double-layer glass, the thickness is 3.2 mm, and for display glass, 6.4 mm.
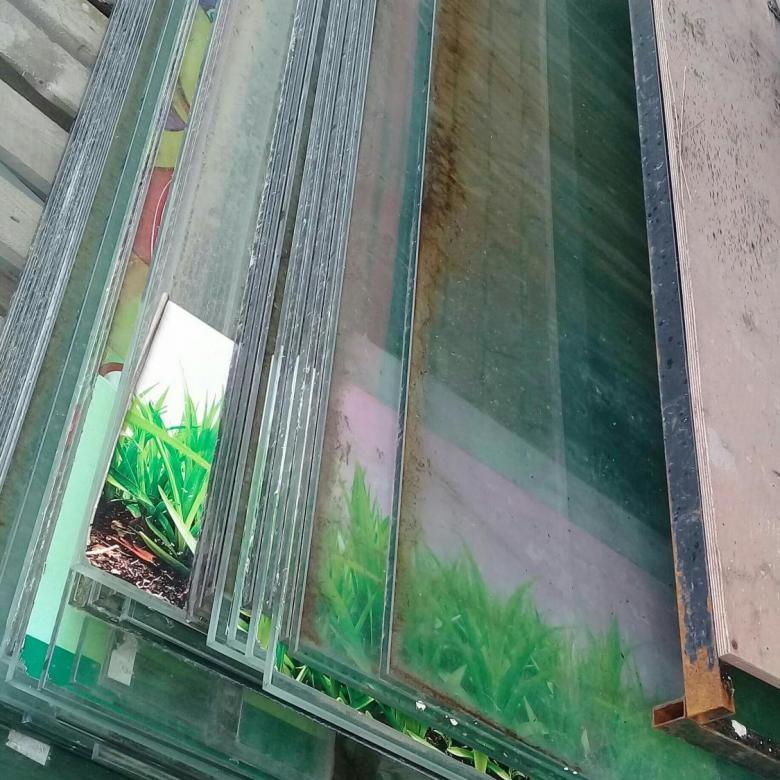
A good solution is to use single or double-glazed windows. When installing them, rubber gaskets should be installed (glass can expand and contract with temperature fluctuations). It's important to keep in mind that double-glazed windows reduce light transmission by approximately 50%.
For safety reasons, it is recommended to use tempered glass, which, when damaged, shatters into small fragments up to 1.5–2.0 cm in size (relatively larger fragments can cause injury). However, this may make it difficult to clean up the shattered glass.
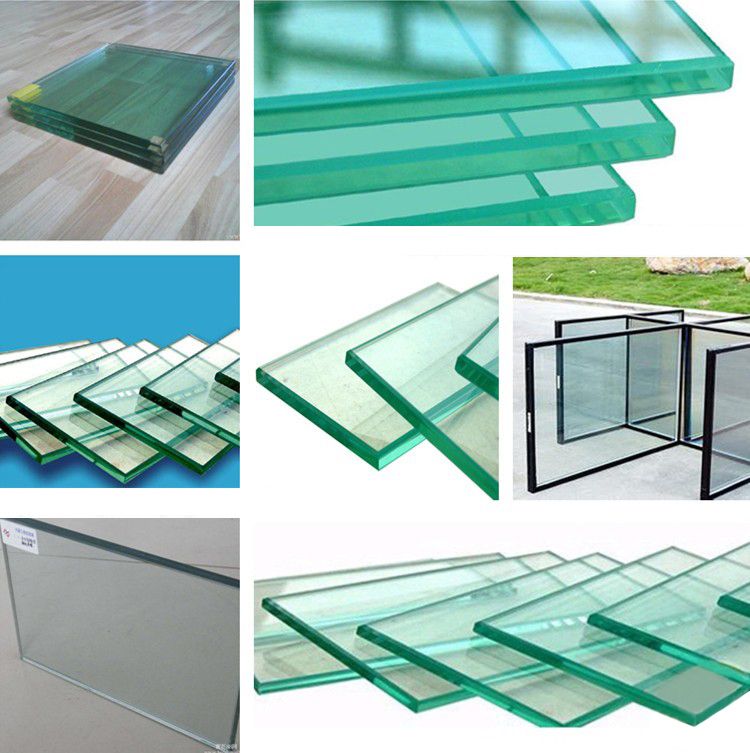
In northern latitudes, it makes sense to use heat-saving types of glass.
It should be taken into account that heat-reflecting glass can have a negative impact on the growth of heat-loving crops, and the use of storm fabrics will definitely reduce the insolation of plants.
Preparation of materials and tools, calculation
The approximate cost of the necessary materials for building an average glass-roofed greenhouse is 48,000-50,000 rubles. These include: profile and fastening metal corners, pine beams of various cross-sections, pine boards, universal hinges, mineral glass sheets, ondulin (a universal ridge cap), self-tapping screws, window nails, sealant, water-repellent impregnation, wood paint, roofing felt, bitumen, a sand and gravel mixture, wooden glazing beads, and liquid nails. The exact quantity of building materials is determined by the specifics of the chosen project and the details of the building plans.
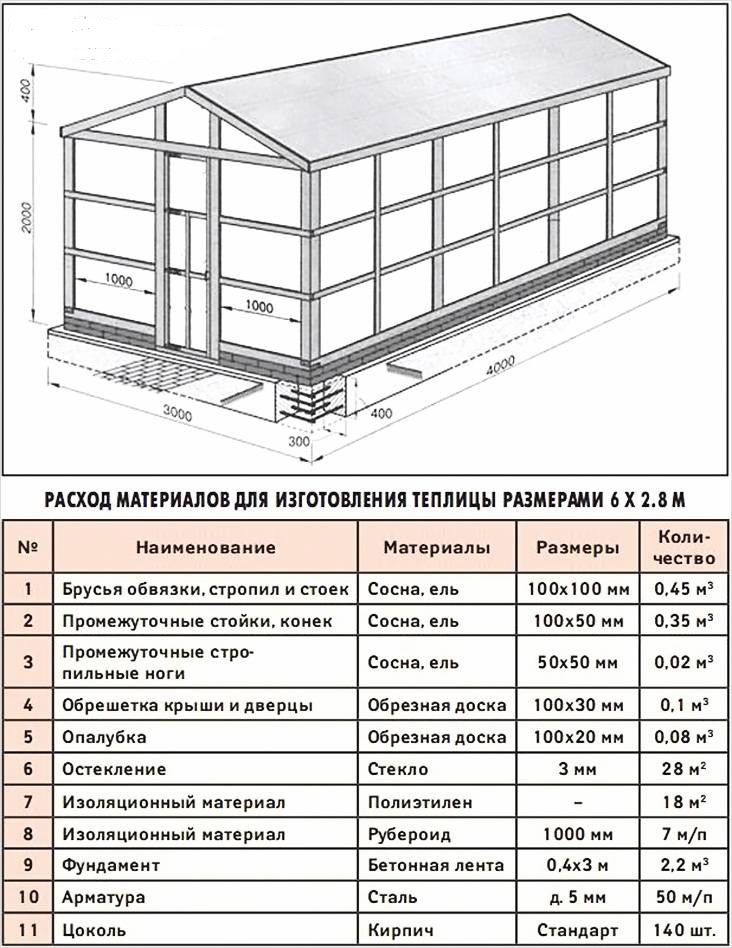
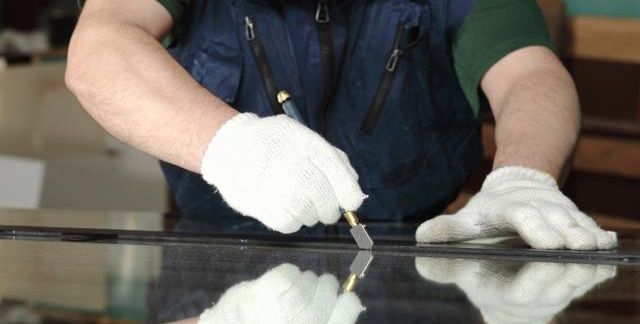
To prepare for building a greenhouse yourself, you'll need to stock up on the necessary tools. You'll need: a shovel and a spade, a rake, several axes, a chainsaw, a power saw, a crowbar, a water level or laser level, a tape measure, sawhorses for working with wood, a jointer, a plane, a router, a set of router bits, hammers of various sizes, a drill, a screwdriver, sandpaper, paintbrushes, and a diamond glass cutter.
Step-by-step instructions for building a glass greenhouse yourself
The frame of a glass greenhouse can be made of either wood or metal.
Glass greenhouse made of wood
Conventionally, we can distinguish five stages of greenhouse construction:
- preparatory stage;
- formation of the lower trim;
- construction of vertical posts;
- formation of the upper trim;
- roof installation;
- glass installation.
The algorithm for constructing a wooden structure will look something like this:
Preparatory stage
Once a suitable site has been selected, it must be cleared. Grass is mown, trees are cut down, and stumps are uprooted. The site is leveled—measuring instruments (a level or spirit level) can be used for inspection.
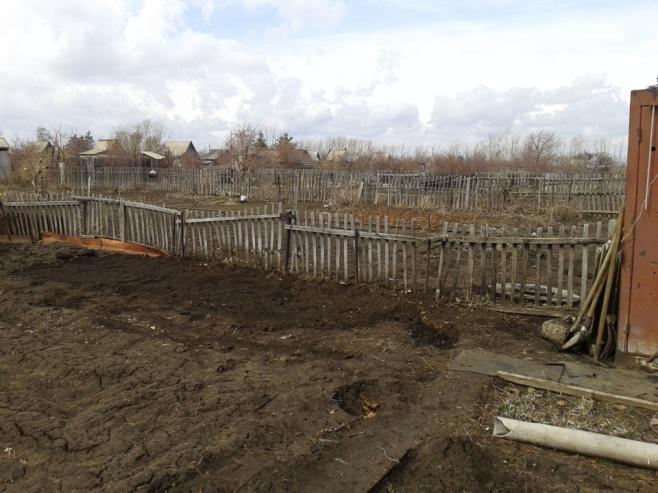
The foundation frame is marked out. A trench is dug and filled with a sand and gravel mixture.
Roofing felt is laid for waterproofing.
Forming the lower trim
The necessary components are manufactured from lumber, including four 10x10 cm beams. A groove is cut into the frames to accommodate the glass panels using a milling cutter. All wood components are then treated at least twice with a hydrophobic and antiseptic impregnation.
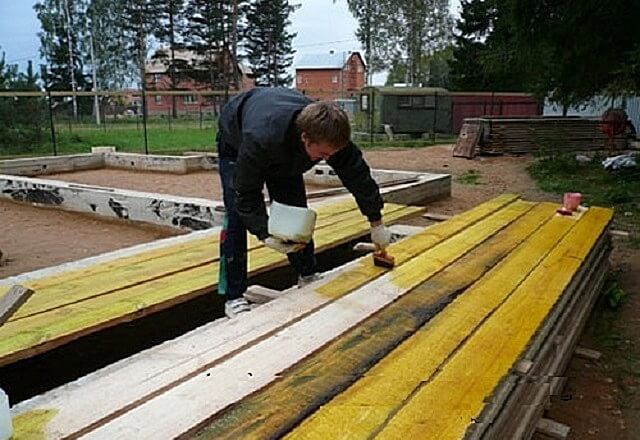
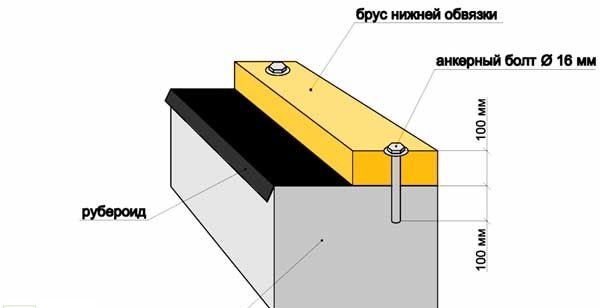
The foundation frame is attached using dowel or half-dowel techniques, after which it is secured with screws (dowels or anchor bolts), reinforced with corners and treated with molten bitumen.
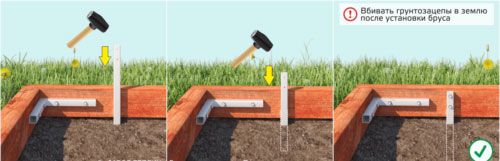
The foundation frame is placed on angle sections that act as ground anchors, after which the timber frame is installed. Particular attention is paid to the installation of the doorway and doors.
Construction of vertical posts
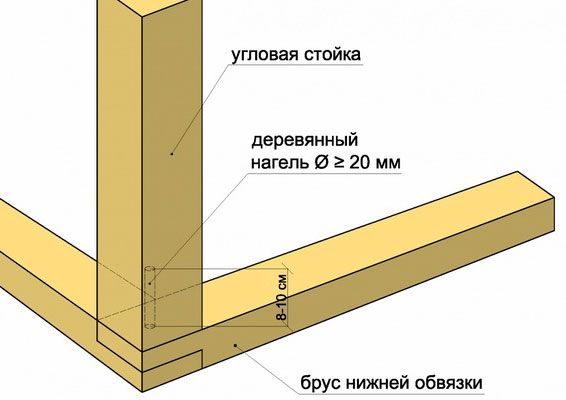
Vertical post beams measuring 10 x 10 cm or 5 x 5 cm are cut to the required height based on the number of posts required. Corner posts are secured to the bottom frame using dowels. The recommended diameter of wooden dowels should be equal to or greater than 2 cm.
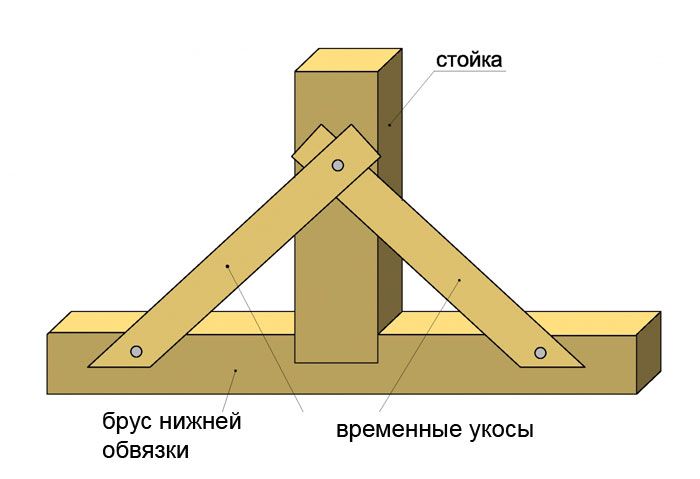
To stabilize the structure, the use of temporary braces is justified.
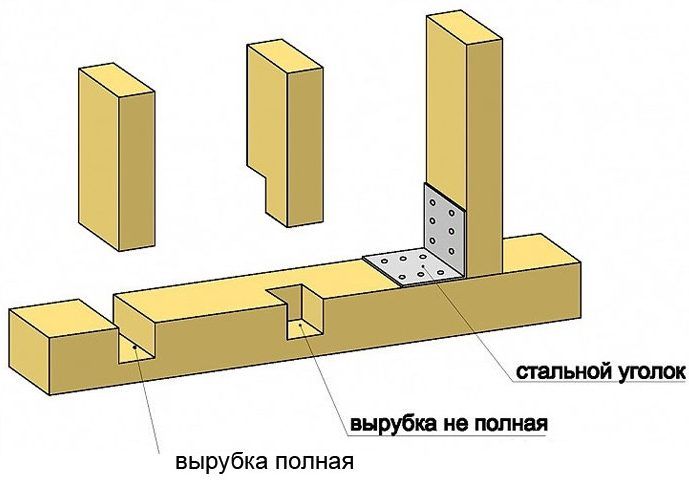
Intermediate posts are installed. Fastening elements can include cuts in the bottom trim, dowels, screws, or metal plates.
Forming the top trim
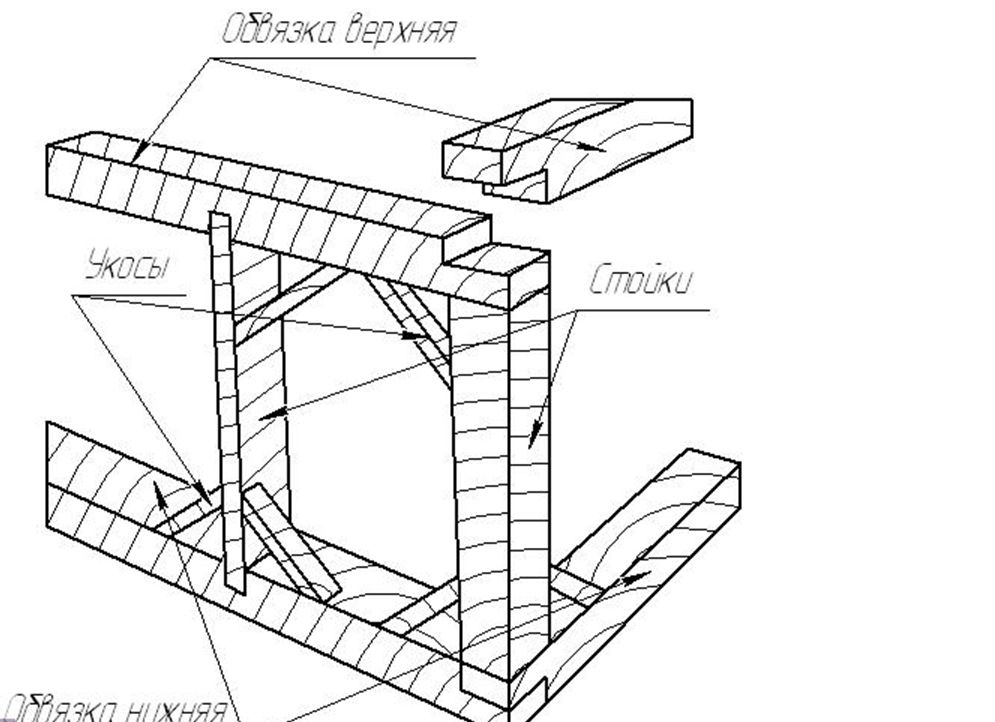
The beams are cut and joined using a half-lap joint. They are secured to the corner posts using dowels or screws.
Roof installation
At the gable ends of the structure, a vertical post is attached to the top frame beam at both ends. It is recommended to secure it either with a plane-to-end joint or with metal fastening plates.
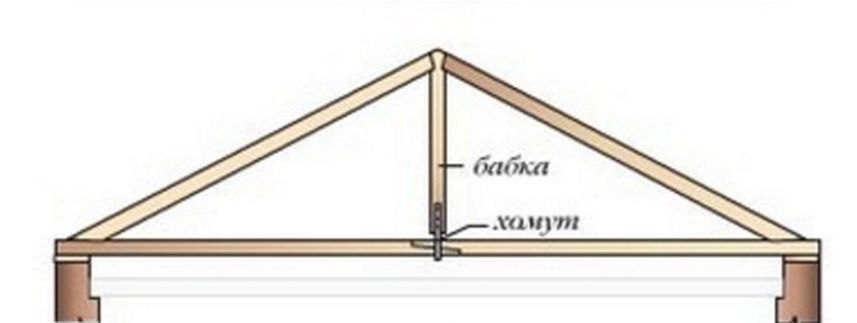
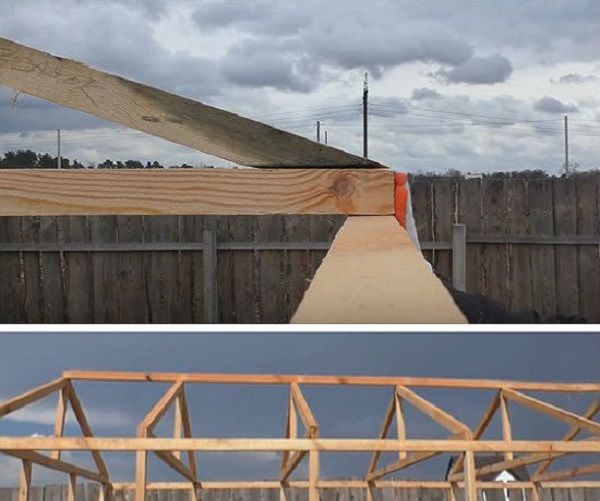
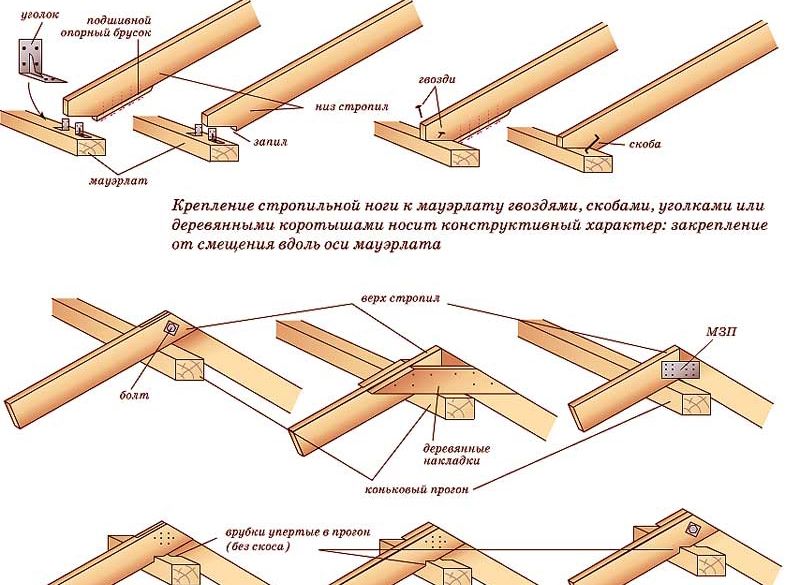
The ridge beam is installed and secured to the posts, after which the rafters are secured to the gables. It is recommended to use brackets or nails as fasteners.
The rafter truss is installed on the greenhouse frame.
Glass installation
Glazing begins with the walls. Wooden slats or glazing beads measuring 2 x 4 or 2 x 2 cm are pre-cut and secured with nails.
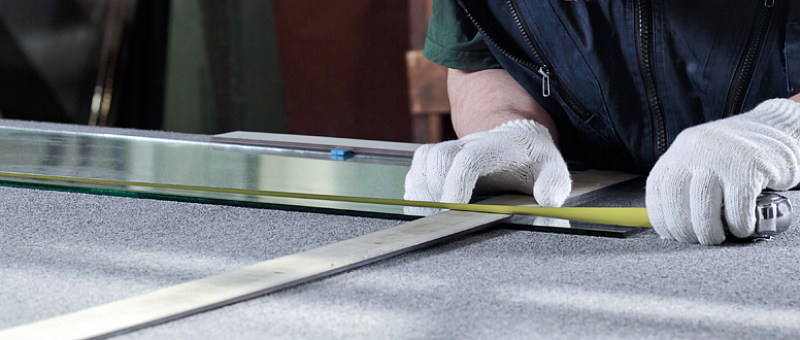
It's best to entrust cutting glass sheets to a professional. The material must be degreased. The one-cut rule should be followed. Keep in mind that the sheet dimensions should be 2-3 mm smaller than the gaps between the mullions. This is done as a preventative measure, as wood can exert compression on the glass as it swells.
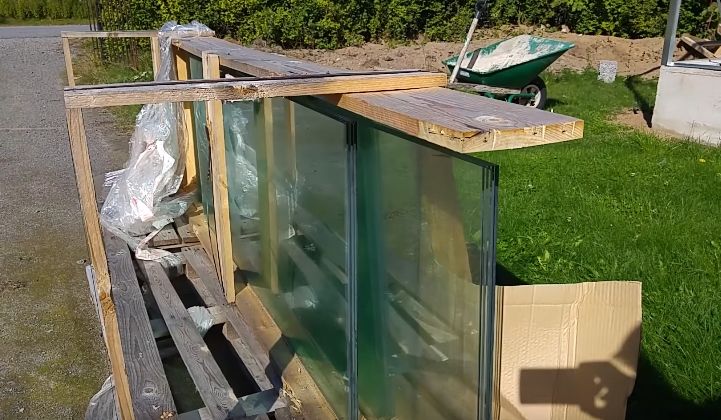
The greenhouse is glazed. Putty or silicone sealant can be used to prevent moisture from penetrating the glass. Suction cup holders can be used when installing the glass, if necessary.
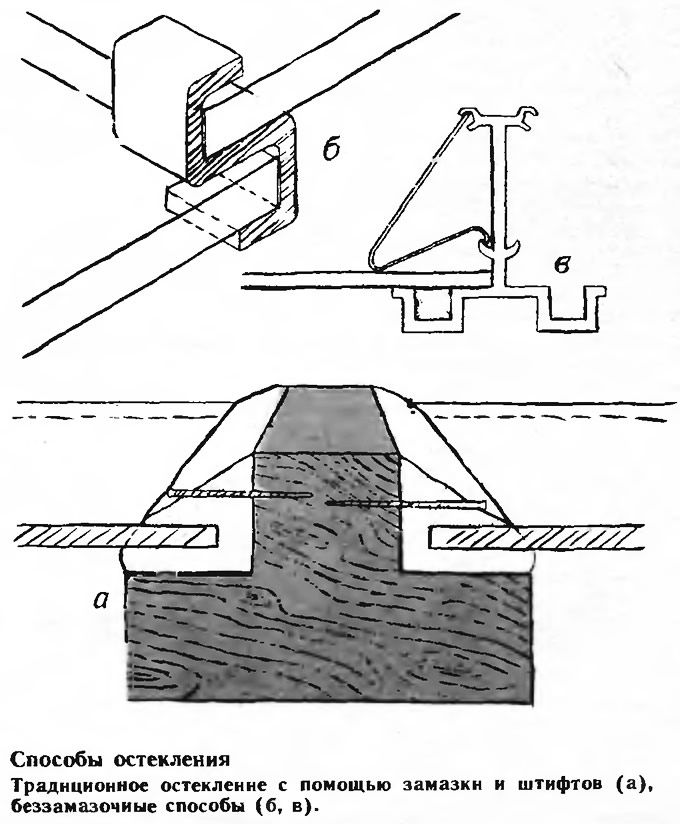
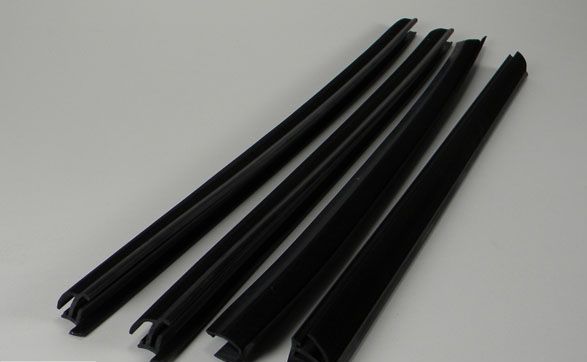
After applying the sealant, each glass panel is placed in its designated place and secured with rubber blocks, after which it is secured with a glazing bead or a semicircular strip.
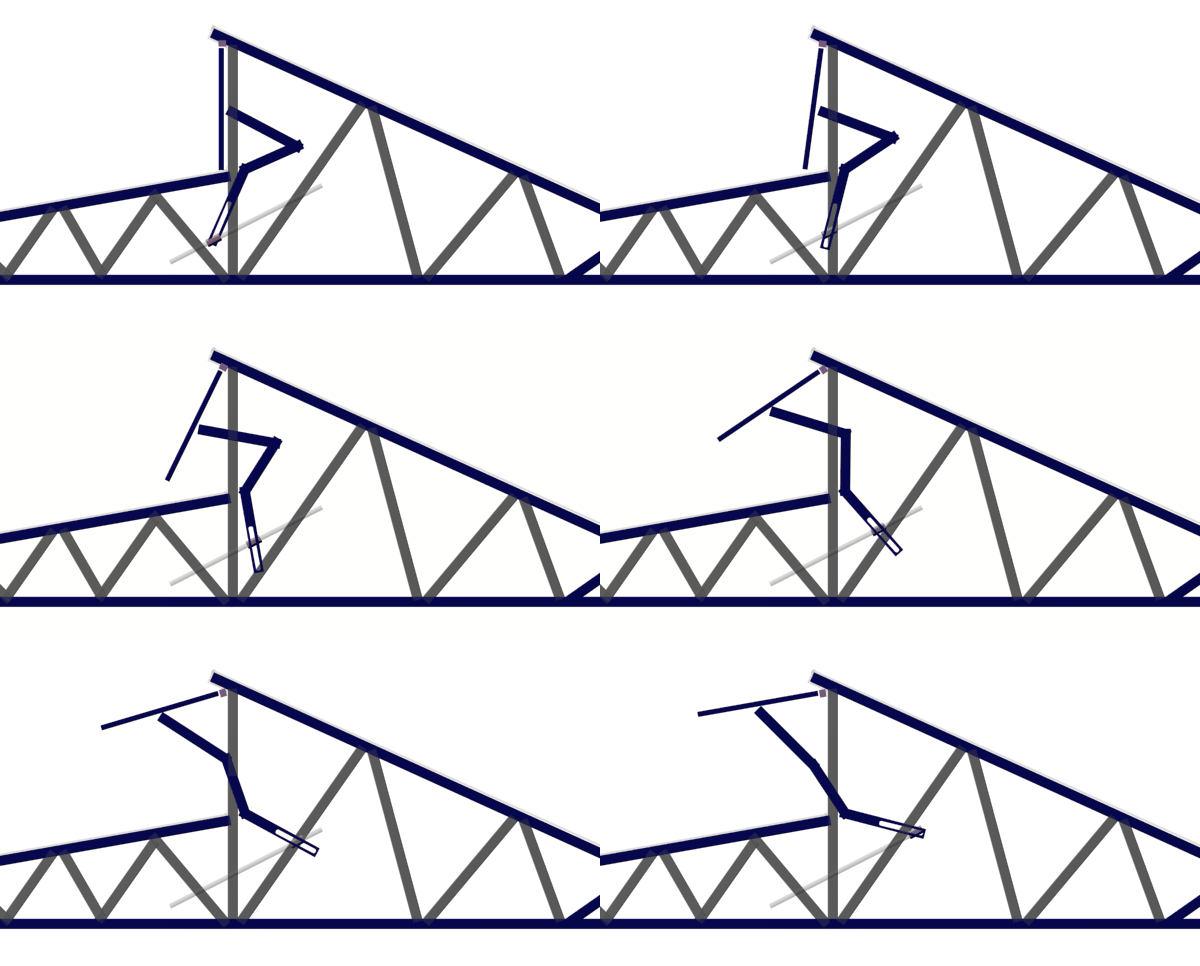
Roof glazing is done in a similar manner, from bottom to top. It is recommended to reinforce the glazing beads on the inside or replace them with smaller cross-section beams, and install a wooden strip on the eaves side to prevent the glass from slipping.
Lastly, the windows and doors are subject to glazing.
The final stage
After glazing is completed, it is recommended to paint the wooden frame.
Onduline elements are installed on the ridge, starting from the leeward side of the roof. Liquid nails are recommended for fastening. The overlap should be equal to or greater than 15 cm.
The structure is ready for operation.
Glass greenhouse made of metal on a strip foundation
Building a metal greenhouse requires a solid foundation. The process can be roughly divided into several stages:
- Preliminary clearing of the site, its marking and digging of a trench with a “cross-section” of 25*30 cm;
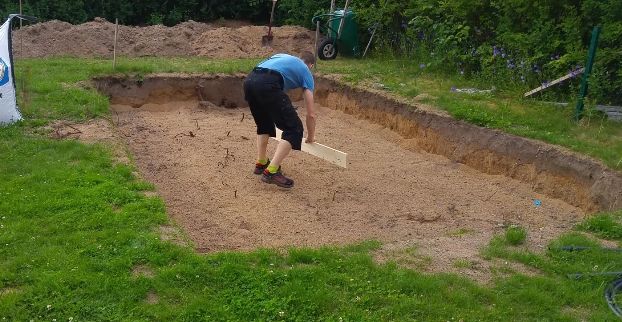
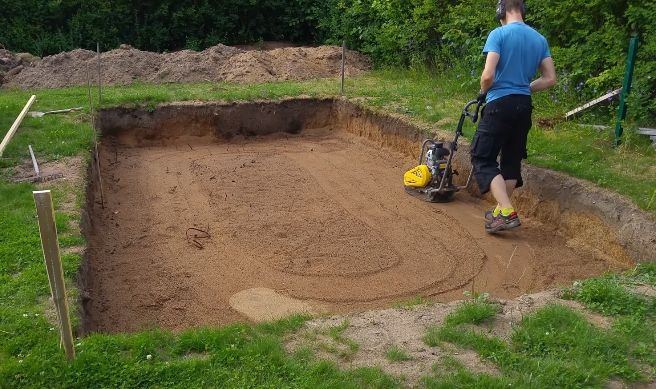
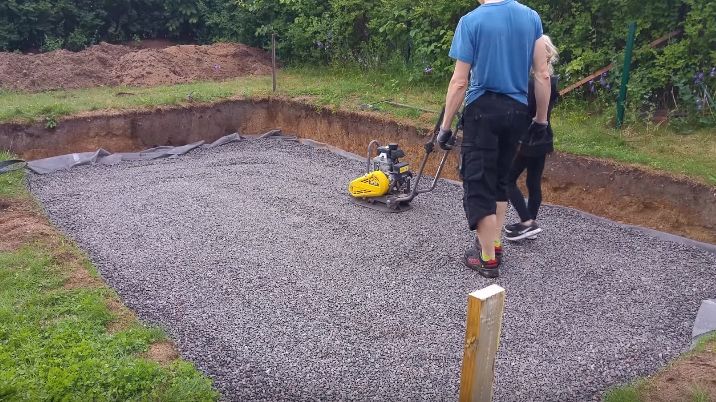
- Compaction of the bottom and walls of the trench with a backfill of sand, gravel or a mixture of them, the thickness of the cushion should be 10 cm;
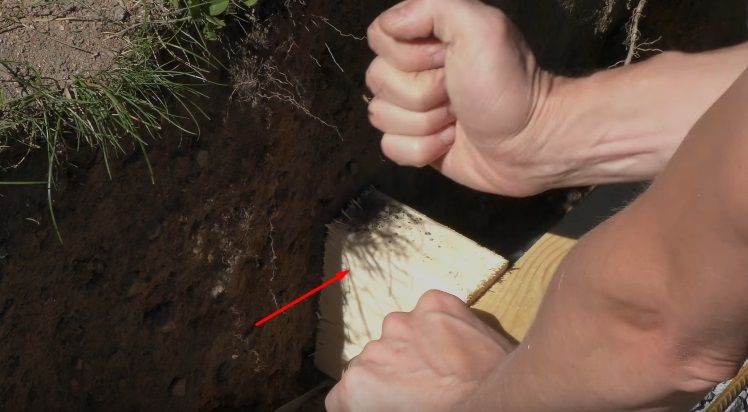
- formation of formwork (preferably using boards), which should rise 5 cm above the ground level, the recommended thickness of the boards should not exceed 2.5 cm;
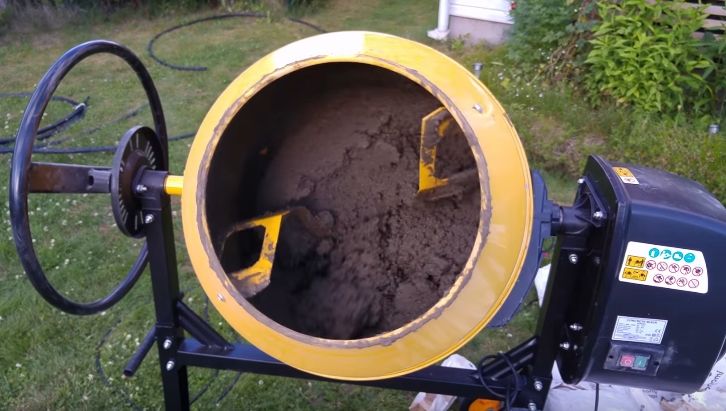
- Preparation of concrete using a large container or concrete mixer, with the grade of cement and its proportions in the mixture with crushed stone, water and sand selected individually;
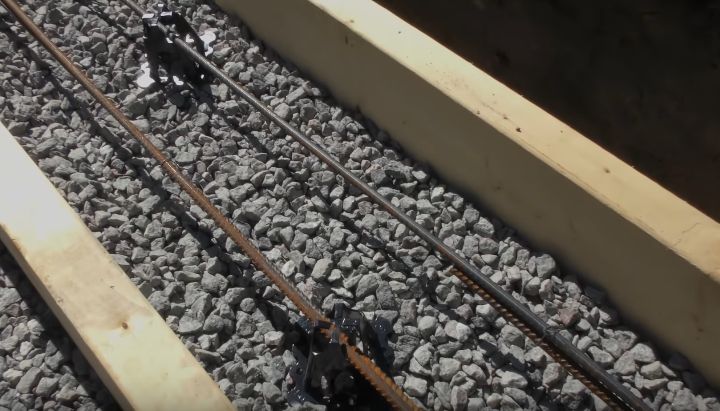
- 50% of the formwork has been poured. Reinforcing bars are laid on the concrete (wire can be used to strengthen them);
- 100% filling of formwork (it is recommended to use a level and ropes for control);
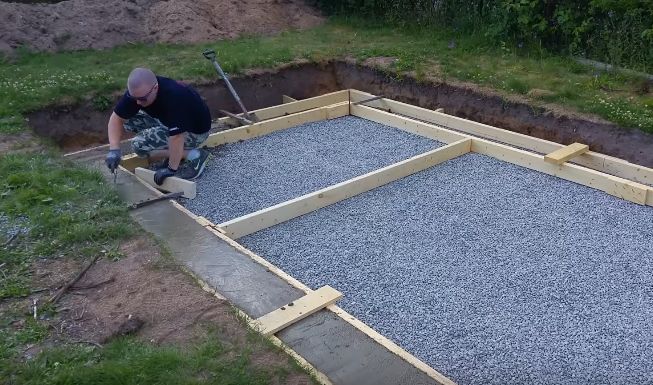
Cover the formwork with polyethylene and spray it with water for a week to prevent possible cracking of the concrete. After the concrete has cured, remove the formwork.
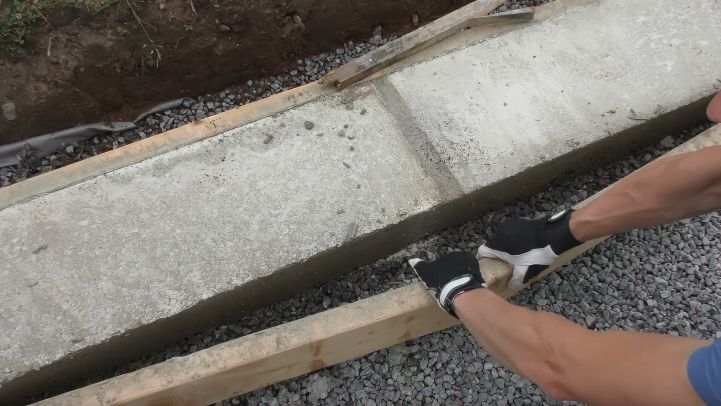
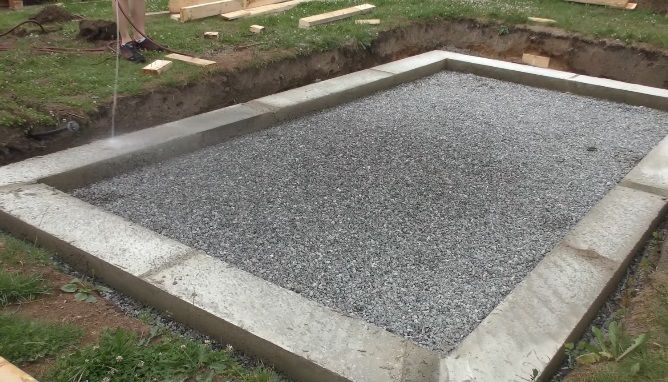
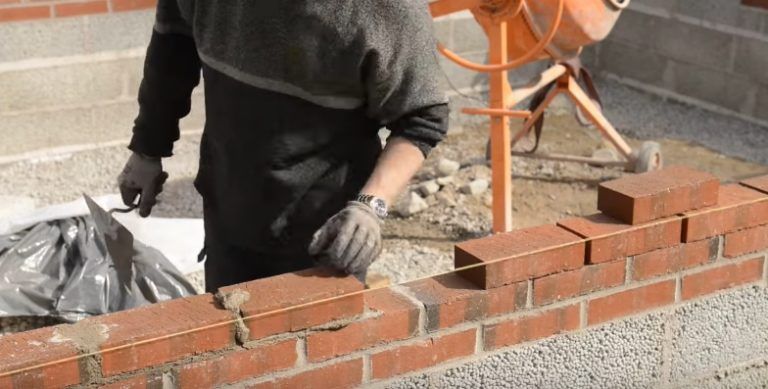
Construction of the basement:
- made of brick;
- from foam blocks;
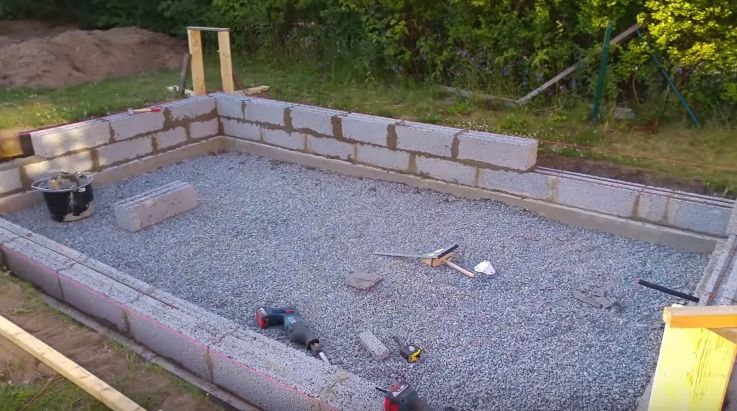
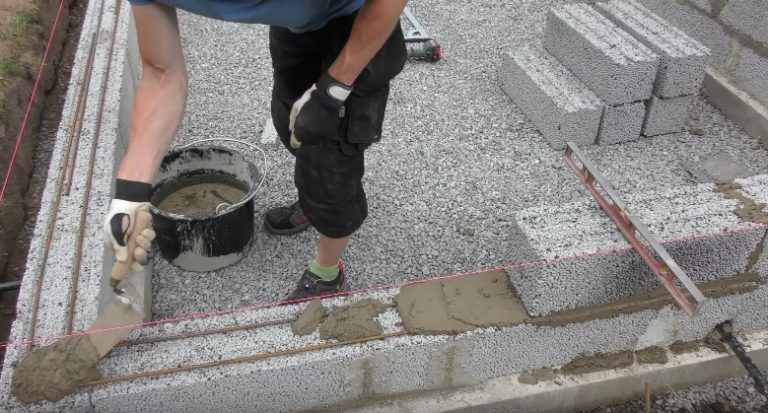
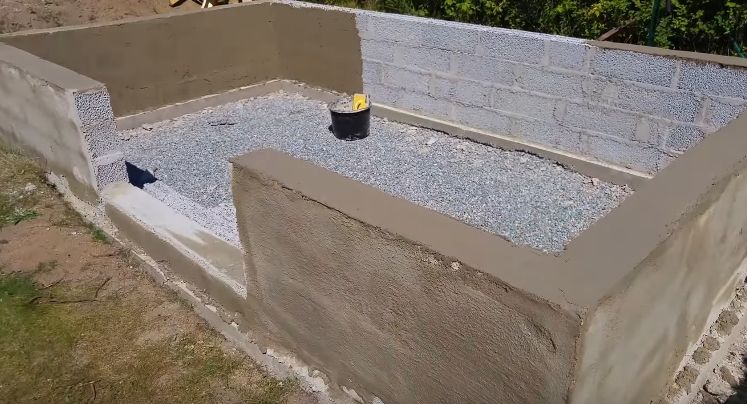
The ability to work with metal and a "friendship" with a welding machine allow you to use metal corners to build a frame:
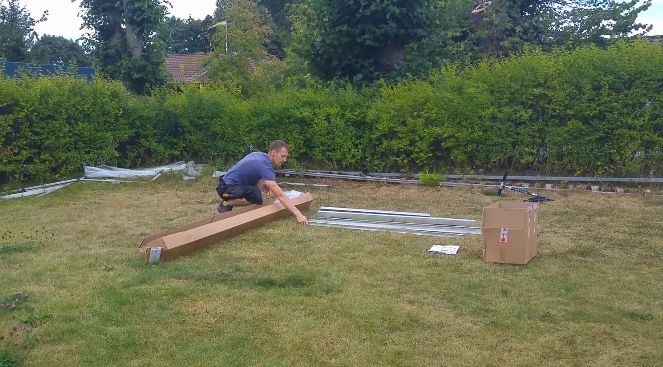
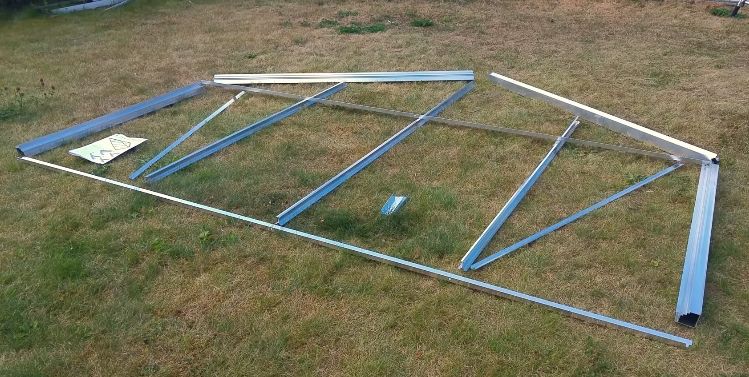
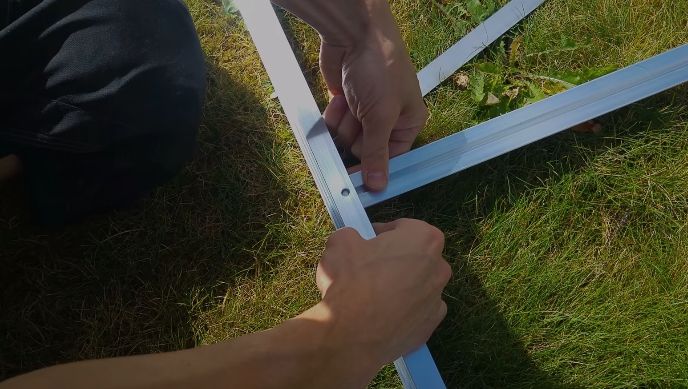
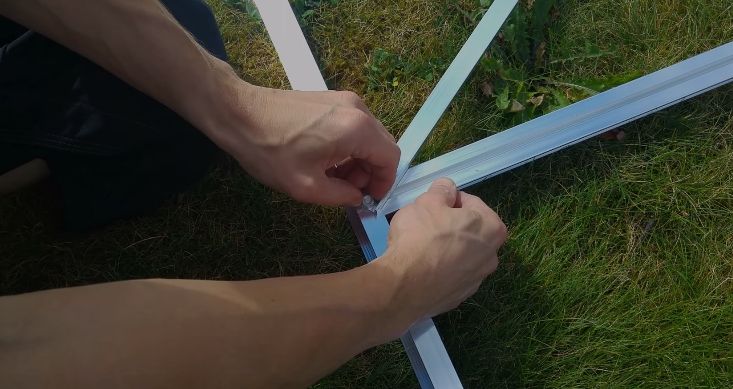
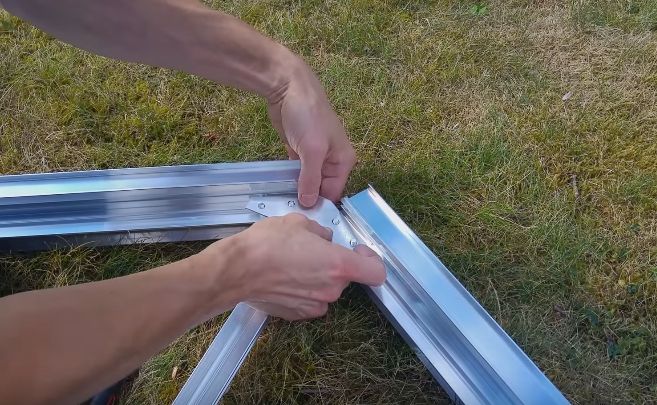
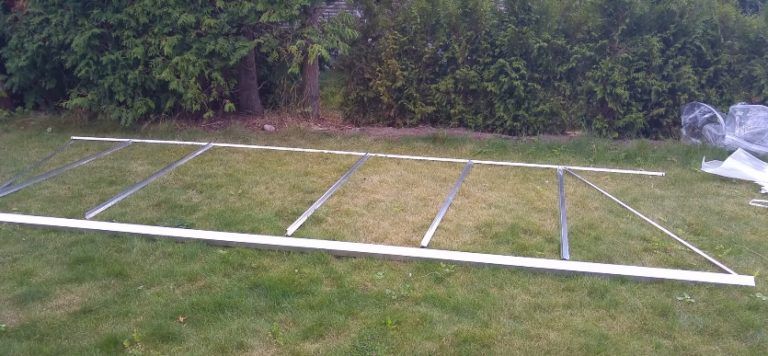
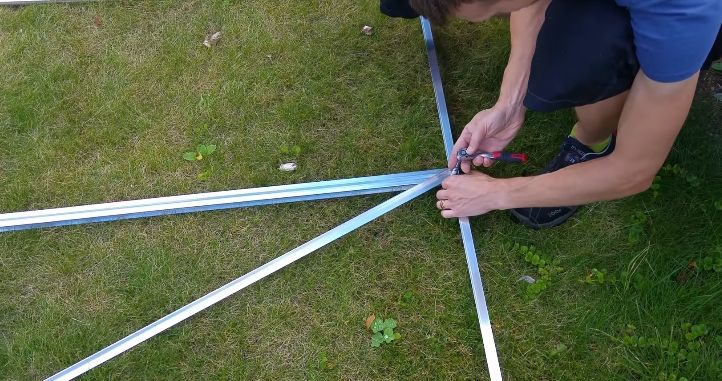
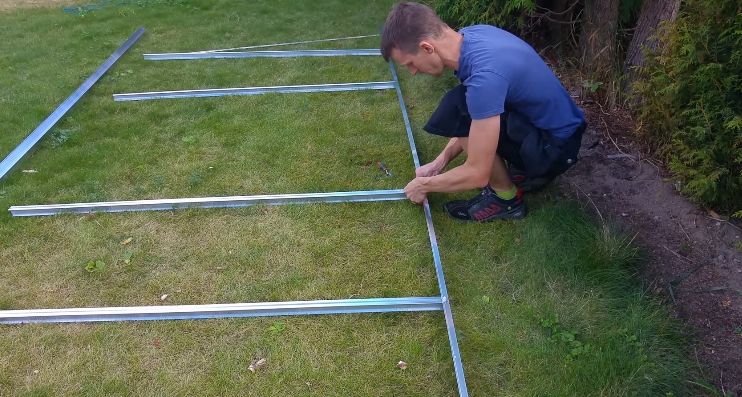
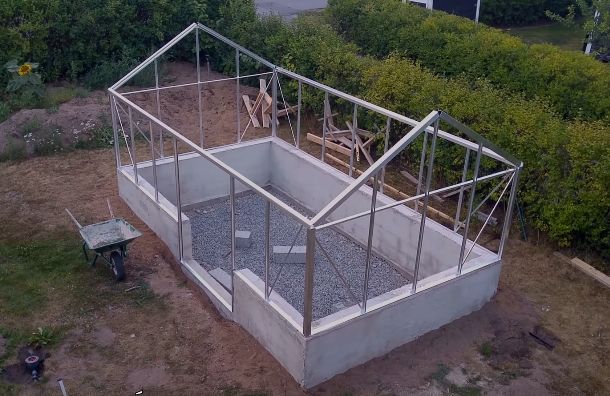
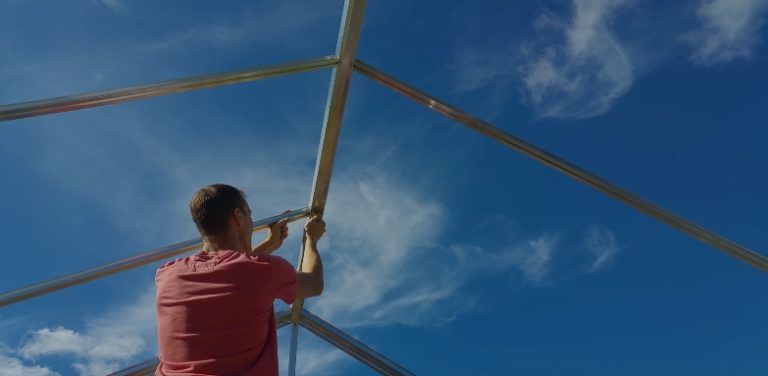
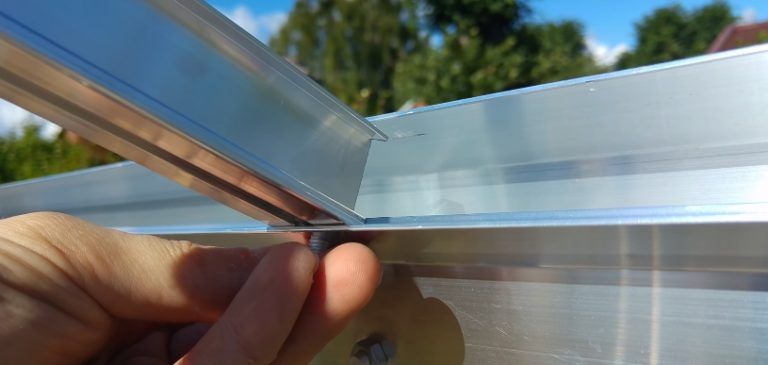
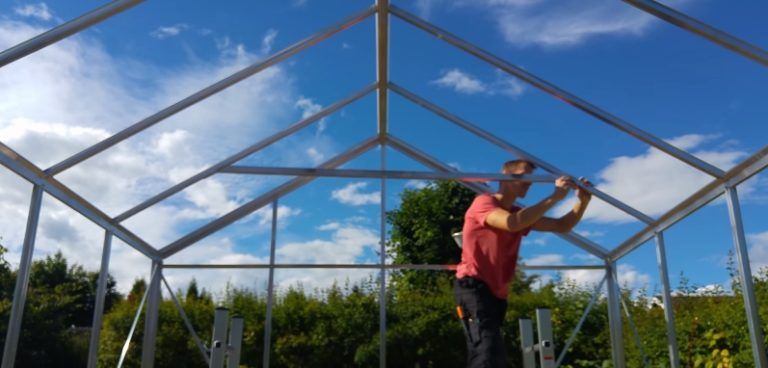
- To create the bottom trim, a 10x10 cm or 5x5 cm angle is attached to the foundation using anchor bolts. Its vertical section should be positioned on the inside.
- Support posts are formed from 2.5*2.5 cm or 5*5 cm corners, which are welded into a T-shaped profile (“T-shaped”).
- A third corner is welded to one side of the T-bar.
- The vertical posts are welded to the lower trim, after which the upper trim is installed.
- On the ground, the roof ridge and rafters are connected, after which they are welded to the upper trim.
At the final stage, glazing is carried out:
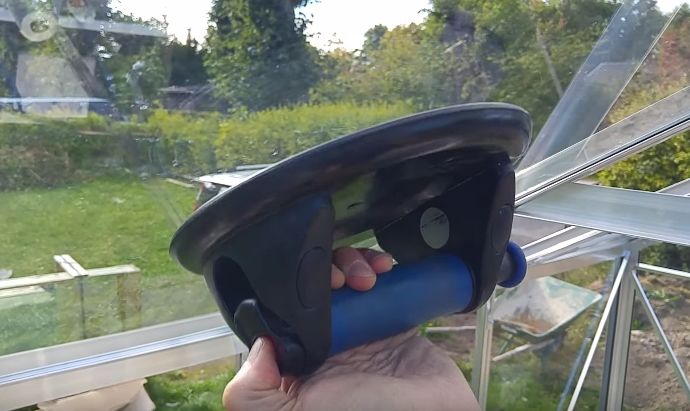
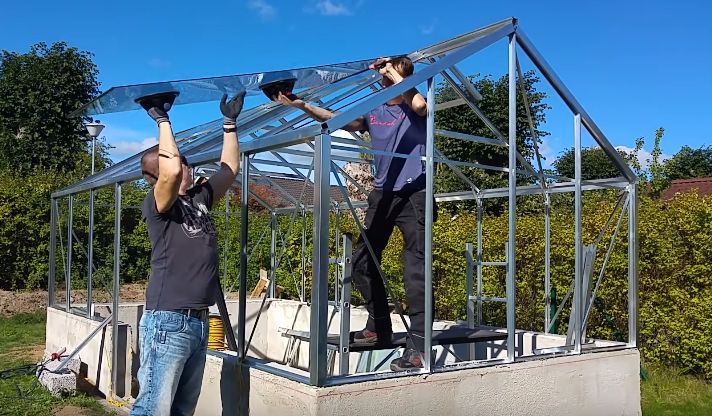
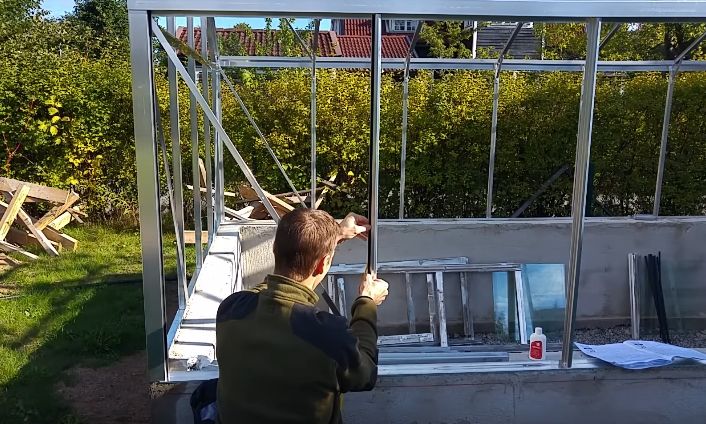
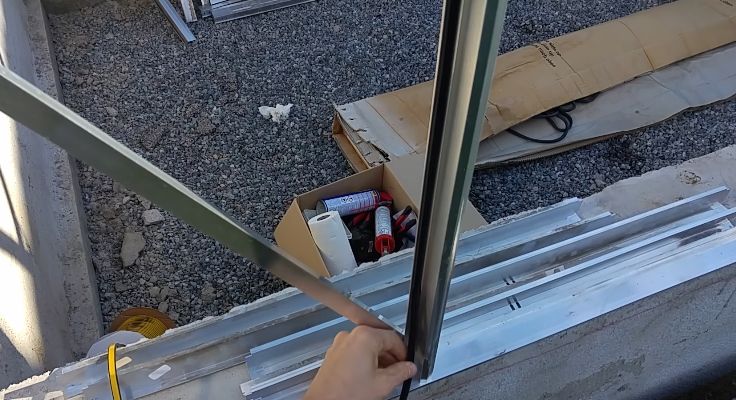
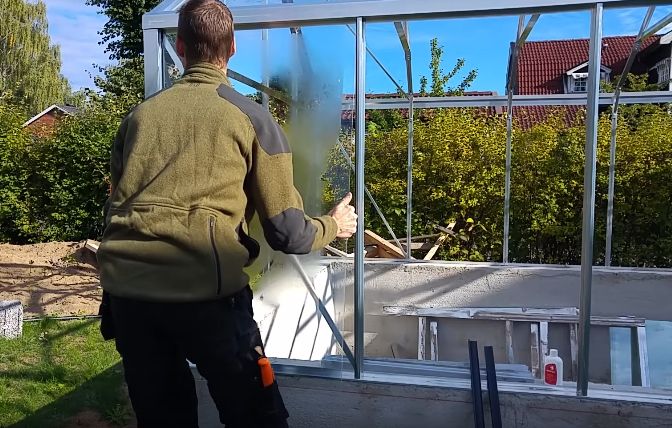
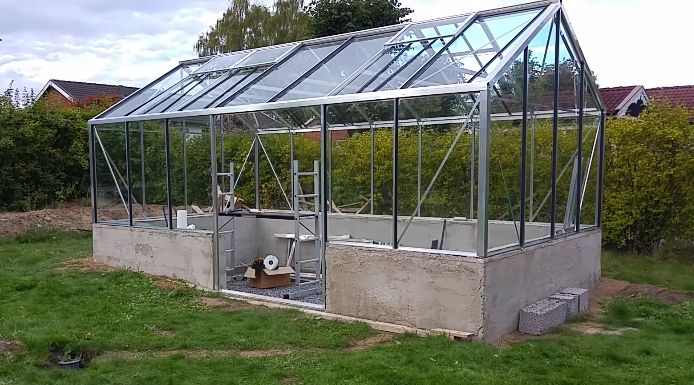
- silicone sealant is applied to the glass edge;
- The glass is installed on an internal frame formed by a corner profile, and is fixed from the outside using clamps or small corners (bolts or welding are used for connection).
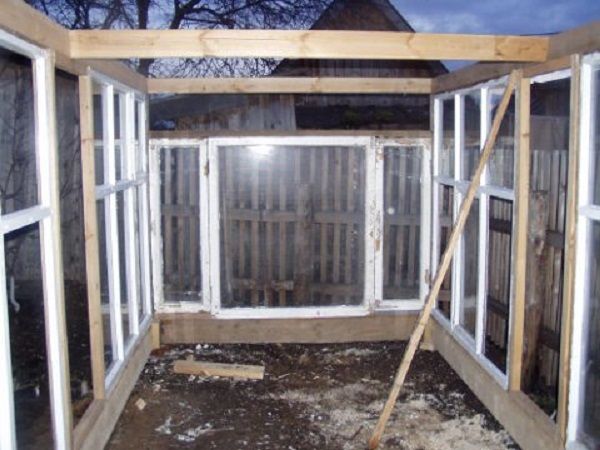
Glass greenhouse made from old window frames
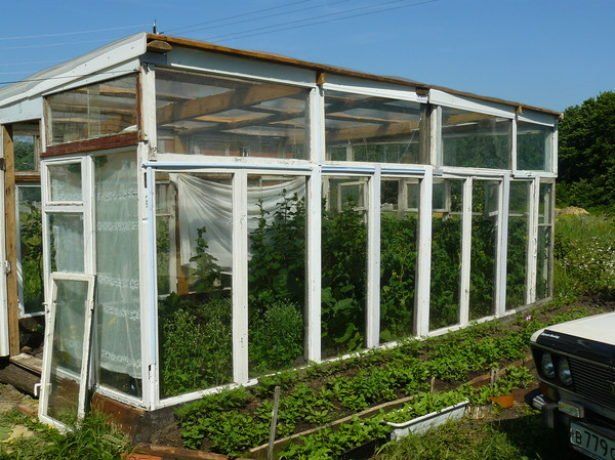
The construction order is as follows:
- The upper and lower trims, as well as vertical posts, are installed.
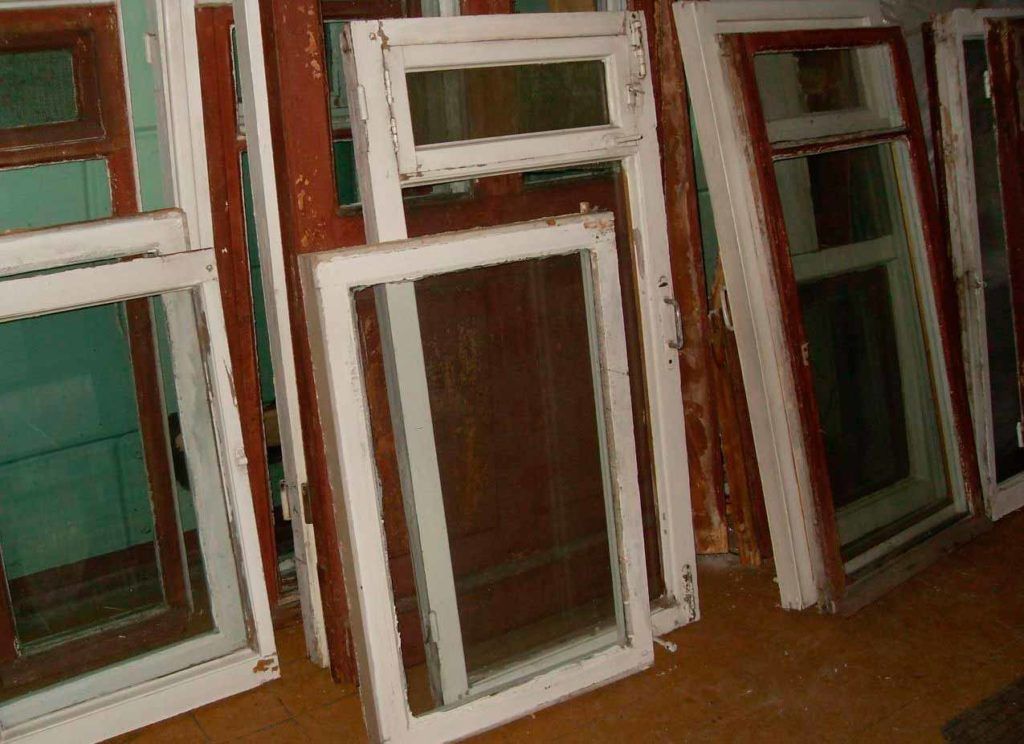
- Excess elements (for example, handles) are removed from the frames.
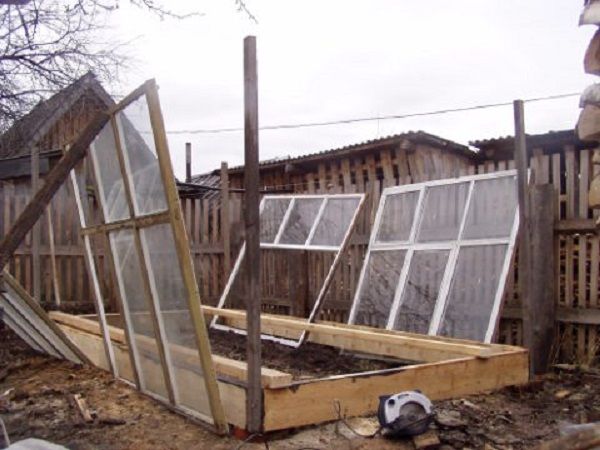
- The glass is cleaned and fixed.
- The frames are fastened using metal corners and plates.
- It is recommended to cover the roof with cellular polycarbonate or polyethylene film.
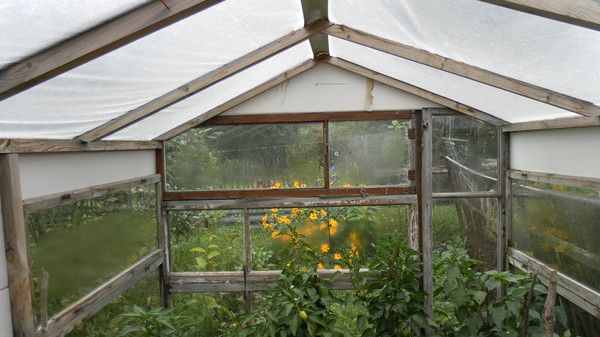
Read the article about Building a greenhouse and hothouse from old window frames with your own hands.
Interior design of a glass greenhouse
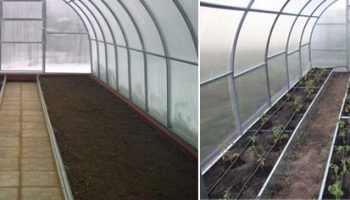
Usually in a greenhouse I make 2-3 beds, between which I lay paths 0.5 m wide.
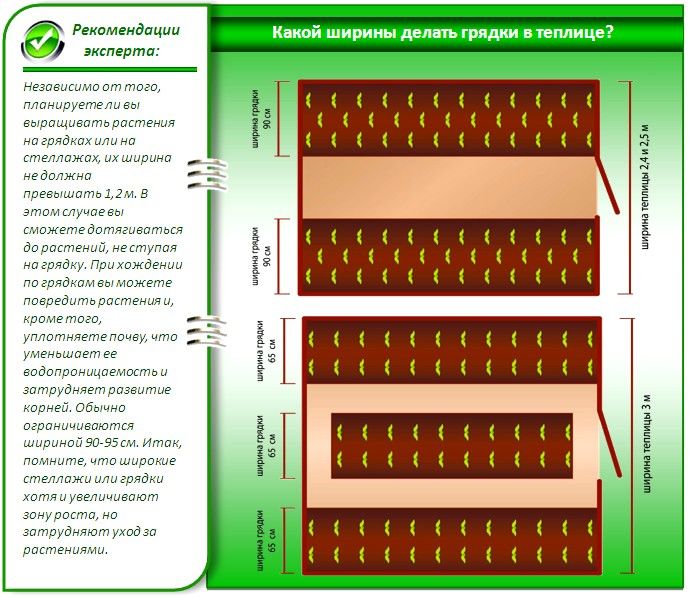
It's best to use a non-slip rubber surface. Raised beds are preferable. Borders are often used for this purpose.
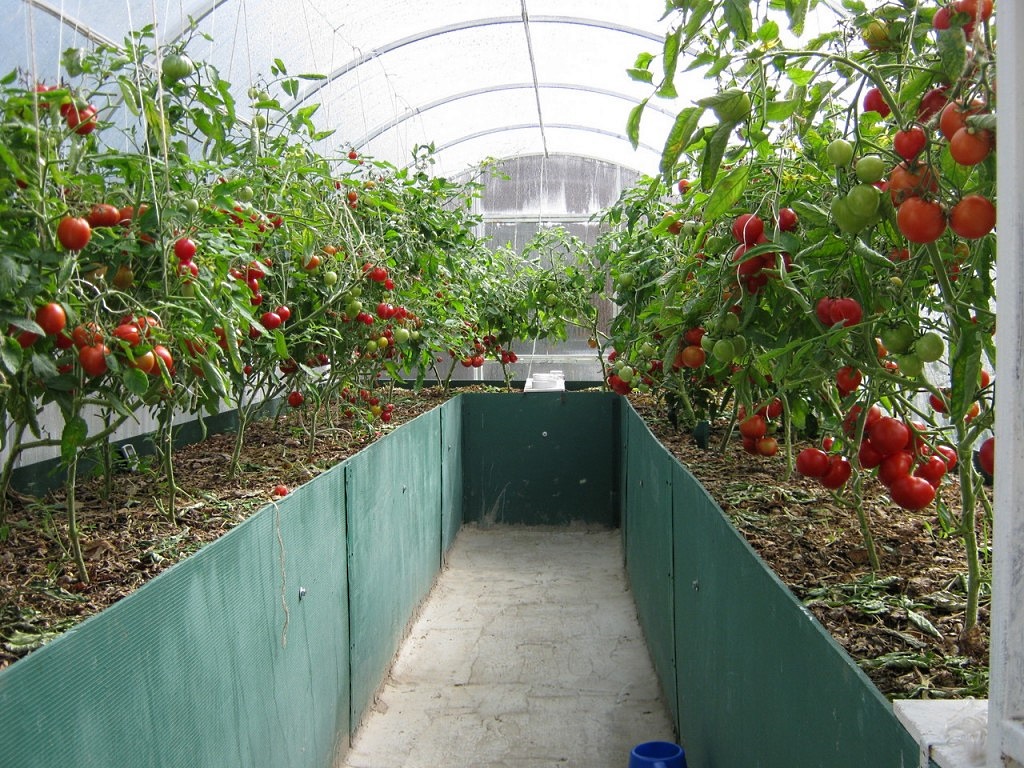
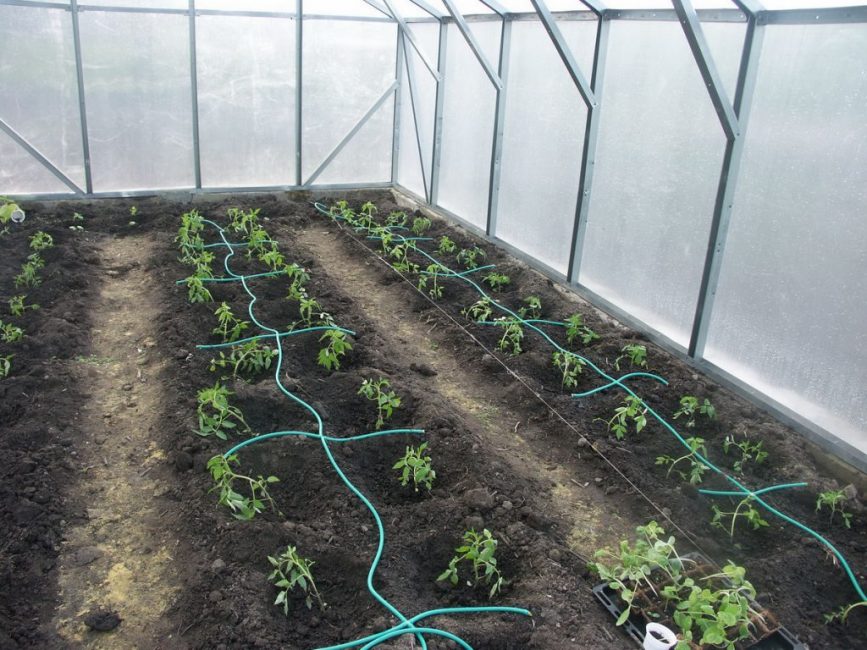
The drip irrigation system has proven itself to be effective.
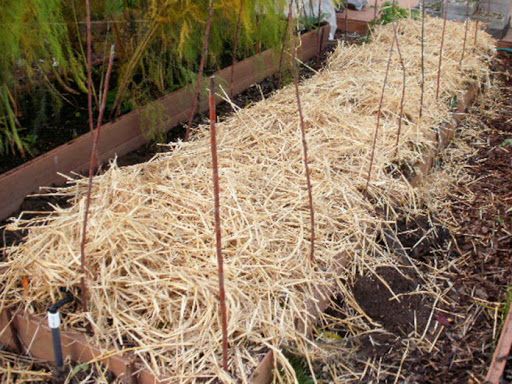
Stoves or "warm bed" technology, consisting of trenches filled with leaves and soil, are used for heating. Their decay generates heat.
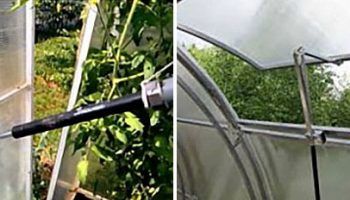
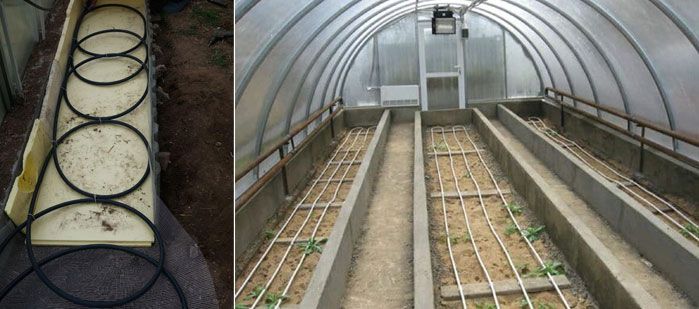
In order to maintain an optimal microclimate, many greenhouses are equipped with thermal drives.
Lighting
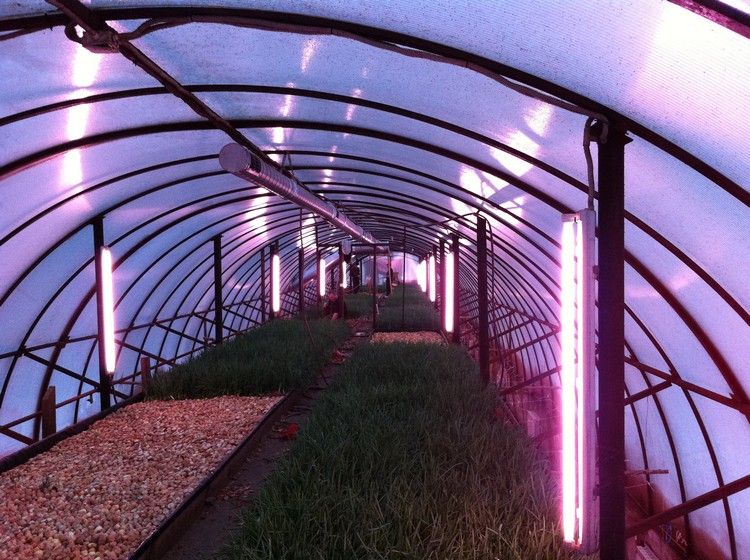
Glass transmits sunlight well, so only rare crops that require evening sunlight require supplemental lighting. LED and fluorescent light sources, or phytolamps, are used for these purposes. Lighting fixtures are often connected to a relay with an automatic switch-on function.
Heating greenhouses
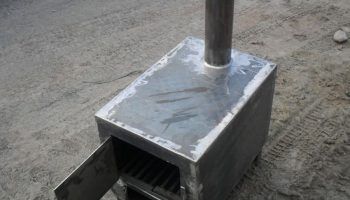
Glass greenhouses are among the permanent structures suitable for installing full-fledged heating systems. Heat guns, electric convectors, infrared heaters, potbelly stoves, boiler-and-radiator systems, and underfloor heating systems are used for this purpose.
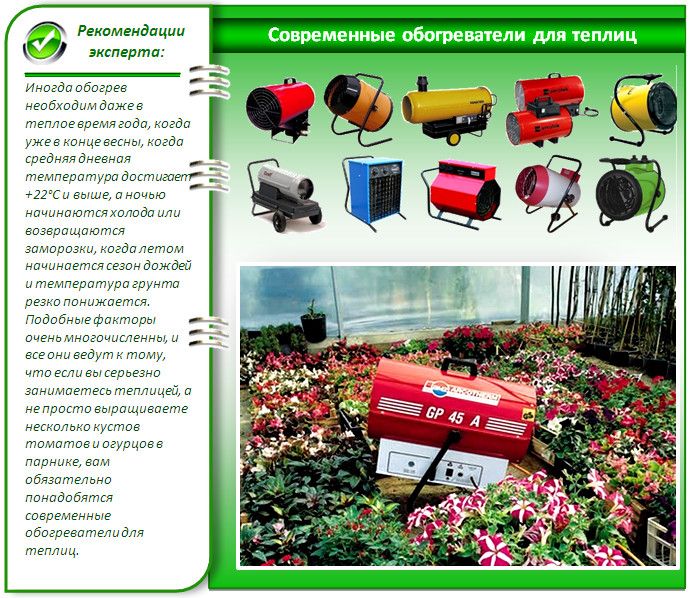
The selection of the heating type is determined by:
- dimensions of the building;
- seasonality of greenhouse operation;
- availability of energy resources.
Ready-made glass greenhouse options: tips for choosing + photo gallery
To make the right choice, you should decide on the shape, dimensions, and purpose of the greenhouse, as well as select a suitable location for the structure.
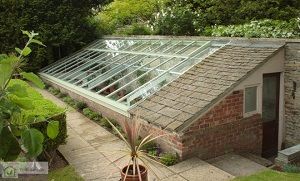
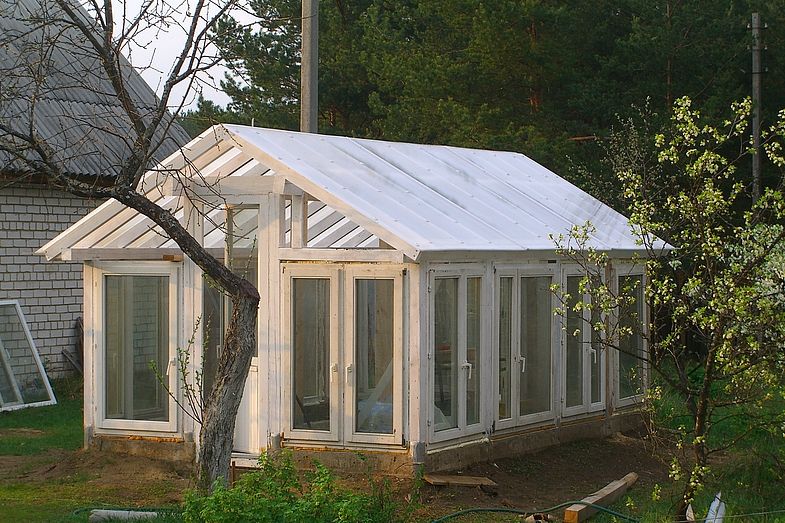
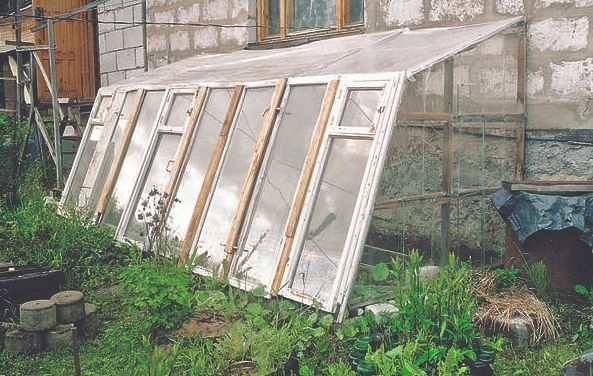
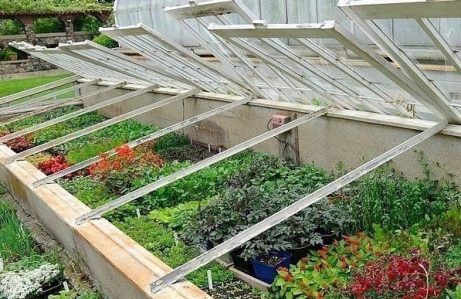
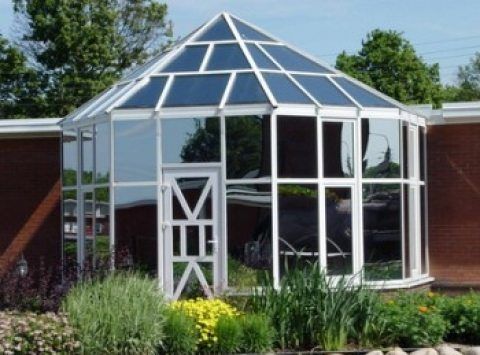
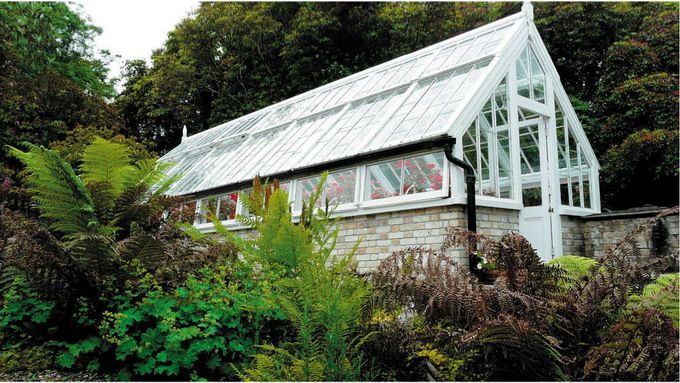
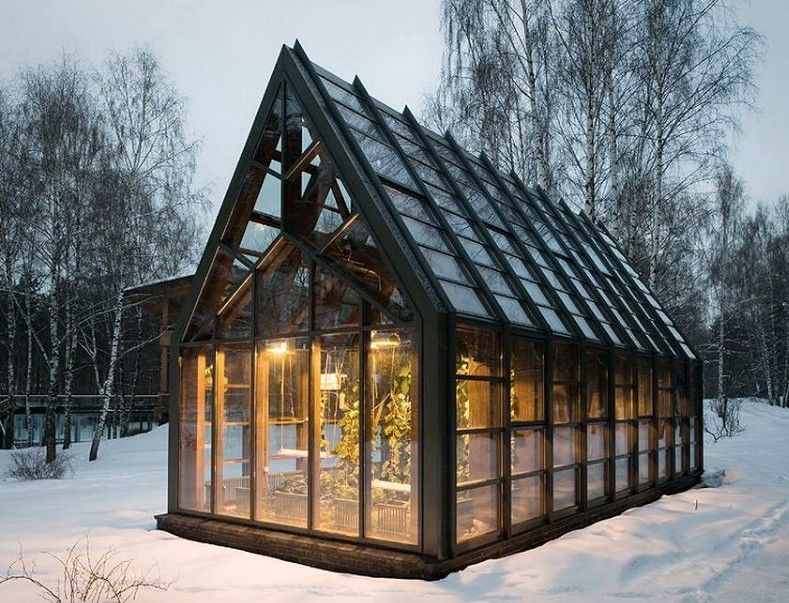
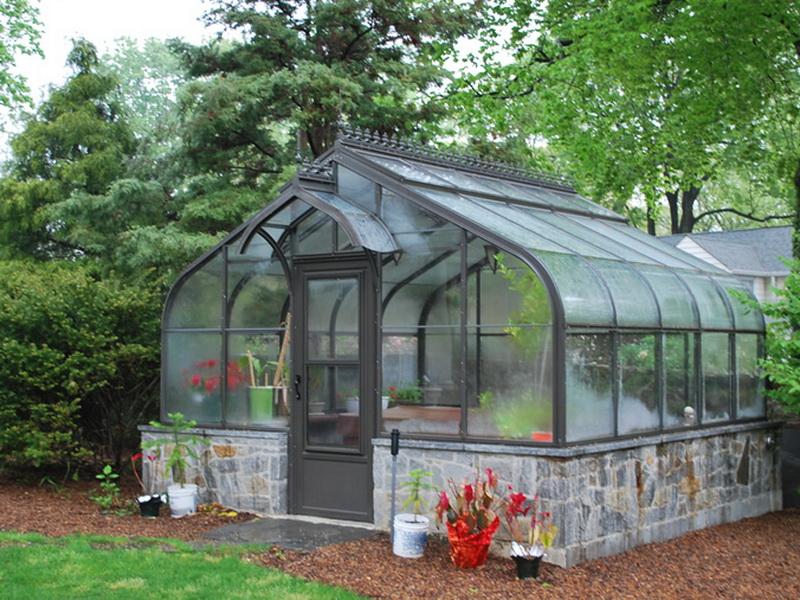
After purchasing, you must check the complete set to ensure it meets the parameters, as well as the availability of a drawing and installation instructions.
It is recommended to pay attention to the price, which is often an indirect indicator of the quality of materials.
How to care for a glass greenhouse
Careful adherence to maintenance rules guarantees the preservation of the greenhouse's aesthetic properties for a long time:
- It is recommended to wash the glass with the same products that are used to clean home windows.
- In places where condensation forms and favourable conditions for the growth of microflora are created (for example, in corners), it is recommended to use an antiseptic for disinfection.
- Carefully maintain the wood, remove scratches, and don’t forget to paint it regularly.
- Closely monitor the tightness of the contacts between wooden and glass elements.
Proper maintenance of the structure will allow it to please the eye and provide benefits for decades to come.
Comparison of glass and polycarbonate greenhouses
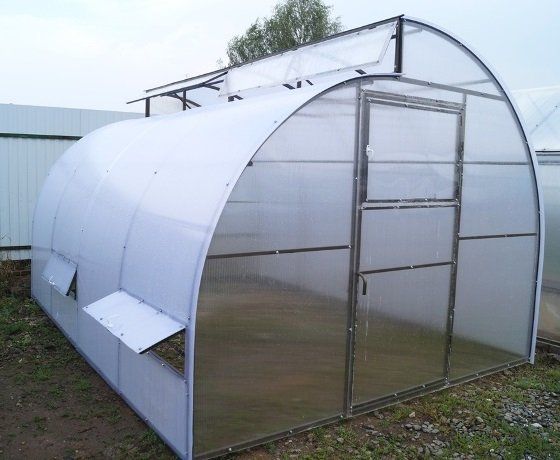
Comparative characteristics of two types of greenhouses are given in the table below:
| Comparison | Glass greenhouses | Polycarbonate greenhouses |
| Advantages | Low ignition level, high fire safety | |
| The ability to maintain appearance for a long time | High strength | |
| Long service life (up to 50 years) | Good thermal insulation properties – 8 W/m2 * °C | |
| Chemical inertness | Low thermal conductivity – 0.14 W/m2 * °C | |
| Ease of maintenance | Light weight – 1.3 m2 | |
| Easy to replace in case of damage or integrity breach | Ease of installation | |
| High transparency – 92% | Minimal time costs for maintenance | |
| With proper qualifications, the material is easy to process and install. | ||
| Low cost of materials | ||
| Flexibility | ||
| Flaws | Relatively high weight – up to 10 kg per m2 | It is recommended to entrust installation to professionals. |
| Low thermal insulation properties – 185 W/m2 * °C | Flexibility becomes a vulnerability when the snow cushion is heavy. | |
| High thermal conductivity – 0.8-0.9 W/m2 * °C | Transparency is about 86% | |
| High cost | Short service life (up to 10 years) | |
| Handling and installation require caution. | Low resistance to chemical reagents | |