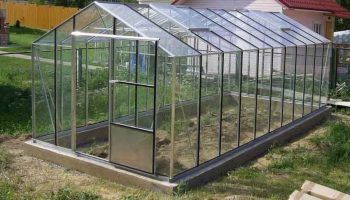
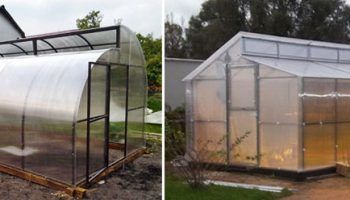
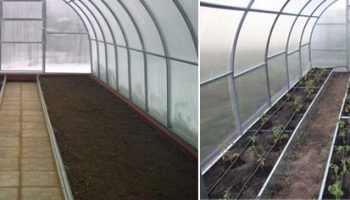
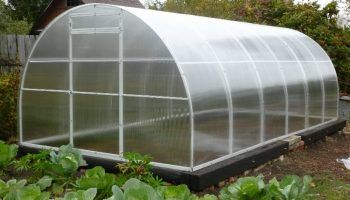
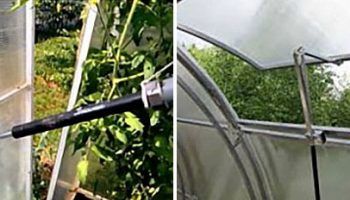
A greenhouse is small and often mobile. Typically, it's used only from mid-spring to fall, primarily for growing seedlings and saplings. A hothouse, on the other hand, is a different structure. It's larger and installed permanently. Plants can be grown year-round, as heating and lighting are sometimes installed inside. A crop can undergo its entire development cycle (from sowing seeds to fruiting) in a greenhouse. Both types of greenhouses are expensive in specialized stores. However, you don't have to spend money on them; you can build them yourself. A well-built, homemade greenhouse or a greenhouse made from window frames is just as good as a store-bought one. The materials for construction are relatively inexpensive.
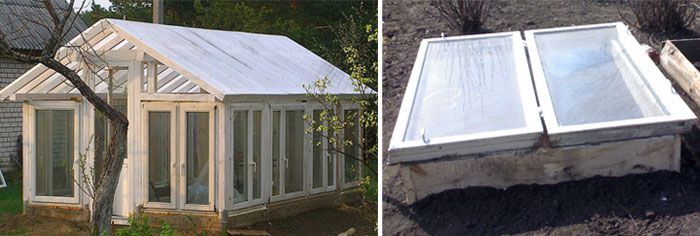
Content
- 1 Types of greenhouses and hotbeds made from window frames
- 2 Calculations and drawings of greenhouses and hotbeds made from window frames
- 3 How to choose windows and prepare them
- 4 Preparing building materials for a greenhouse frame and a hothouse made from window frames
- 5 DIY greenhouse foundation from window frames, if needed + photos
- 6 Step-by-step instructions for building a greenhouse from window frames on a foundation, with photos.
- 7 DIY Greenhouse from Window Frames: Step-by-Step Instructions with Photos
- 8 DIY Recessed Greenhouse from Window Frames: Step-by-Step Instructions with Photos
- 9 How to make a mini greenhouse from window frames yourself
- 10 DIY mini greenhouse for a windowsill made from photo frames
- 11 Advantages and disadvantages of window frames as a building material for a frame
Types of greenhouses and hotbeds made from window frames
There are different design options.
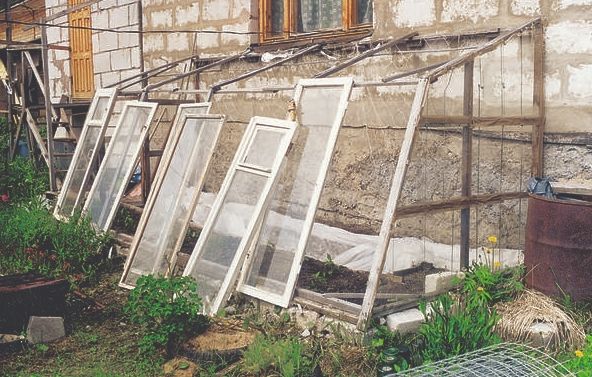
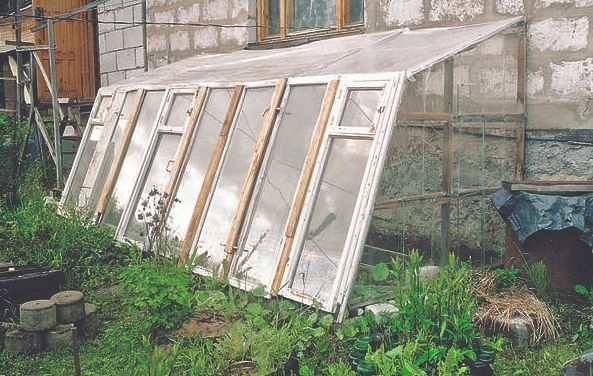
Single-pitched
A greenhouse is an attached structure, meaning one wall is adjacent to another building (a barn or house). This saves space in the garden. However, this type also has a significant drawback: light only reaches one side. Because of this, plants will be in the shade for most of the day. This won't be a problem if shade-loving crops are grown in such a structure. As for a hotbed, it's often built with a lean-to roof; its small size allows for freestanding construction.
Single-pitched greenhouses:
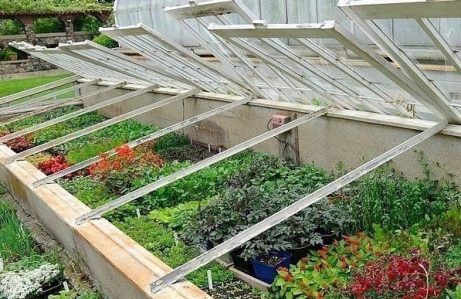
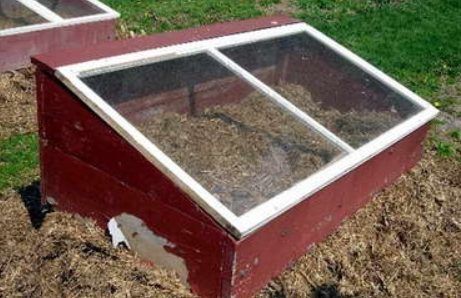
Construction of a wall-mounted greenhouse from window frames:
Gable roofs
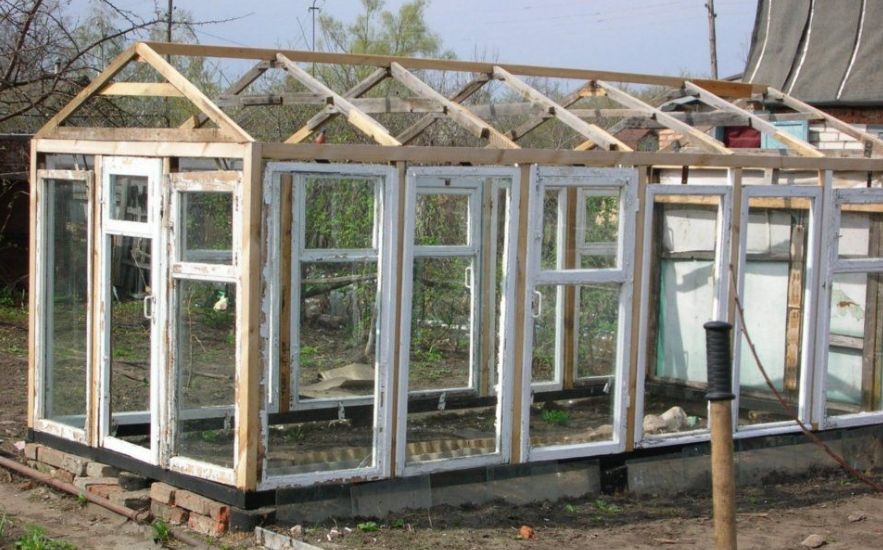
This is the classic option; greenhouses of this type are designed like a house with a ridge on the roof. A hotbed, on the other hand, is like a small house. Hotbeds are fairly easy to install and operate, but they have a significant drawback: they are permanent. A hotbed of this type, on the other hand, is quite simple to build.
Gable greenhouse and a possible design option:
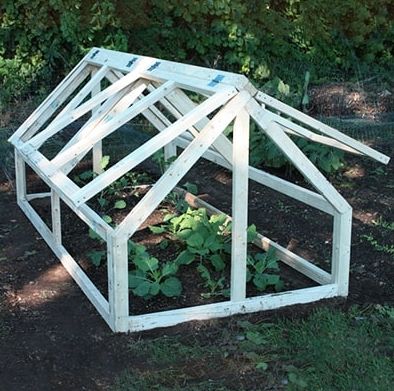
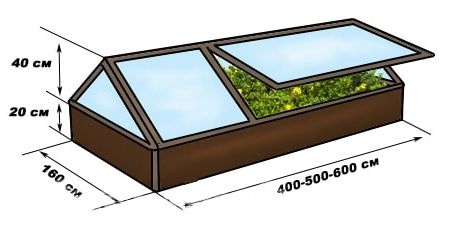
Gable greenhouse:
Polygonal
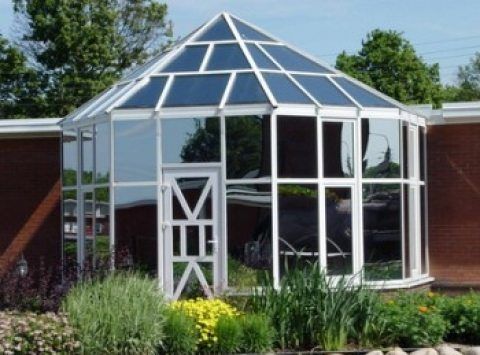
This type is built exclusively for greenhouses. These are structures with six or more sides. Typically, this type of structure is used for conservatories and gazebos, which are always warm. Building one yourself would be quite difficult.
Polygonal greenhouse option:
Calculations and drawings of greenhouses and hotbeds made from window frames
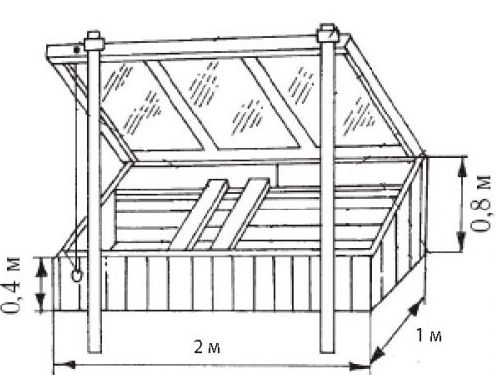
You need to count the number of frames and measure their dimensions. It's best if they're identical, so you don't have to adjust their height. Only then should you begin drawing the design. You can either create your own and draw a diagram on paper, or use a ready-made one, such as one of the following options.
Drawing of a gable greenhouse:
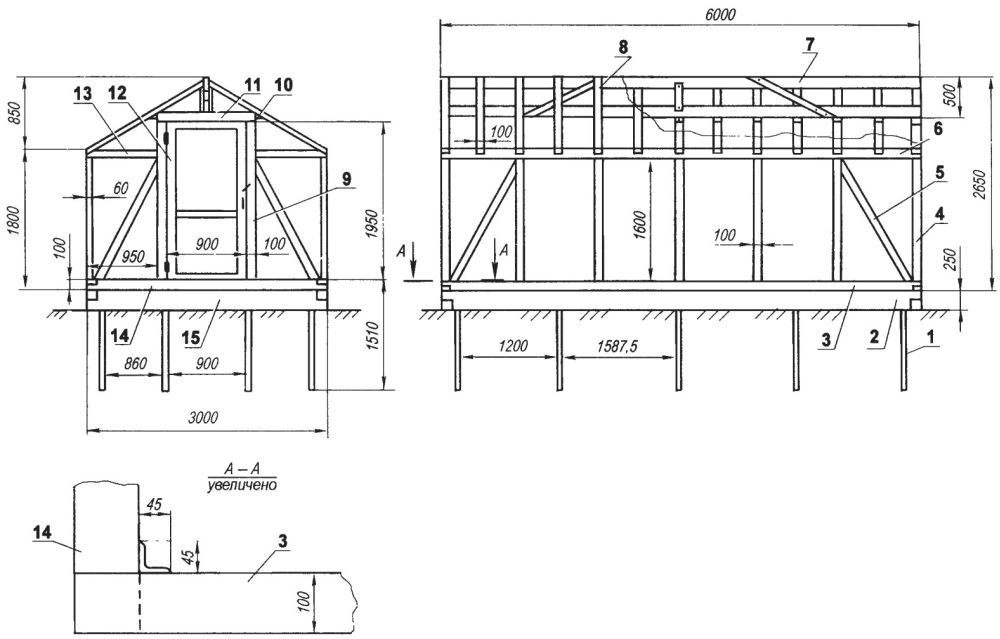
Based on the exact frame dimensions, make adjustments. For example, if increased height is needed, it is recommended to place the vents horizontally at the top.
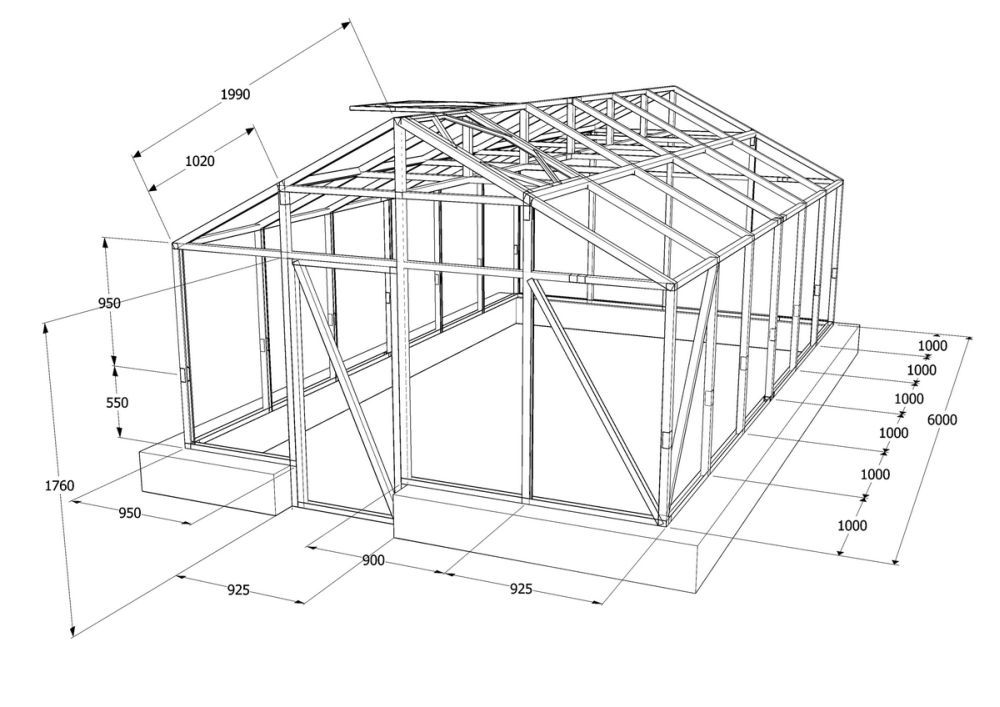
Example of a single-pitched greenhouse diagram:
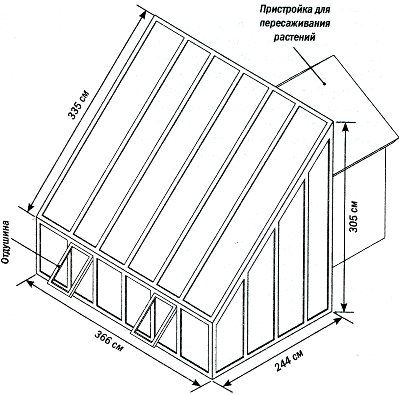
At this stage, you need to decide on the type of foundation. If the structure is planned for long-term use, it's best to choose a strip foundation. If the greenhouse will be standing for several years, you can use timber insulated with roofing material or treated with an antiseptic. A greenhouse doesn't require a foundation at all. Below, we'll provide step-by-step instructions for building different types of foundations for a greenhouse made from window frames.
You should also think about the roof in advance. It can be either single-pitched or double-pitched, as we've already discussed in the design types. Greenhouses with flat roofs are also available, but for most regions of Russia, this isn't the best option, as snow will accumulate on the roof, and the roof may simply not be able to withstand the weight.
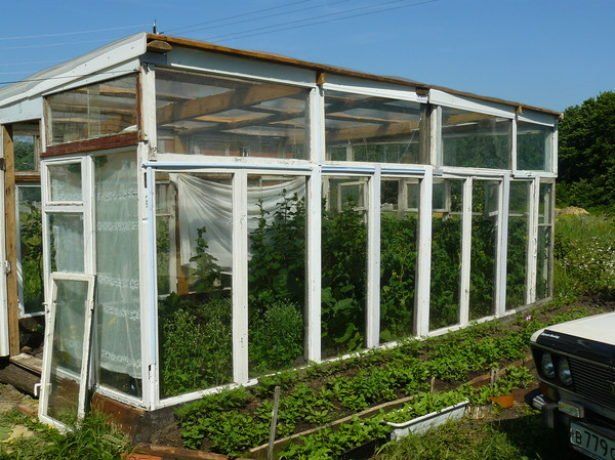
It's not recommended to use window frames as a roof. They may not be able to withstand the weight of snow in winter. Polycarbonate or boards are better.
Before installing the roof, you also need to draw up a detailed drawing and think about reliable fastening.
Two drawings of greenhouses made from window frames:
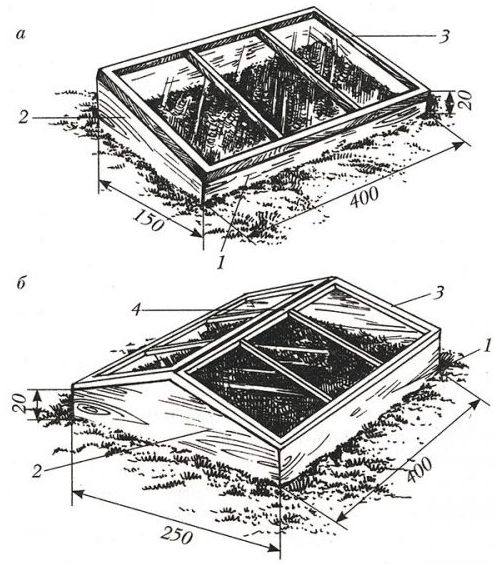
Drawing of a recessed and single-pitched greenhouse made from window frames:
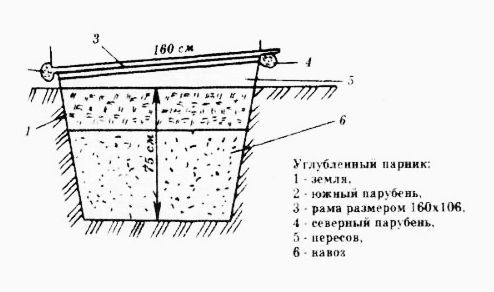
How to choose windows and prepare them
To ensure long-lasting durability of wooden frames, it's important to choose them carefully. If they've darkened or have peeling paint, this indicates rot. It's not recommended to use such windows. If the defects are minor, the frames can be used in construction, but they won't last long. Any damage should be taken into account during the drawing stage.
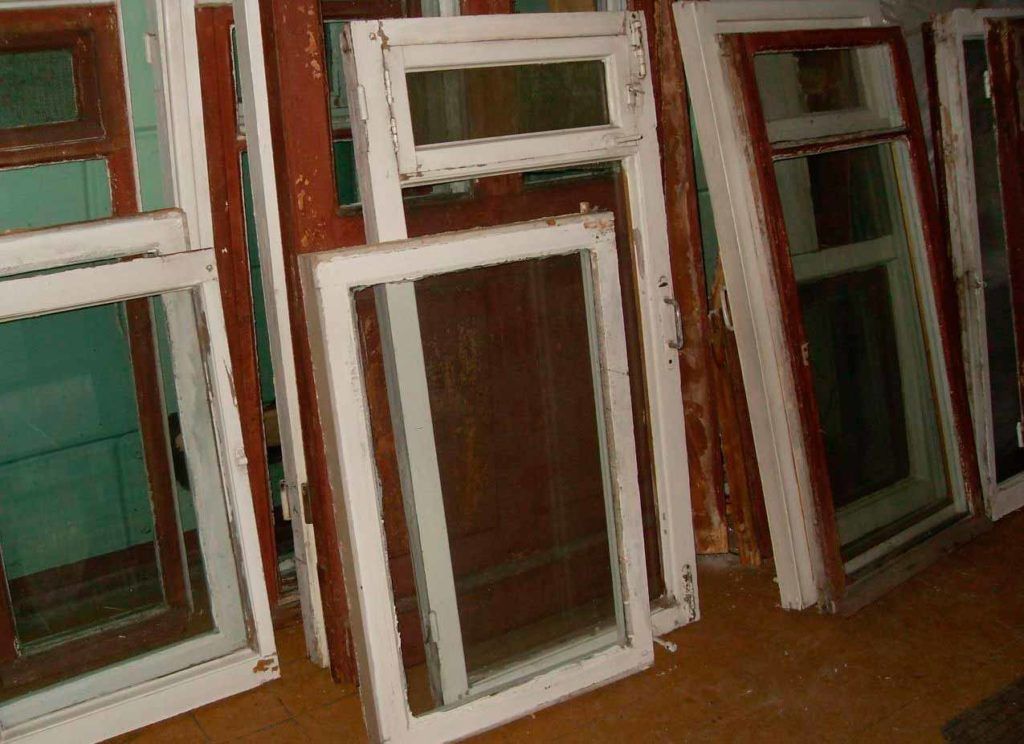
It's best to place the damaged section at the top, right under the roof. This will reduce moisture penetration, and the DIY greenhouse made from old window frames will last longer.
Preparatory work:
- remove unnecessary fittings;
- clean the paint;
- treat the surface with an antiseptic to prevent rotting and insect activity;
- remove the glass so that it does not break if a hammer and nails are used during installation;
- tape the vents so that they do not open and do not interfere with assembly;
- board up unnecessary shutters.
Important! Frames shouldn't be too old, as glass has a lifespan. After that, it can crack due to subsidence or even strong winds.
Preparing building materials for a greenhouse frame and a hothouse made from window frames
The material calculation is based on the drawing. Standard frames measure 1.2 x 0.9 m. This would give the structure a length of 90 cm and a height of 120 cm, plus the base and top. The optimal width is 2.7 m, or three frames. This would give the beds a width of 1 m and a space of 0.4-0.6 m between them.
In addition to windows, the following will be required for production:
- door;
- beams for the frame;
- base material;
- anchors, screws;
- bars;
- roof.
You need to think about all this in advance so that you don’t have to go to the store during the work process.
DIY greenhouse foundation from window frames, if needed + photos
If the greenhouse will only be used in the summer, a timber foundation is the most economical option. It should be clean and dry, free of rot and insect infestation. The timber cross-section depends on the size of the greenhouse (the larger the greenhouse, the larger the timber). Larch treated with an antiseptic is the best option. If it isn't pre-treated, you'll need to do it yourself; otherwise, the foundation will rot and become a breeding ground for insects.
How to build a foundation step by step:
| Illustration | Process |
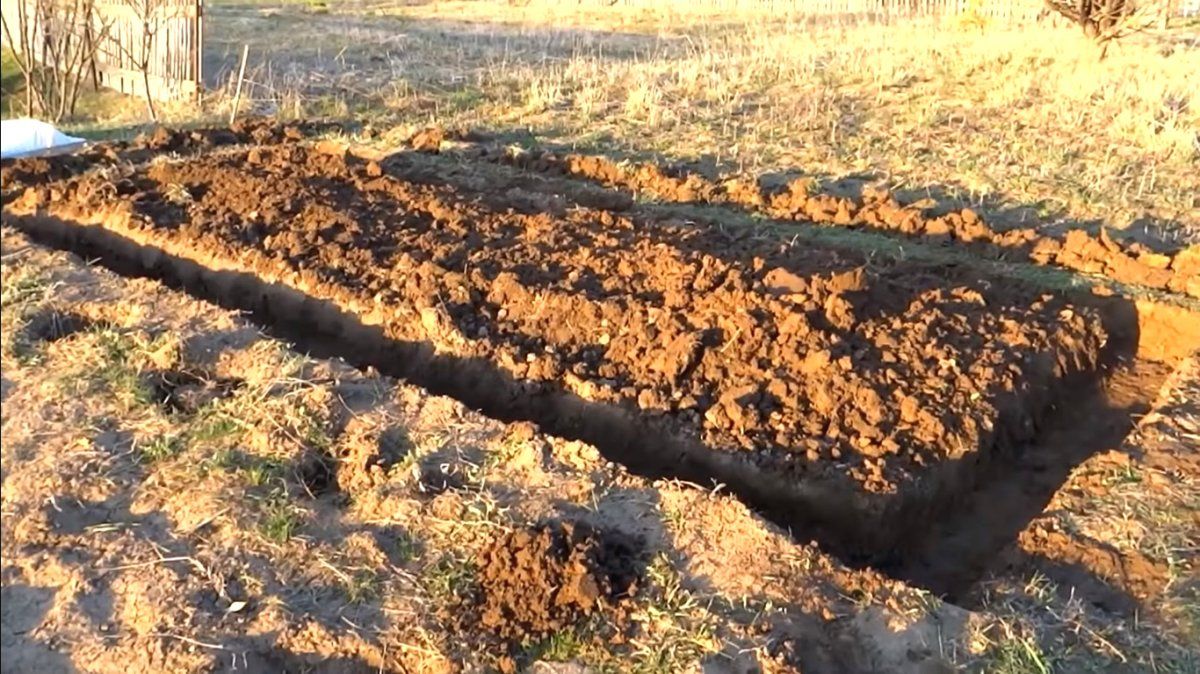 |
Mark the area so that each corner is 90 degrees. Remove the top layer of soil. Dig a trench around the perimeter. For 10x10 cm beams, a depth of 15 cm is sufficient. The trench width should be 7-8 cm wider than the thickness of the beams. |
 |
Place roofing material on the bottom. |
|
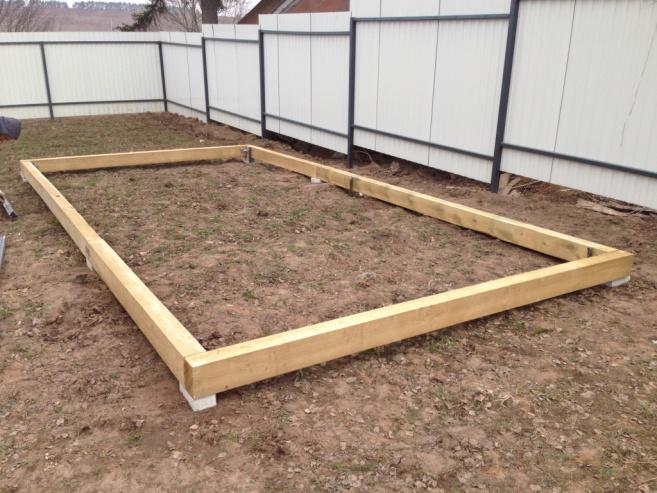
Place the beams on top. |
|
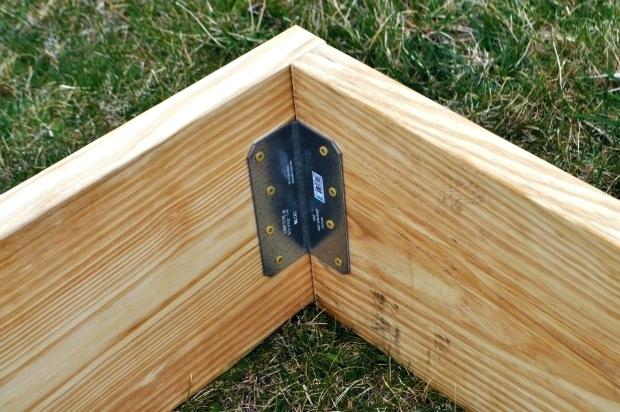 |
Fasten with corners. |
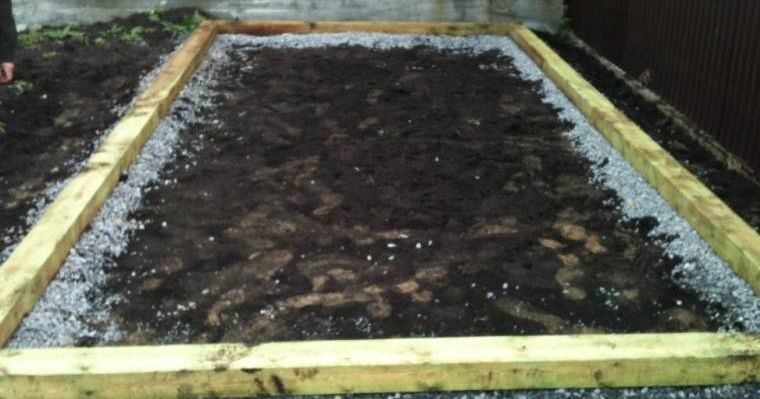 |
Level the foundation using a spirit level. Minor deviations can be corrected by adding gravel or sand. |
A strip foundation is more reliable, but its construction is also slightly more complex. Step-by-step instructions:
| Illustration | Instructions |
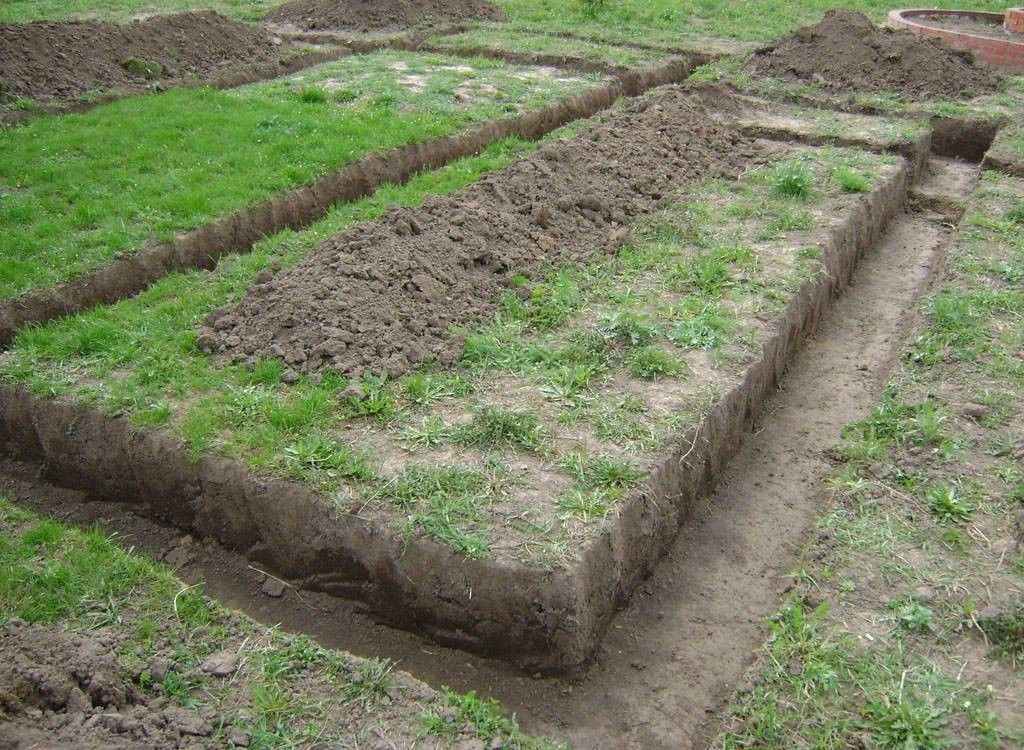 |
Mark the area and dig a trench along it, 30-50 cm deep and 15-20 cm wide. If the greenhouse will be used in winter, dig deeper, just below the soil freezing level. |
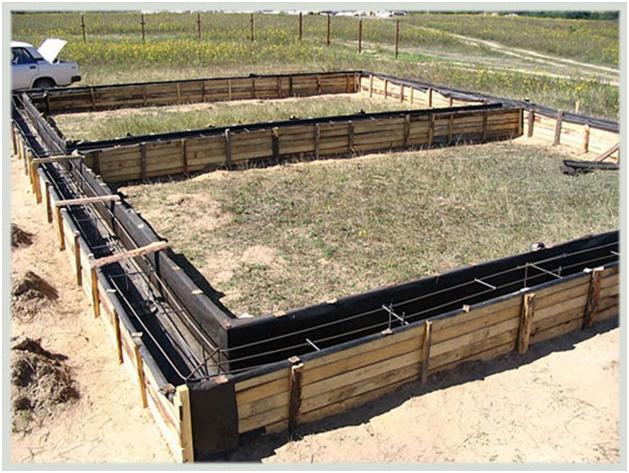 |
Build formwork from planks. Reinforce if necessary. Lay down plastic sheeting to prevent the cement from sticking to the planks. |
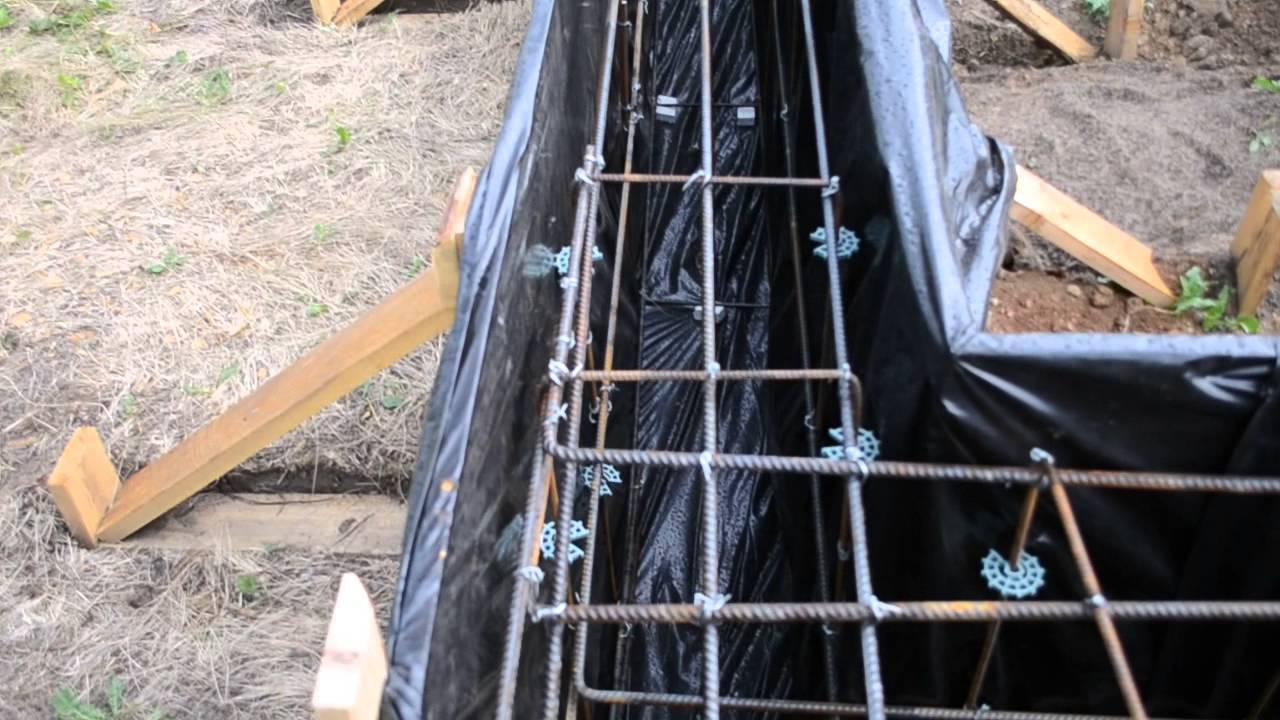 |
Make a belt out of rebar. If there's no metal, add 20 cm of sand or at least 5-10 cm of gravel to the bottom and compact it. |
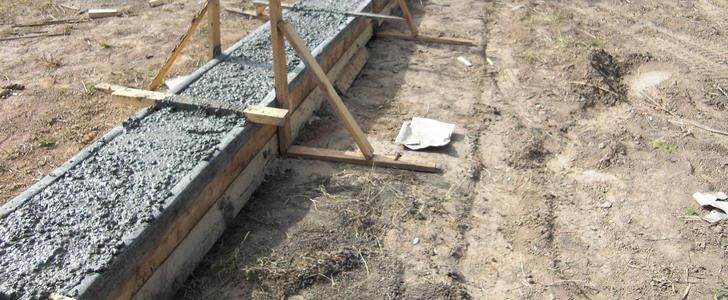 |
Pour the concrete in one go to avoid uneven curing. Wait about 20 days for it to fully harden. Then remove the formwork. |
If the structure will be lightweight and will only be used in the summer, a columnar foundation can be constructed:
| Illustration | Process |
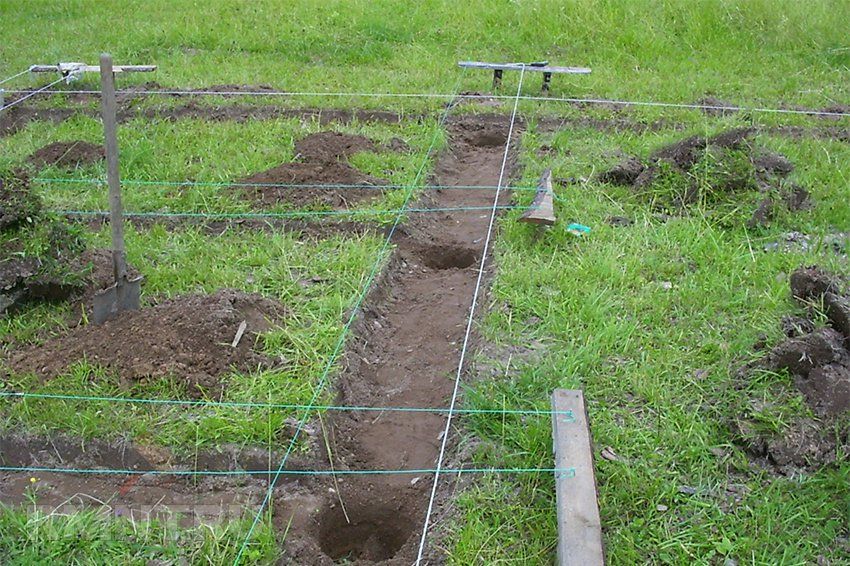 |
Make markings, place pillars (piles) at the corners and along the perimeter at a distance of 0.7-0.9 m. Make a trench about a meter deep between the posts. |
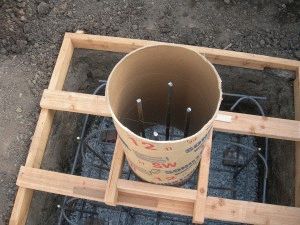 |
Place roofing material on the bottom, which will serve as formwork and waterproofing. |
| Make a frame from 2-3 reinforcement bars. | |
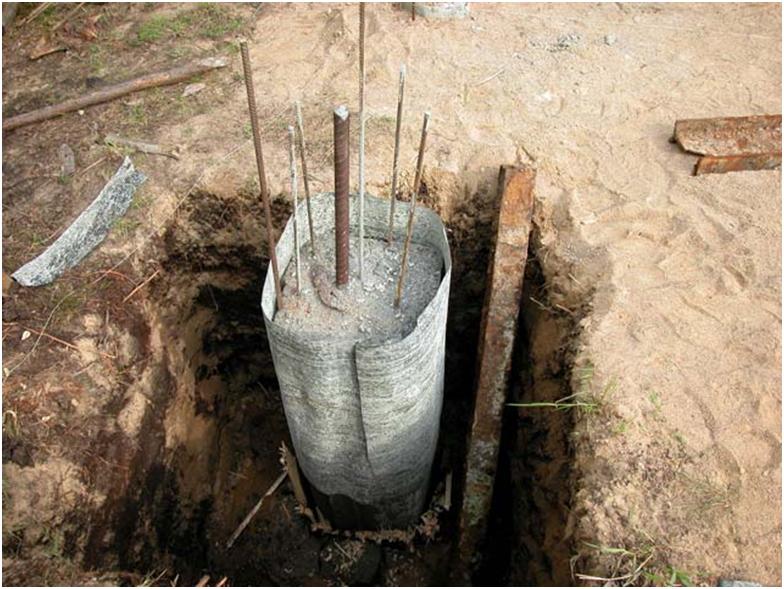 |
Pour concrete. |
Above, only the simplest methods of installing a foundation were given; there are other options.
Step-by-step instructions for building a greenhouse from window frames on a foundation, with photos.
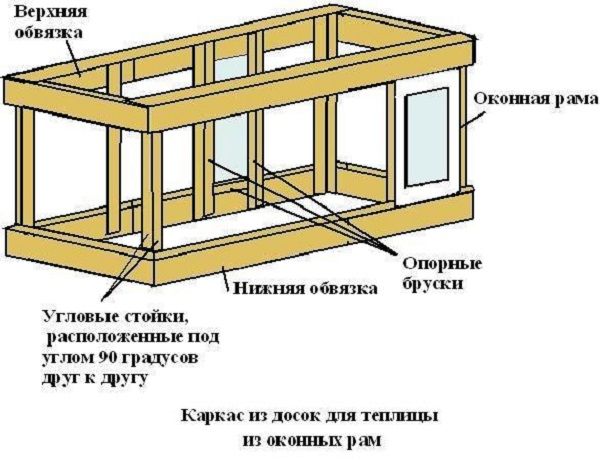
Detailed step-by-step instructions for constructing the main part of the greenhouse:
| Illustration | Process |
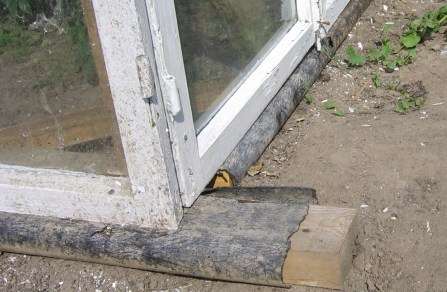 |
Cover the foundation and base with roofing felt sheets for waterproofing. |
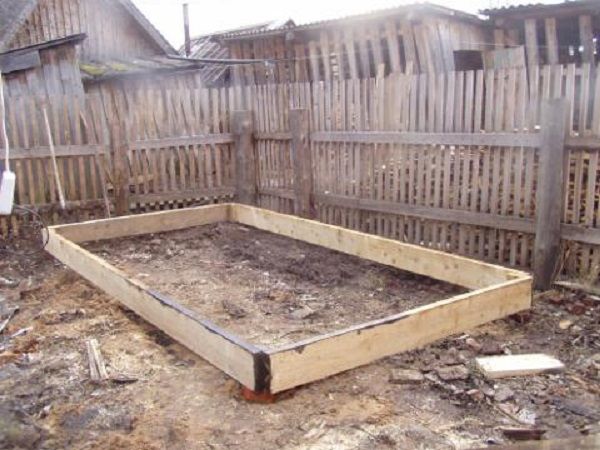 |
Mount the beams for the bottom trim on top of the anchors. Connect with corners. |
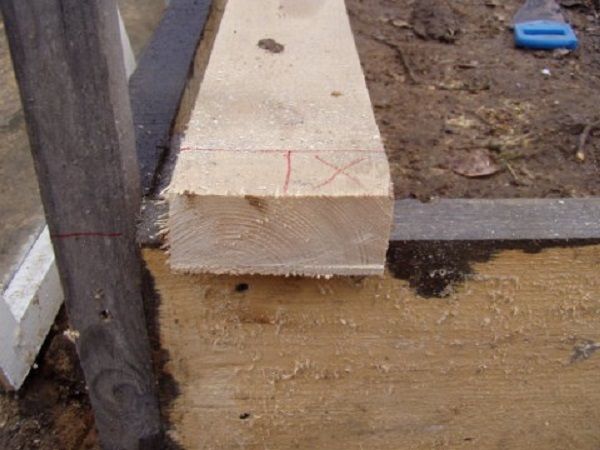 |
Make markings for vertical supports. |
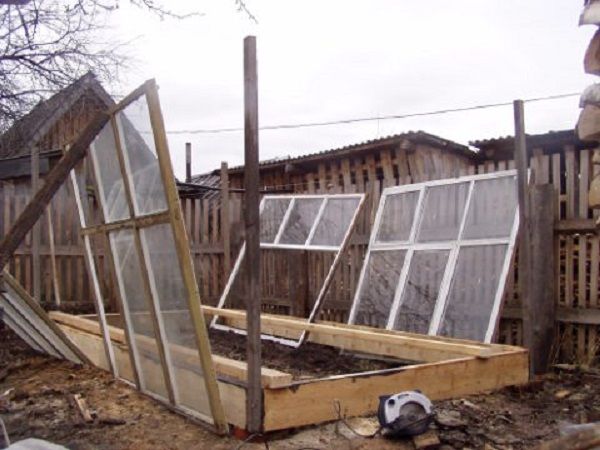 |
Install the corner posts, checking them with a level. Install the intermediate supports. |
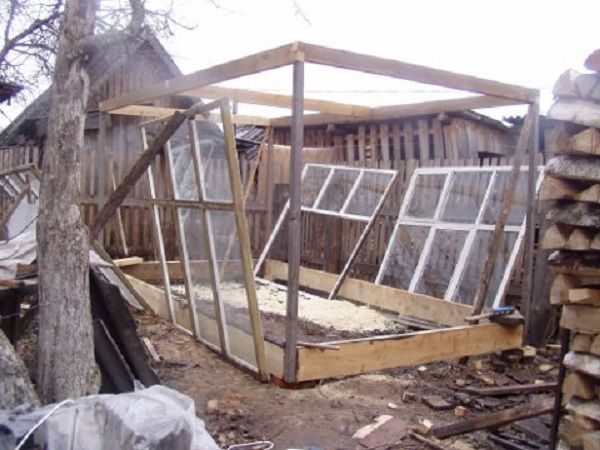 |
Use blocks to temporarily secure the supports to prevent them from tilting. These can only be removed after the entire installation is complete. Install a brace on top to prevent the posts from leaning. |
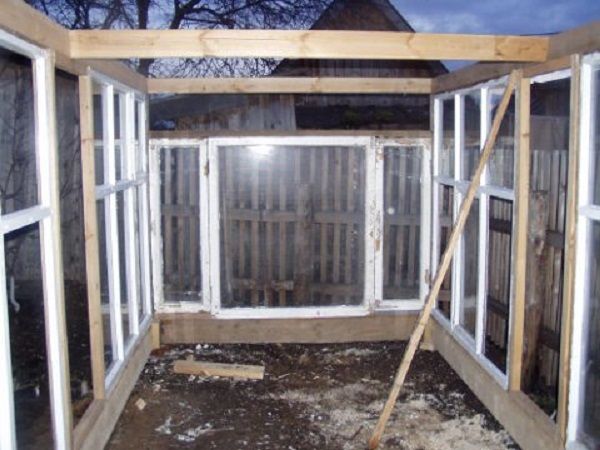 |
Attach the frames to the frame using self-tapping screws or regular screws. This will prevent damage to the glass, which can occur with nails. Seal all cracks with foam. |
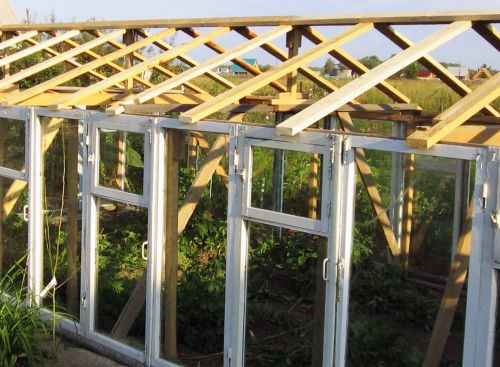 |
Build a roof. |
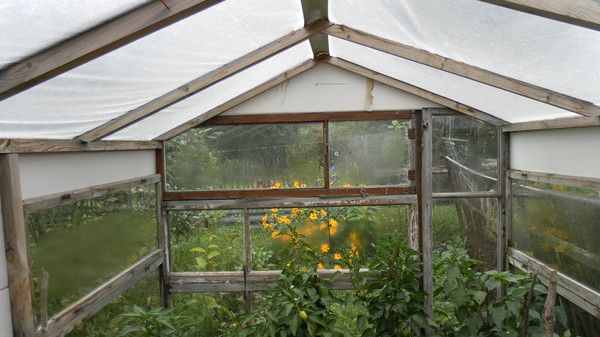 |
Install doors and seal the gables. Film or polycarbonate can be used for the roof. |
Please note: If the structure is long, intermediate posts will be required to ensure stability.
DIY Greenhouse from Window Frames: Step-by-Step Instructions with Photos
If space is limited, the structure can be built in a miniature format; such a greenhouse can even fit on a balcony. The walls of the structure will be made of wooden planks, and the roof will be a window frame. During the day, it can be opened for ventilation. The width of the frame should correspond to the size of the greenhouse. A rectangular shape is more convenient.
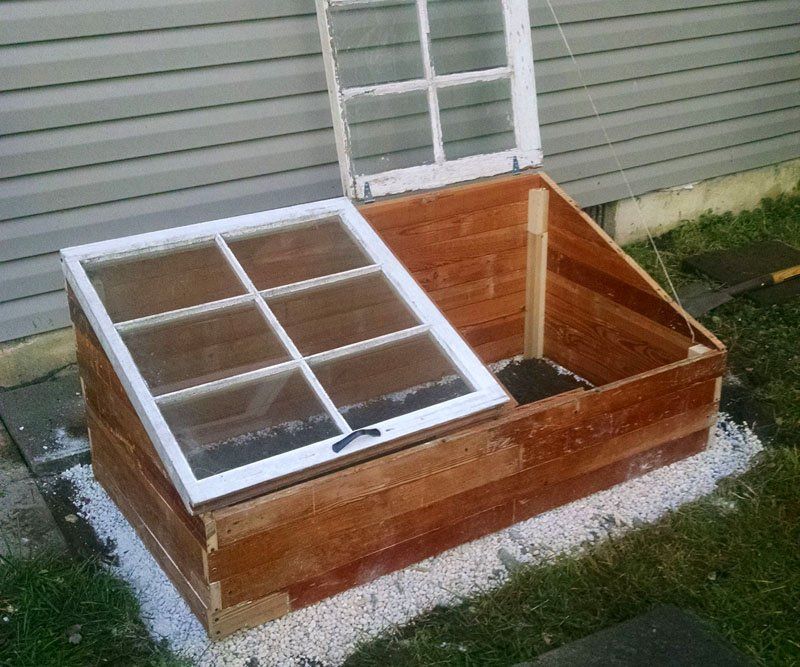
If the greenhouse is installed in an open area, then installation occurs as follows:
| Photo | Manufacturing |
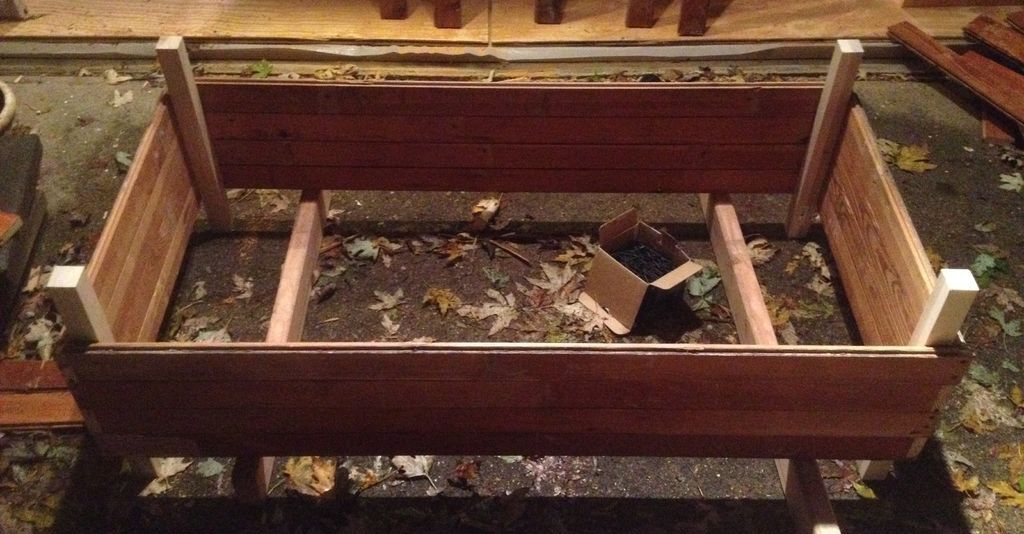 |
Mark the area and dig in wooden blocks at the corners. Make shields from the planks. |
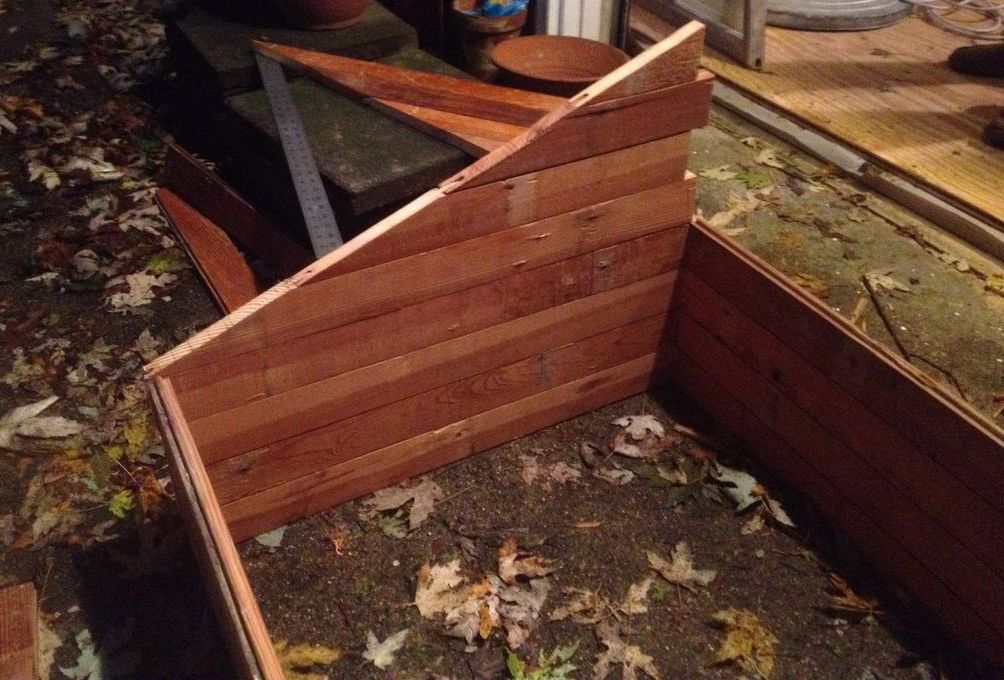 |
Attach the top layer to the lower panels, making it higher on one side of the structure and lower on the other. This will create a sloped roof and prevent moisture from accumulating. Fix the shields to the supports with nails. |
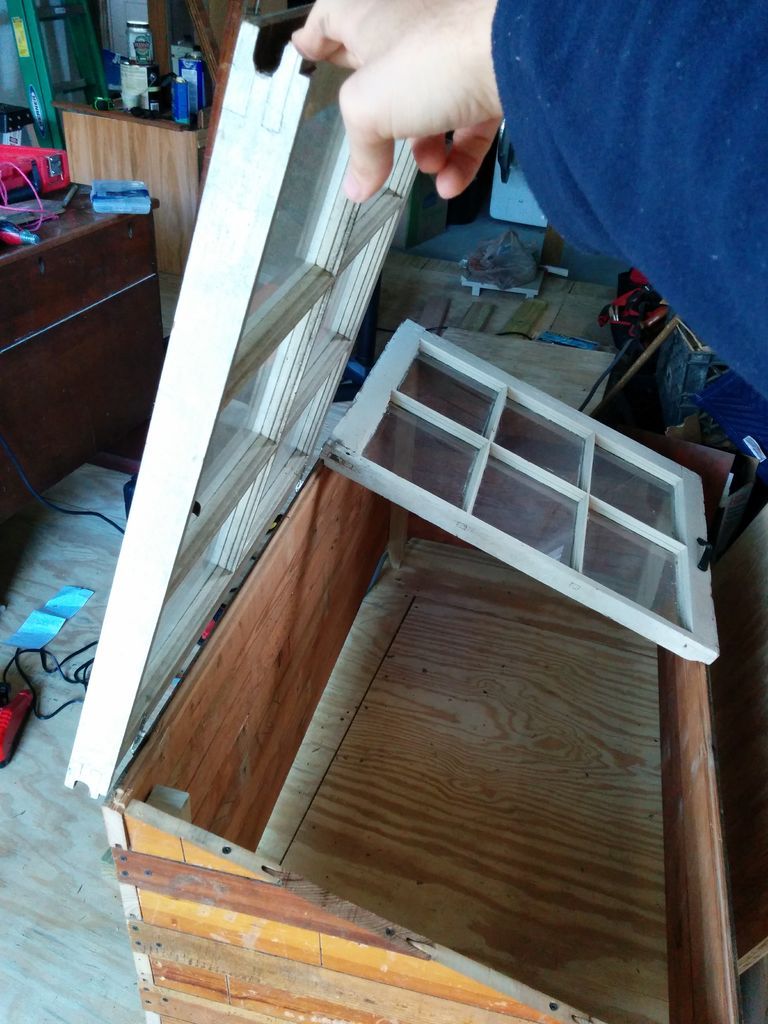 |
Position the frames at a 90-degree angle to the high side. Secure the windows to it with hinges. |
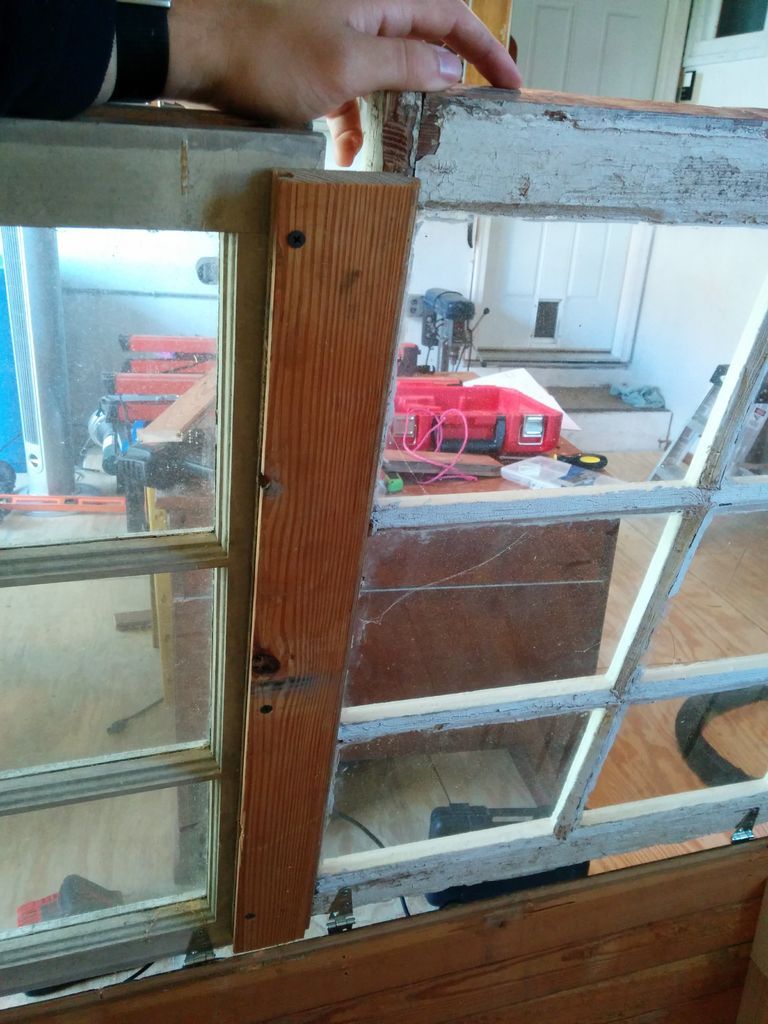 |
Attach a strip between the windows so that there is no hole between the frames and one frame rests on this strip. |
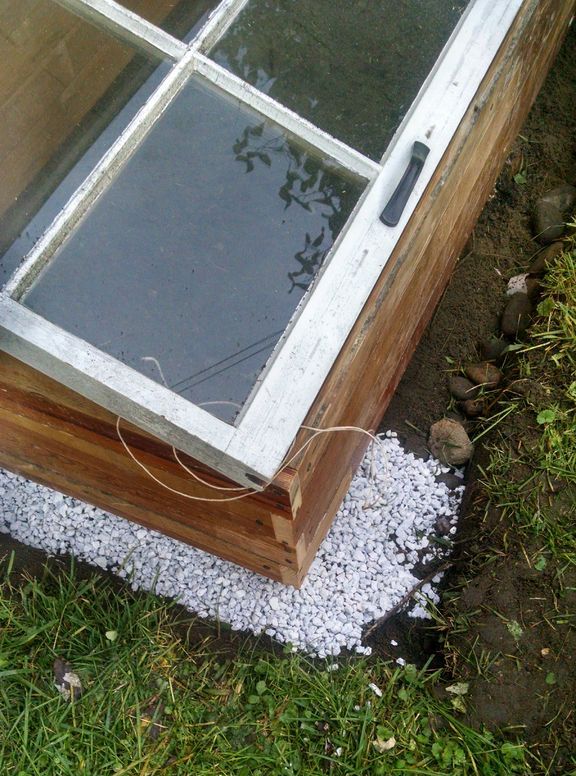 |
Install handles on the roof to make it easy to open and close. |
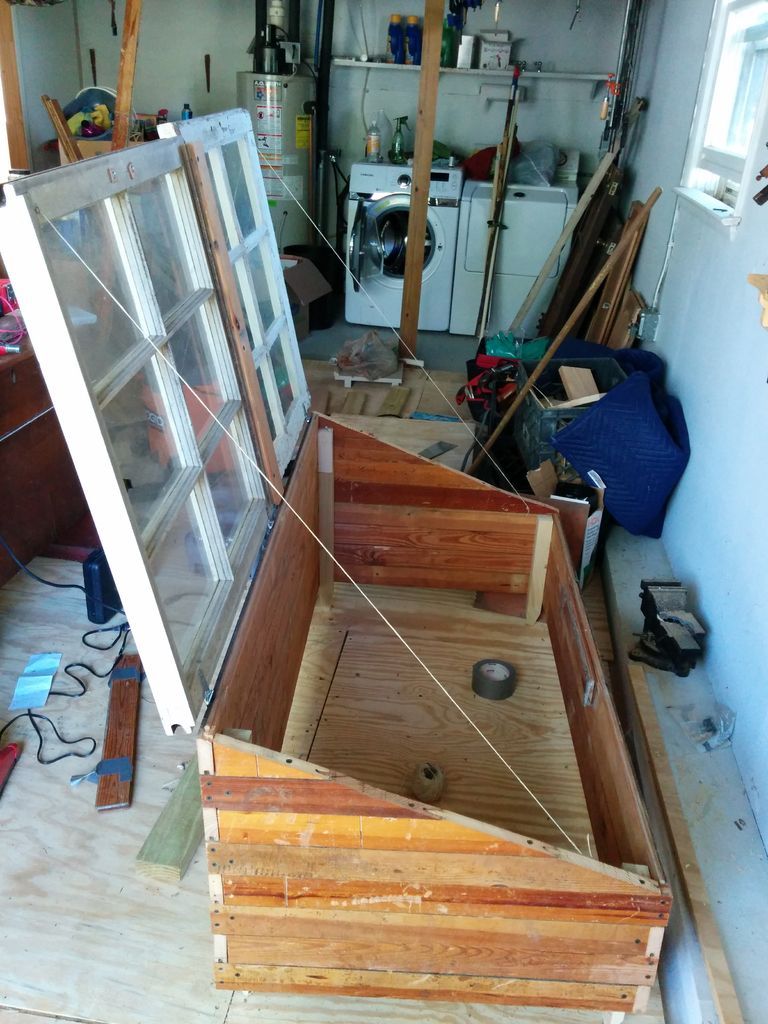 |
Install clamps on the short side. Build a small strip to support the open frames. |
This completes the construction of the mini-greenhouse (hotbed). The work usually takes 2-3 hours maximum.
DIY Recessed Greenhouse from Window Frames: Step-by-Step Instructions with Photos
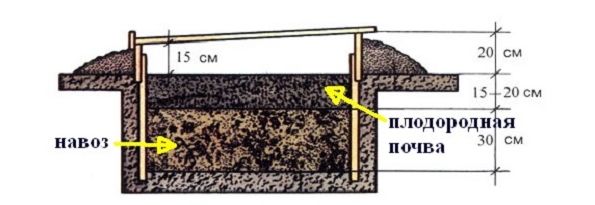
This type of greenhouse is ideal for those living in cold climates. It has natural heating and can be further insulated with straw on the outside. Early seedlings are often grown in this type of greenhouse. Here's what you'll need to build it:
- straw as insulation;
- wooden boards for the frame;
- old window frames;
- manure or droppings for natural heating.
Approximate diagram of a deep greenhouse:
| Illustration | Description |
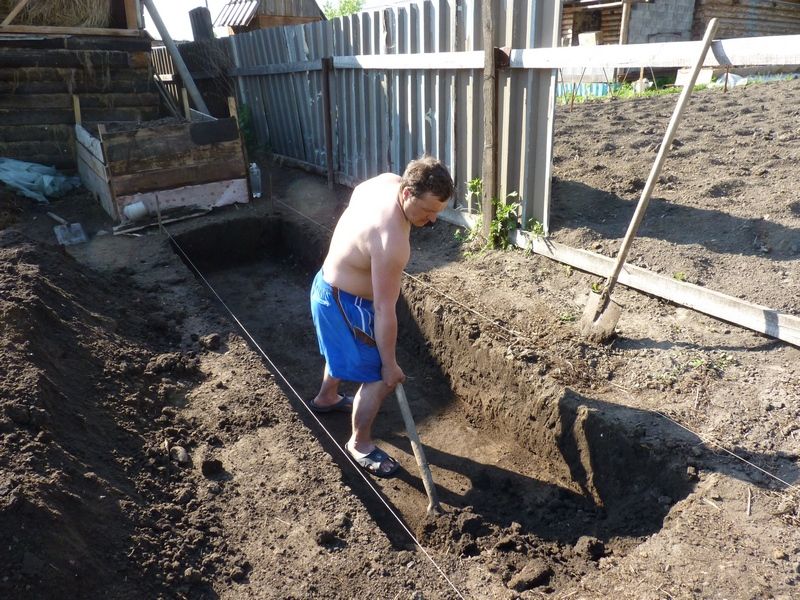 |
If the top layer of snow has already melted, it's time to start building the deep greenhouse. Mark out the area with stakes and dig a trench 60 m deep and 100 cm wide. The length can be any length you prefer. By the way, if the soil is too loose, it must be additionally reinforced with boards. |
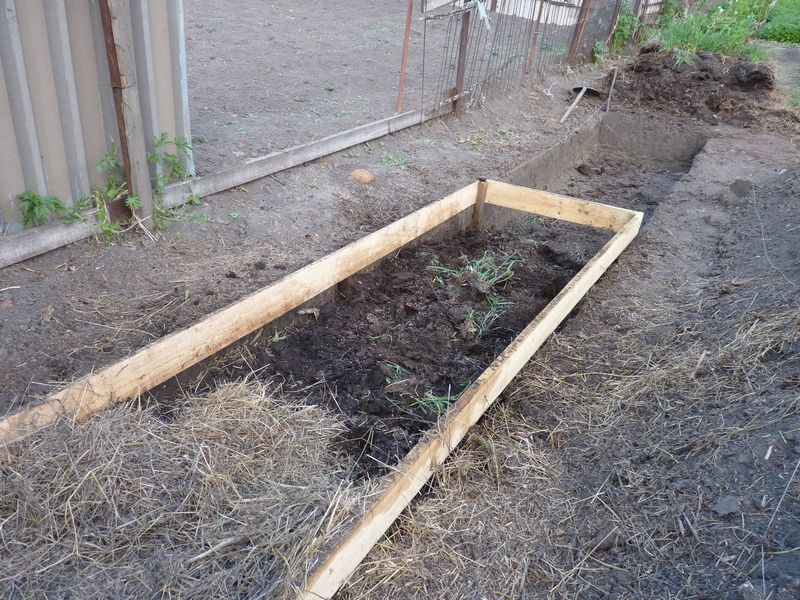 |
The next step is to lay down a 30 cm layer of manure mixed with straw or rotted sawdust (1:2). This should be done 2-3 weeks before planting. Top with 20 cm of fertile soil and cover with a thin layer of straw to protect against weeds. |
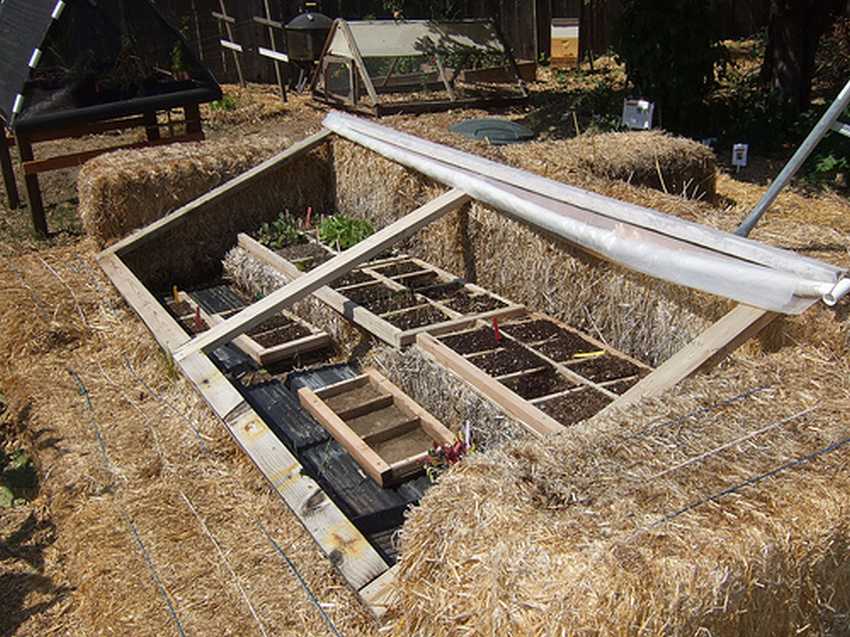 |
Build a box and insulate it with straw bales. Create a roof frame from planks and position it at an angle, with one side resting on the straw and the other resting on the ground. This will create a single-pitched, sunken greenhouse. |
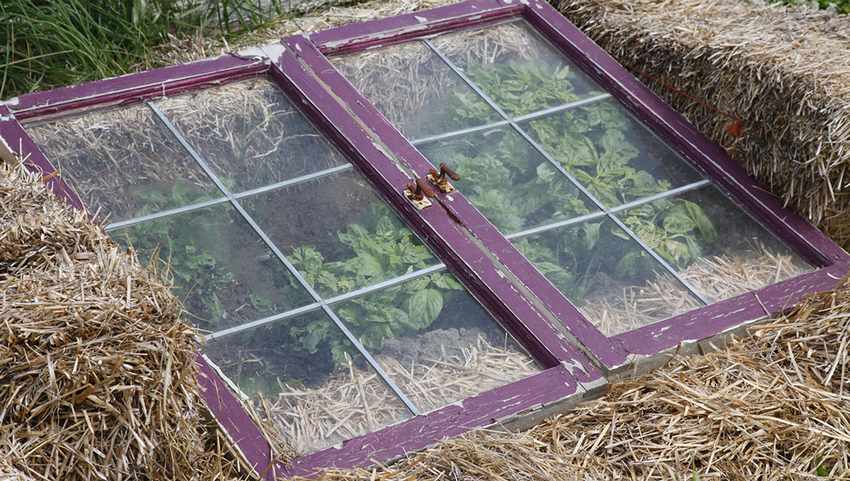 |
Attach window frames to the frame of the recessed greenhouse. |
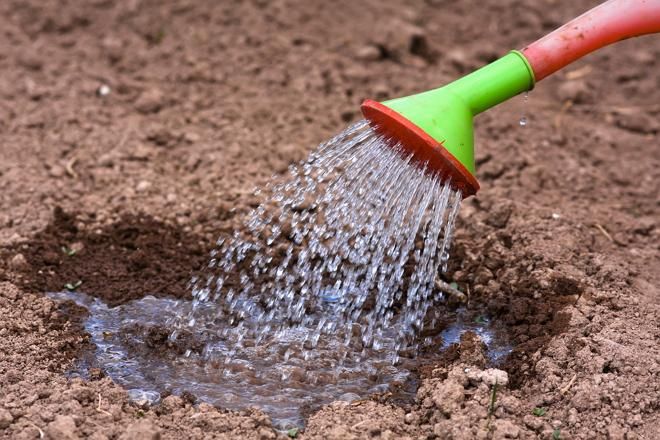 |
After all the work, you need to warm up the greenhouse. To do this, pour hot water over it and close the structure tightly. It's a good idea to cover the window frames with plastic film while it warms up. Afterward, leave the greenhouse for 2-3 weeks, as mentioned above. |
How to make a mini greenhouse from window frames yourself
Of course, such a greenhouse will not fit on a windowsill, but it can be placed on the site and it will not take up much space.
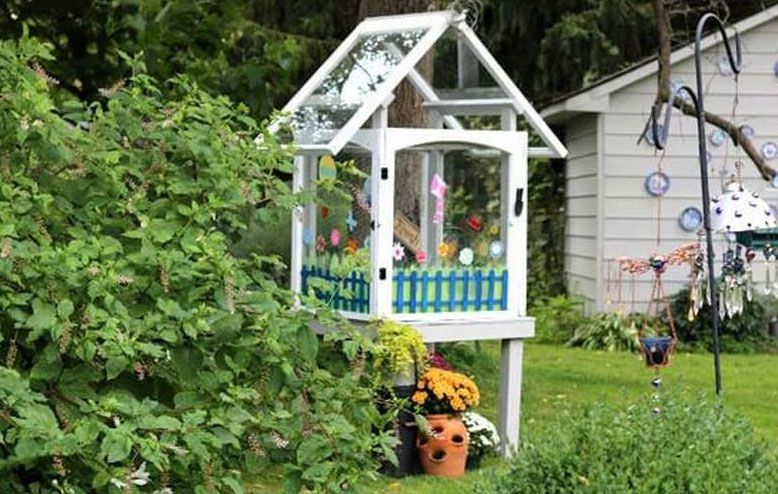
Step-by-step assembly instructions:
- Form a square frame from the windows with 2x4 outer sections. The result should be a box closed on all sides, including the bottom. Leave the top open.
- Nail legs to the corners like a table.
- Strengthen the structure with horizontal beams cut at a 45-degree angle. Place them around the perimeter of the greenhouse.
- Cover the top of the box with wooden boards or polypropylene.
- To make it more attractive, you can construct a gable roof from frames.
Fertile soil is poured into this mini-greenhouse, and plants are planted there. This structure is primarily decorative, and it is recommended to house a few flowers (even indoor ones) rather than vegetables.
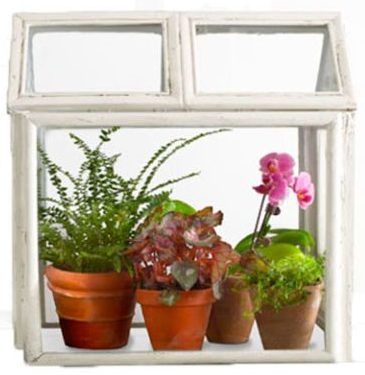
DIY mini greenhouse for a windowsill made from photo frames
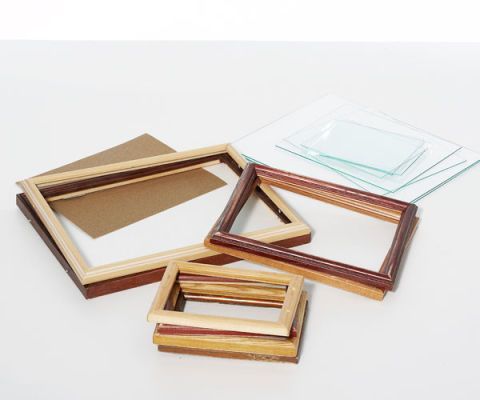
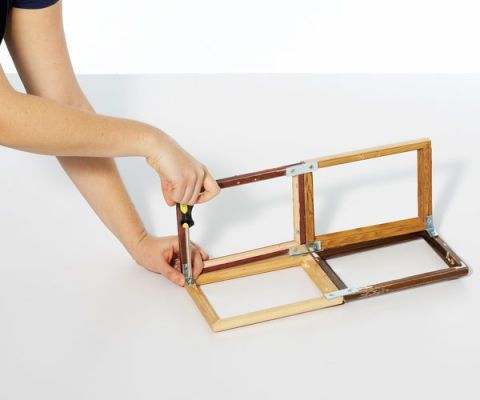
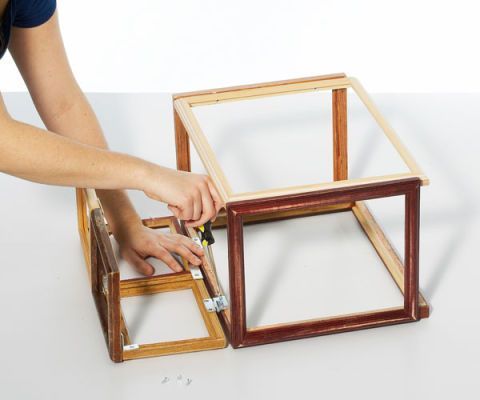
If you want to build a small greenhouse for growing seedlings on a windowsill, it's best to use photo frames rather than large window frames. They're very inexpensive, and the finished greenhouse will be not only functional but also very beautiful.
| Illustration | Process |
|
|
It's best to use wooden frames. You'll need:
Before use, they need to be polished to remove the paint. |
|
|
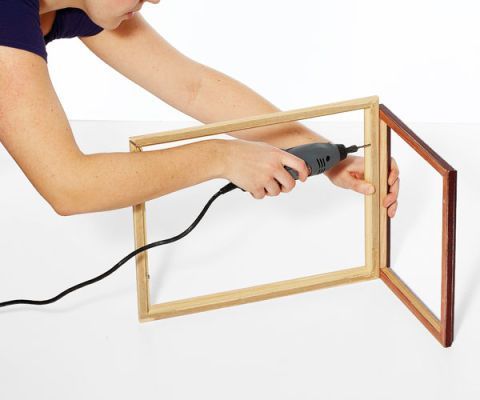
First, assemble the frame. The 28 x 35 cm frame is placed next to the 20 x 25 cm frames so that their 28 and 25 cm sides touch. The back of the 25 cm frame should be pressed against the outside of the 28 cm frame. |
|
|
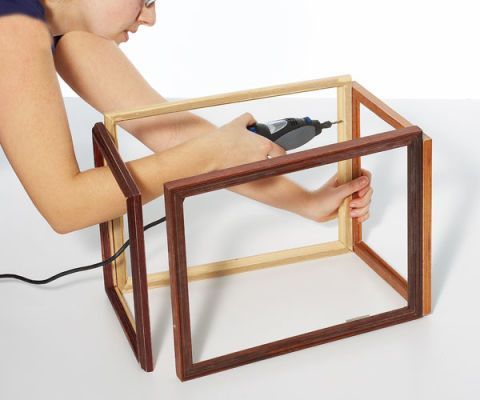
Connect the frames by drilling a small hole through the inside of the larger frame and extending to the center of the smaller frame. Then, secure the frames together using a screw that matches the diameter of the drilled hole. |
| Continue joining frames until you have a rectangle formed by the four largest frames (two 28 x 35 cm and two 20 x 25 cm frames). | |
|
|
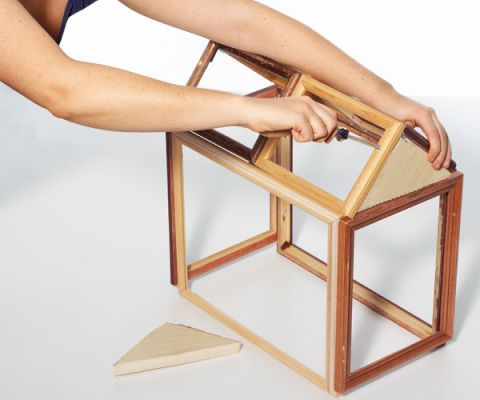
The next step is to assemble the roof. You'll need to connect four small frames measuring 13 x 18 cm. Join them in pairs and fasten them together to form a triangular roof. Attach a hinge so you can open the greenhouse and water the plants. Place two 13 x 18 cm frames side by side, touching at the short ends. Connect them using 5 cm (2 in) flat steel strips, screwing them to both pieces. To make this easier, you can drill a pilot hole. Repeat for the other 13 x 18 cm frames. |
|
|
The next step is to attach the roof to the main structure using 1-inch hinges, placing them on the connecting boards at equal intervals. |
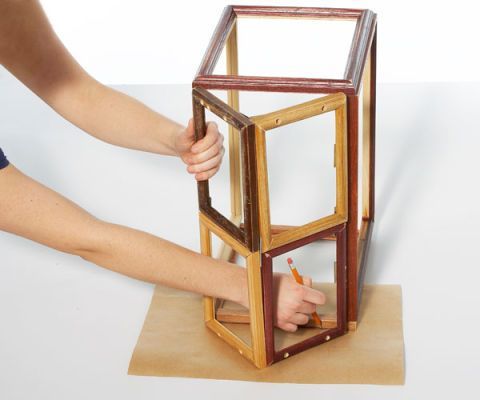
|
Next, you need to patch the triangular hole in the roof. You can use a piece of plywood. You can simply nail it to the frame with small nails or screw it in place. |
|
|
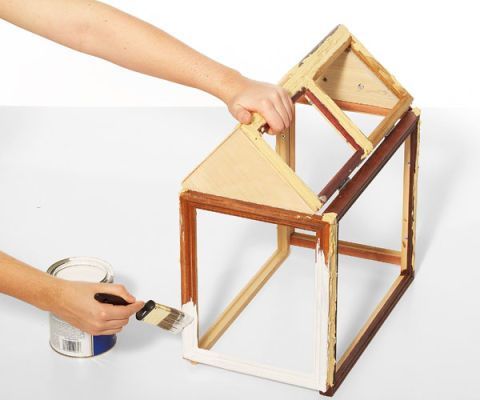
Paint the finished frame with wood paint before inserting the glass. |
|
|
Insert the glass. The greenhouse is ready! |
Advantages and disadvantages of window frames as a building material for a frame
Window frames have the following advantages:
- Minimal costs. If you replace windows in your house or apartment, don't throw them away—they can be used for a greenhouse.
- Quick installation.
- Long-lasting operation. With proper installation and maintenance, this structure can last for decades.
- Installation is easy and requires no expensive tools. A hammer, screwdriver, and level are usually sufficient.
- Installation on any foundation. When installing, consider the weight of the frames. In some cases, a strip or columnar foundation is necessary, while in other cases, simple framing is sufficient.
- Excellent performance properties. The glass maintains a suitable temperature and lets in plenty of light. If it breaks, it can be replaced with film or polycarbonate.
- Compatibility with other materials. For example, the roof can be made from polycarbonate, polyethylene, or boards.
The material also has its disadvantages:
- Complexity of preparatory work.
- Constant care.
- Fragility. Glass may break under strong mechanical impact.
For your information! Wooden frames will be cheaper. However, plastic ones will last significantly longer.
To summarize, it's easy to build a plant shelter. It won't take much time, except for waiting for the cement to dry if you're pouring a foundation. Another clear advantage of a homemade structure is that it can be customized to a specific size, tailored to the site where it will be located. Store-bought options have standard dimensions, which isn't always convenient.