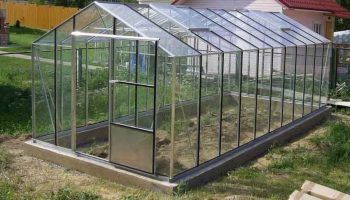
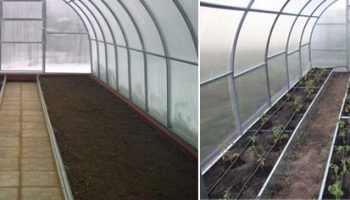
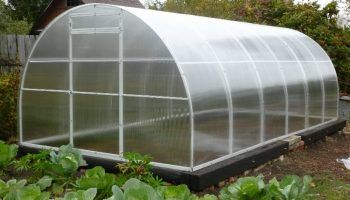
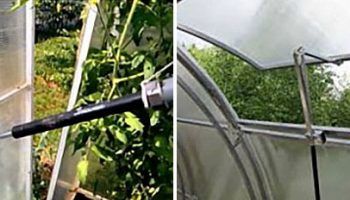
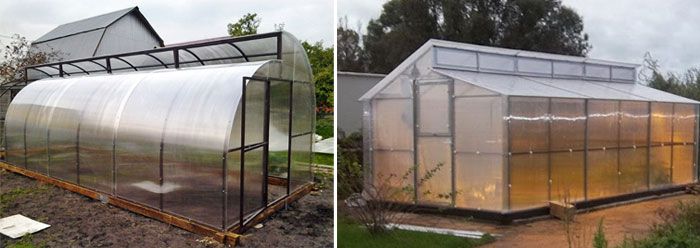
A Mittlider greenhouse is a structure characterized by an unusual roof slope and window design, which creates optimal conditions for gas exchange. The greenhouse roof has two slopes at different heights, each with a ventilation opening. This layout promotes air circulation. The design of a Mittlider greenhouse is usually based on its orientation to the cardinal directions. Arched greenhouses are the most common.
Content
- 1 Advantages of a Mittlider greenhouse
- 2 Disadvantages of a Mittlider greenhouse
- 3 Greenhouse modifications according to Mittlider
- 4 Greenhouse according to Mittlider: drawings
- 5 Selecting a greenhouse frame material according to Mittlider
- 6 Selecting a greenhouse covering material according to Mittlider
- 7 Building a Greenhouse Using Mittlider's Method: Calculating the Necessary Materials and Tools
- 8 Step-by-step instructions for building a greenhouse using the Mittlider method
- 9 Prices for arched greenhouses according to Mittlider in different sizes
- 10 Reviews of the Mittlider greenhouse
Advantages of a Mittlider greenhouse
The advantages of the structure include:
- simplicity and practicality, the assembly of the structure can be done independently;
- a frame that is resistant to increased loads and capable of withstanding a significant weight of snow;
- the wooden frame can be dismantled and transported to a new location if necessary;
- efficient and uniform gas exchange thanks to well-thought-out ventilation:
- the air vents and roof slopes have an original, optimal location;
- it is possible to easily automate the process of opening and closing the transoms;
- the possibility of growing a variety of crops:
- absence of drafts that could have a negative impact on plant metabolism;
- wooden structural elements, as well as a ventilation system
- prevent condensation;
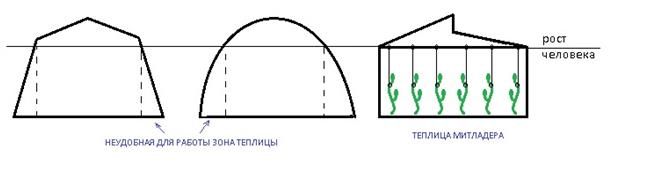
- The greenhouse is characterized by an optimal height, which provides
- the ability to grow vigorous crops;
- High-mounted horizontal beams make gardeners' work easier, providing the opportunity to tie up climbing crops (for example, tomatoes);
- The significant internal volume and well-established microclimate control system ensure its relative stability and greater resistance to fluctuations in outside air temperature.
Disadvantages of a Mittlider greenhouse
The disadvantages of the "American" roof are due to the specific climate conditions of central Russia and its northern latitudes. This includes snow accumulation on the roof. To prevent damage (such as frame collapse) during the cold season, regular snow removal is necessary.
Greenhouse modifications according to Mittlider
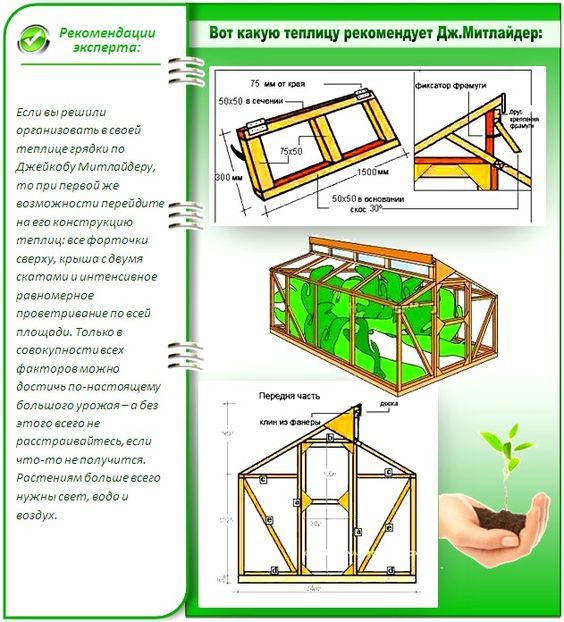
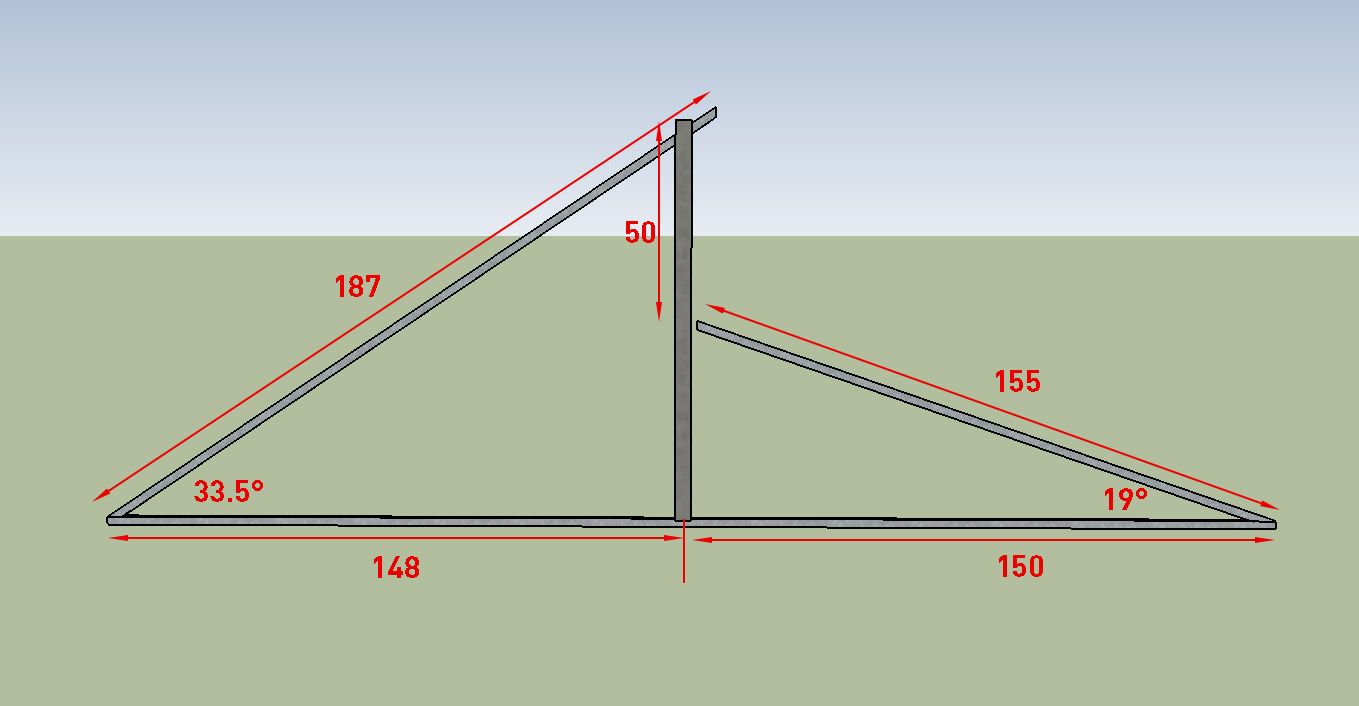
A distinctive feature of the structure is the different angles of inclination of the opposite parts of the roof.
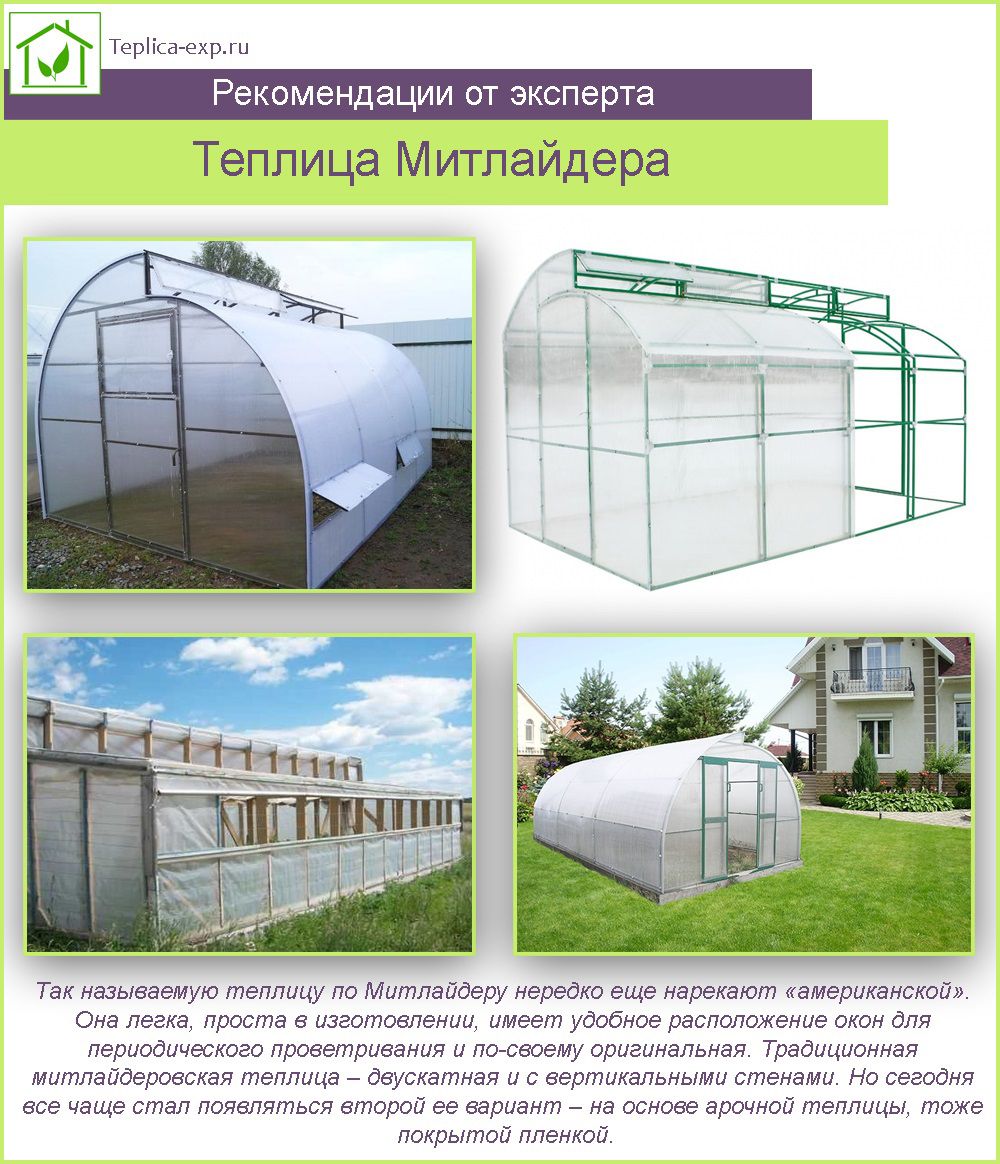
As a result, they are not adjacent to each other. This feature allows the gardener to construct a vertical transom window along the entire length of the greenhouse. It is attached to the upper ridge using piano hinges.
During its existence, the greenhouse has undergone a number of modifications:
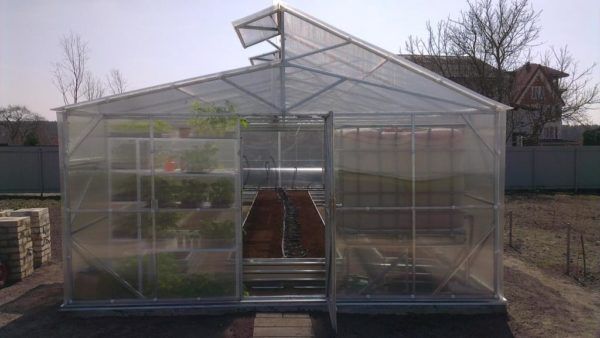
- Traditional (canonical). It has vertical walls and a flat roof with two slopes. In the classic version, the structure is 6 m wide, 12 m long, and 1.8 m high. Ventilation openings are located on the south side.
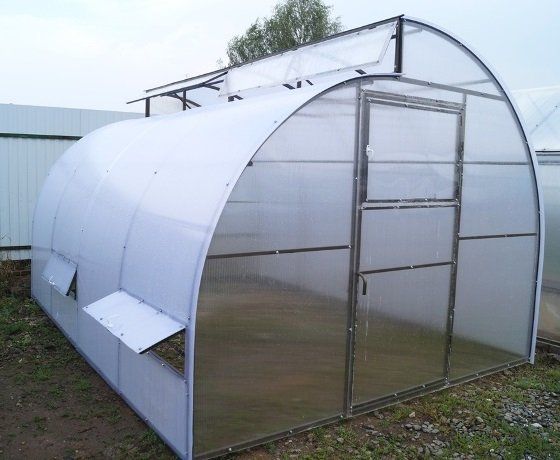
- Arched. Distinguished by its semicircular roof.
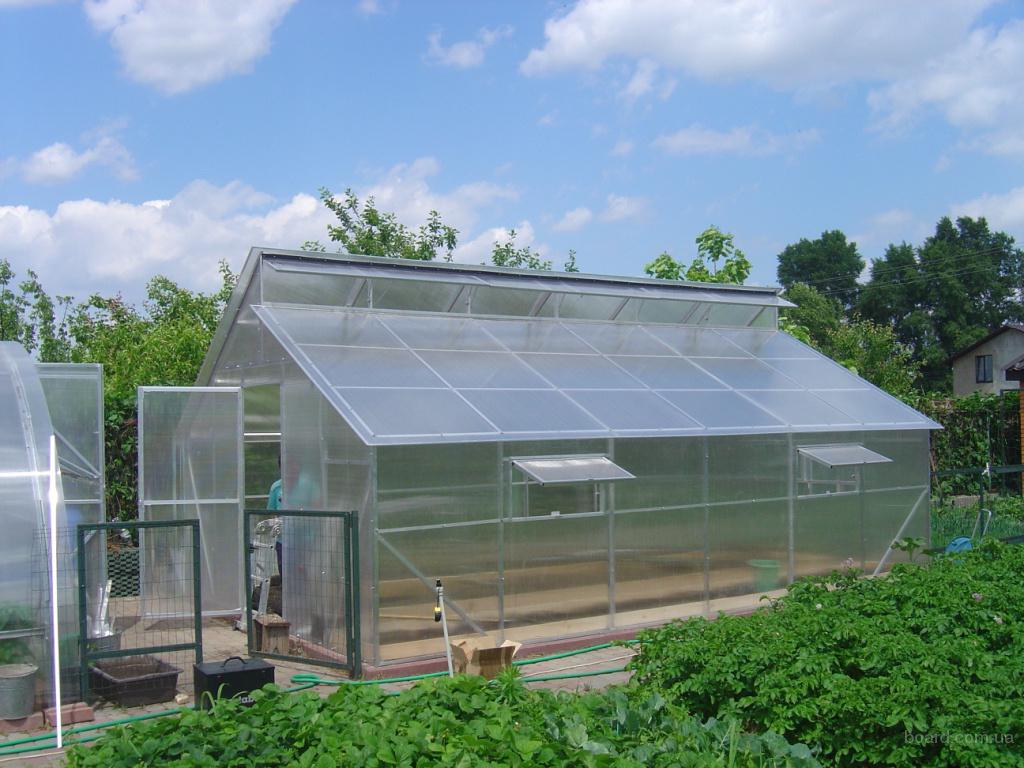
- With two transoms. This is a classic "American" type. It differs from the traditional model by the presence of a transom window under the south-facing slope. Its purpose is to enhance ventilation.
Transparent polycarbonate is used as the covering. Film can also be used. The use of polyethylene reduces construction costs.
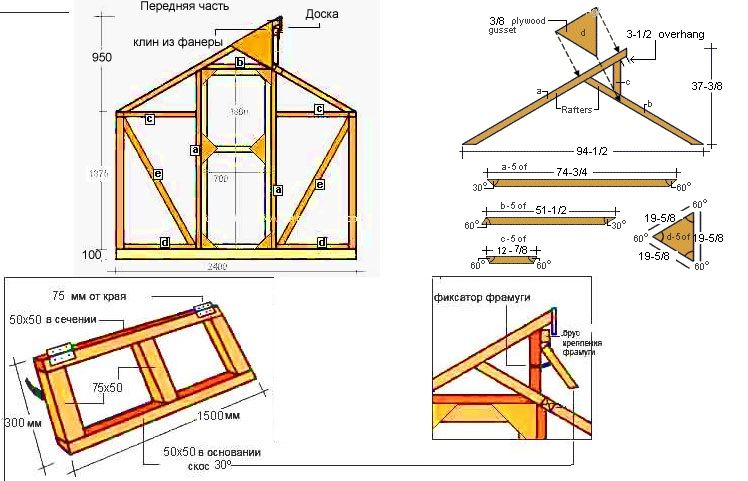
Greenhouse according to Mittlider: drawings
When designing a greenhouse, not only its size but also its orientation is taken into account. The ideal location is for the taller side to be on the north side, with the ventilation openings on the south side. This protects the crops from cold northern air masses. Heating occurs primarily through the more gently sloping roof facing south.
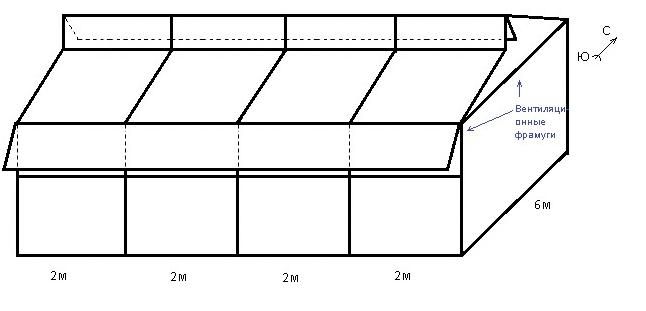
The classic Mittlider design is intended for small farms, so when building a greenhouse on a summer cottage, its dimensions are often reduced. The vertical dimensions are kept constant, the length is chosen arbitrarily, and the width is determined based on the number and expected size of the beds, as well as the paths between them. Typically, the width is limited to one meter. When determining the dimensions of the paths, the need for garden carts and other equipment or devices is taken into account. Experience shows that a width of ½ meter is sufficient.
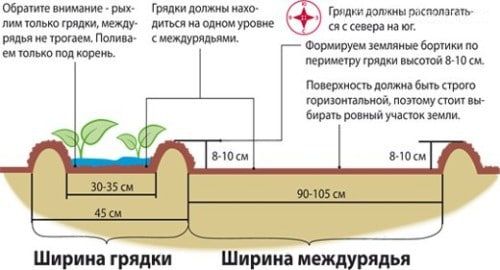
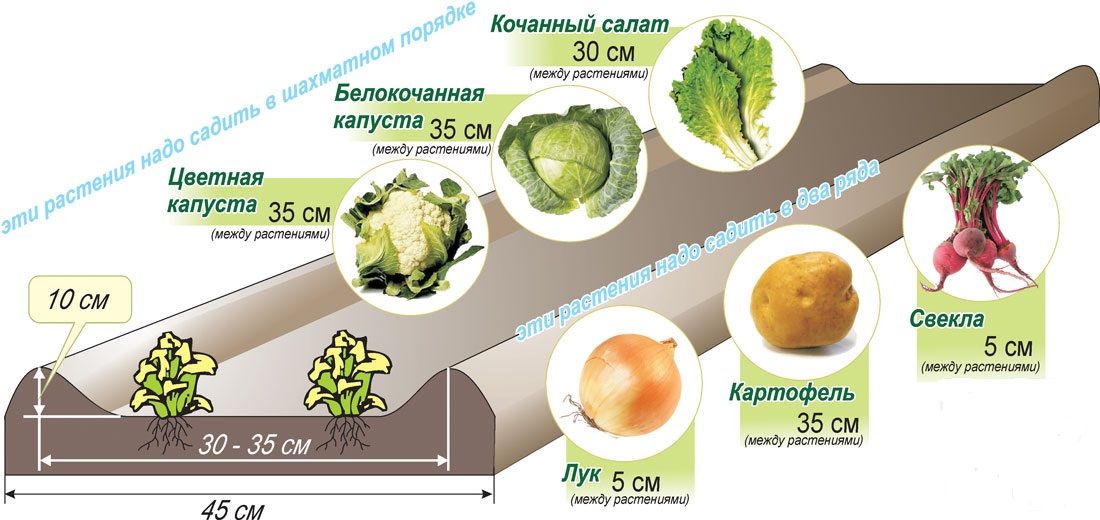
When performing drawing work, the following nuances are taken into account:
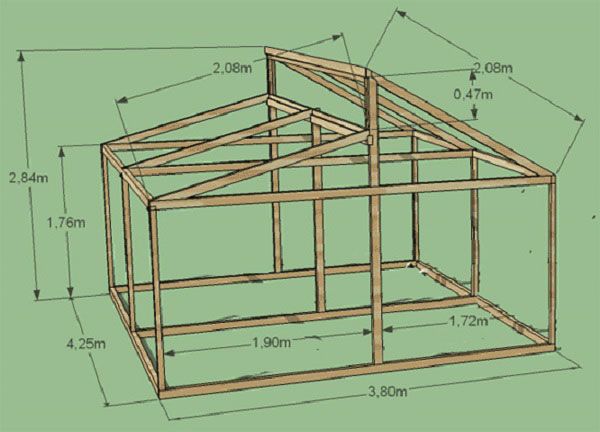
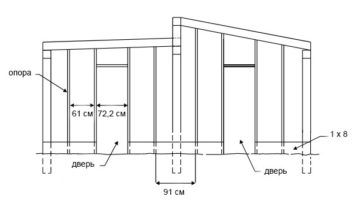
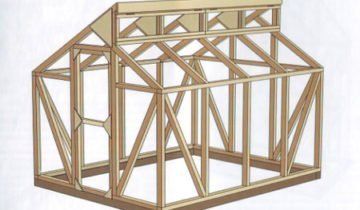
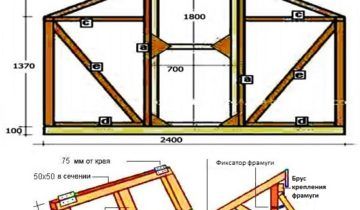
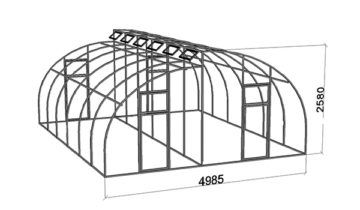
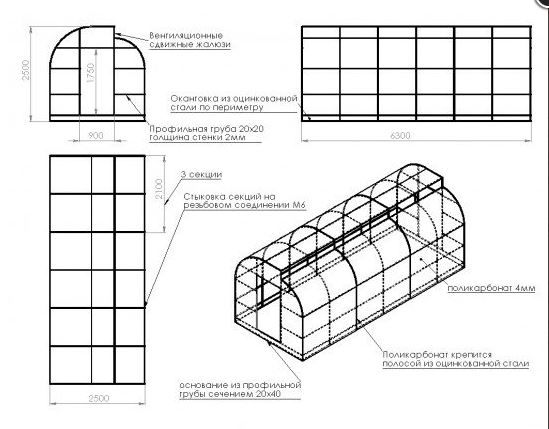
- The frame can be constructed using wood and/or metal elements. However, the expected wind and snow loads on the profile must be taken into account.
- The lower frame is made from 10x10 cm hardwood beams or a 5x5 cm section pipe. To improve wear resistance, the wood elements are treated with an antiseptic and painted with a kerosene-bitumen mastic, while the metal sections are coated with anti-corrosion compounds.
- The vertical posts must be made of timber with a thickness of more than 6 cm, or, when using a metal profile, with a cross-section of more than 4*4 cm.
- The braces are installed using pipes or slats with a cross-section of 4*2 cm.
- To prevent roof sagging, beams are made from boards 10*4 cm in diameter, or from a profile pipe with a cross-section of 4*2 cm.
- The greenhouse is most often covered with polycarbonate or polyethylene film.
Selecting a greenhouse frame material according to Mittlider
The chosen material determines the lifespan of the greenhouse and its ability to maintain the required microclimate. When constructing the frame, gardeners most often choose wood, PVC, polypropylene, or metal.
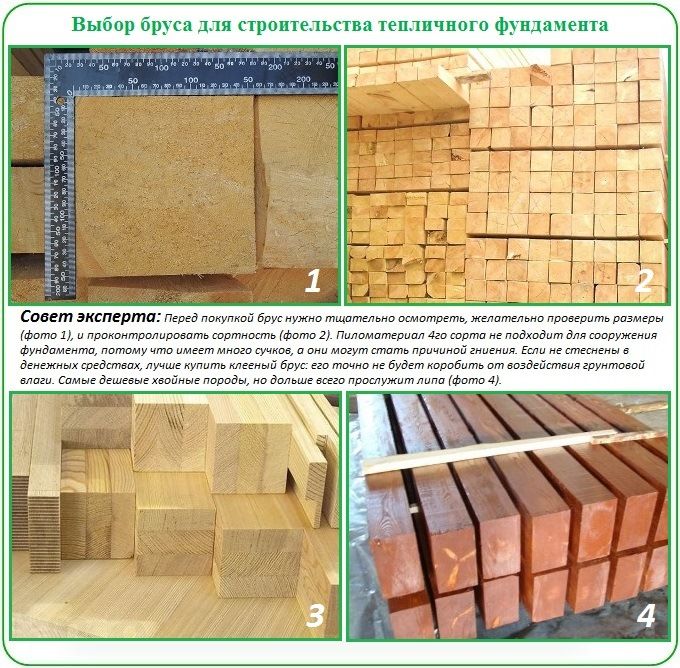
Made of wood
Hardwoods are most often used: oak, hornbeam, beech, spruce, pine.
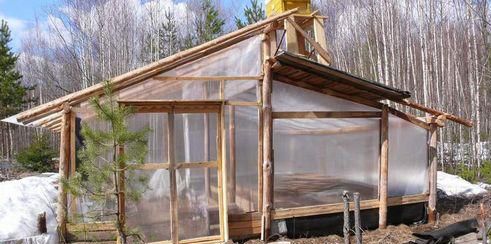
In this case it is necessary:
- determine the moisture content of varieties, not exceeding 20-22% (determined by a moisture meter);
- make sure there are no traces of wood-eating insect pests;
- exclude the presence of cracks, chips or knots in the selected samples (there should not be many).
Made of polypropylene or PVC
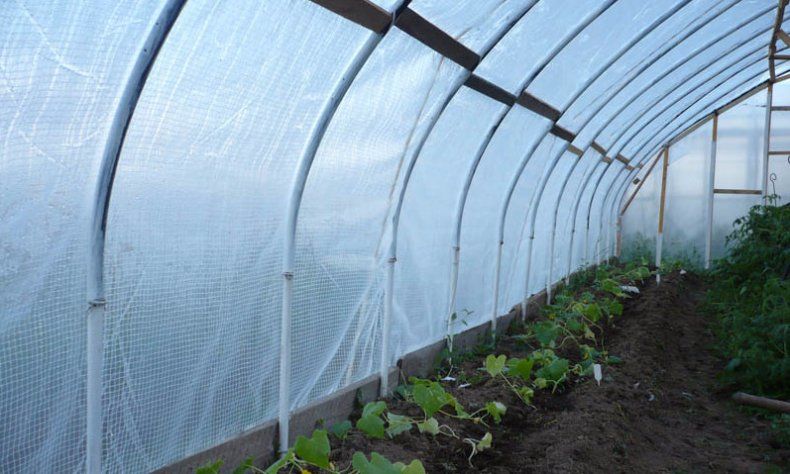
When choosing plastic pipes, their rigidity and wall thickness are considered. These factors are important for maintaining their shape.
Made of metal
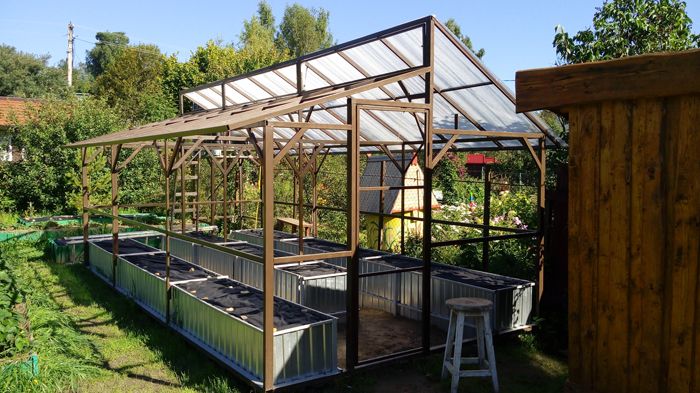
The use of pipes allows the construction of structures of any shape.
Comparative characteristics of materials used in construction
A comparison of different materials is given in the table:
| ANDmaterial used | Pros | Cons |
| Wood | An environmentally friendly, easy to process and install, inexpensive material that, with proper care, can last 10-15 years. | Low resistance to fungi and bacteria (preliminary and regular treatment with oil-based ingredients is recommended). |
| Polypropylene or PVC | It is environmentally friendly, highly resistant to corrosion, low and high temperatures (open flames), moisture, microflora, and durability. Plastic pipes are easy to install. Their lightweight design facilitates transportation. | The relative lightness of the structure makes it vulnerable to strong wind gusts and prone to deformation. |
| Metal | Easy installation, durability and long service life (more than 25 years). | Relatively high cost, untreated ferroalloys are prone to oxidation (corrosion). |
Selecting a greenhouse covering material according to Mittlider
Typically, cellular polycarbonate or polyethylene film is used to cover the greenhouse.
Polyethylene film
Choosing PVC or polyethylene film allows the greenhouse to be used for 2-3 seasons (or even 5 years). When choosing film materials, heat-stabilized reinforced options are preferred. They are characterized by increased strength and resistance to solar radiation. The recommended film thickness is at least 200 microns.
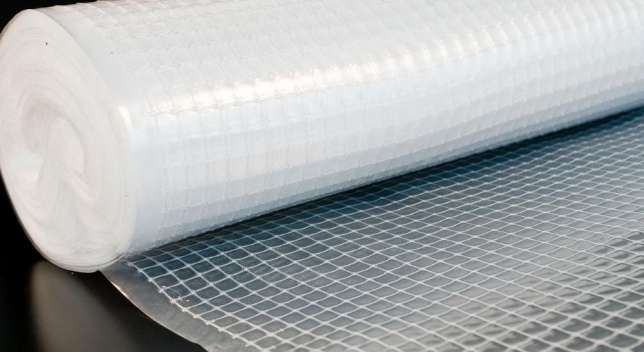
The original "American" model has a double film coating, with the layers spaced 5-7 cm apart. Maintaining this distance improves thermal insulation properties, preventing condensation.
The coating is carried out in the following sequence:
- The film is attached from the “north” to the lower trim of the side wall, using wooden planks for this purpose.
- The material is stretched by nailing the top edge to the beams of the upper trim and the roof ridge.
- In a similar manner, the film is attached to the “south” side to the bottom of the transom.
- The ends of the greenhouse are covered in a similar manner.
- The remaining film is used for upholstering doors and windows.
Cellular polycarbonate
This material is more expensive, but it is stronger, more durable, and better at retaining heat. Sheets with a thickness of 6-8 mm are recommended. For colder climates, it is recommended to increase this thickness to 1 cm. To increase polycarbonate's resistance to temperature fluctuations, as well as the effects of water and solar radiation, a protective film is applied to the material. When choosing sheets, consider their guaranteed thermal insulation properties and flexibility, which is especially important for arched structures.
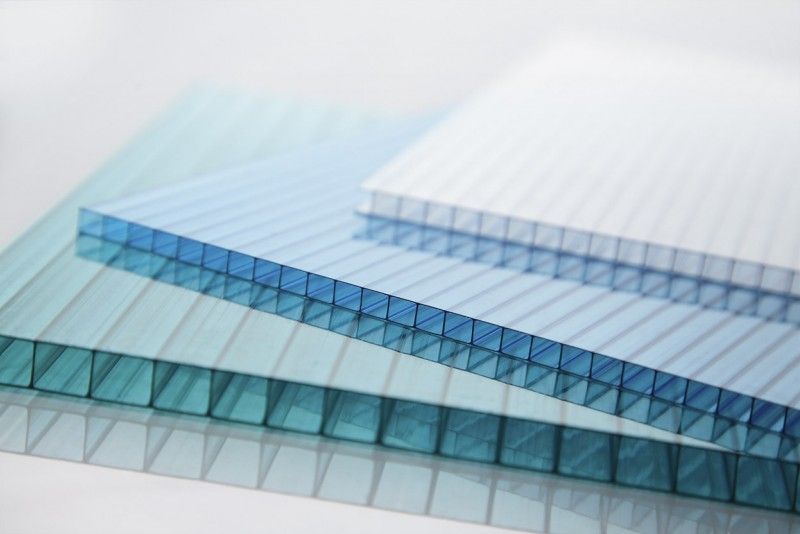
In general, the advantages of the material include its transparency (90% of the transparency of glass), lightness combined with flexibility and strength, and good thermal insulation properties.
At the same time, polycarbonate is not without its drawbacks. These include its relatively high cost, vulnerability to direct mechanical impact, and sensitivity to ultraviolet radiation (without the use of a protective film).
The sheets are fastened with screws, positioned so that condensation drains easily.
Building a Greenhouse Using Mittlider's Method: Calculating the Necessary Materials and Tools
Before starting work, a preliminary calculation is made to avoid unnecessary costs or a shortage of building materials.
As an example, a structure with a wooden frame and a polycarbonate covering, 2.7 m high, 3 m wide and 6 m long, will be used.
Foundation
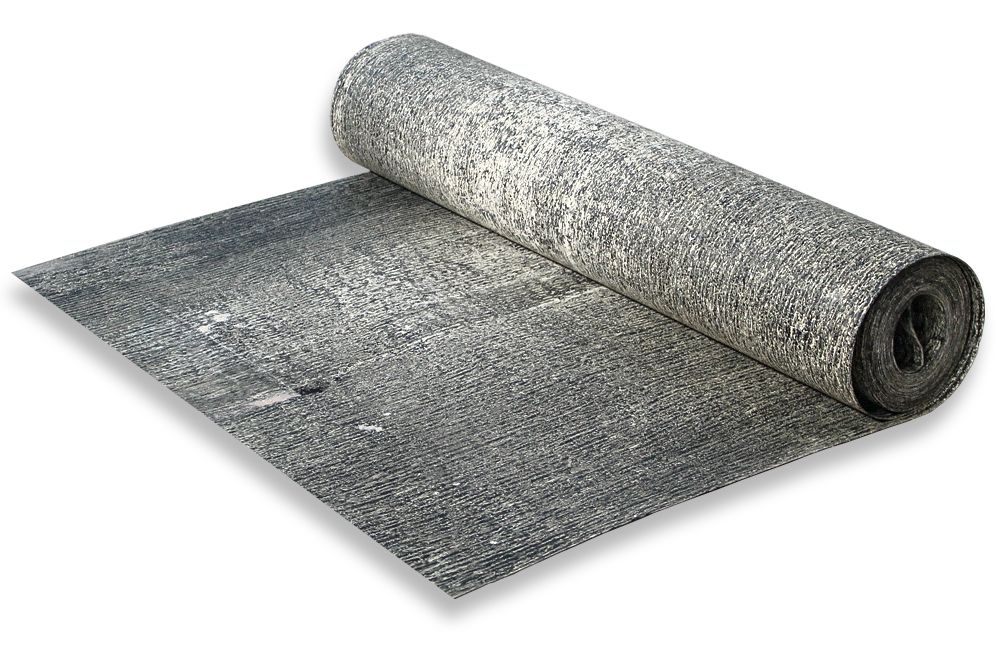
To lay the foundation, you will need roofing felt, reinforcement, sand, and M200 grade concrete. Calculations are made for each side of the perimeter (3 m and 6 m).
The planned height of the sand cushion trench is 10 cm, and its width is 20 cm. The approximate volume of sand required will be 0.344 m3.
When laying the foundation strip, the height taken into account is 30 cm and the width is 20 cm.
Calculations are carried out in a similar manner. A volume of concrete equal to 1.032 m³ is required.
Cellular polycarbonate
The calculation is made based on determining the coverage area on each side of the greenhouse.
Taking into account the initial assumptions, a total of 61.44 m2 of material will be required. It is recommended to purchase polycarbonate with an excess.
Reinforcement
To strengthen the structure and form the framework, 8mm-thick metal rods are used, secured with connecting elements spaced 30 cm apart. Considering that each side of the perimeter is reinforced with four horizontal rods, the total length of required reinforcement is 120 m.
Wood
For installation work you will need the following bars:
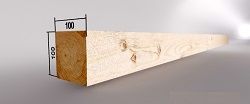
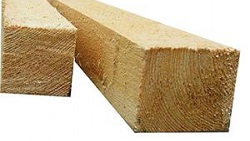
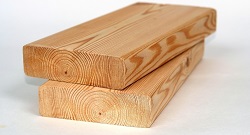
- 10*15*220 cm No. 18 for creating vertical posts;
- 10*15*270 cm No. 4 for roof support;
- 5.5*8*200 cm No. 5 and 5.5*8*140 cm also No. 5 for creating a rafter system;
- 10*15*600 cm No. 2 and 10*15*250 cm No. 2 for making the lower trim;
- 10*10*600 cm No. 2 and 10*10*250 cm No. 2 for the top trim;
- 6*6*150 cm No. 14 and 6*6*30 cm No. 14 for making vents;
- 6*6*200 cm No. 4 and 6*6*75 cm No. 4 for making doors.
Tools
To complete the work you will need tools for:
- taking measurements: measuring tape, plumb line, building level, large square, pencil or marker;
- wood and metal work: hacksaw, hammer, screwdriver, sander or sandpaper, paint brush, hammer drill, angle grinder, jigsaw, fine-tooth saw, sharp utility knife, cord with stakes;
- Work with soil and concrete: shovels (bayonet and shovel); concrete mixer, water tanks, concrete pouring hose.
Step-by-step instructions for building a greenhouse using the Mittlider method
Building a greenhouse is a multi-stage process that requires a number of sequential steps.
Selecting a site
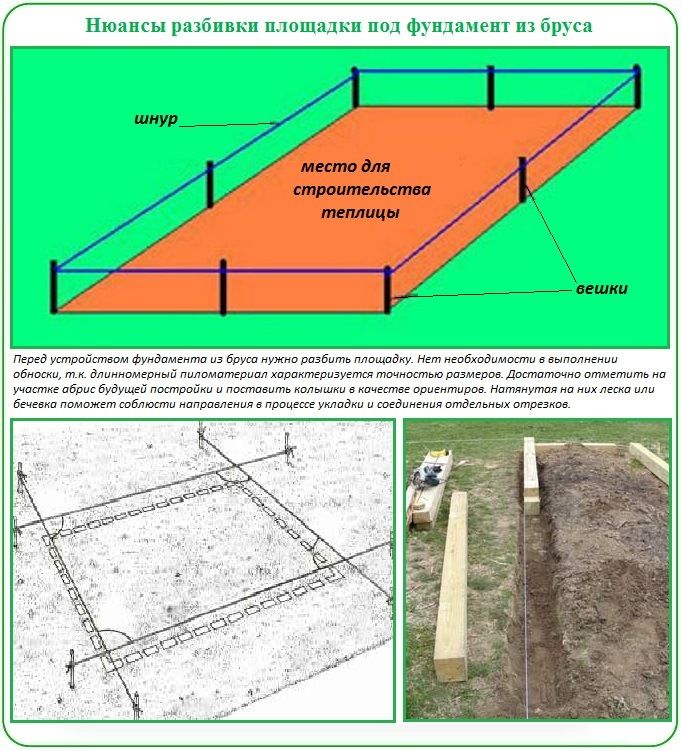
Before construction begins, select a sunny, level, or elevated area. Terracing is used if necessary.
It's important to keep in mind that the structure should be oriented east to west. The selected site is marked out using stakes and rope.
The structural elements include the base, walls (side and end), door, roof, and transom windows. They are reinforced with screws, corner brackets, and connecting plates (rectangular and T-shaped).
Laying the foundation
A trench with a cross-section of 20 x 20 cm is dug around the perimeter of the site, the walls and bottom of which are compacted, after which sand is poured onto the bottom.
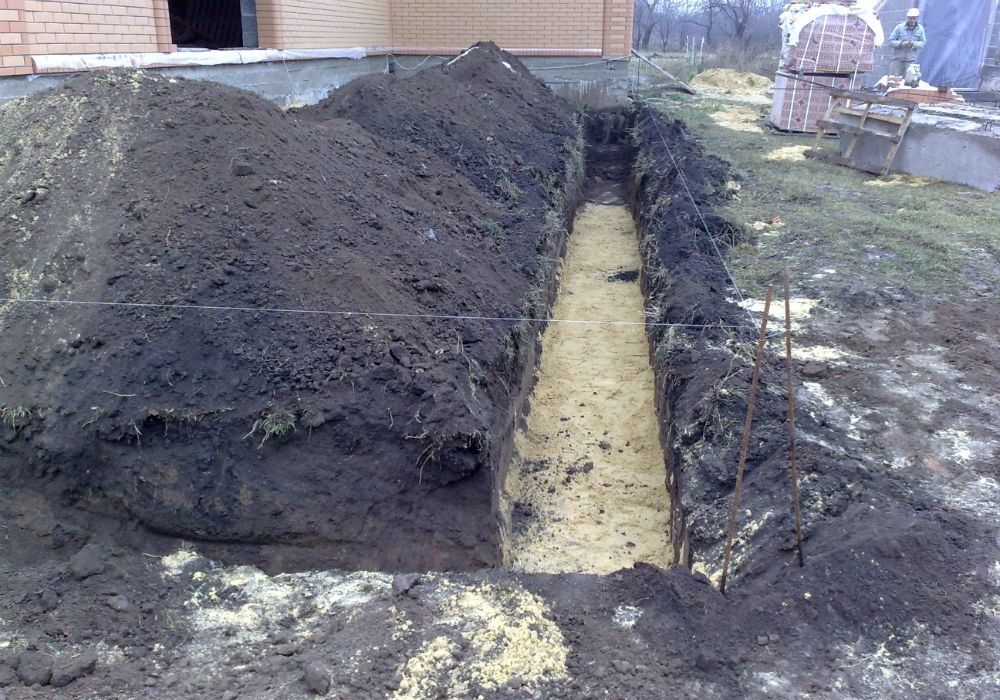
The layer should be 10 cm high; for this purpose, it's best to mark the trench walls first. The sand must be compacted.
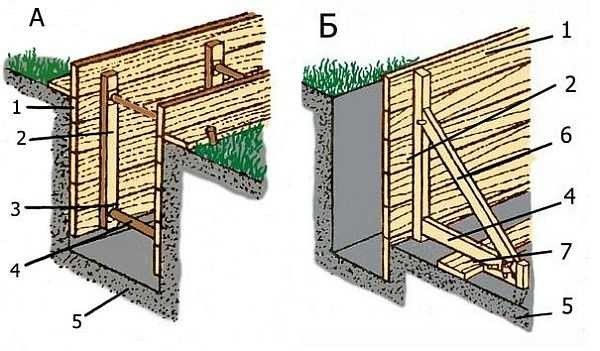
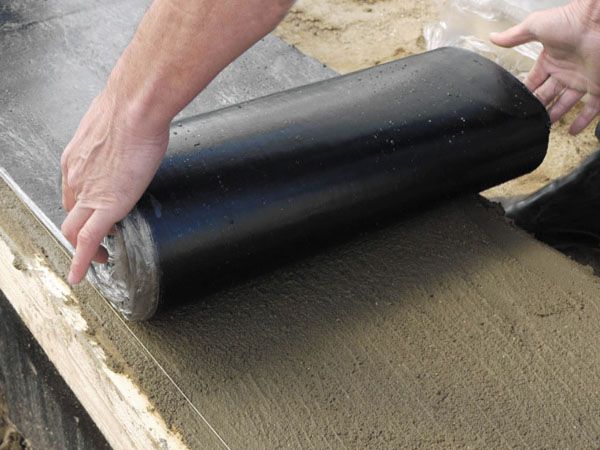
A waterproofing layer, such as roofing felt or polyethylene film, is applied over the sand. Ideally, the waterproofing covers the bottom and sides of the trench. Formwork is made from available materials, such as boards or plywood sheets, and should be 25-30 cm high. Spacers are usually used to stabilize it.
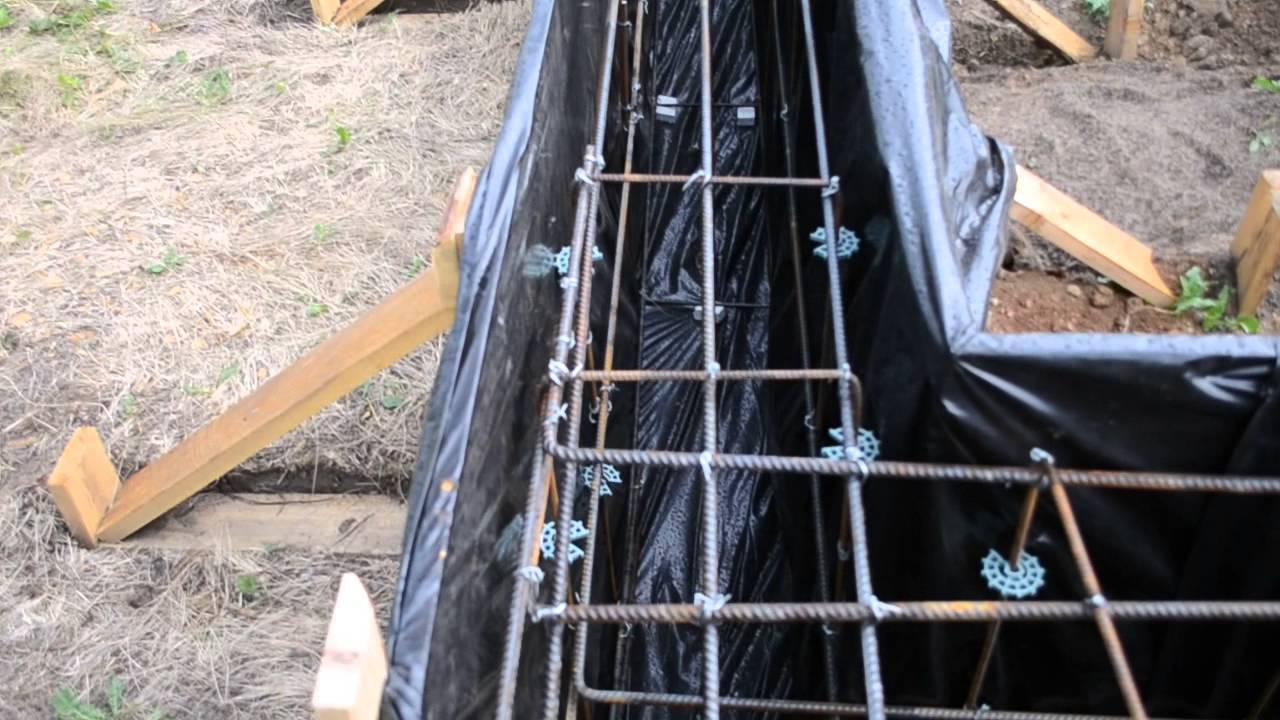
Reinforcement is used to strengthen the strip foundation. A 15 x 20 cm frame is formed from 8 mm thick steel rods with connecting elements spaced 30 cm apart. They are secured with welding or anchors. During installation, care must be taken to avoid any contact between the reinforcement elements and the waterproofing elements. For this reason, the metal frame is installed on 3.5-4.5 cm high beams.
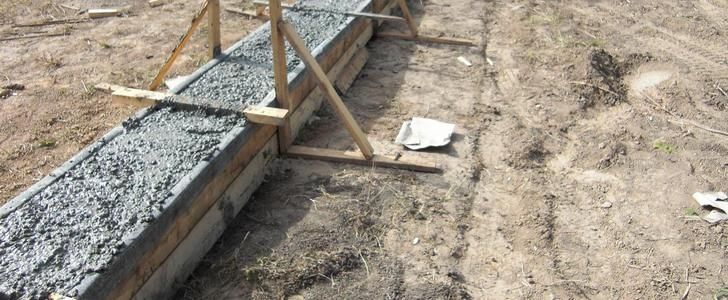
Next, grade M200 concrete is pumped into the formwork using a hose. A shovel is used to evenly distribute it within the trench. The steel structure must be completely filled. When properly poured, the concrete base should rise 20 cm above the ground (for a concrete base height of 30 cm). Alternatively, pre-embedded metal elements can be used.
After the concrete is poured, it is covered with a waterproofing layer. To ensure uniform curing, the concrete is uncovered for approximately 25 minutes every 12 hours for 48 hours. Once the mixture has hardened, the formwork is removed.
Setting up the frame
After the foundation is laid, wooden elements are installed.
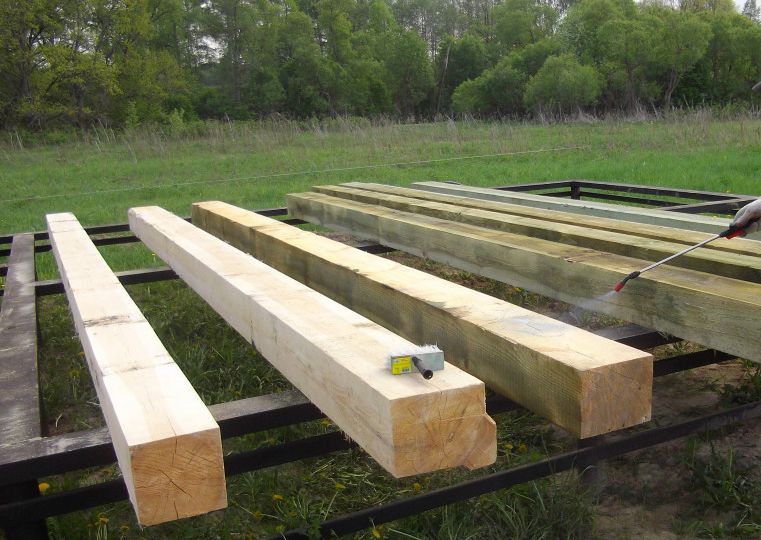
The wood is pre-treated.
The beams in the trench are securely waterproofed. A layer of roofing felt is laid over the concrete slab.
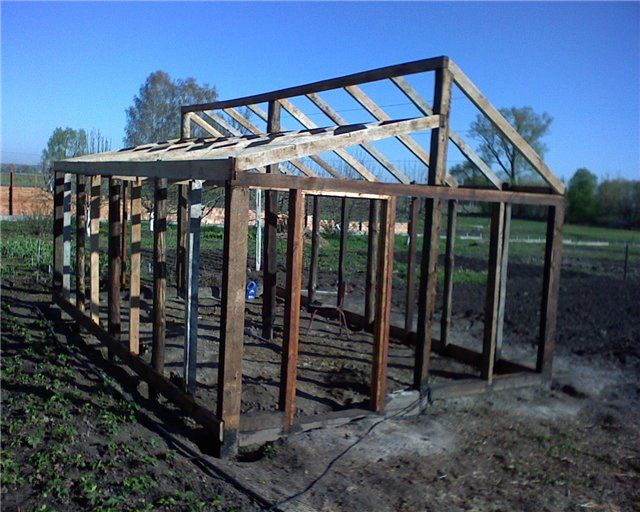
Building a timber frame is similar to assembling a barn:
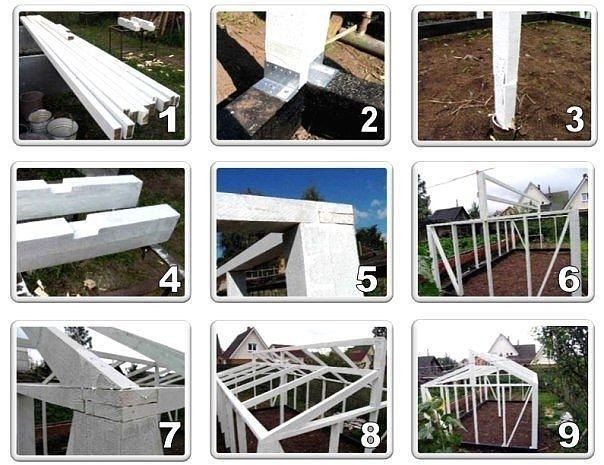
- The lower frame is constructed using 10x15 cm beams with half-lap joints. To strengthen the joint, notching is recommended.
- The timber is secured with nails (screws, nails, or bolts can be used at the corners), after which the frame is installed on the foundation. Holes are drilled in the corners for anchor bolts. Holes are similarly drilled at intervals of 130-140 cm.
- Posts are installed at the corners, as well as at a distance of 65-75 cm from each other, around the entire perimeter, including the doorway (10 x 15 cm timber is used); mounting brackets are used for reinforcement; braces are placed between the posts to stabilize the frame.
- The upper frame is prepared from beams with a cross-section of 10 x 10 cm. For this purpose, full-cut grooves are formed in the beam every 75 cm.
- Installation of 4 support posts designed to support the roof is underway.
Transom vents are made from a smaller cross-section profile. For doors, a 2 x 2 cm profile is typically used, with a width of 70 cm and a height of 180 cm. It is recommended to glaze the door with polycarbonate on both sides to create an air gap, which will serve as future thermal insulation.
When installing a frame made of metal pipes, the connecting elements must be welded.
Roof installation
The rafter system is being installed. The components are assembled on the ground, with the number of rafters matching the number of posts. The starting materials are 5.5 x 8 x 200 cm and 5.5 x 8 x 140 cm beams. The "north" slope should be steeper and higher than the "south" slope by approximately 40-47 cm. The elements are then lifted onto the frame.
The finished rafters are secured to temporary braces. The wooden rafters are secured with nails, metal plates, and mounting brackets.
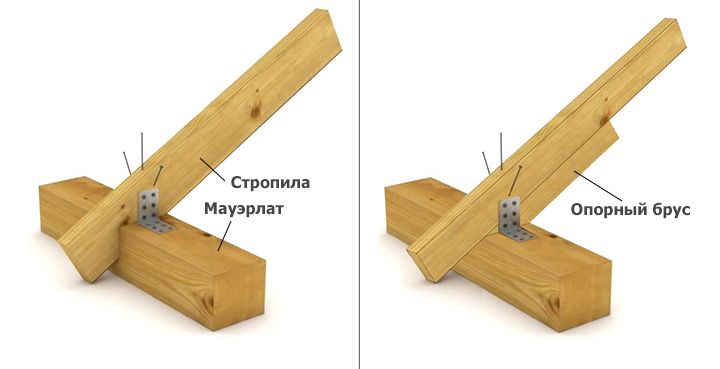
Metal elements are welded to the steel frame structures or secured with bolts. Once the structural elements are secured, the braces are removed.
Greenhouse covering
Typically, polyethylene film or cellular polycarbonate are used.
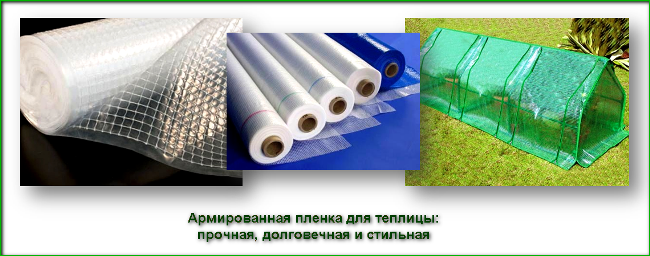
When choosing a polyethylene coating, you should pay attention to:
- stabilization – the ability to maintain physical properties against the background of prolonged solar radiation;
availability: - reinforcing insert that increases the strength and wear resistance of polyethylene;
antistatic coating, which slows down dust settling and increases the transparency of the film; - hydrophilic coating that allows condensation to drain freely (not all plants like water dripping on them).
Since polyethylene is significantly lighter than polycarbonate, a strip foundation is not required for installing such a greenhouse.
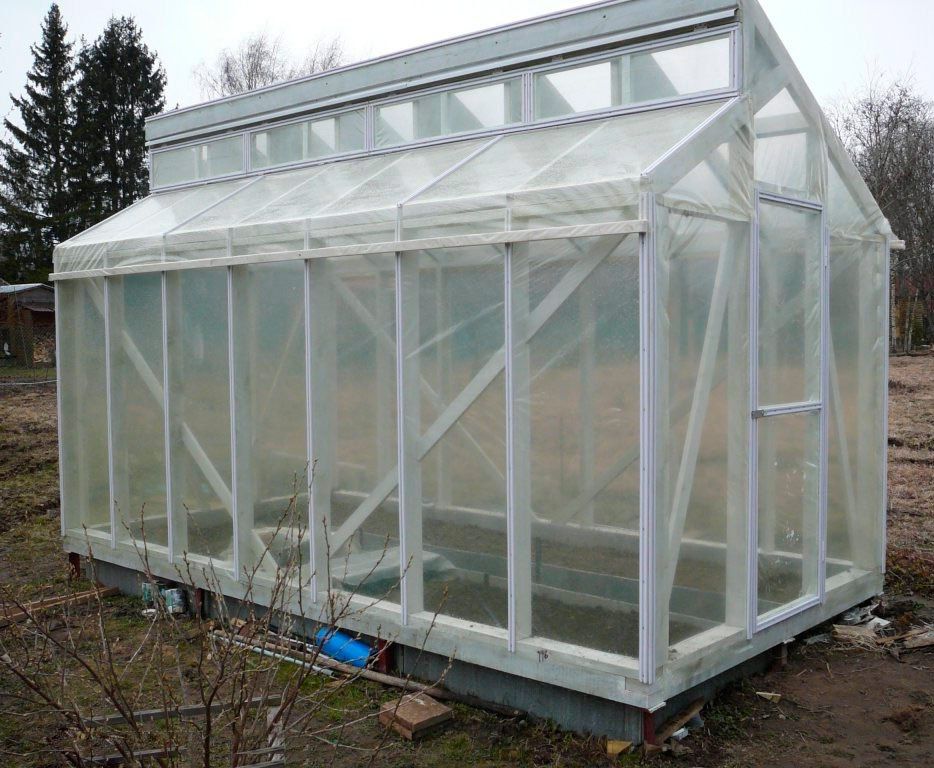
The sheathing order is as follows:
- a piece of film is stretched over one of the greenhouse sections;
- slats are applied on top of the material and fixed with self-tapping screws;
- in a similar manner, a piece of polyethylene is applied and fixed from the inside –
- in this case, a heat-insulating air gap with a thickness of 5-7.5 cm is formed;
then all wall sections are covered in a similar manner.
When choosing cellular polycarbonate as the covering material, the greenhouse is covered from the outside, using self-tapping screws for fastening.
Polycarbonate cladding
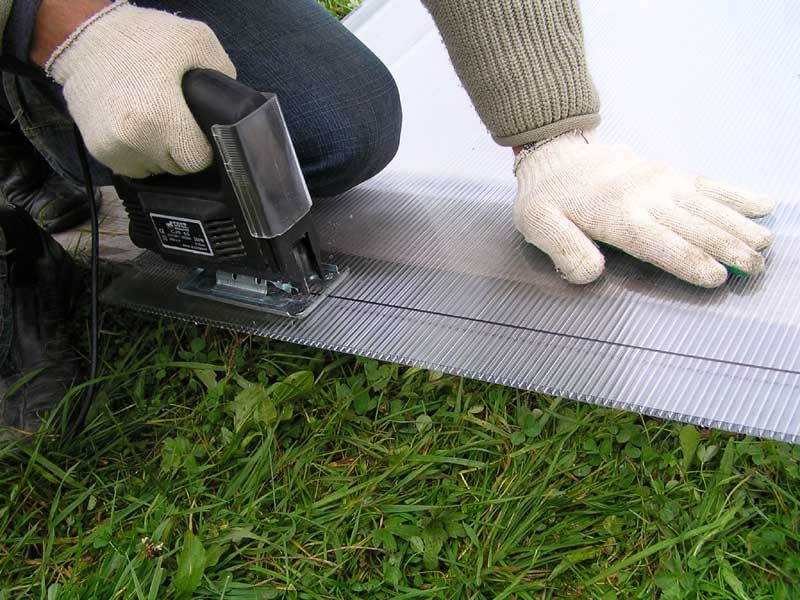
The process begins with cutting the material using a jigsaw and a fine-toothed blade. Fixing points are marked and holes are drilled using a drill.
The sheets are laid with a small gap to allow for possible expansion of the polycarbonate. Self-tapping screws with rubber gaskets are used to secure them. Their joints, as well as the ends, are covered with a connecting profile. It's important to remember not to over-tighten the polycarbonate with screws, as the material is fragile, and to ensure that the film-covered side faces outward.
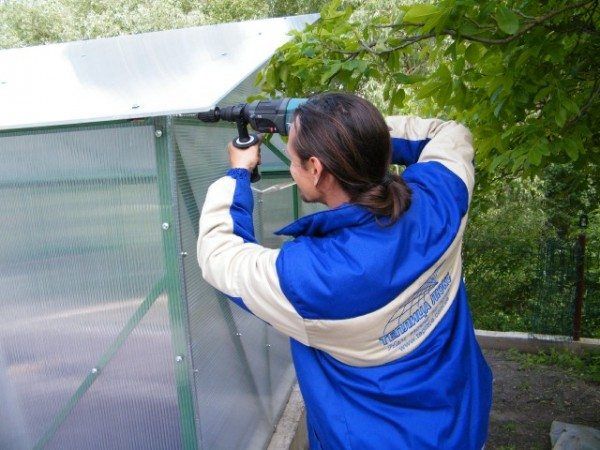
After the roof is sheathed, work begins on the walls. It's important to remember that the sheets must be oriented so that the internal cells are vertical when fastened.
After the walls, they begin covering the end surfaces, transoms and doors.
Interior design
The interior design includes, first of all, electrical wiring, autonomous water supply, and the installation of artificial lighting.
Particular attention is paid to the layout of beds and paths. Access to the beds must be convenient.
Regarding heating, everything depends on the greenhouse's intended purpose and the gardener's plans. For year-round use, a heating system is essential.
Prices for arched greenhouses according to Mittlider in different sizes
Approximate prices for a non-collapsible arched greenhouse structure with a distance between arches of 1 meter, a width of 3 meters, and a height of 2.3 meters, depending on the length of the structure and the thickness of the polycarbonate, are shown in the table below:
| Non-collapsible arched structure | ||
| Length, m | Cellular polycarbonate, Russia, mm | Price, RUB |
| 4 | 3.5 | 25,510 |
| 6 | 32,730 | |
| 8 | 40,594 | |
| 10 | 48,495 | |
| 4 | 4 | 26 122 |
| 6 | 33,517 | |
| 8 | 41,644 | |
| 10 | 49,772 | |
| 4 | 6 | 29,010 |
| 6 | 37,230 | |
| 8 | 46,594 | |
| 10 | 55,959 | |
Reviews of the Mittlider greenhouse
Natalia Sergeevna Shestopalova, 52 years old, Semiluki
My husband and I built a Mittlider greenhouse out of wood and covered it with plastic. We use it for growing peppers and tomatoes. We don't need heating. We regularly visit our dacha in the spring and summer, so we avoid problems with ventilation. We open the transoms as needed. The harvest is good, and we're happy.
Dmitry Anatolyevich Veshnyakov, 60 years old, Moscow
I built the Mittlider greenhouse three years ago. I decided to build the frame out of metal and the sheathing out of polycarbonate for added stability. The air exchange is noticeably better than in traditional greenhouses. I use the greenhouse for growing tomatoes. During the late blight outbreak, I tried to keep the transoms closed.
Denisova Larisa Nikolaevna, 34 years old, Tver
The greenhouse complements our garden perfectly. Its dimensions are 270 x 300 x 540 cm with a 90 cm arc pitch. The structure is durable, reliable, and wind-resistant. It's also very convenient.
Ratnikov Alexander Vladimirovich, 61 years old, Moscow
I think the greenhouse design was well chosen. Construction didn't take long and was generally straightforward. The task was made significantly easier by the fact that the building materials were already included. The greenhouse is sturdy and spacious, and retains heat very well.
Ogurtsov Valery Pavlovich, 54 years old, Moscow
Our plot is small, so we chose a custom-designed 5-meter greenhouse to replace the worn-out one. The Mittlider greenhouse is certainly more convenient, taller, and retains heat better. And, most importantly, it's easier to work with zucchini and tomatoes. Unfortunately, we didn't consider installing thermal actuators in time—in hot weather, we have to regularly open the transoms. I'll fix that this summer.