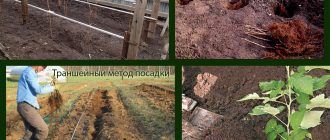
Experienced gardeners note that whether raspberries are planted in the fall or spring has virtually no impact on the quality of the harvest. It all comes down to personal preference, although there are still some slight differences. This article will explain the benefits of planting raspberries in the fall and how to do it correctly to ensure the best possible harvest.
Content
- 1 Why plant raspberries in the fall: pros and cons
- 2 Favorable and unfavorable days for planting raspberries in the fall of 2023
- 3 What weather is favorable for planting raspberries in the fall?
- 4 Boarding times vary by region
- 5 Rules for choosing raspberry seedlings
- 6 The best raspberry varieties for planting in autumn
- 7 How to prepare raspberry seedlings for planting
- 8 Preparing a plot for autumn planting of raspberries
- 9 Methods for planting raspberries in the fall with step-by-step instructions
- 10 Transplanting raspberries to a new location in the fall
- 11 Features of planting raspberries in autumn
- 12 Specifics of planting raspberries in the fall in different regions
- 13 Peculiarities of planting everbearing raspberries
- 14 Top.tomathouse.com warns: common mistakes beginners make
- 15 When to expect fruiting after planting
- 16 Raspberry propagation in autumn
- 17 Growing raspberries using Sobolev's method
- 18 Tips from Top.tomathouse.com
- 19 Answers to frequently asked questions
Why plant raspberries in the fall: pros and cons
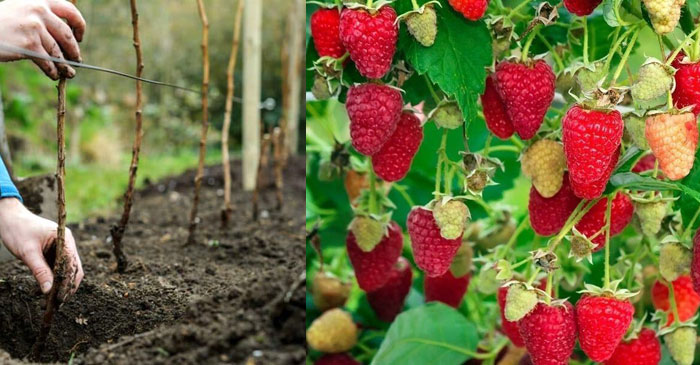
Autumn weather is ideal for raspberries. Before the first frost sets in, the root system has time to adapt and strengthen, leaving plenty of time for new roots to form.
Raspberries need to be planted in the fall in several cases:
- A winter-hardy variety was selected; all other varieties are best planted in the spring.
- Your region has a temperate or hot climate. In this case, autumn is the most suitable time for planting.
- I want to harvest as soon as possible. Raspberries planted in September will produce their first berries in the summer. Spring seedlings won't begin bearing fruit until a year later.
Benefits of autumn planting of raspberries:
- Planting material prices are much lower, and you can buy expensive varieties for a fraction of the price. These varieties usually already have berries, which you can sample and evaluate their flavor. This isn't possible in the spring.
- In autumn, even during the daytime, there's less intense solar activity, and humidity remains at the right level. In spring, there's a high risk of sudden temperature fluctuations, which can negatively impact seedling survival.
- Autumn raspberries expend energy not only on rooting but also on vegetative growth. This results in reduced resistance and poor survival rates.
The only drawback to planting raspberries late in the season is the uncertainty of weather forecasts for the next month. Therefore, there's a high probability of frost arriving before the berries have time to adapt.
Favorable and unfavorable days for planting raspberries in the fall of 2023
Experienced gardeners often use the lunar calendar when working and know that planting is best done during the waxing moon. This is when plants thrive best. The waning moon is not the best time for such manipulations. But sometimes there is no other time. Then, raspberries can be planted, observing all agricultural practices. However, the new moon and full moon are absolutely not suitable for planting and transplanting crops.
Please note! Many gardeners know from experience that it is not advisable to plant not only during the new moon or full moon, but also the day before and the day after these dates.
| Autumn month | Favorable days | Unfavorable and prohibited days |
| September | 3 (from 18:00)-5 (until 23:05), 13, 18 (from 07:58)-24, 27 | 14,15, 28 (from 12:58 p.m.), 29, 30 (up to 12:58 p.m.) |
| October | 1-3 (until 08:02), 5 (from 15:32)-7, 10 (from 15:02)-12, 16-22 (until 09:06), 24 (from 11:32)-26 (until 13:01) |
14,15,28,29 |
| November | 2-4 (until 10:20), 6 (from 22:39)-11 (until 21:39) | 12 (from 12:26 p.m., 13, 14 (until 12:26), 27 (from 12:16),27, 28 (until 12:16 p.m.) |
What weather is favorable for planting raspberries in the fall?
The optimal temperature is considered to be +15°C. The weather should be overcast, without bright sun or heavy rain. If autumn days are sunny, all work should be done in the morning to prevent the roots from drying out in the sun.
Boarding times vary by region
Autumn varies from region to region. There's no single date for the entire country; there simply isn't one. You just need to pay attention to your weather and follow the forecast to ensure the next frost doesn't occur until three weeks after planting.
Different regions have only approximate dates for autumn planting of raspberries:
- The Urals, Siberia, and the entire North plant berries in early September. If the month is cold and damp, it's best to postpone the work until spring to avoid losing the harvest.
- In the south, planting takes place from the second half of September to mid-November, depending on the weather.
| Region | Timeframe for completion of works | Note |
| The Volga region, Moscow, the Moscow region and other cities of the central zone | Early September – mid-October |
According to folk wisdom, raspberries should be planted before the Orthodox holiday of the Intercession of the Mother of God, which falls annually on October 14th. If the weather is fine and no frost is expected, the work can be postponed until the second half of the month. |
| Leningrad region and northwestern regions | Until the second ten days of September | It's important to take the weather into account. If August and September were cold and rainy, it's best to wait until spring to repot. Otherwise, there's a high risk of fungal diseases developing, which will prevent the plant from developing normally. The beds should face north to south. |
| The Urals, Siberia and northern regions | Until the beginning of September | |
| Southern regions and the south | From the second half of October to November |
As a rule, there are no early frosts in the regions, and the seedlings have time to take root well and gain strength by spring. |

Rules for choosing raspberry seedlings
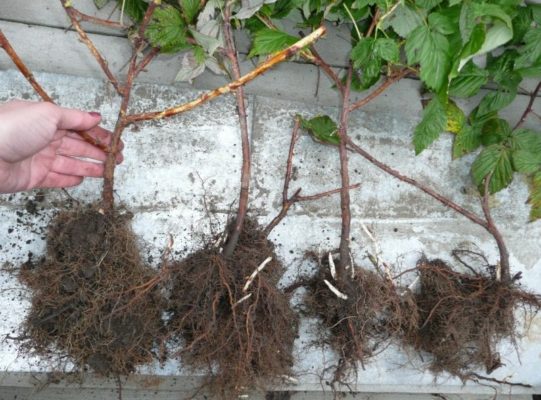
No amount of agricultural practices can save diseased raspberries. Therefore, it's crucial to choose planting material responsibly. Weak seedlings won't survive the winter. There are several important criteria to consider when purchasing raspberries.
| Selection parameter | Characteristic |
| Features of the root system | Carefully inspect the roots. They should be vibrant, without dry or brittle areas, and the ideal length is 15 cm. The root system shouldn't be limited to a couple of shoots; make sure it's well-developed. |
| Kidneys | The number of buds isn't that important. Even one bud per seedling is enough. A shoot will emerge from it later. The presence of buds is the key to good rooting. Only plants with no buds at all should raise suspicion. |
| Variety |
Breeders have developed many varieties for different regions of the country. Choose only the one recommended for your location. Choose raspberries that produce the highest yields and are resistant to weather conditions and pests. |
The best raspberry varieties for planting in autumn
Dwarf raspberry varieties thrive best in the garden. Their buds typically develop more quickly. The most popular varieties are listed in the table below:
| Name of the variety | Characteristic | What regions is it suitable for? |
| Bryansk
|
The berries ripen quickly, weighing up to 3 grams and having a sweet flavor. Up to 80 kg of yield can be harvested per 100 square meters. The variety is resistant to anthracnose and didemella. The main disease is spider mites. Treating the plantings with Fufanon will help control them. | Mari El, Mordovia, Tatarstan, Udmurtia, Chuvashia, Bryansk, Vladimir, Ivanovo, Kaluga, Kirov, Moscow, Nizhny Novgorod, Penza, Ryazan, Samara, Smolensk, Tula, Ulyanovsk regions and Perm Krai. |
| Kind
|
The ripening period is mid-season. The berries weigh up to 4 grams and have a pleasant aroma and a sweet and sour taste. Up to 90 kg of raspberries are harvested per 100 square meters. This variety tolerates even the harshest winter frosts well. It is highly resistant to pests and diseases. | Kamchatka, Primorsky and Khabarovsk Krais, Amur, Magadan and Sakhalin Oblasts. |
| Malakhovka
|
A mid-season variety. Berries grow up to 4 grams in size and have excellent flavor. About 85 kg of yield is harvested per 100 square meters. Malakhovka is resistant to spider mites and does not rot or dry out during winter. Its winter hardiness is not the best; it will survive frosts only with good snow cover. It is often susceptible to gray mold, which is easily treated. | Bryansk, Vladimir, Ivanovo, Kaluga, Moscow, Ryazan, Smolensk and Tula regions. |
| Tenderness
|
The ripening period is average. The berries, up to 3.5 grams in weight, have a pleasant sweet-tart flavor. With proper care, up to 92 kg can be harvested per 100 square meters. The variety tolerates winter well and is susceptible to anthracnose and purple spot. | Bryansk, Vladimir, Vologda, Ivanovo, Kaliningrad, Kaluga, Kostroma, Leningrad, Moscow, Novgorod, Pskov, Ryazan, Smolensk, Tver, Tula and Yaroslavl regions. |
| Enlightenment
|
This is a mid-season variety. The berries are small (weighing no more than 2 g), aromatic, and have a sweet and sour taste. The yield per 100 square meters is approximately 80 kg. However, with proper care and all the necessary conditions, it can reach 124 kg. The variety has excellent resistance to numerous common diseases and winter frosts. | Bryansk, Vladimir, Ivanovo, Kaluga, Moscow, Ryazan, Smolensk and Tula regions. |
| Bryansk ruby
|
The variety ripens mid-season. The berries have a delicate, sweet flavor. Bryansky Rubin doesn't tolerate deep frosts well, but it is resistant to many diseases. The yield is low—only 44 kg per 100 square meters. | Bryansk, Vladimir, Ivanovo, Kaluga, Moscow, Ryazan, Smolensk and Tula regions. |
| Hercules
|
A mid-season, everbearing variety. The bushes are gently spreading, reaching 2 m in height. The shoots are vigorous, so trellises are not required for cultivation. The berries are large, weighing 6-10 g, though some can reach 15 g, and are a bright ruby color. A bush can yield 3-4 kg. Drawbacks include a large number of thorns and susceptibility to severe frost. | Bryansk, Vladimir, Voronezh, Moscow, Ryazan, Tula, Tver, Yaroslavl, and Rostov regions. May freeze in the north. |
| Strongman
|
A standard variety, meaning it requires support for proper development. It grows up to 2 m and is thornless. The berries average 6-8 g, are bright red, and do not fall off even when fully ripe. The yield is up to 4 kg per bush. Frost-hardy down to -30°C. | All regions. In northern regions, winter shelter is required. |
| Orange miracle
|
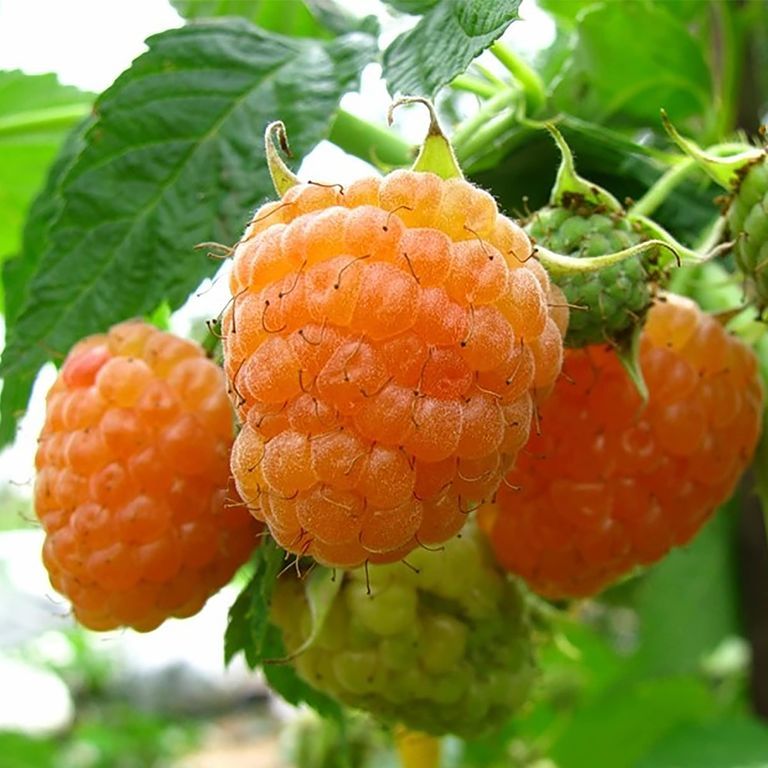
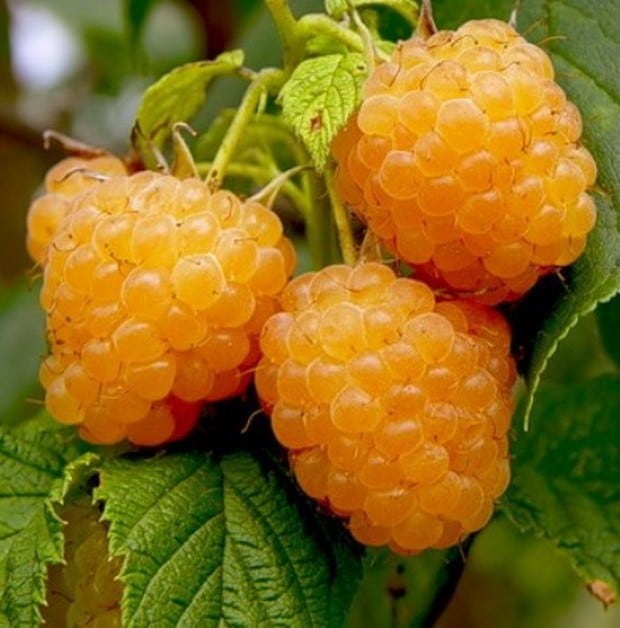
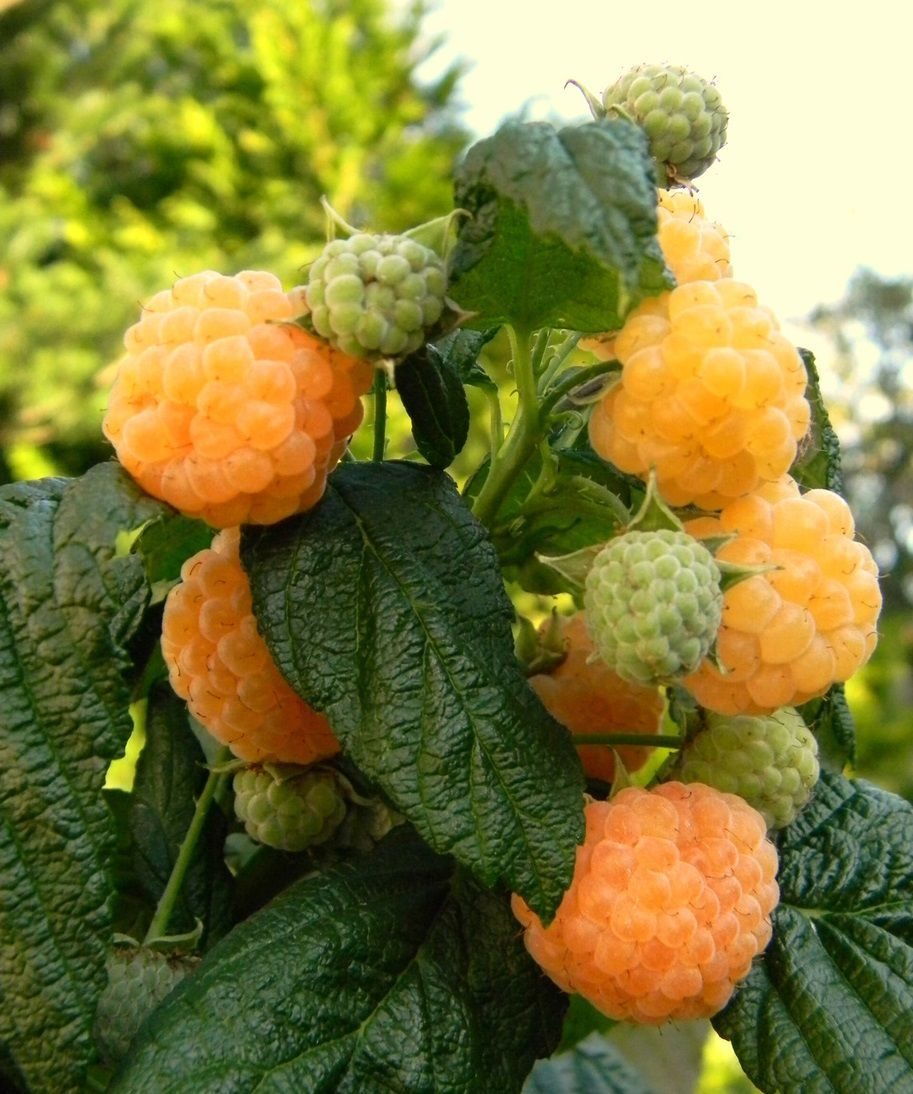
A remontant variety. A vigorous bush with spreading branches reaching 2 m in height. It has numerous thorns. The berries are yellow, quite large, 5-8 g. Yields 3.5 kg per square meter. Frost-hardy down to -35°C. | Bryansk, Vladimir, Voronezh, Moscow, Ryazan, Tula, Tver, and Yaroslavl regions. There have been cases of raspberries freezing at -27°C in the Leningrad region. |


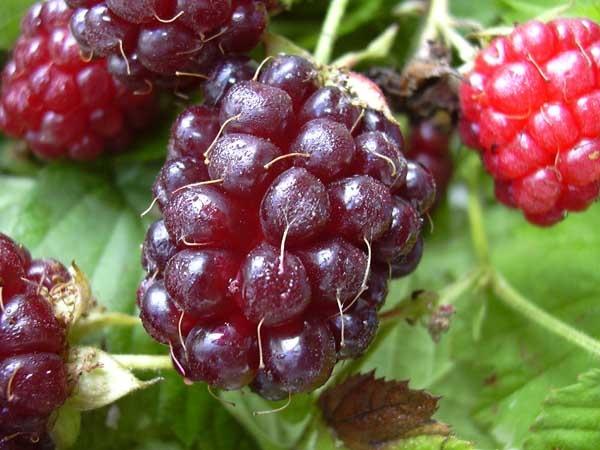
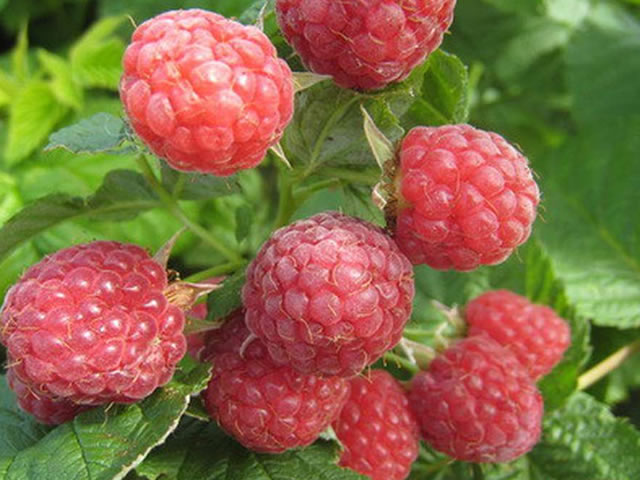
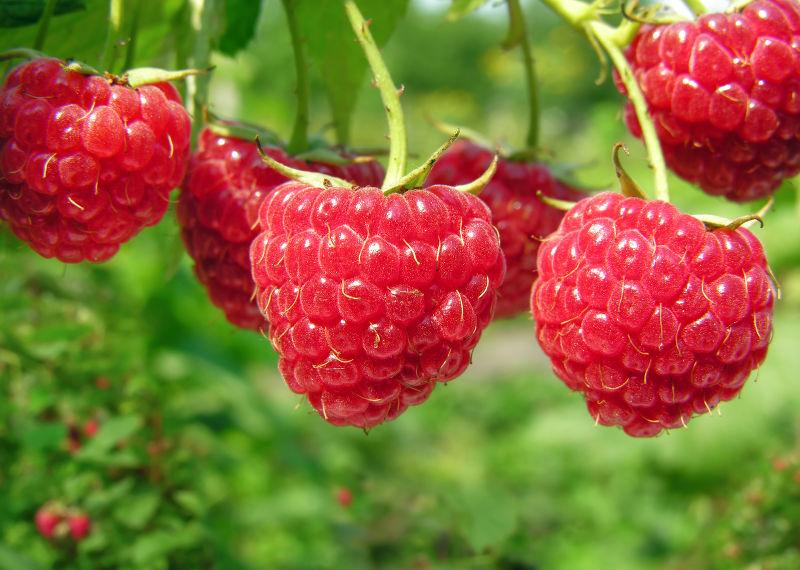
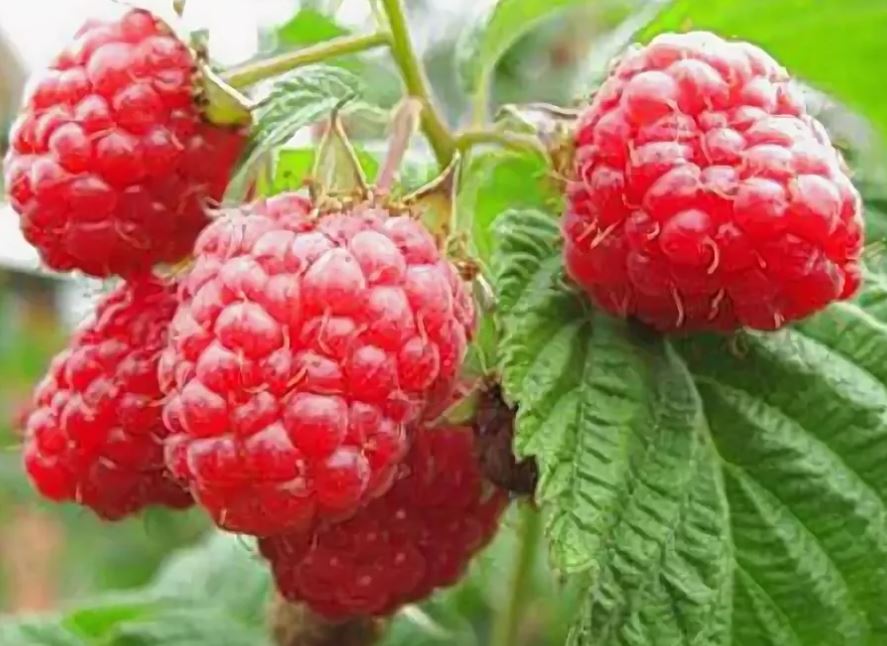
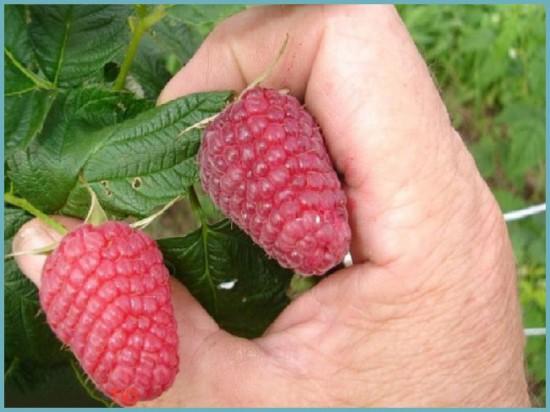


From the author. Much information has recently surfaced about the so-called Tibetan raspberry. In fact, this name refers to seedlings of the rose-leaved raspberry. I don't recommend planting it if you're aiming for a good harvest, as even with good care, the yield is no more than 1 kg per bush. Furthermore, picking the berries is inconvenient, as the bush is thorny. In our country, this raspberry is planted more for ornamental purposes.
How to prepare raspberry seedlings for planting
Purchased seedlings shouldn't be planted immediately. To ensure they take root well, they need to be prepared first.
Any pre-planting work should be carried out under a roof, such as a shed or barn. Young plants should not be exposed to direct sunlight or wind, as their delicate roots are too sensitive to external influences.
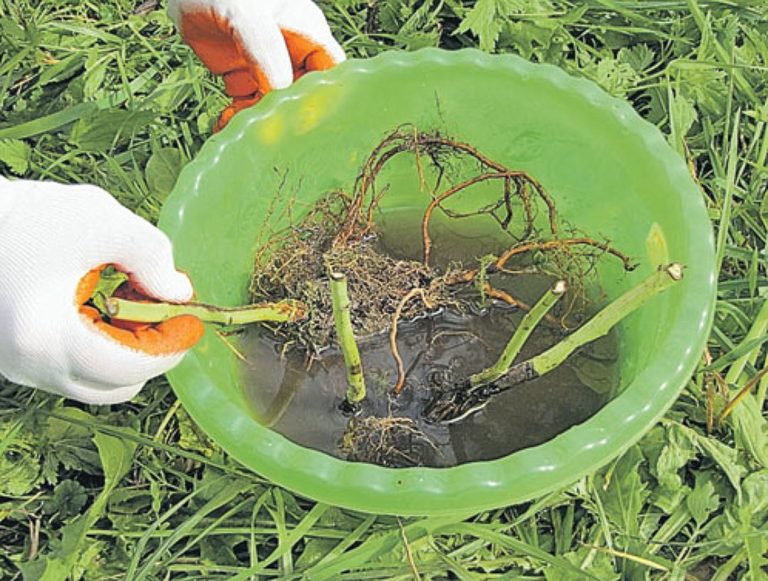
Carefully inspect the root system for damaged roots. If there are signs of rot, cut these areas off with disinfected, sharp pruning shears to prevent the disease from spreading and destroying the raspberry. Treat the cut areas with potassium permanganate or crushed charcoal.
Tall shoots should be trimmed back to just 25 cm of stem length. This will help the plant use its energy more efficiently, devoting it to root development rather than feeding the larger vegetative parts.
Before planting, wrap the roots in a damp cloth and leave them there for several hours. The water should be warm, as cold running water can stress them.
We recommend a video about raspberry propagation:
Preparing a plot for autumn planting of raspberries
Raspberries are planted in their designated location for several years to come. Therefore, it's important to choose the right bed and prepare it properly to ensure the bush continues to delight you with its harvest for as long as possible.
Choosing a location
The raspberry plot should be well-ventilated and have adequate airflow. Drafts and icy winds should be avoided, but moderate airflow is necessary. Some shade from tall trees is acceptable.
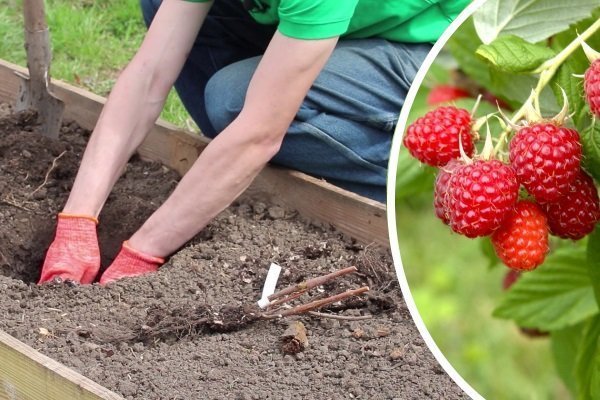
Planting berries in low-lying areas is not recommended, as the root system does not tolerate stagnant water. However, conditions at elevated elevations are also unfavorable—water quickly drains into deeper layers, often starving the roots of moisture.
Note: Raspberries can also grow well in the northern part of the plot, provided they are protected from the cold side by a fence or outbuildings.
Preparing and selecting soil for planting
Raspberries grow well only in fertile soil. If the soil lacks nutrients, the harvest will be meager, and young plants will begin to wither and turn pale.
There are different recommendations for different types of soil:
- Loam is the best option for planting raspberries. It retains moisture well. Humus and expanded clay will help increase fertility and improve aeration.
- Supersand is another suitable soil option for berries. It allows moisture to penetrate easily, and fertilizing it will help enrich the bed with nutrients.
- Sandstone. A bush will bear fruit well in this type of soil only with regular watering and fertilizing. Micro- and macronutrients are quickly leached from sandstone by rain and watering, so it's important to replenish them promptly.
- Clay soil. In such a bed, seedlings will thrive and yield little. Soil that's too compact doesn't provide room for root development and is reluctant to release nutrients. If this is the only type of soil on your property, adding sand at a rate of one bucket per square meter can help.
Raspberries have their own requirements for soil acidity:
- Soil with a neutral pH is best. If the pH is too high, lime can help lower it. Add lime to the bed at a rate of 0.5 kg per square meter.
- Seedlings don't thrive in alkaline soils. This is why experienced gardeners avoid using chalk and ash as fertilizers. These substances increase the pH, which leads to root death.
It's easy to determine the soil type in your garden without any equipment – if plantain, fireweed, sorrel, or horsetail predominate among the weeds, the soil is highly acidic. Clover and nettle prefer a neutral pH.
All fertilizers at the planting stage are applied by mixing them into the soil, rather than adding them to the hole along with the raspberries. When preparing the soil substrate, add 12 kg of rotted manure (compost can be substituted), 45 g of superphosphate, and 30 g of potassium sulfide per square meter.
To strengthen the root system and nourish it with organic matter, soak it in a solution of rotted manure for several minutes. This will help the seedlings better adapt to their new location.
Planting ends with watering the plants.
After which you can plant raspberries
Raspberries, like all other crops, have preferences regarding their predecessors and neighbors in the garden. They grow well after cucurbits (cucumbers, zucchini, etc.) and legumes (peas, beans, etc.).
It is strongly recommended not to plant a bush in soil where nightshades (eggplant, pepper, potato, tomato) and strawberries were previously grown.
What can I plant next to raspberries?
Garlic, apple trees, or marigolds make ideal neighbors. Avoid placing raspberries near radishes, grapes, strawberries, and parsley.
If planting partners are chosen incorrectly, plants may share common diseases and pests, which can quickly spread from bush to bush and overrun the entire plot. Furthermore, a well-chosen crop combination helps protect plants from external influences, provide shelter from the wind, and shade low-growing varieties.
Ideal neighbors for raspberries are:
- Lilac.
- Rowan.
- Apple.
- Pear.
- All varieties of currants.
- Plum.
- Red elderberry.
- Spicy herbs.
- Nettle.
But it is best if this bush has no nearby neighbors at all.
Distance between plantings
To ensure the berries grow well, the roots have enough space in the soil and nutrients, the plantings are not too dense, and care is not complicated, raspberry bushes need to be planted at a certain distance from each other.
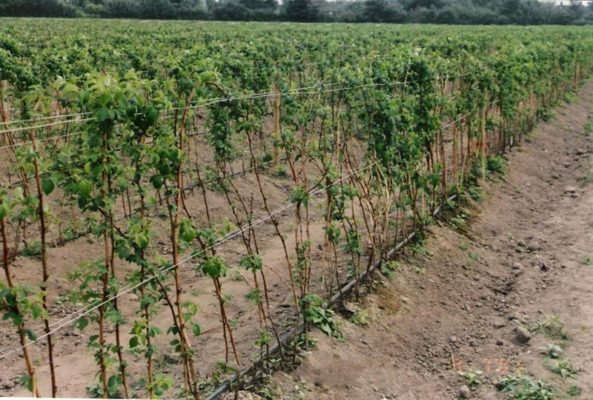
It depends on the type of bed and planting method:
- Row planting. With this method, the distance between seedlings is 70 to 100 cm. If multiple rows are planned, a 1-1.5 m wide gap should be left between them. Each hole should contain no more than two seedlings.
- The tape method involves planting raspberries at intervals of 40-50 cm. The distance between the tapes varies from 1.8 to 2 m.
Methods for planting raspberries in the fall with step-by-step instructions
Berries are most often planted using bush or trench planting. Strip planting is typically used on farms. Let's take a closer look at each of these methods.
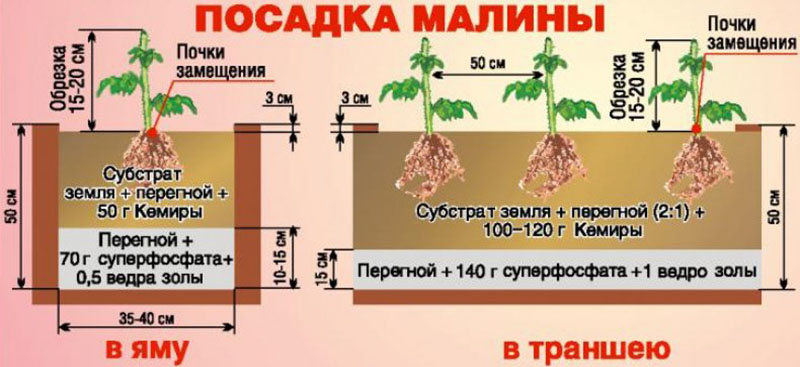
Bush (pit)
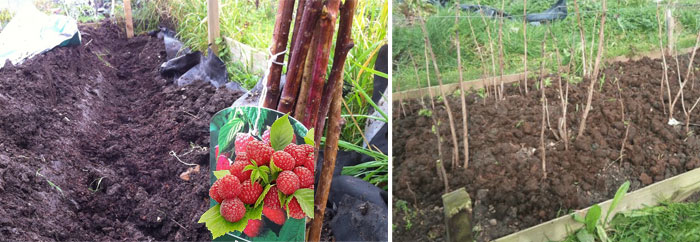
This method is called "pit" planting because the seedlings are planted in a pre-dug hole. It's ideal for regions with high humidity, allowing for a sparse raspberry patch. These plants will benefit from better warmth and ventilation, reducing the risk of disease and pests. Another advantage is that there's no need to pre-fertilize the soil.
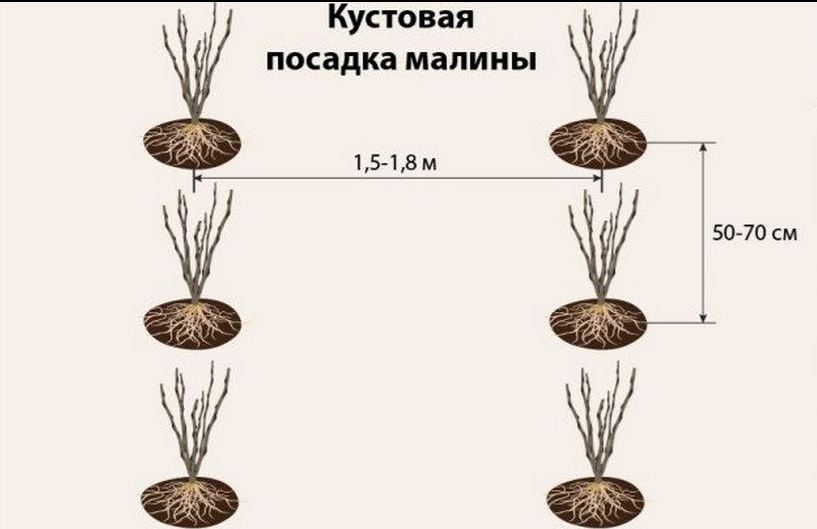
We offer step-by-step instructions for planting raspberries using the bush method:
- 10-14 days before the start of work, holes 30-40 cm wide and 40 cm deep are dug on a pre-prepared site.
- 5 kg of humus is poured into the bottom of each of them.
- The remaining soil after digging the holes is divided into two equal parts. One is mixed with 20 g of superphosphate and 10 g of potassium sulfate to create a nutritious soil mixture. If potassium is unavailable, 2 tablespoons of ash can be used instead. The second part is left for surface filling.
- Half of the hole is filled with the substrate obtained in the previous stage.
- The prepared seedling is placed in the hole, and the roots are carefully spread out along the base. The planting depth should be such that the root collar remains at ground level.
- The plant is covered with soil so that it is better distributed between the roots, and the seedling is gently shaken.
- Dig a hole in a circle around the planting and pour about 5 liters of water into it. Don't water the raspberries directly at the roots; the soil will wash away, exposing the entire root system.
- If the shoots are tall enough, they should be cut to a size of 20 cm.
- The soil is mulched using straw, humus or hay.
Ribbon
For larger plots, the ribbon method of growing raspberries is more suitable. It requires more preparation, but the results are very good.
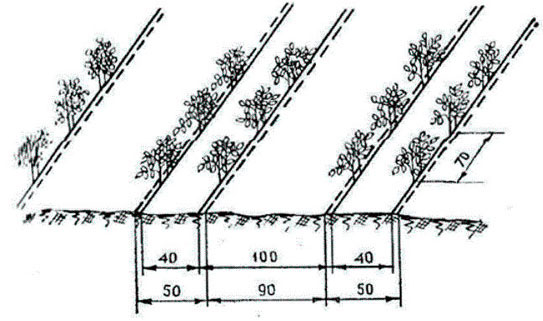
Step by step guide:
- A ribbon bed is a flat, straight bed. To prepare it, dig a trench 40 cm deep and wide. The length will depend on your preference.
- The soil resulting from digging is poured back into the ditch and mixed with 3 kg of rotted manure, 30 g of superphosphate, and 20 g of potassium salt. This amount is specified for 1 square meter.
- Seedlings should be spaced 40-60 cm apart to prevent future plantings from becoming too dense. The distance between rows should be at least 1.5 m. These figures aren't absolute. They depend on the variety's characteristics; the planting pattern is specified on the manufacturer's packaging. Generally, the taller the bush grows, the greater the distance required.
- The root system in the strip bed is straightened out so that the roots do not bend and are oriented vertically downwards.
Strawberry planting can be single-row (as discussed above) or double-row, where one strip consists of two rows of raspberries. The latter method requires several rules:
- Within one strip, rows of raspberries should be located 40-80 cm from each other, the more precise distance is determined depending on the variety.
- The seedlings are planted at a distance of 40-50 cm from each other, as in single-row cultivation.
The main advantage of two-row ribbon cultivation of berries is the saving of space on the plot.
Trench
Trench planting is a variation of the strip planting method, with one difference: a nutrient layer is placed in the trench beforehand. This is necessary to ensure the plant can absorb nutrients over a long period of time. Furthermore, the layer creates additional warmth as it decomposes.
Step-by-step algorithm for creating a trench:
- A trench 70 cm wide and 40 cm deep is dug according to the previously made markings.
- If the soil on the site is heavy and clayey, a 10-15 cm layer of sand is poured into the bottom of the trench. Dry branches and leaves, hay, and green organic matter are placed on top. To ensure that they all rot simultaneously, the layers are interspersed with sawdust.
- Next, the created layer is watered.
- The top layer is covered with a mixture of fertile soil, mineral fertilizers, and organic matter. After this, you can begin planting the raspberries, which is done in the same way as for strip cultivation.
If you doubt the quality of the organic matter used to create the interlayer, disinfect it first.
In-line
This is another variation of strip planting, differing in the number of rows or trenches. Planting is done using the classic method; the need for an organic layer depends on the soil quality and climate conditions in your area. The most important thing is to maintain the correct spacing between rows to prevent the plants from growing too densely.
Planting in containers or tires
This method is very similar to the potting method, using old tires or sturdy containers as the recesses. It's used when the soil on the site is unsuitable for planting raspberries, for example, in very marshy areas. Its advantage is that the bushes won't spread across the entire site.
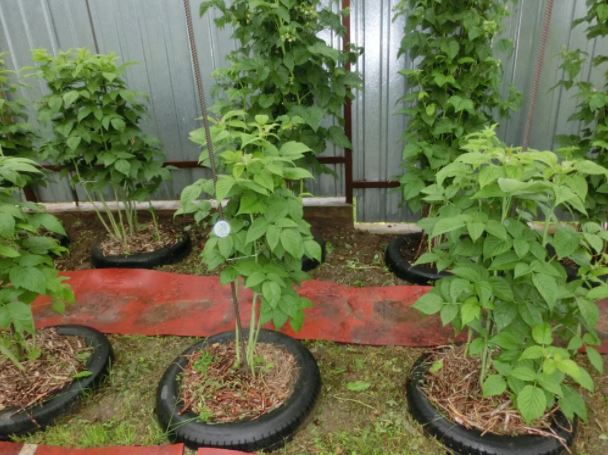
Regardless of the planting method you choose, it's important to border the bed to prevent it from spreading across the entire plot. For this purpose, use boards, iron sheets, or slate.
Transplanting raspberries to a new location in the fall
Fall replanting should only begin if there are at least 3-4 weeks left before the first frost. This period typically falls between the second half of September and early October, depending on the region.
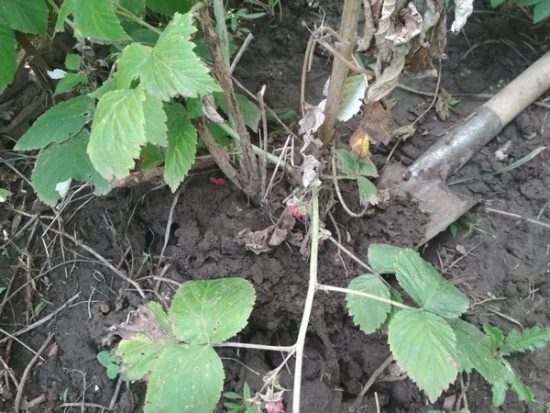
You can begin replanting raspberries only if the following conditions are met:
- All the dry leaves have fallen from the stems.
- Replacement buds have formed on the root collar.
There are a few more subtleties that need to be taken into account when replanting bushes in the fall:
- The shoots should be of medium thickness.
- The root system must be well developed, with no damaged, dry or rotting roots.
- The optimal number of shoots on seedlings is 3.
- The length of the shoots is about 70 cm.
- The bush looks healthy without visible damage, blackening or swelling.
If you plan to plant the raspberries not immediately after digging, wrap their roots in a wet cloth, which will need to be regularly moistened as it dries out.
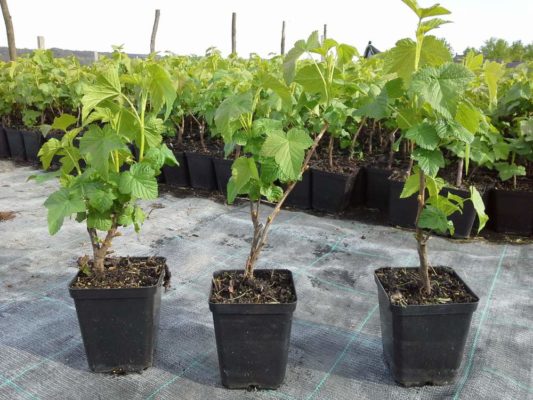
Before planting berry bushes in the soil, the roots need to be disinfected. Various soaking solutions can be used for this, such as clay solutions or those made from biologically active compounds (Kornevin, Rostkontsentrat, and others).
Features of planting raspberries in autumn
After planting raspberries in the fall, it is important to provide good care so that the plant adapts quickly and takes root well in its new location.
Watering
The plant needs watering during planting. When planting, water the soil thoroughly, then take a short break. This helps the roots grow better. If your region experiences heavy rainfall in the fall, additional watering is not necessary. This should only be done after the soil has dried out.
Before the onset of winter, the bed is watered to a depth of 40 cm; experienced gardeners call this "moisture-recharging" watering. This is done to increase the plant's frost resistance.
Fertilizer
Raspberries don't require additional feeding in the fall; all the necessary nutrients were added during bed preparation. This amount will be sufficient for the plant for the next 2-3 years.
If your soil allows you to plant raspberries without additional organic layers, you can add a small amount of fertilizer after planting. To do this, dig shallow furrows between the rows along the entire length and add 40 g of potassium salt and 60 g of superphosphate per bush. Water the plants afterward to ensure better dissolution and penetration of the minerals into the soil.
Trimming
Spring planting of seedlings requires pruning them to a height of just 15-20 cm. Pruning in the fall is not recommended. If the weather is too warm, side shoots may begin to grow prematurely. They will certainly not survive the winter, and for a young bush, the loss of even a small portion can lead to disease and stunted growth.
Mulching
Mulching should be done in the fall, immediately after planting. A thin layer is sufficient initially, and additional mulch is added during the winter. This helps protect the plants' root systems, allowing them to better survive frosts and adapt to their new location more quickly. This procedure is especially important in regions with light snowfall.
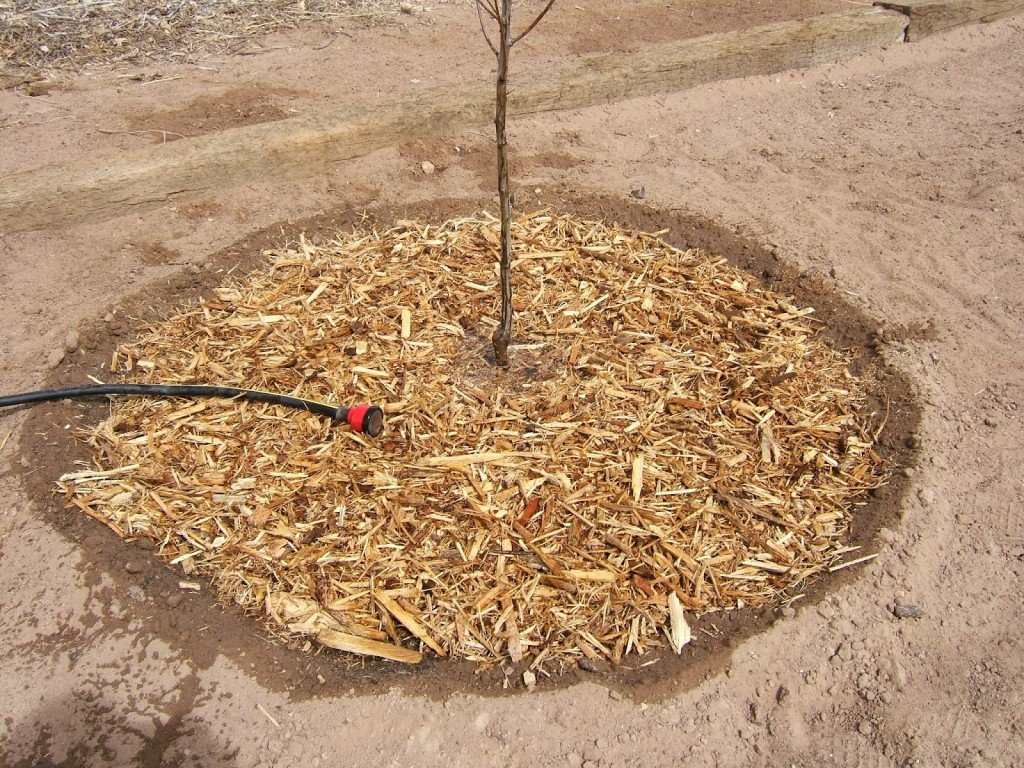
Almost any organic material with a neutral pH level can be used as mulch material.
The following are best suited for mulching raspberries:
- Peat. Raspberries readily absorb all the beneficial macronutrients contained in this "bog" fertilizer. It can be spread over the garden bed even if there's light snow cover. The optimal layer is 5-7 cm.
- Sawdust. The most readily available and popular mulch among gardeners. Within 2-3 years, it will rot and turn into humus.
- Compost. Best suited for spring mulching due to its high nitrogen content, which stimulates green growth. It is not recommended for use in winter.
Before the onset of frost, you can additionally cover the bed with straw or rotted leaves.
Preparing for winter
In southern regions, simple mulching is sometimes enough to ensure the bush survives the winter. In cold winters, which are common in the central part of the country and severe frosts in northern regions, plants need additional protection. Snow cover provides natural protection for the roots, but it's not a reliable option. If frost occurs before it sets in, the roots may freeze, and the raspberries will die.
Preparing raspberries for winter is carried out in several stages:
- If the weather is warm and there is no precipitation, then the plantings need to be watered.
- Next, loosen the soil and mulch the bed with peat, spruce branches, or dry leaves. This layer should be at least 10 cm thick, otherwise it will be ineffective.
- If winters in the region are characterized by severe frosts and the variety lacks the required frost resistance, the shoots are bent toward the ground a week before the frost. This must be done very carefully, with all parts of the bush bent to one side and secured to ground level with rope and stakes. To provide additional warmth, the raspberry patch is covered with snow.
Specifics of planting raspberries in the fall in different regions
Each region has its own unique challenges when it comes to fall raspberry planting due to varying weather conditions. Let's take a closer look.
When to plant raspberries in the fall in the Moscow region
Work begins in early September and continues until the end of November, depending on weather forecasts. Experienced gardeners consider the first two weeks of October to be the most favorable time for planting raspberries. This gives the plants time to establish roots and survive the winter well.
Early and ultra-early varieties are very popular with gardeners, allowing the first harvest to begin as early as late June, when most other berries are still unripe. Among them are: Gusar, Bryanskaya, Sputnitsa, Bryansky Kaskad, Kuzmina Novost, Ranniy Surprise, Solnyshko, Meteor, and Lazarevskaya.
Autumn planting of raspberries in the central zone
Raspberry planting can begin here in the second half of September. If there is no prolonged rain and the weather is warm enough, planting can continue until mid-October.
After planting, minimal care is required. Watering is only necessary if the soil is dry. It should always be slightly moist to promote root development and allow the roots to become established for the winter. If it rains, no additional watering is required.
When and how to plant raspberries in Siberia in open ground
This region is characterized not only by harsh winters but also by the earlier onset of cold weather. Therefore, raspberry planting times shift by a month compared to central Russia. Gardeners begin work as early as mid-August, then rely on the weather. If the forecast doesn't predict night frosts, transplanting can be done as early as mid-September. However, if there is continuous rain and temperatures are cool, it's best to postpone transplanting until spring. Under these conditions, the bushes won't have time to harden before the first frost.
The site must meet several criteria:
- good lighting;
- no drafts;
- flat surface;
If natural watering is not enough to moisten the soil, you will have to additionally water the plants yourself.
The method of preparing beds is not much different from other regions:
- The soil is pre-dug, weeds are removed and organic fertilizers are added.
- For better growth, a cushion of soil and fertilizer is created on which raspberries are planted.
- If the soil is not moist enough, then additional watering of the plantings is necessary.
With proper care, raspberries will grow well in all regions if the necessary conditions are created.
The following varieties are suitable for the northern regions and Siberia: Early Sweet, Siberian Flame, Barnaul, Reward, Dar Sibiri.
Peculiarities of planting everbearing raspberries
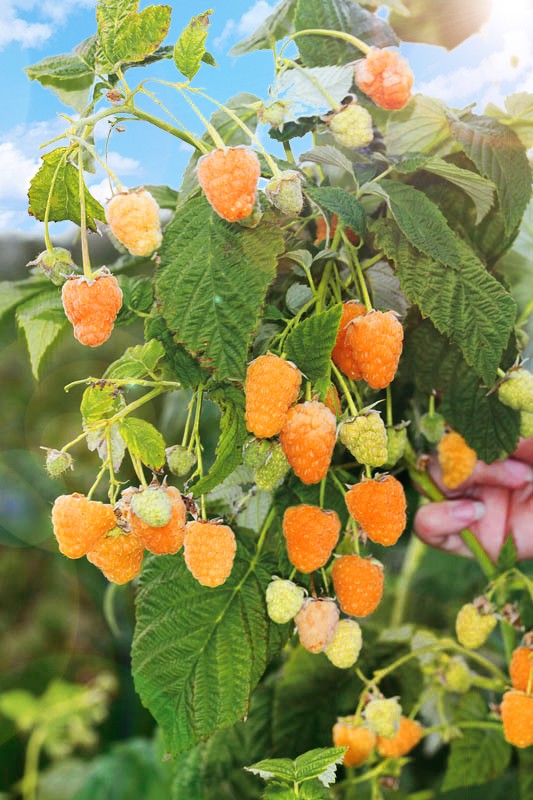
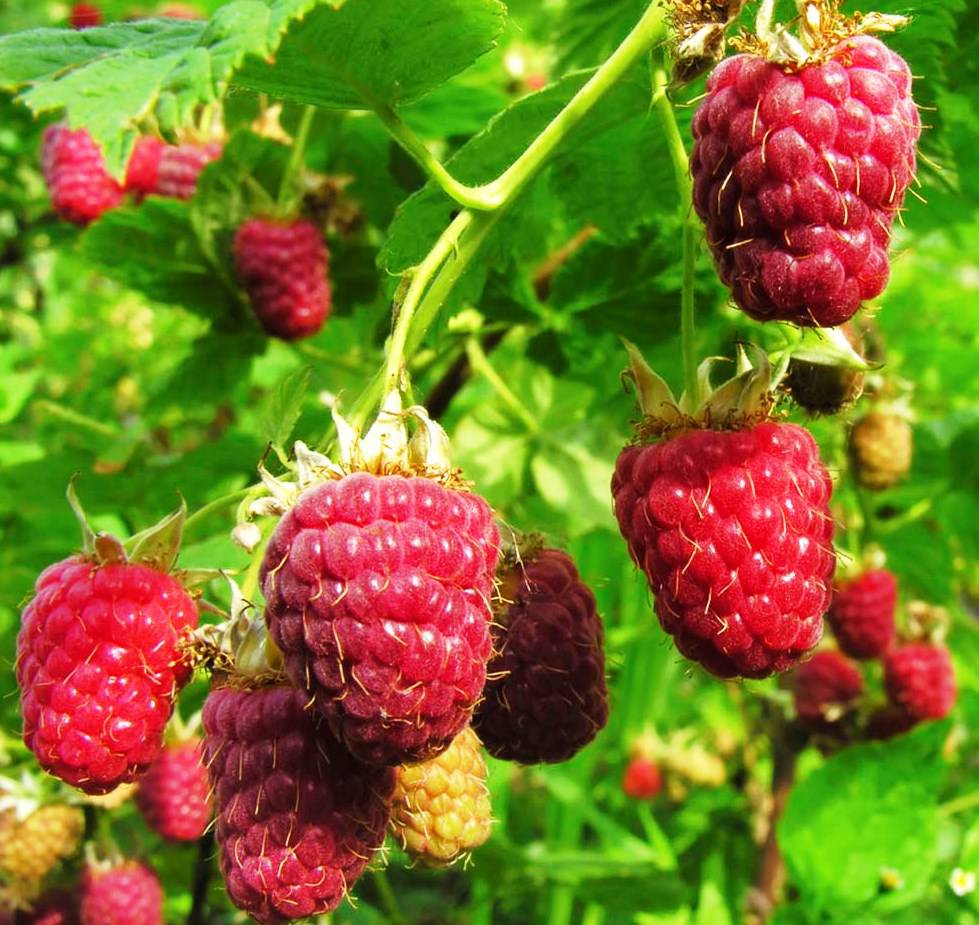
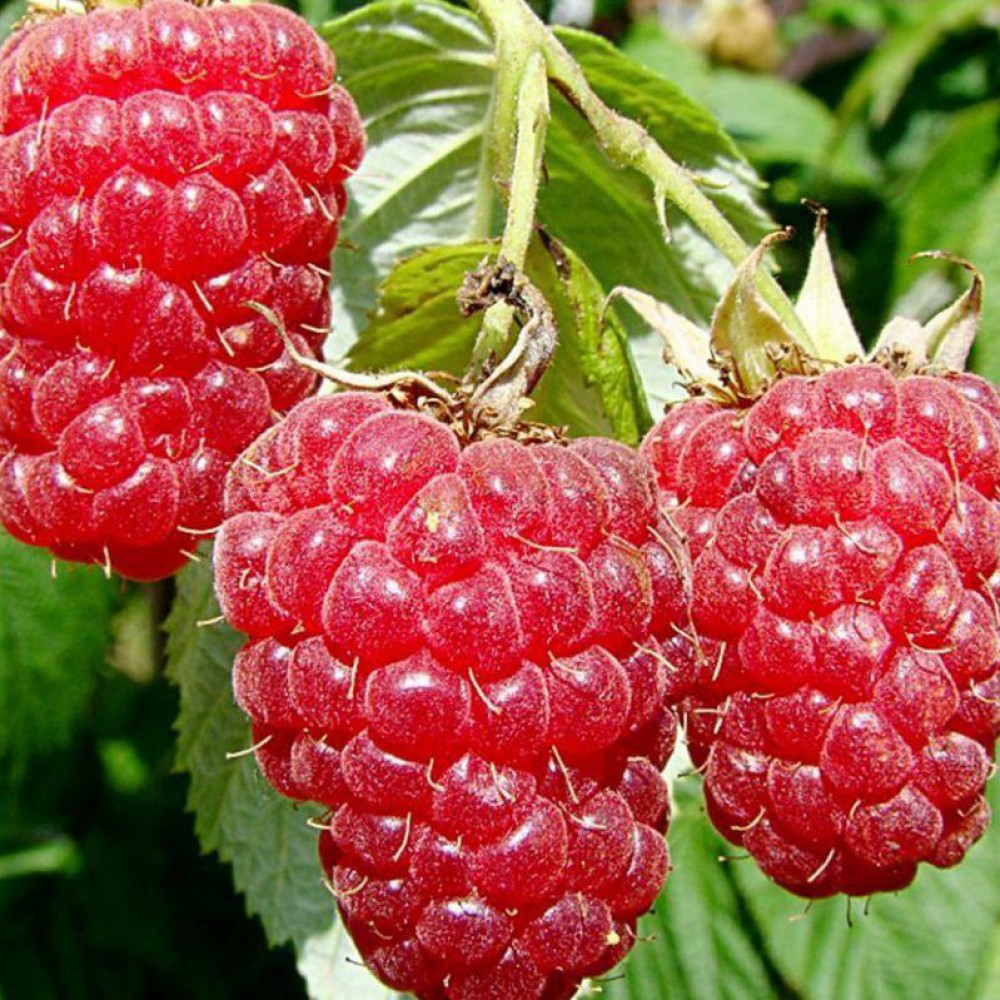
Everbearing raspberries thrive in sunny locations. Sunlight should reach the plantings throughout the day, as this directly affects the quality and volume of the future harvest.
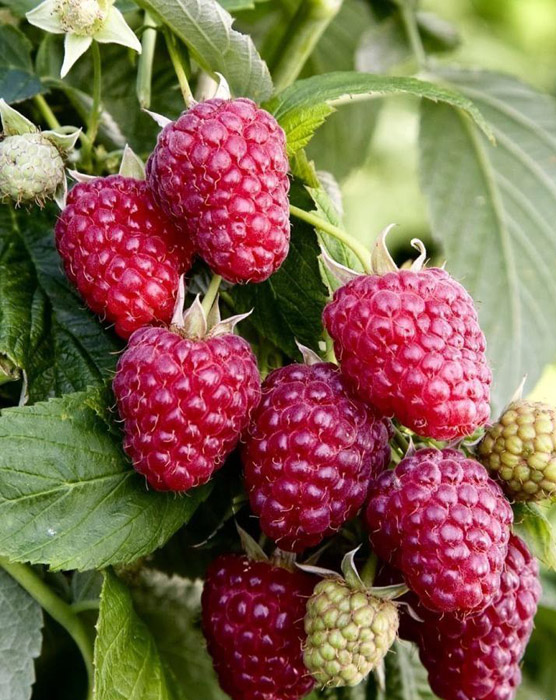
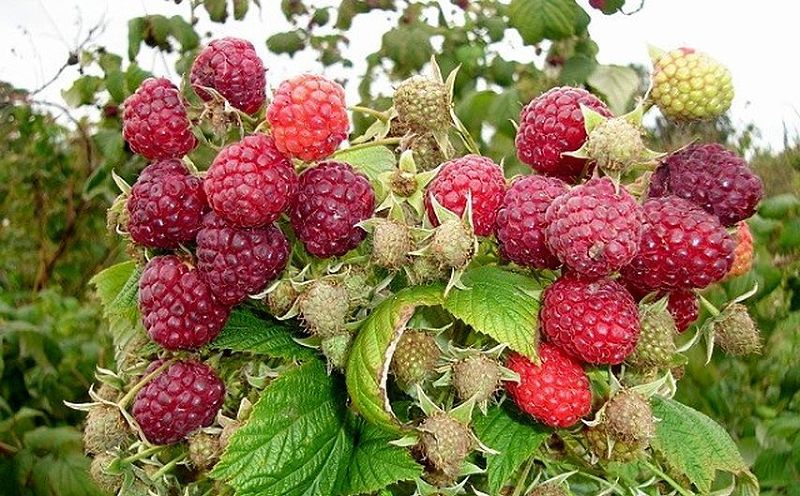
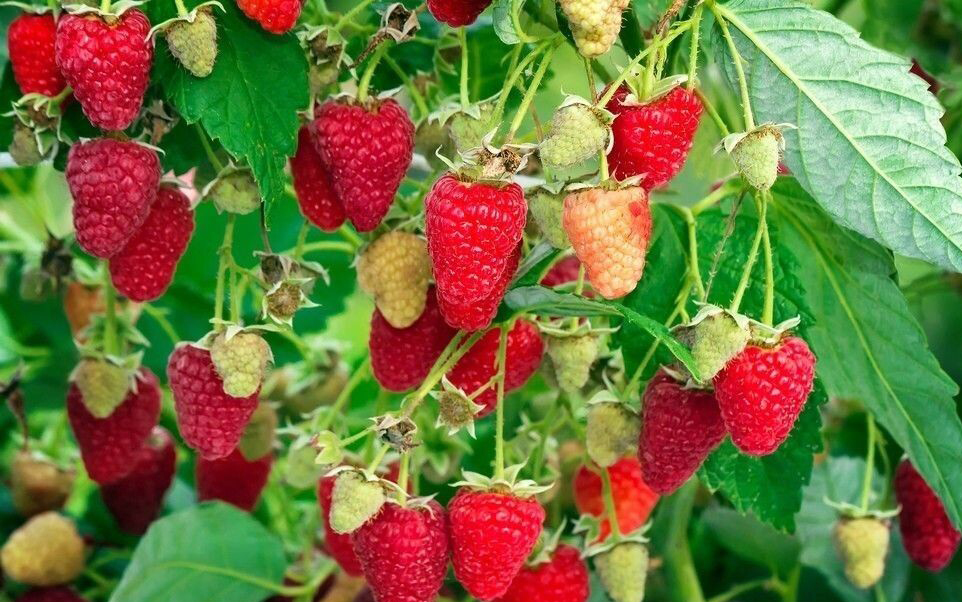
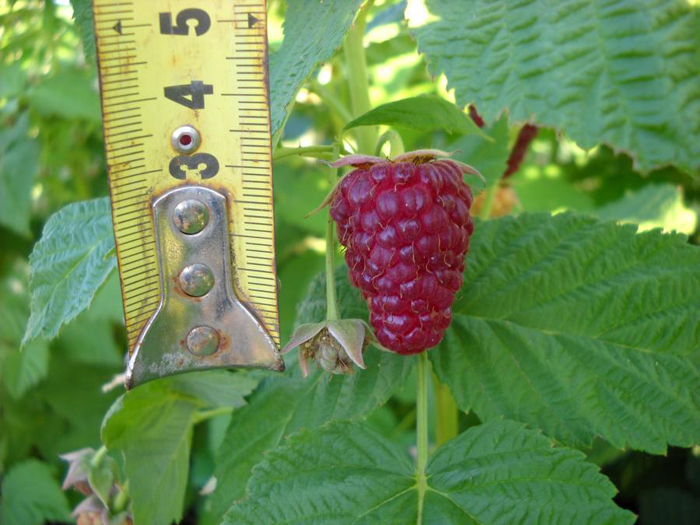

Choose a part of the garden that is reliably protected from drafts.
There are two main methods for planting remontant raspberries:
- Trellis. Sometimes a fence is used as a trellis, but more often it's a pair of stakes driven into the ground with mesh or wire stretched between them.
- Clumping. Used for weak seedlings, this method involves planting 2-3 bushes in a single hole.
Planting times vary by region and weather conditions, but the main rule remains the same: at least 4 weeks must pass from planting until the first frost.
After planting, plants must be fed either with chicken manure at a rate of 0.5 kg per 10 liters of water, or with rotted manure at a rate of 1 kg per 10 liters.
Before the winter period, the bed is covered with a layer of mulch.
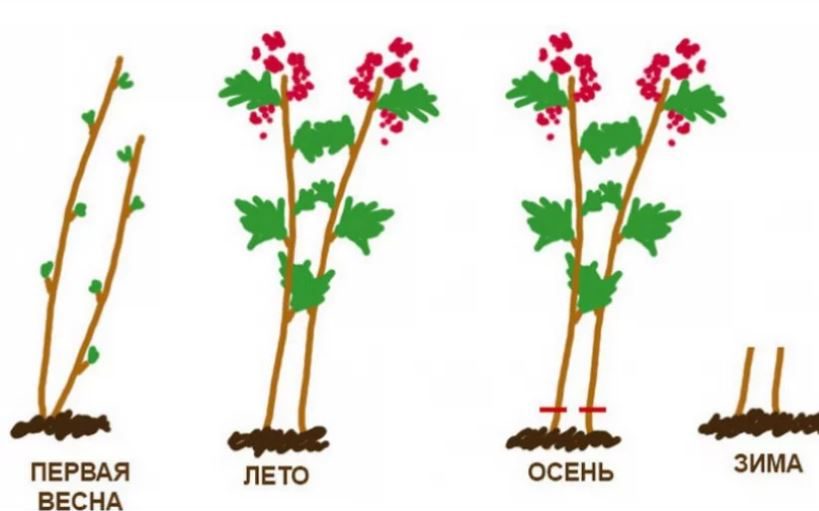
Everbearing raspberries can be planted:
- Seedlings. The key to this method is covering the root bud with soil. Furthermore, the seedling should be positioned in the bed 4 cm lower than its level in the nursery.
- Root suckers or "nettles." To do this, first prepare holes 30 cm deep. The root suckers are placed in them along with a lump of soil on the roots. The hole is then filled with soil and watered thoroughly.
- Cuttings. A mature bush is dug out of the ground, and the roots are cut to a width of 5 mm. The cuttings should be 15 cm long. The cuttings are planted in pre-prepared furrows at a depth of 4 cm, using the chain planting method.
Top.tomathouse.com warns: common mistakes beginners make
Many novice gardeners make a number of mistakes that lead to crop failure or a small harvest. Our portal http://top.tomathouse.com warns about these:
- The landing was carried out too earlyIn this case, if the weather is favorable, the plant begins to produce new shoots. These will not be able to survive frost, which will inevitably weaken the raspberry's immunity.
- The garden bed is poorly lit and dark.When sunlight is insufficient, shoots begin to actively stretch toward the sun, preventing them from developing properly and resulting in thin and weak growth. Such a bush will likely not survive the winter due to a lack of accumulated nutrients.
- Raspberries are planted in clay soil, in which fluid stagnation occurs.
- Insufficient pruningIf a shoot is left taller than 20 cm, it will begin to draw away too many nutrients, resulting in weakened roots and slower growth.
- Poor quality seedlingsIt's best to buy raspberries from reputable sources, such as specialized nurseries. Prices are slightly higher there than from private sellers, but the chances of the bush growing strong and healthy are higher. Carefully inspect the roots; they should be alive and free of dry or rotten areas.
When to expect fruiting after planting
Fall planting allows you to harvest the first berries the following summer. This is only possible with proper care.
To get tasty berries in large quantities, you need to follow these rules:
- Plant raspberries in accordance with all agricultural requirements.
- Select healthy seedlings.
- Ensure the required level of soil moisture.
- Cover plantings for the winter.
- Carry out treatment with Karbofos, pouring a solution of 10 ml and 10 liters of water under each bush.
- Sprinkle the soil with a solution of copper sulfate to prevent the development of fungal diseases and the appearance of lichens.
With proper fall preparation and timely spring care, you'll be able to harvest your first raspberries by the end of June. The fruiting period depends on the variety you choose.
The biggest challenge in fall planting is the inability to predict the timing of the first frost. Weather forecasts are often incorrect. All other stages pose no difficulties for gardeners.
Raspberry propagation in autumn
There are several main ways to propagate raspberries in the fall; we will look at each of them in more detail.
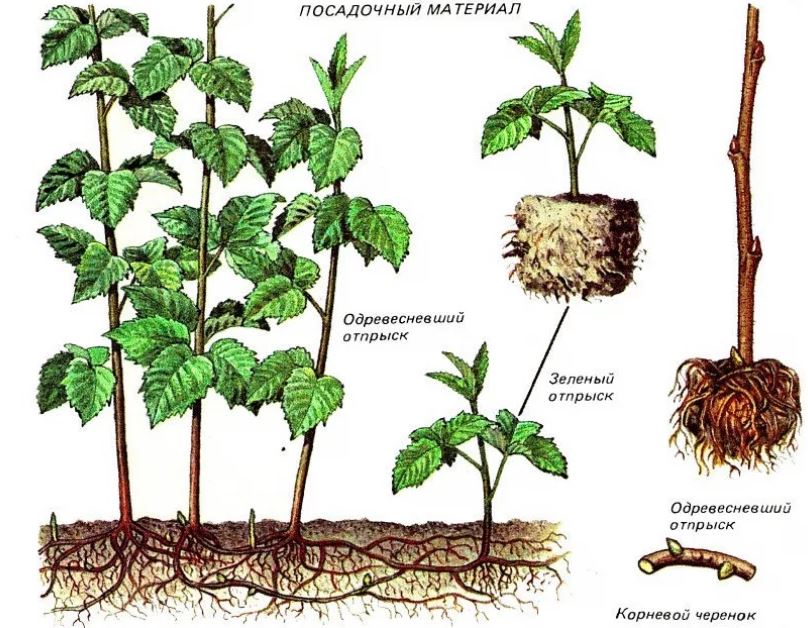
Propagation of raspberries by suckers
The most common method is to propagate raspberries by suckering them. These suckers grow from adventitious buds; for propagation in the fall, woody root suckers should be selected. In the spring, green suckers are used.
Propagation of raspberries by woody shoots
Woody shoots are separated from the main bush in the fall. To separate them, you need to:
- Select the most developed, healthy bush without visible damage or signs of disease.
- Dig it up, select the most viable shoots and separate them from the main mass.
One of the conditions for successful propagation is to select only fresh shoots that have emerged this season. Experienced gardeners recommend choosing shoots that are 25-30 cm from the main stem; closer shoots should be avoided.
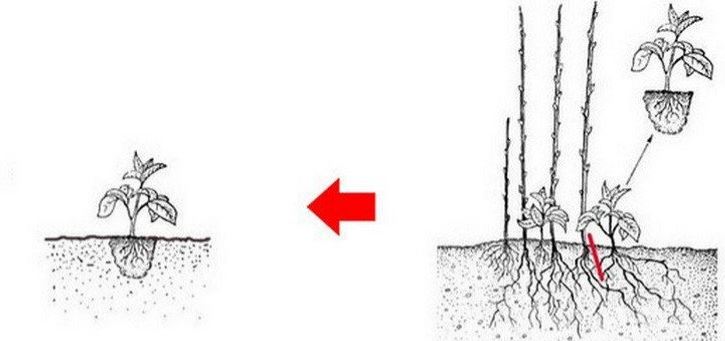
They should be separated in such a way that as many root shoots as possible remain, approximately 10-15 cm long. They can be longer, but definitely not shorter, otherwise the plant may not take root.
What shoots cannot be used for propagating raspberries?
Some disease lesions are visible only on the root system or at the base of the stem. Carefully inspect the cutting you intend to use. If the base of the cutting is covered with small swellings, this indicates a gall midge infestation; such material should not be used under any circumstances.
If you notice blue spots on the roots, know that they are a sure sign of purple spot. These should be removed from the bush and burned. If the affected area is large, the entire raspberry bush should be burned.
Sometimes, oddly shaped swellings are clearly visible on the roots. These growths usually indicate root canker. It's highly contagious, and the bush will have to be burned.
Planting woody shoots
Healthy shoots have straight stems and succulent roots, making them ideal for propagating raspberries. The key is to remove all leaves so the plant doesn't waste energy on their development.
Please note! For spring propagation of raspberries, green shoots that have already reached 15 cm in length are suitable.
Propagation of raspberries by cuttings
Gardeners usually take cuttings from their favorite raspberry varieties, which have been growing in their plots for a very long time; the berries are producing less and less, but they really want to keep them, but it is not possible to buy them.
For fall replanting, root cuttings should be used; green cuttings are only suitable for spring and summer replanting. Woody cuttings will not root new plants.
Propagation of raspberries by root cuttings
Experienced gardeners know that the best time to propagate raspberries is with root cuttings in the spring. However, if you don't have time for this work at the beginning of the season, you can begin in the fall, following all the necessary agricultural practices:
- The raspberry bush is dug up at a distance of 40 cm from its center. This work is carried out with extreme care to avoid damaging the adventitious root and its branches.
- After the cutting is removed from the soil, the roots are prepared. Any roots thicker than 3 mm are cut so that they are 10 cm long, but with at least two or at least one living bud.
- There is no need to remove the overgrown roots; they remain in the same state in which they were removed from the garden bed.
Planting root cuttings
- After the root cuttings have been cut, they need to be soaked for 1-2 hours in any suitable growth activator solution.
- Next, prepare the bed by digging up the soil thoroughly.
- Remove all weeds, loosen and moisten the soil, and fertilize it at a rate of 1 tbsp of potassium sulfate per 1 sq.m.
- The optimal depth of the furrows is 5-7 cm.
- The cuttings are immediately transferred from the solution to the garden bed; there's no need to rinse off any remaining solution. They should be placed in the furrow, one after the other, without leaving any gaps between them.
- At the next stage of planting, the remaining soil is sprinkled on top; it must be carefully but firmly compacted so that there are no voids left inside.
- Water at a rate of 1 bucket per 1 square meter. Melt or rainwater, preheated to room temperature, is best.
- To help cuttings root faster and thrive, they can be planted in a greenhouse. When growing in this manner, it's important to monitor the soil moisture level. In enclosed structures, the soil dries out faster, so water more frequently. However, overwatering the bed is also a bad idea, as this can activate fungi and cause rot.
After planting, caring for cuttings comes down to a few points:
- Fertilizing in spring with nitroammophoska at the rate of 1 tbsp per 1 sq.m.
- Timely removal of weeds.
- Water regularly as needed.
- Loosening the bed to improve aeration.
Propagation of raspberries by dividing the bush
This is the easiest method for propagating raspberries. It's used when you have a mature bush and want to divide it into two or three parts.
- At the end of the season in September, the bush is dug up, trying to preserve as many roots as possible. It should be noted that this process is quite labor-intensive and time-consuming.
- The bush is divided depending on its size. Sometimes two seedlings are produced, while other times five can be separated.
- The planting material is immediately transferred to a permanent bed; it is best to use the hole planting method.
Caring for raspberries after dividing the bush
After the separated sections of the bush are planted, all above-ground shoots should be pruned. Only those growths that have already formed 2-3 live buds should be left intact. Water the bed regularly throughout the season until the seedlings begin to grow.
Each individual planting requires additional feeding:
- In spring it is carried out using 1 tbsp of nitroammophoska,
- In summer it is enough to add 1 teaspoon of potassium sulfate,
- In the fall, fertilizer is added to the soil after the harvest. Wood ash, at a rate of 250 g, is best for this purpose.
Propagation of raspberries by seeds
This method also has its place, but it is used exclusively by breeders for the purpose of developing high-quality raspberry varieties.
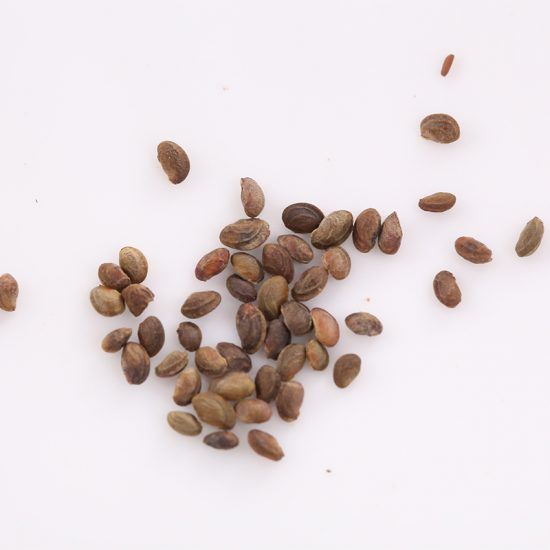
It's not practical to do at home due to its extreme labor intensity and slow results. It's performed as follows:
- From all available seedlings, a pair of plants is selected whose yield differs in volume, size and taste.
- The seeds are separated from the berries and planted in pre-prepared containers with soil.
- Seedlings appear only the following year; usually no more than 10% of all seeds hatch.
- Plant care is carried out in the usual way; replanting can only be done in the third year.
Growing raspberries using Sobolev's method
Many breeders have tested what they considered effective cultivation methods. But the method of Kuban gardener A.G. Sobolev has gained the greatest popularity. His method has become widely adopted and is very popular among gardeners across the country.
Raspberries are considered an easy-to-grow plant, growing in virtually any garden. Even the most unsuitable soil can be properly prepared to ensure the bush produces fruit well. Sobolev developed his own method that, when followed, results in significantly higher raspberry yields. This requires adhering to a number of agricultural requirements:
- The beds are placed on the plot in a north-south direction. They can also be placed in an east-west direction.
- The soil should not be swampy with constant stagnant moisture.
- To retain water within the plantings and prevent the raspberries from spreading across the plot, the bed is bordered with slate sheets or wooden boards. Most of the structure is dug into the ground, with the rest protruding 20 cm above the ground. For warmer beds, a wooden box can be constructed.
- The length of the bed depends on the number of seedlings, and its width should be 1 meter. The distance between plantings should also be approximately 1 meter. Many gardeners ignore this rule, reducing the distance to save space. However, this measure allows the bush to be evenly exposed to the sun and wind, which reduces the risk of disease. Proper spacing has a beneficial effect on the future harvest.
- The best time to plant raspberries is early fall. Prepare a separate hole for each seedling, about 40 cm deep. Planting several plants in the same hole will slow their growth due to a lack of nutrients. If all the rules are followed, raspberries will remain in the same spot for up to 15 years without losing the quality of their fruit.
- In spring, mature raspberries need to be pruned to encourage new shoots to form. These should also be shortened in the first two weeks of June, leaving a height of 80 to 100 cm. This is done to prevent the berries from breaking the branches and to make the bush easier to care for.
- A year later, the following spring, a second pruning is performed. By this time, the previous year's young shoots have strengthened and developed into main stems, from which new shoots begin to emerge. These should be trimmed back, leaving no more than 15 cm above ground level. This procedure is guaranteed to increase the number of ovaries, which directly impacts the bush's fruiting.
- Among the newly emerging shoots, you should leave only three or four of the strongest and healthiest ones; remove all the rest. If you don't want to get rid of the shoots, you can carefully dig up the shoots and plant them in a new bed.
When a bush simultaneously has both young shoots and stems bearing berries, the fruiting period is significantly extended. This allows regular raspberries to become everbearing raspberries. This method of propagation and planting increases their resistance to diseases and pests.
Once the bed is formed and the raspberries are planted, no further soil loosening is required. The key to Sobolev's method described above is double pruning, which is the key to a bountiful harvest. The remaining care follows the classic pattern: water the bushes as the soil dries, mulch the bed, periodically apply various fertilizers, and tie up the bushes if a tall variety is chosen.
Watering is crucial when caring for raspberries. This should be monitored very carefully, especially during the adaptation and fruiting stages.
According to Sobolev's method, mulching is best done with manure, spread 15-20 cm from the bushes. It is then watered, and as it dries, a crust forms on top. This crust helps retain water in the soil and nourishes the soil with essential organic elements. In this case, additional fertilizer is not required.
Tips from Top.tomathouse.com
There are no particularly complicated tricks to planting raspberries. Even a novice gardener can handle it if they follow a few important guidelines.
- Pay close attention to the root system of the seedlings you purchase. Carefully inspect the bush – the roots should be strong, without dry spots, signs of rot, or damage.
- Consider the soil type in your area. Loamy and super-sandy soils are best for raspberries. Black soil will do just fine. Any other type will require fertilization before planting.
- Level the raspberry patch. The berries shouldn't grow on a slope, as moisture will drain quickly and the bushes won't be able to develop properly. Additionally, the planting site should be slightly shaded and protected from strong winds.
- Prepare holes of the correct size. Approximately 40 x 40 cm. This may vary depending on the variety chosen. The main thing is that all the roots can fit vertically in the hole, and the growing point is at ground level.
Answers to frequently asked questions
Is there any way to limit the growth of raspberries? Yes, it's possible. To do this, barriers made of metal sheets or tiles are dug into the ground.
Which variety is best to choose for planting? Choose raspberries that are suitable for your region and produce a high yield. A universal, all-Russian variety has not yet been developed.
Should I water the beds after planting? Watering is essential. Raspberries are moisture-loving plants. Watering should be limited only when planting in the fall after a rainy season.