In autumn, when the harvest is all in and all preparations are made, a quiet period sets in. During this period, gardeners have free time to properly engage in autumn plant preparation. In this article, we'll explain when and how to plant currants outdoors so they take root well and produce a bountiful harvest in the spring.
It makes absolutely no difference whether you plant red, white, or black currants. Planting currants in the fall follows the classic pattern.
Content
- 1 Pros and cons of planting currants in autumn
- 2 Timing of planting currants
- 3 10 Best Currant Varieties for Fall Planting
- 4 How to plant currants in the fall: step-by-step instructions
- 5 Methods of planting currants
- 6 How to propagate currants from a bush
- 7 Caring for a currant bush after autumn planting
- 8 Possible mistakes when planting currants in autumn
- 9 Tips from Top.tomathouse.com for beginning gardeners
- 10 When is it better to plant currants – in autumn or spring?
Pros and cons of planting currants in autumn
Of course, autumn work always carries a risk. But it has several advantages over spring planting:
- Rooting occurs in a shorter period of time.
- Pest activity is minimal.
- The plant adapts faster.
- In spring, seedlings appear almost simultaneously.
- The crown is forming more actively.
If autumn planting of currants is carried out correctly, the bushes will not only take root well, but will also produce an excellent harvest in the summer.
In this work, even the smallest recommendations cannot be neglected; every detail is important both during planting and during the care period after its completion.
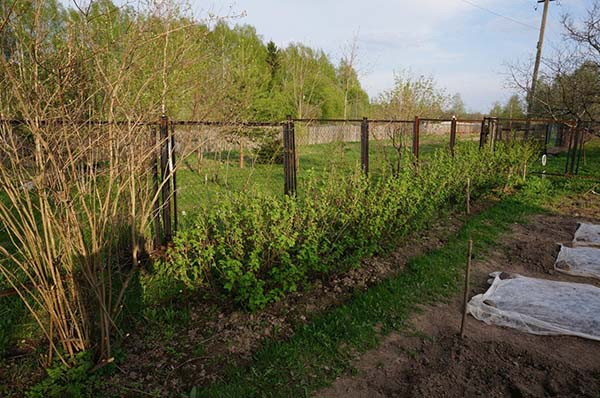
The key to success is choosing the right location on the plot. The most important thing is reliable shelter from strong winds. This protection can be provided by neighboring plantings, a fence, or the walls of buildings.
Another danger of autumn is early frosts. Weather forecasts are unreliable, so frost often strikes before the roots have time to establish. To prevent seedlings from dying, they need additional cover at night.
Timing of planting currants
There's no set time for planting currants. It varies from region to region. Furthermore, even in a typical climate, unusual weather conditions can occur. All these factors can shift the recommended planting time.
Experienced gardeners know that the longer the warm weather lasts, the later you can start planting currants.
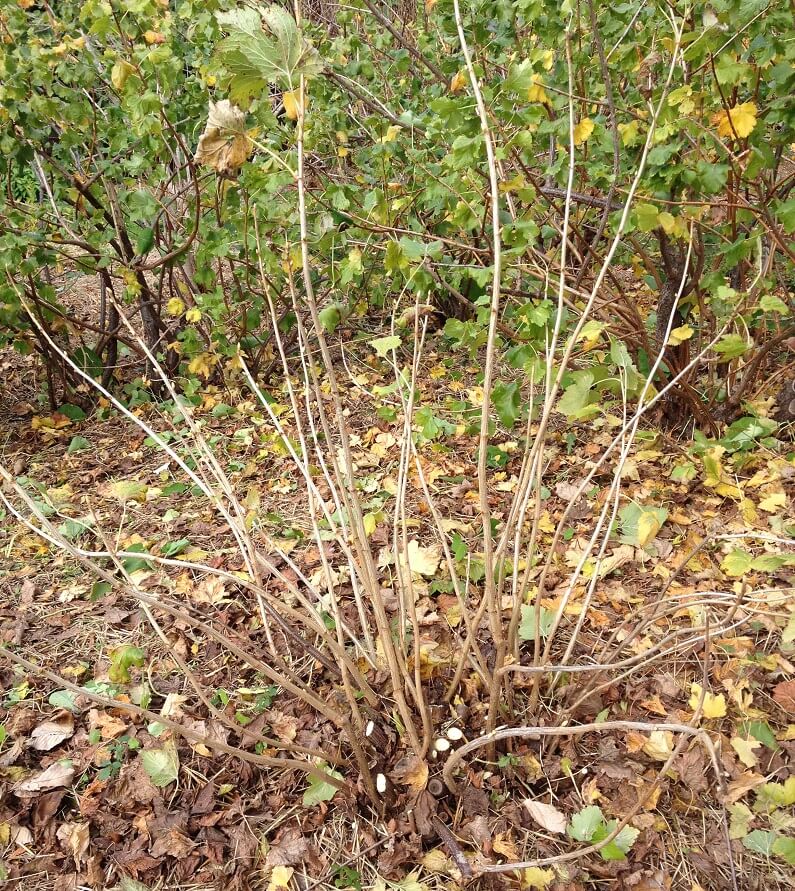
The optimal time from planting to the first frost is considered to be 3-4 weeks. This gives the bush time to adapt to its new location and the roots enough time to strengthen.
But planting too early can also have consequences: if the weather is good, new shoots may begin to grow on the currant bush. This is completely undesirable in winter. Furthermore, leaf fall is an indicator that the seedling is ready for planting. If you plant the bush too early, before the leaves have had time to fall, the moisture that the roots so desperately need will evaporate from their surface.
Important! If you missed the deadline and frosts are forecast earlier than expected, it's best to postpone planting until spring. The finished seedling can be stored in the basement until the snow melts.
By region
In any region, currants can be planted in both autumn and spring.
| Region | Planting time |
| Northern regions, the Urals, Siberia | The second half of August |
| Leningrad Oblast | Early October |
| The central zone, including the Moscow region and the Volga region | Second half of September – beginning of October |
| Southern regions | Mid-October |
These dates are approximate; it's best to base them on the weather. Starting at the right time allows the young currant bushes to better adapt to the coming winter, and the parent bushes to more easily survive the cutting process.
Many gardeners believe that the most suitable month is September; for some regions, it’s the beginning, for others, it’s the second half and the end.
A young plant takes approximately 2-3 weeks to root, but for white and red berries, this period can extend up to four weeks. Therefore, frost should not occur before this time.
In spring, you can begin planting shrubs after the snow melts. This usually occurs in late March. By this time, the soil has warmed up, and night frosts are virtually impossible. Initially, the plants don't need watering; the shoots begin to grow very quickly, and the root system has time to adapt and establish itself.
Some novice gardeners delay planting their seedlings, which can lead to them not getting any berries this season.
According to the lunar calendar of 2023

The lunar calendar has been helping gardeners navigate planting times for decades. Currants also have favorable and unfavorable days.
| Month | Auspicious dates | Unfavorable and prohibited dates |
| August | 26 (from 14:04 pm) - 28 (until 17:31 pm) | 30, 31 |
| September | 3 (from 18:00)-5 (until 23:05), 13, 18 (from 07:58)-24, 27 | 14,15, 28 (from 12:58 p.m.), 29, 30 (up to 12:58 p.m.) |
| October | 1-3 (until 08:02), 5 (from 15:32)-7, 10 (from 15:02)-12, 16-22 (until 09:06), 24 (from 11:32)-26 (until 13:01) |
14,15,28,29 |
It's advisable to time the work so it falls on appropriate dates. Of course, this can be a big problem for those who only visit their plot on weekends. However, planting currants on restricted days is strictly not recommended, especially if the Moon is in the constellation Aquarius.
10 Best Currant Varieties for Fall Planting
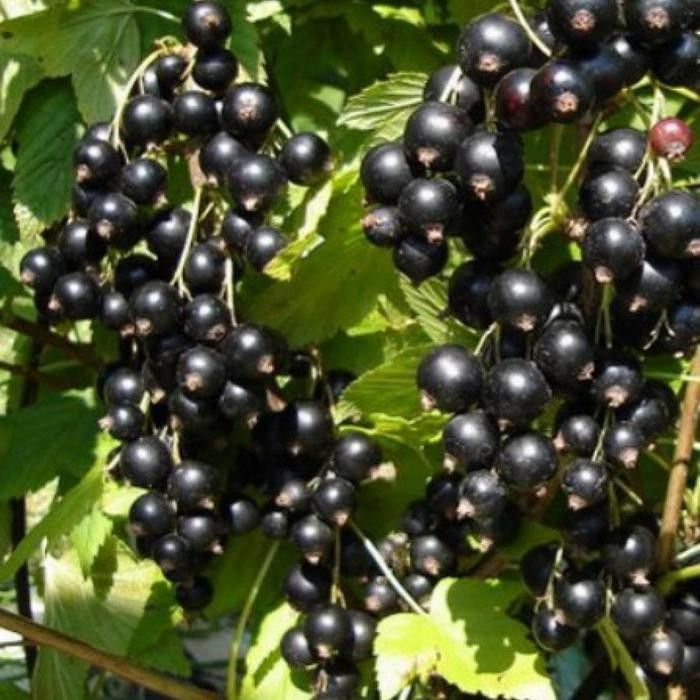
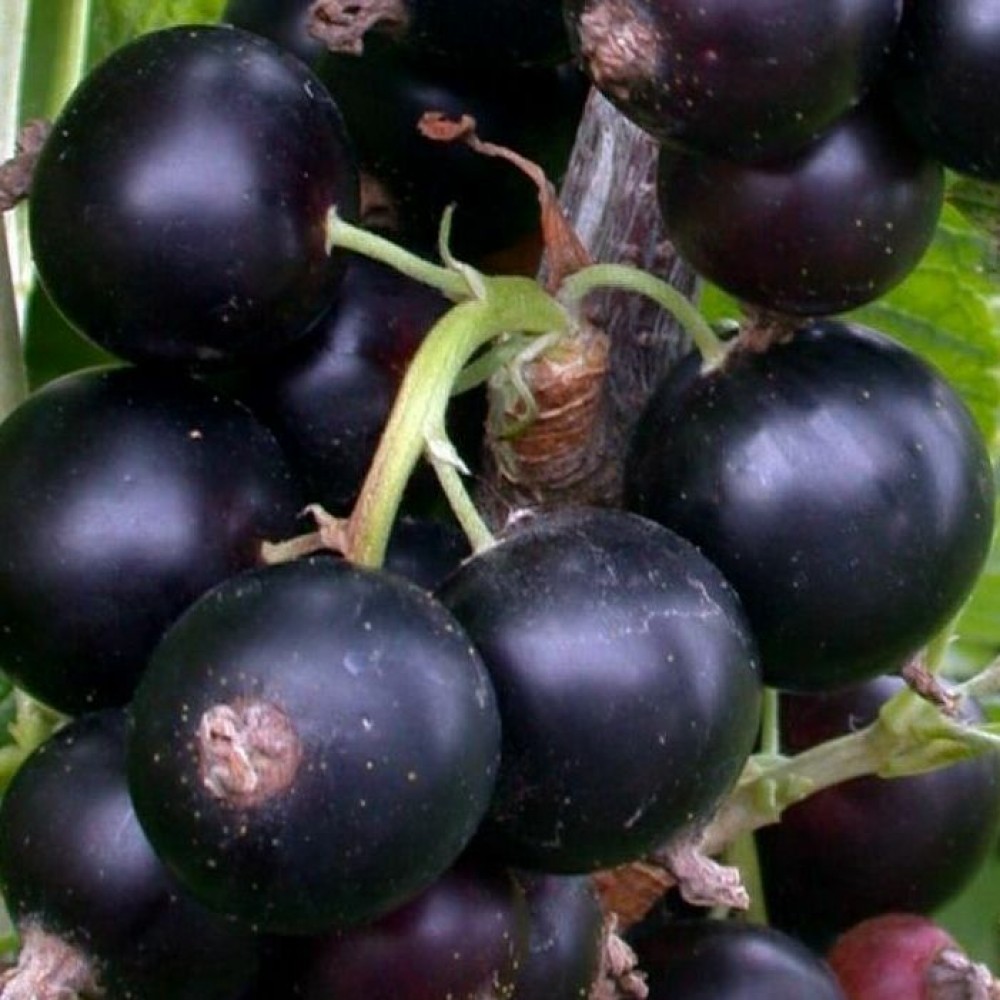
To ensure your currants take root well and survive the winter, it's important to choose the right variety. We've listed the most winter-hardy varieties in the table below:
| Name | Characteristic |
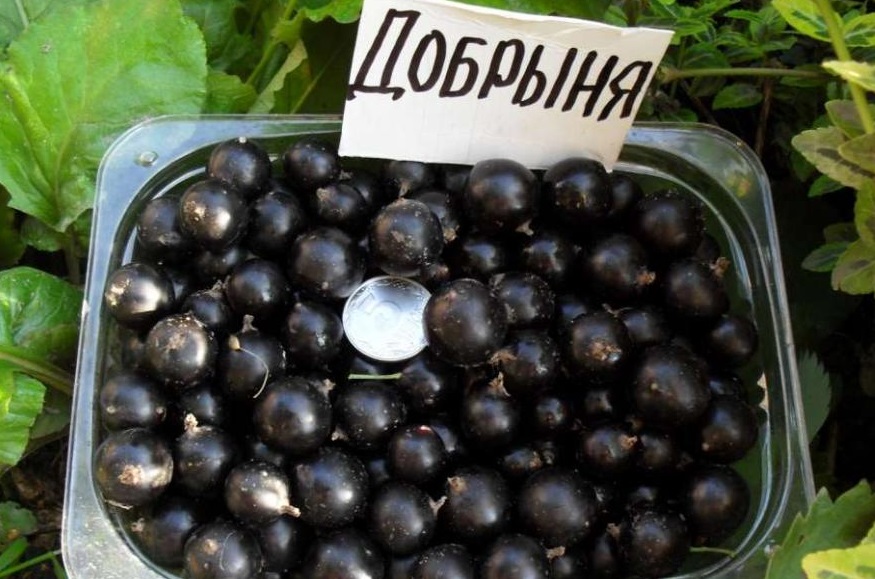
| Dobrynya
|
An early-ripening blackcurrant. The berries ripen in the second half of July and can weigh up to 7 g. This variety is resistant not only to harsh winters but also to diseases such as powdery mildew. |
| Selechenskaya-2
|
An early blackcurrant. The berries grow sweet and large, weighing up to 6 g. The harvest is good, and the variety is frost-hardy and highly resistant to diseases and pests. |
| Sevchanka
|
A versatile blackcurrant variety, it's self-fertile. It produces a bountiful harvest, with berries weighing up to 5 grams. They can hang on the vine for a long time without falling off. It's ideal for gardeners who only have access to their plots on weekends. The variety is frost-resistant, making it suitable even for northern regions. The berries are easy to store and transport, and are resistant to diseases and pests. |
| Cherry
|
This blackcurrant variety was developed by Ukrainian breeders. The berries are very large, weighing up to 7 g. They are easy to pick and transport well. The bush easily tolerates temperatures down to -30°C. |
| Bayana
|
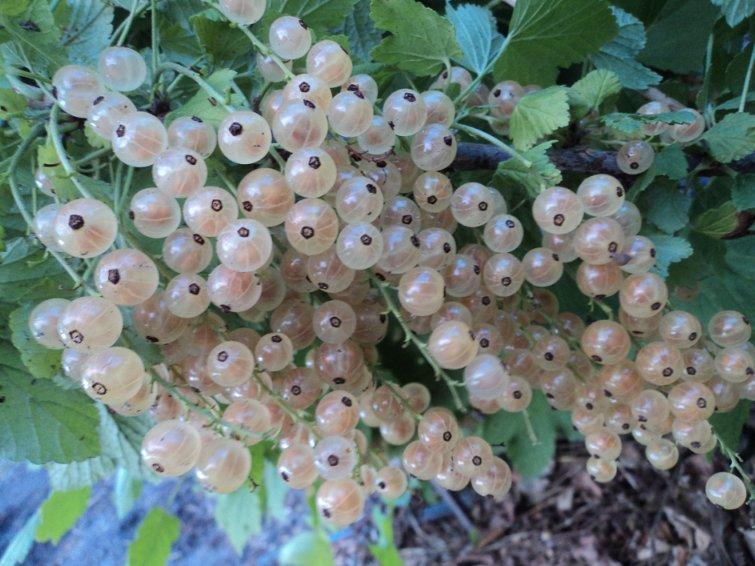
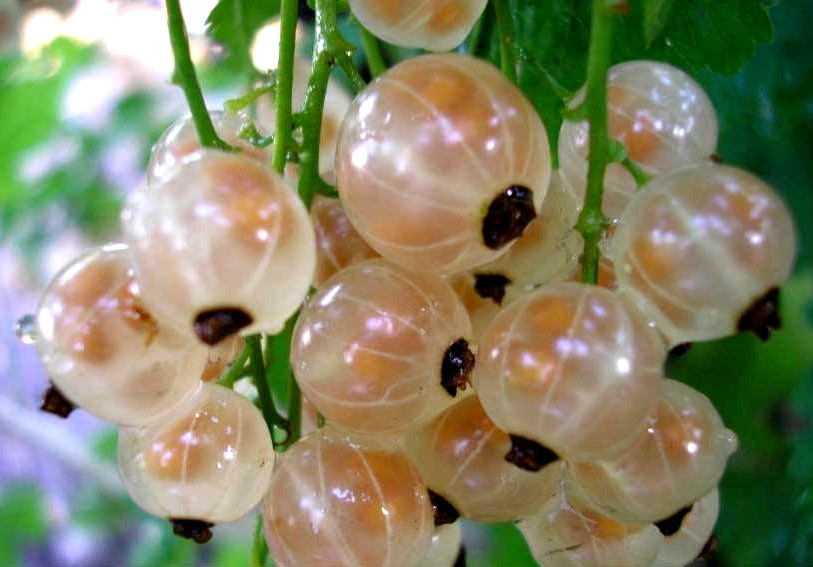
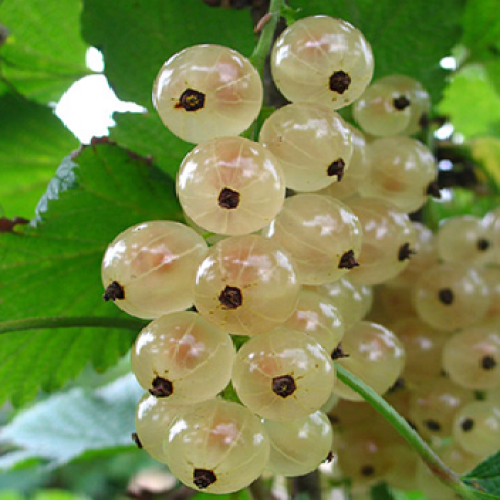
A white currant variety. It's extremely low-maintenance and tolerates winter and drought very well. The yield is average—up to 3 kg per bush. The berries are ideal for making jelly and have many beneficial properties. |
| White Fairy
|
A self-fertile white currant variety. The berries have a pleasant sweet-tart flavor and are easy to transport. The bush grows quickly, so it requires periodic pruning. It is frost-resistant. |
| Minusinsk white
|
This white currant variety is ideal for northern latitudes due to its increased frost resistance. The berries are sweet and large, weighing up to 1.2 g. They don't transport well, but are ideal for preserves. |
| Vetch
|
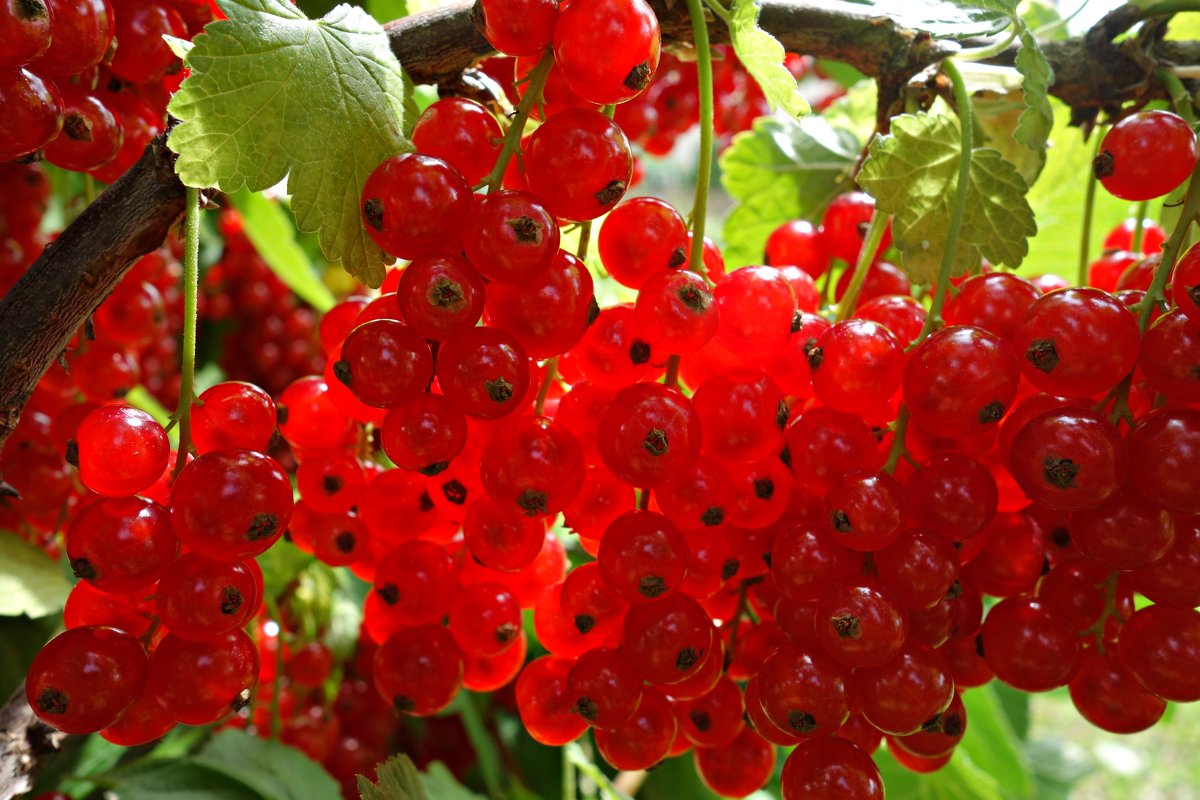
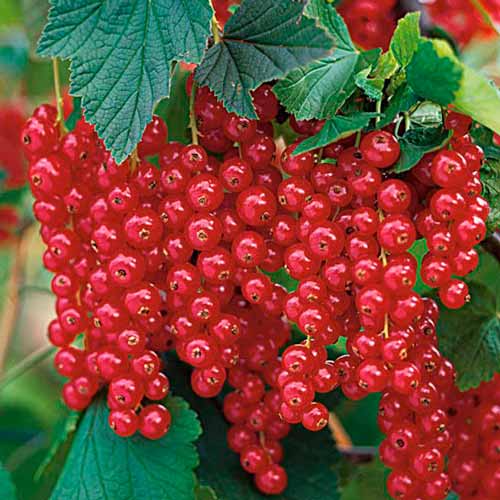
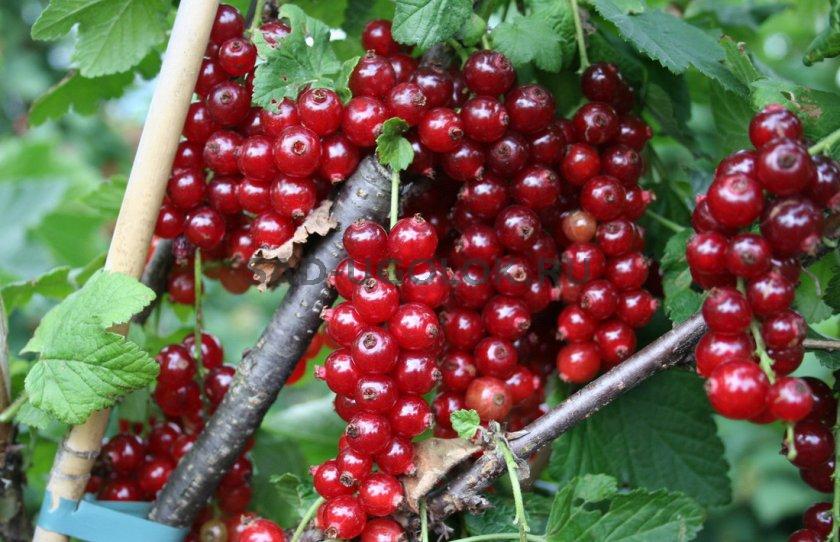
A productive red currant variety. The bush grows tall and is literally covered with berries. They aren't the largest in size, but the quantity is impressive. Frost resistance is excellent. The plant is resistant to anthracnose and powdery mildew. |
| Early sweet
|
An early-ripening red currant variety. Berries grow to medium size, yielding up to 4 kg per bush. It has increased frost resistance, is rarely susceptible to diseases, and is tolerant of pests. |
| Ural beauty
|
A high-yielding red currant variety. Resistant to frost, powdery mildew, sawflies, and moths. The bush is not too tall and spreads gently. The berries are very sweet, dessert-quality, weighing up to 1.5 g. With proper care, each bush can yield up to 10 kg of fruit. |
How to plant currants in the fall: step-by-step instructions
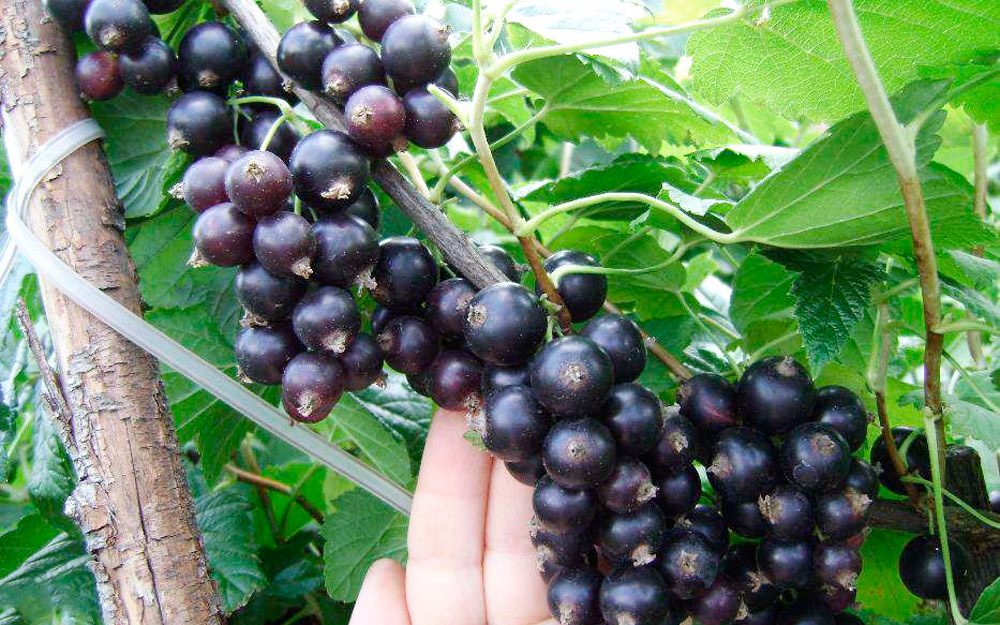
Planting currants involves several stages. It all begins with choosing the optimal variety and preparing the seedlings. Next, you need to choose a site, prepare the planting holes, plant the currants, and prune them. We'll cover each of these steps in more detail.
Selection of seedlings
High-quality seedlings are the key to a great harvest. It's important not only to choose them correctly but also to prepare them for planting. There are several options for obtaining seedlings:
- take cuttings from an old healthy bush;
- buy planting material in a special nursery;
- grow a seedling from a grafted currant bush.
Very often, cuttings are taken from a favorite and trusted variety that has been growing in the garden for a long time, but due to age, has begun to bear less fruit. It's time for a refresher.
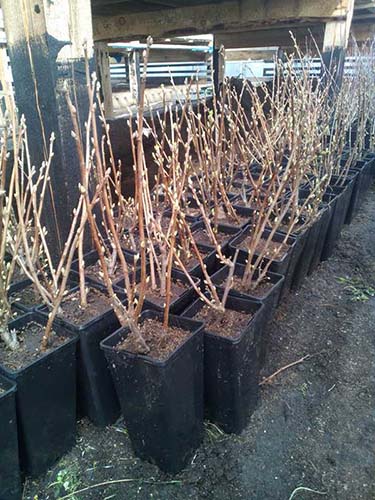
It's best to buy currants from reputable nurseries to reduce the risk of buying diseased plants. When choosing planting material, pay attention to the following:
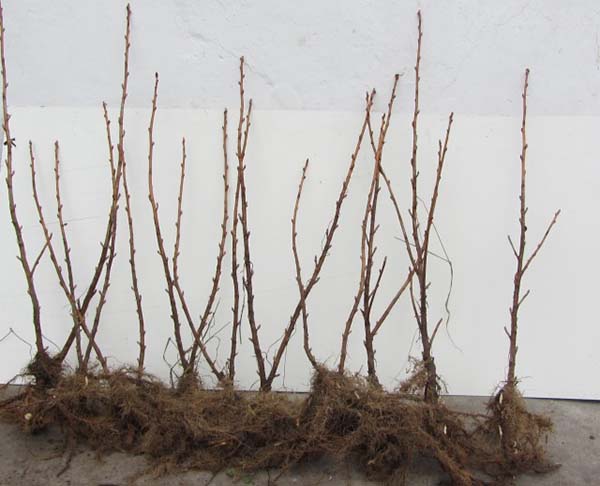
- the root system should be a bunch of healthy shoots, among which there are 3 to 5 lignified skeletal roots 18 to 20 cm long, and the fibrous system should be well developed;
- there are 2 to 3 healthy above-ground shoots, the height of which is approximately 30-40 cm;
- there are living buds on the stem;
- there is no visible damage or signs of disease or pests on the bush;
When choosing a variety, you need to focus not only on its yield and the taste of the berries, but also on whether it is suitable for your specific region.
Many experienced gardeners graft a cutting from another variety onto a bush. In September, a shoot is separated from it, which will later become an independent bush.
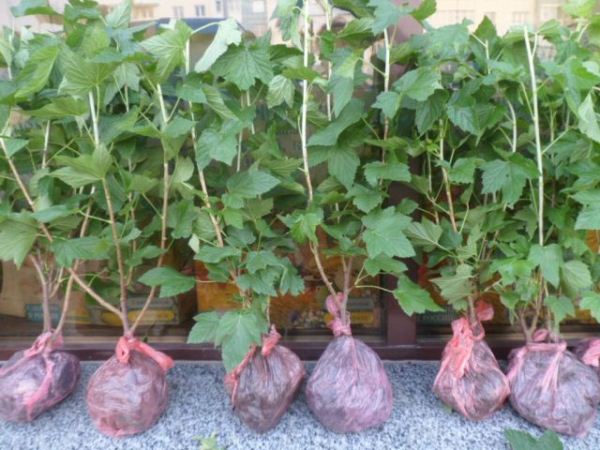
If seedlings have already been purchased and their planting is postponed indefinitely for various reasons, they should be stored with the roots wrapped in a wet cloth, covered with a layer of plastic film. This will prevent the root system from drying out.
How to prepare a seedling
The finished seedling will only be stored if the roots are covered with a damp cloth and placed in a bag.
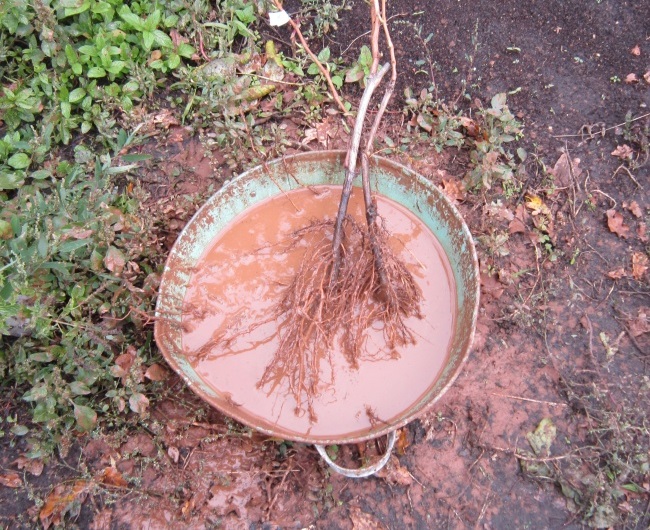
Before planting a seedling in the soil, its roots are dipped in a clay solution diluted to the consistency of sour cream. Soaking the roots for two minutes in any root stimulant (Kornevin, Heteroauxin, etc.) will help stimulate root growth.
Advice! Before planting, trim excessively long roots to 20 cm, and remove dry spots down to living tissue. All damaged shoots should also be removed.
Choosing a location
Each garden has its own soil type, so it is important to choose the most suitable location for currants, taking into account the following parameters: chemical composition, moisture level, acidity, predecessors and neighbors.
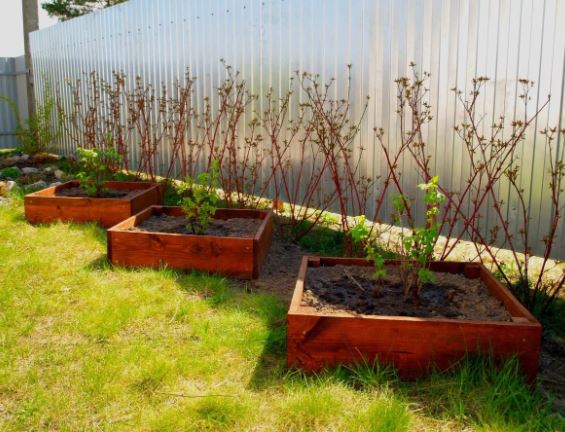
Currants grow best in black soil, loamy or fertile soil with low or neutral acidity.
The site should be well-lit. Some shade from trees or building walls is acceptable, but it shouldn't block the bush from sunlight all day. Otherwise, the branches will stretch out, buds will form poorly, and a good harvest will be unattainable.
Important! Currants don't tolerate drafts and cold winds well, so the bed should be protected from them.
The shrub prefers well-moistened soil but does not tolerate stagnant water. If the area is waterlogged, the stems will become covered in lichen, which slows growth.
Bushes can be safely planted in areas previously occupied by perennial herbs or vegetables. Beds previously planted with raspberries, gooseberries, and other currants are definitely not suitable.
In addition, close proximity to sea buckthorn, raspberries, gooseberries, walnuts, pine or cherry trees is considered an unfavorable neighborhood.
Necessary materials and tools
To carry out gardening work, you will need a shovel, a watering can (or bucket), gloves, pruning shears, ash and other fertilizers (organic or mineral).
How deep should I plant?
When preparing the hole, aim for a dimension of 50 cm on all sides (length, width, depth). If necessary, you can increase this by 10 cm. In fertile soil, a hole 40 cm deep will be sufficient.
Tip! If you're using a special container to plant currants, dig a hole 2-3 times larger than the container.
At what distance should I plant?
Even in a modest-sized plot, it's not recommended to reduce the distance between currant bushes. If currant bushes are planted too close to each other, they will become too dense. This can disrupt aeration, leading to increased disease and pest infestation.
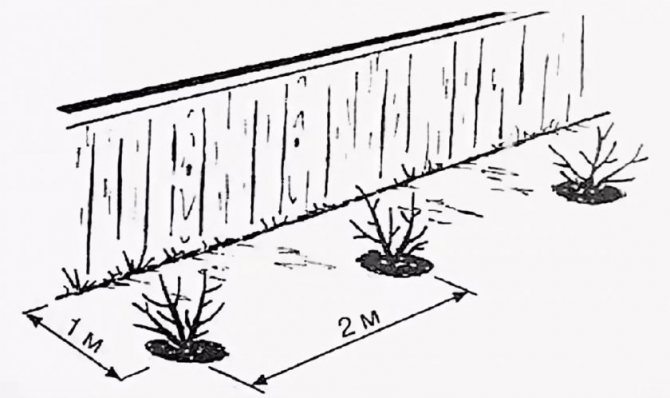
A small-looking bush will certainly grow and will require more free space.
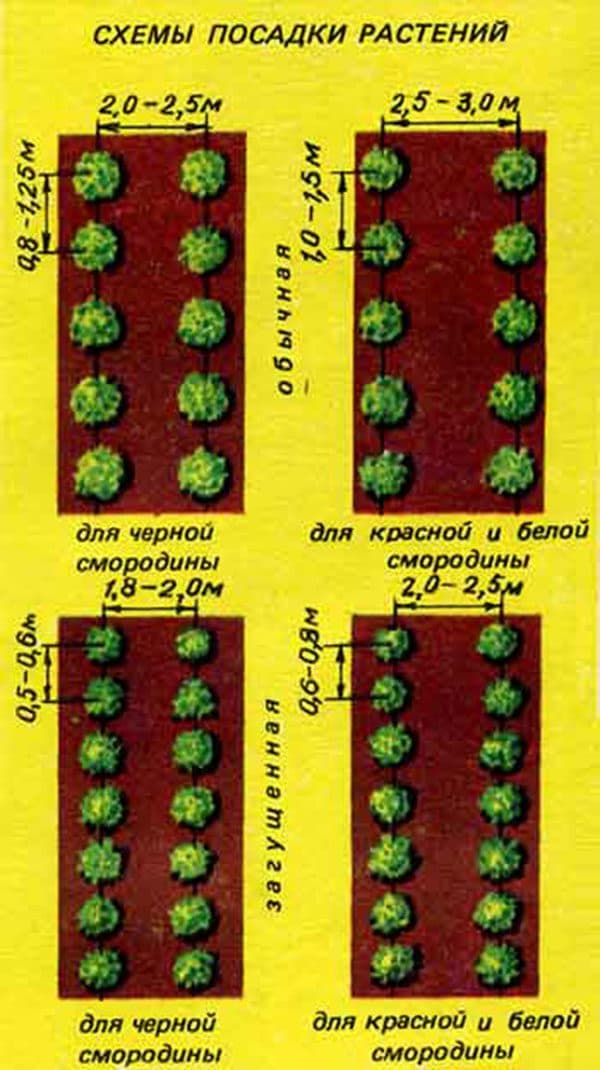
The ideal distance between currant bushes is 2 m, but if absolutely necessary, it can be reduced to 1.5 m. The same distance should be maintained between rows.
Important! When planting bushes near a fence or house walls, maintain at least a meter of distance from them.
Preparing the holes
The minimum dimensions of the hole are 40 x 40 cm. In poor soils, these dimensions increase to 60 cm due to the need to place a thick layer of fertilizer inside. The remaining soil after digging is used to prepare a nutrient mixture. If this is not necessary, simply sift the soil, remove weed roots and large clumps, then mix it with compost in a 2:1 ratio and backfill the hole. A small amount of soil mixture is allowed, which is added as the soil settles.
The optimal distance from one hole to another is from 1.5 to 2 m, with a minimum width of 1.2 m allowed between rows.
Fertilization
The amount of fertilizer applied depends on the quality of the soil on the plot. If it's fertile and rich in black earth, minimal fertilizer is required. However, the average Russian garden often doesn't boast highly nutritious soil.
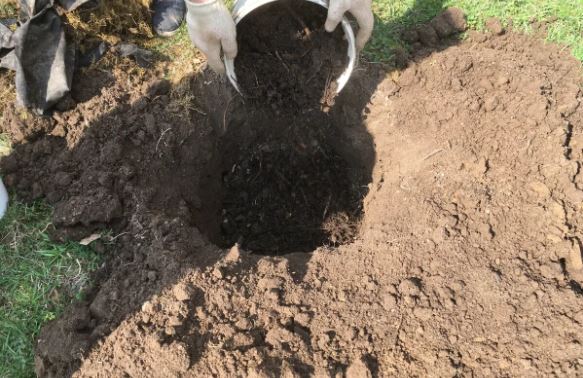
Therefore, garden beds often need to be fertilized regularly. With constant fertilization, plants drain the soil of all its vital micronutrients, rendering it impoverished and useless.
For sandy and clayey areas, organic matter is ideal: add 10 kg of compost or humus per square meter. Dolomite flour will help reduce acidity.
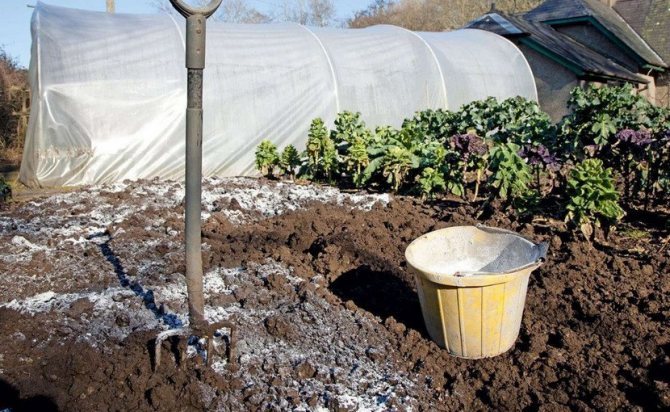
It's best to avoid applying mineral fertilizers in the fall. They're most effective during the plant growth stage. However, organic matter will help prepare your plants for winter. You can spread humus over the surface of the bed, then dig it down to a depth of about 25 cm. This preparation will be most effective.
Applying lime safely to plants is only safe a year before planting. The aggressive product can burn delicate roots.
Step-by-step planting instructions
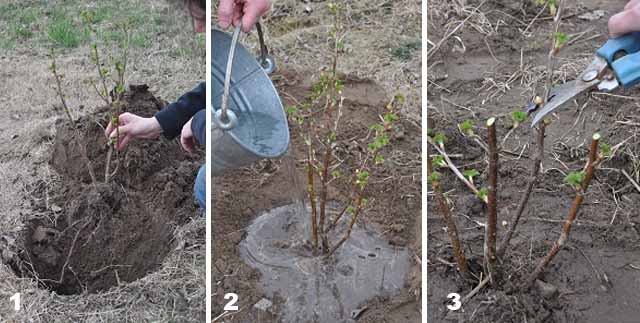
We offer you a step-by-step guide to planting currants in the fall:
- Dig a hole and fill it about halfway with the nutrient mixture.
- If the soil in your garden is dry and sandy, water it before planting. Many gardeners water after the bush has been planted. Consider the specific characteristics of your garden.
- Form a small cone-shaped mound in the center of the hole. This is only necessary if you're planting bare-root currants. When planting currants directly in containers, no mound is necessary.
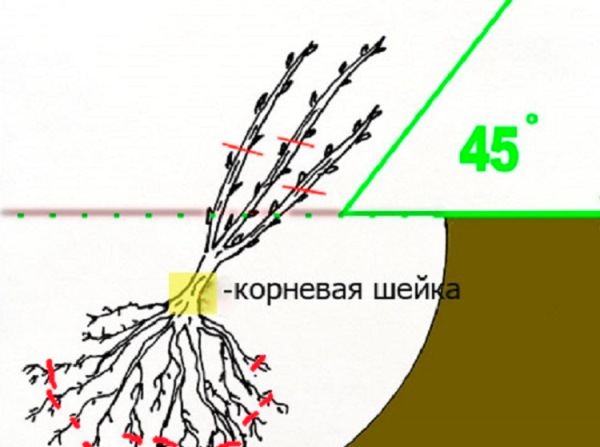
- Place the bush in the hole at a 45-degree angle, then carefully straighten the roots. They should be positioned downwards. Make sure the roots are not bent or sticking up.
Please note! Unlike gooseberries, currant bushes are planted at a strict 45-degree angle, with the shoot facing north and the roots facing south.
- Carefully fill the hole with the remaining soil, mixed with peat or humus. Gradually lift the bush and gently shake it to fill the space between the roots.
- Compact the soil in the hole so that the seedling sits firmly in it.
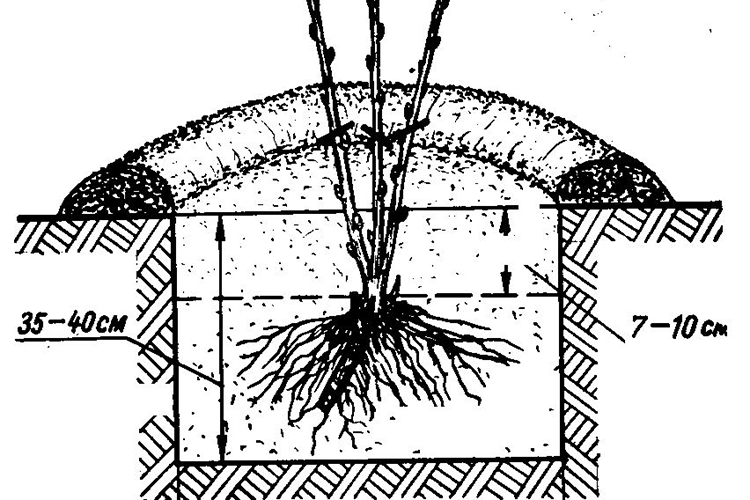
Please note! Each soil type has an optimal depth for planting the root collar. In heavy soil, a depth of just 5 cm is sufficient, while in light soil, 10 cm is sufficient due to rapid settling. This will help the currant bush produce new shoots more quickly in the spring, increasing the width of the bush and improving the yield. By the way! The root collar is the point on the trunk where the first root emerges.
- Form a small (5-10 cm high) belt of soil around the bush.
- Water the soil within the improvised belt. This earthen barrier prevents moisture from spreading throughout the bed, but rather retains it near the currants.
- After the water has been absorbed, water again.
Important! You only need to water the bed if the weather has been dry and there has been no rain for a long time. If you feel the soil is already damp, water only as needed.
Methods of planting currants
Gardeners use three main methods for planting currants:
- Fan-shaped.
- Trellis.
- Classical.
Fan method
Instead of traditional planting holes, a full trench is prepared for the seedlings. The optimal width is 40 cm, and the length depends solely on your preferences and the size of the plot. The bushes are placed in this trench, spaced 1 meter apart, and the shoots are spread along a low, fan-shaped trellis installed in advance. This planting method gives the plants more room to develop; bushes planted in such trenches typically grow almost twice as large as their counterparts planted using the traditional method.
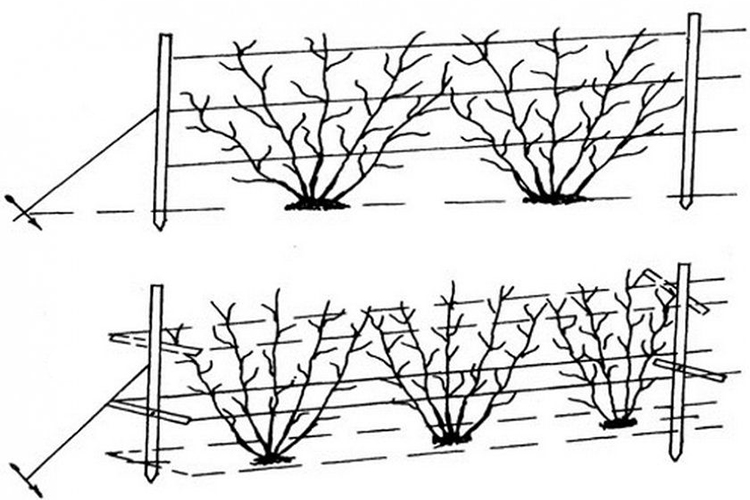
The yield of currants is much higher than usual, but the fan-shaped method of growing requires additional efforts from gardeners to tie up the plants.
Vertical planting on a trellis
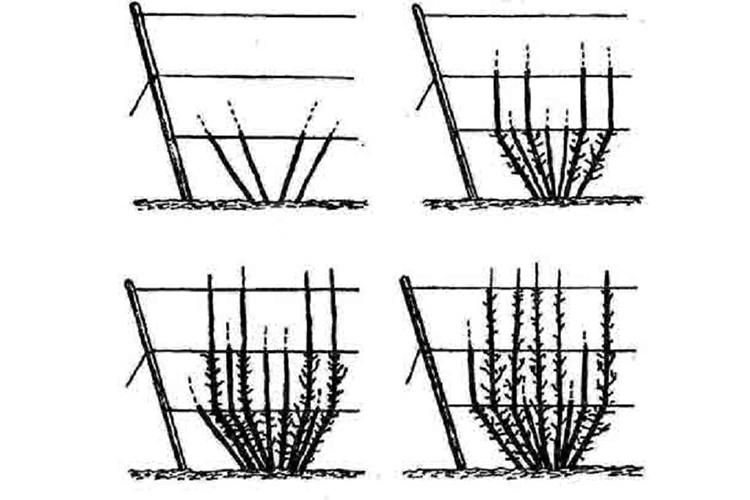
Planting currants vertically on a trench differs from the previous method in the way the trench is created. It only needs to be dug 20 cm deep and 15 cm wide. The trench is then filled with fertilizer, adding 50 g of nitroammophoska per square meter. The remaining space is covered with soil. The bed is covered with a thick plastic film, in which X-shaped cuts are made every 30 cm. One-year-old cuttings or seedlings will be planted in these cuts at a depth of approximately 7 cm.
The classic way
The use of this method is recommended when there is a limited amount of planting material in conditions where creating a trellis is not possible.
Using the method described previously, prepare the holes and fill them with nutrient substrate if necessary. Place one currant bush in each hole at a 45-degree angle. To maximize the number of shoots in the spring, you can plant it 2-3 buds deep. Furthermore, this planting method will increase the yield for the next three years.
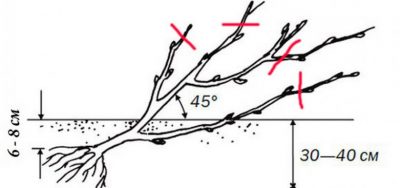
It is preferable to plant blackcurrant bushes at a depth of 10 cm, for red and white ones 6-8 cm is enough.
How to propagate currants from a bush
There are three main vegetative methods of currant propagation, which we will discuss below.
Layering
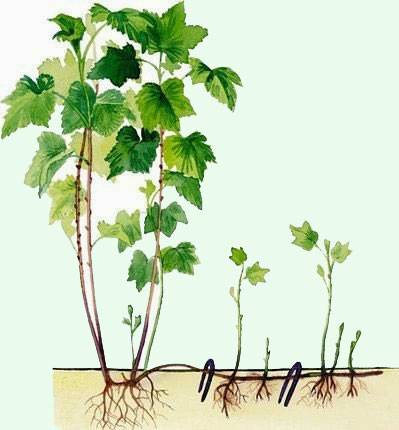
Layering begins in the spring. Select a healthy, two-year-old branch growing close to the ground. It should be buried 10-15 cm deep in the garden bed, having fertilized the area beforehand. A section of the branch up to 30 cm long should remain above ground. To ensure it holds firmly in the soil, it can be secured with a special bracket or a hook made of thick wire. This shoot will need to be watered and fertilized as needed throughout the summer. With proper care, up to four new shoots will emerge by the end of September, and the root system will have time to develop well. Replanting is now ready.
Green or woody cuttings
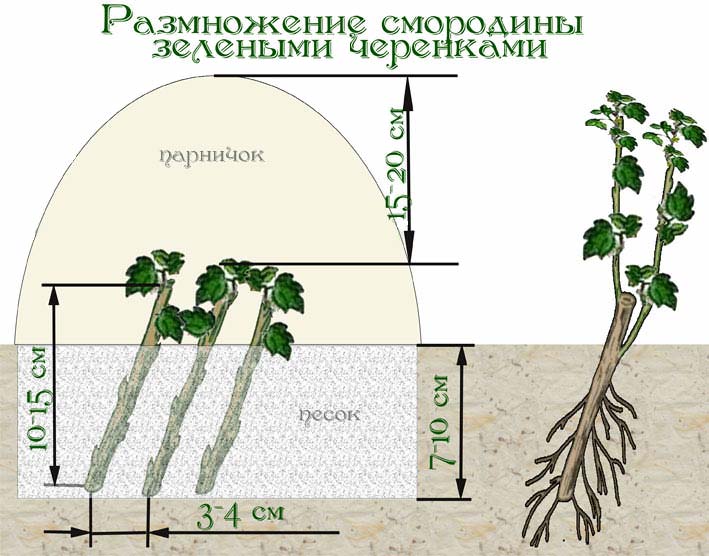
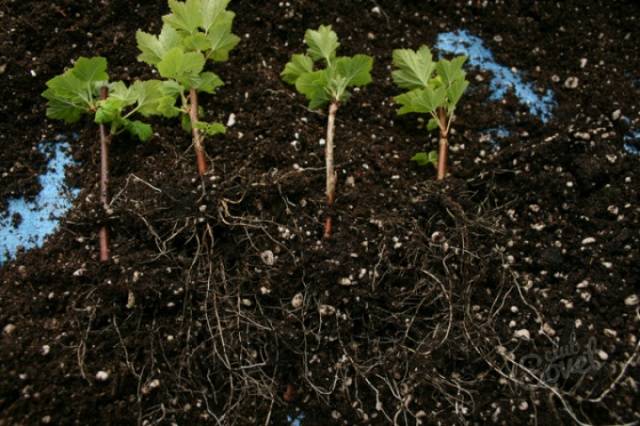
Propagation by cuttings is done by dividing a single young, healthy shoot into several smaller pieces. To do this, you'll need sharp pruning shears, which must be disinfected first to prevent the introduction of bacteria. The optimal length of the cutting is 20 cm. The top cut should be straight, and the bottom should be at an angle. This prevents you from confusing the top and bottom. Secondly, an angled cut provides a larger surface area, significantly increasing the likelihood of successful rooting. This process is carried out in mid-September (the exact timing depends on weather conditions). The cuttings are placed in a container of water overnight, and the next day they can be planted in pre-prepared holes.
By division
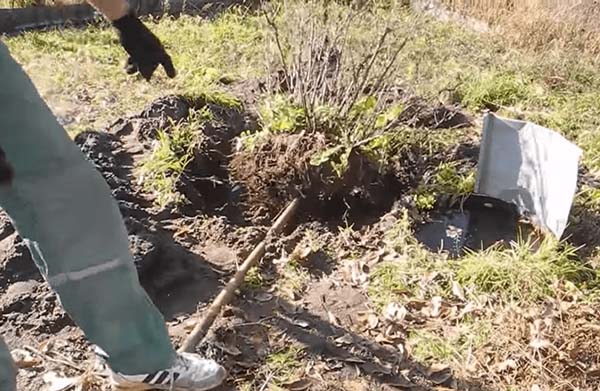
Currant division is done in the fall. A healthy bush with numerous shoots and a strong root system is cut into 2-3 pieces using a sharp tool. The cut areas are sprinkled with ash to prevent infection. The separated portion of the bush can be immediately transplanted to a prepared permanent bed. The harvest can be ready within a year.
Caring for a currant bush after autumn planting
After transplanting currants in the fall, the young bush first needs proper care.
It is expressed as follows:
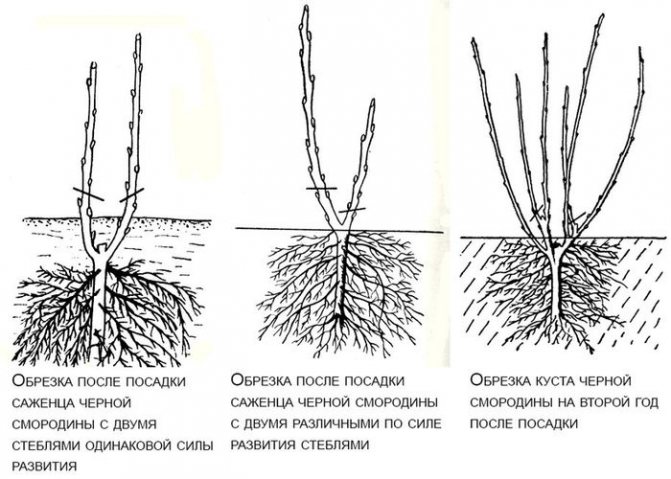
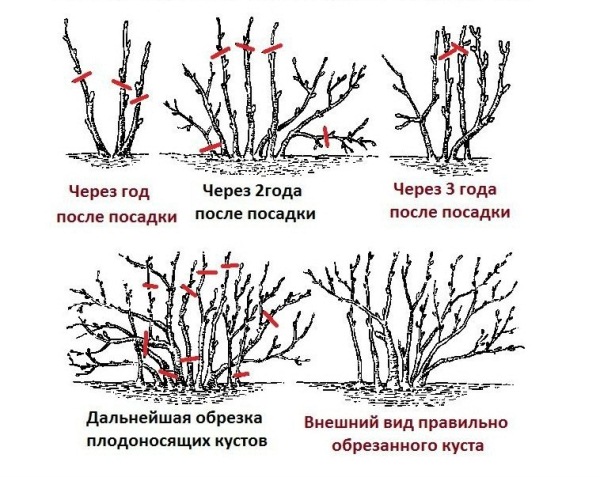
- Pruning. After planting a seedling in the fall, the main goal is to establish a good root system to help it adapt to its new location and avoid freezing in the winter. Growing too much at this point will only cause harm, so prune it back to a distance roughly equal to the roots or even less.
- Mulch the bed using humus, peat, or compost. The optimal height of this layer is 10 cm.
- All holes are covered with sand to prevent a crust from forming on the surface of the beds after watering.
- In dry autumn, regular watering is carried out, which should be done only with warm water.
- Before the onset of frost, the plantings are hilled up to a depth of 15 cm.
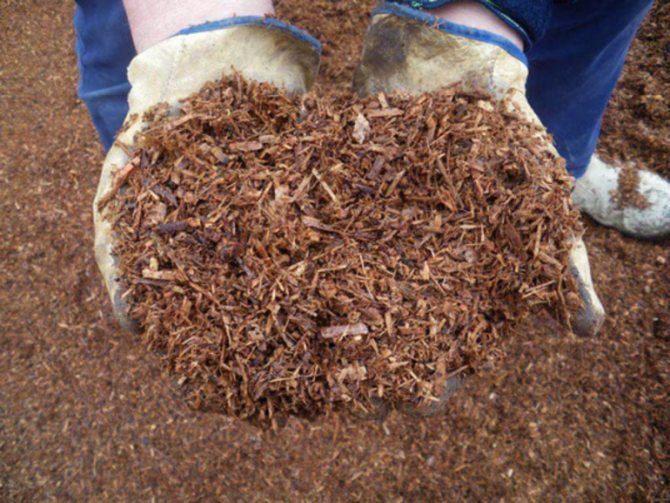
With the arrival of spring, when the soil is just beginning to warm up under the first rays of sunlight, the layer of earthed soil is removed. This will shorten the path for young shoots from the roots to the ground surface and stimulate active growth of the currants.
Possible mistakes when planting currants in autumn
When planting currants, some novice gardeners make common mistakes that can be easily avoided.
Let's list the main ones:
- Planting of seedlings is carried out too early (when they still have a lot of leaves) or, conversely, too late (when there are less than 2-3 weeks left before the first frost).
- A bush of poor quality was purchased or the variety is not suitable for the region.
- When choosing a site, lighting rules were not taken into account - the bed ended up in too shaded a place.
- The bushes were planted very close to each other (less than 80 cm). This complicates care and harvesting.
- After planting, the recommended pruning, which is an important condition for the normal development of seedlings, was not carried out.
Tips from Top.tomathouse.com for beginning gardeners
Our portal http://top.tomathouse.com offers several tips on planting currants that will be useful not only for gardening novices but also for experts:
- When planting several bushes, it's best to place them in one spot rather than scatter them throughout the plot. This will improve the quality of the harvest and help retain moisture in the soil.
- You can prune your bushes not only in spring but also in autumn. After this work, the bush will grow better in spring, and the crown will develop more quickly.
- To prevent the plant from freezing in the soil, cover the bed with black plastic film. This will retain heat and prevent condensation from forming even in the winter sun.
- The bushes need to be watered as the soil dries out; black currant varieties need water the most.
If all the proper growing practices are followed, the location is chosen correctly, the seedlings are healthy, and the care is timely, the bush will grow strong, and the harvest will certainly delight you.
When is it better to plant currants – in autumn or spring?
For many beginning gardeners, the question of when to plant currants is a real dilemma. So, which should you choose: fall or spring?
Many experienced gardeners believe that autumn is the ideal time for such work. But if planting currants in the fall wasn't an option, you can try it in the spring. However, it will require a little more effort, and the harvest may be delayed.
Autumn planting has its advantages:
- Many seedlings with open root systems appear on sale.
- Easier care compared to spring replanting.
- Gardeners have more free time at the end of the season.
- Plants planted in the fall take root better. In the spring, there's very little time for adaptation, as growth and vegetation begin. In the fall, currants are dormant, devoting all their energy to rooting.