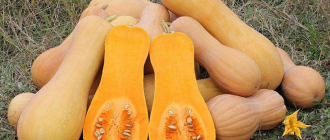
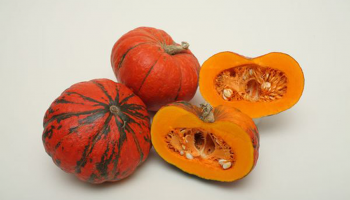
Pumpkin is a herbaceous plant belonging to the large Cucurbitaceae family. This crop can be ornamental or edible. The distinguishing feature of the edible variety is its large fruits, which can reach 20 kg in high temperatures and grow up to 50 kg in temperate climates. With certain guidelines, caring for and growing these giants is a simple task for gardeners.
Content
Growing pumpkin seedlings
This vegetable is grown in two ways: by sowing directly into the ground or using seedlings. The latter method is suitable for colder climates and allows for a faster harvest. Some varieties can be grown using pre-grown plants, such as gymnospermous pumpkins.
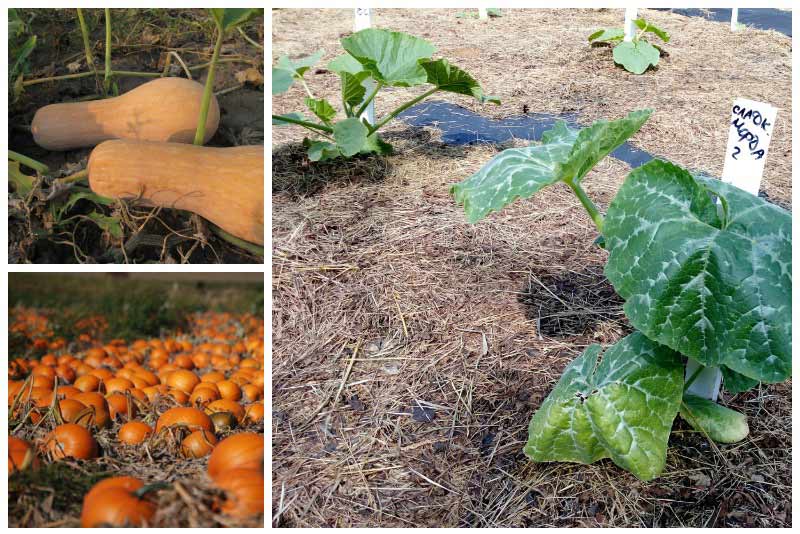
Seed preparation
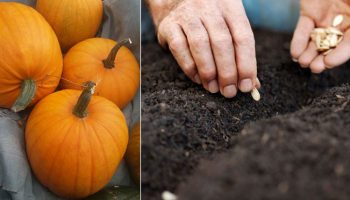
The first step before planting is collecting the planting material. This can be done in two ways: by purchasing seeds from a store or by removing them from existing fruits and then preparing them for planting. Here's how:
- Keep in water for 1-2 hours at a temperature of +40…+45 °C.
- Wrap in a damp cloth and store in a warm place for 2-3 days until germination.
- After the seedlings emerge, hardening can be done, especially for those living in northern regions. Move the seed cloth to the bottom shelf of the refrigerator for 1-3 days.
- Create extreme temperature changes: maintain for 8-10 hours at +18…+20 °C, and then reduce the temperature to +1…+3 °C for half a day.
- Fertilize by sprinkling with wood ash; 1 teaspoon is enough for 25-30 pieces.
This preparation will strengthen the seedlings and future plants, as well as protect them from pests. For rapid growth, the seed should be watered with Epin.
Soil for seedlings
You can buy soil for growing seedlings at the store, choosing based on the ingredients on the packaging. The most suitable soil is for cucumbers. However, a better option is to prepare your own soil mixture. The optimal combination is peat, sawdust, and humus in a ratio of 2:1:1. Nitroammophoska can be added to the resulting substrate at a rate of 1 teaspoon per 5 kg of soil.
Boxes or plastic containers, pre-treated with a potassium permanganate solution for disinfection, are suitable for growing seedlings. The bottom of the pots should be pierced to allow excess liquid to drain; these can be easily made, for example, with a sharp awl. A 1-3 cm thick drainage layer of expanded clay or sawdust is also necessary.
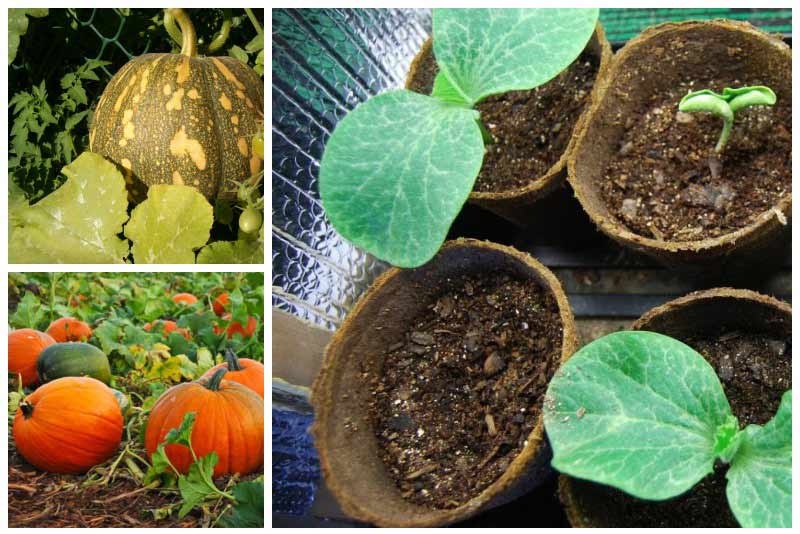
Another option is disposable plastic cups, which also need holes in the bottoms. To avoid damaging the delicate roots when transplanting into open ground, you can use peat containers. Once the plants are transplanted to their permanent location, these will rot in the soil, enriching it with nutrients. The diameter should be at least 7-10 cm.
The prepared soil, poured into containers, must be thoroughly watered with rainwater or settled water at room temperature.
Sowing seeds
The average sowing time is 18-22 days before transplanting the seedlings into the garden. In northern regions, the optimal time to sow is mid-May, around the 10th to 15th, allowing for the pumpkins to be transplanted into warm soil. In milder climates, the ideal time is April.
Plant two plants per disposable or peat cup. When transplanting, remove the weaker plant or move it to another pot. Place the seeds 3-4 cm deep into the soil.
When growing indoors, containers or cups with seedlings should be placed on south-facing windowsills; if a greenhouse is available, they can be moved there. For plants placed on windowsills, it's best to create a greenhouse out of a plastic bag or cling film. Remove the cover briefly once every seven days for ventilation. The substrate can be moistened with a spray bottle; the soil should not be allowed to dry out. The optimal daytime temperature is 19 to 24°C, while the average nighttime temperature should be slightly cooler, 14 to 16°C.
Caring for seedlings
Once the sprouts emerge, remove the plastic wrap and rotate the pots every three days to ensure even growth and prevent the seedlings from leaning toward the light. If the sprouts are growing too tall, you can lower the temperature for seven days:
- +16…+18 °C during the day;
- +11…+14 °C at night.
Watering should be regular, but avoid overwatering the soil; it's best to water in small increments. It's best to use a spray bottle, aiming to moisten not only the top layer but also the soil to a depth of 3-4 cm. It's worth noting that the soil will dry more slowly in areas with high humidity.
Fertilizers also have a positive effect; they should be applied to slightly loosened soil, gently using a sharpened match or toothpick. Nitrophoska is a good choice; apply it 7 days after the seedlings emerge. Apply 7-8 g of fertilizer per bucket of water. If the seedlings are growing in individual pots, 1 teaspoon per plant is sufficient. Organic fertilizers can be diluted 1:10 with warm water and left for 12 hours. Then dilute the mixture 1:5 and water with 1 tablespoon per plant or 1 liter per square meter.
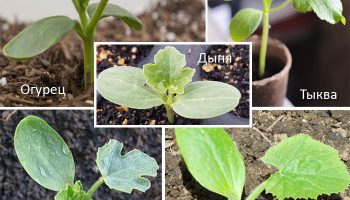
The optimal location is a south-facing, well-lit spot; however, at midday, the seedlings should be protected from strong sunlight with paper. If everything is done correctly, the stems will grow densely, with short internodes. Once the pumpkins reach a height of 18-22 cm, they can be planted outdoors.
Transplanting
First, you need to select a suitable garden bed and prepare it in the fall. To do this, you'll need:
- dig the soil deeply;
- remove weeds and plant debris;
- fertilize per 1 m2: 200 g of lime, 3-5 kg of humus and 30-40 g of mineral fertilizer.
Seedlings should be planted in the ground when the air temperature no longer drops below +10…+13°C. At lower temperatures, the plants will not grow and may even begin to rot in the soil. Seedlings should be spaced 1 meter apart in the plot, with a wider spacing of up to 1.5 meters between rows to ensure easy access to each plant, if necessary.
It's best to transplant with a partial root ball; this will prevent damage to the roots and help the pumpkins establish themselves more quickly in their new location. To ensure the sprouts receive moisture, pour 0.5-1 liter of warm water into each hole. Once the water has been absorbed, you can place the seedlings in the holes, covering them with soil. It's best to plant in the evening or on cloudy days to protect the young seedlings from bright sunlight. You can also shade the seedlings from the sun for the first few days.
Growing conditions requirements
Pumpkin is considered an undemanding plant; however, for its proper development and high yield, a number of conditions must be met. Recommendations can be found in the table:
| Factor | Conditions |
| Lighting | Light areas, partial shade from buildings, fences and tall plants are suitable. |
| Temperature | Optimum +25 °C. |
| Priming | Loose, moderately moist, nutritious, especially near the surface. The environment is neutral or with slight fluctuations in pH 5-8. |
| The best predecessors | Legumes, potatoes, onions, cabbage. |
It's dangerous to plant after zucchini, squash, cucumbers, or watermelons, or in the same spot for a second season in a row, due to the risk of contamination from bacteria lingering in the soil. The optimal time to plant vegetables in this family is every 3-4 years.
Growing pumpkins without seedlings
Gardeners are usually advised to grow pumpkins this way because they don't like being transplanted and adapt less well.
Preparation of seed material
Before planting, select seeds should be tested for germination. To do this, spread the seedlings on a damp cloth for 2-3 days, and discard any unsuitable ones after germination. Germination can be accelerated by soaking the seedlings in a sodium or potassium humate solution for 24 hours. The ideal temperature for germination is 20°C.
Landing
The selected, well-lit area needs to be fertilized: 2 buckets of humus, 0.5 tbsp of sawdust, 1 kg of ash, and 1 tablespoon of nitrophoska per 1 m² of soil. After this, the soil should be dug deeply and watered with hot water.
The key to planting is soil temperature, which should be at least 12°C. The depth at which the seeds are planted depends on the soil type: 8-10 cm in loose, light soil, 5-6 cm in loamy soil, and 25-30 cm in poor soil. In the latter case, fertilization is essential: 3 buckets of compost or cow manure, 1-2 tablespoons of wood ash, and 50 grams of superphosphate. The distance between the holes should be at least 1 m. If there is a risk of partial freezing, it is better to plant the seeds at different heights, 3-4 cm apart.
A common problem when planting in the garden is low soil moisture, which means a long wait for sprouts to emerge and slow development. To increase soil moisture, add 2 liters of water to each hole when planting, and add the seeds only after they've been completely absorbed. Mulching the substrate with peat or humus can also help. Another way to conserve moisture is to create a small greenhouse made from a frame with plastic stretched over it.
If all conditions are met and the air temperature is warm (25…28°C), seedlings will appear within a week. Once a couple of leaves have grown, transplanting can be done. Large-fruited varieties are left with one plant, while Muscat and Hard-barked varieties are left with two. Only when five leaf blades have emerged should the weaker plant be pinched.
Another option without growing seedlings is to use a greenhouse and sow pumpkins in the same space as cucumbers, preferably on the south-facing wall. Fertilize the substrate and dig several holes to plant the sprouted seeds. Once the plants grow and their shoots reach a sufficient length, make holes in the plastic film and, pulling the shoots through the holes, place them in the garden bed. This will keep the roots warm, protecting them from sudden cold snaps. This method allows you to sow pumpkins 8-10 days early.
Top.tomathouse.com recommends: pumpkin growing methods
There are several ways to grow pumpkins outdoors, each of which is easy to apply in your own garden:
- The classic option is spreading. This requires large beds with easy access to each plant.
- Trellis. A very original and compact method that allows you to save space in your garden, as the distance between bushes is only 30-40 cm. A sturdy 2-meter wooden structure is required to support the heavy fruits, which can be attached to the supports with hooks.
- Compost heap. Bush and semi-bush varieties are suitable; plants are best planted in pots 70-80 cm apart. You can also sow sprouted seeds directly. Pumpkins grown this way require no fertilizer at all.
- Wooden or metal barrels. The advantage of this technology is the compact hanging vines. At the beginning of the season, the containers are filled with organic matter: weeds, stems, and paper. The next layer is fine grass, food scraps, and you can also add decomposition accelerators. After 1-1.5 months, the substrate is ready for planting. Synthetic bags are a good alternative to barrels; they are best placed near a fence to which the vines can be easily attached.
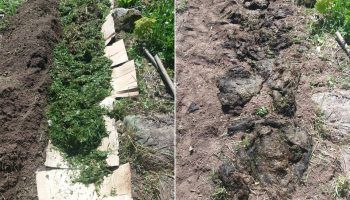
- Warm beds. Rotting grasses and plants are laid out in trenches two spade deep and covered with soil. This differs from planting in a garden in that after the sprouts emerge, the soil is covered with plastic film, with holes punched for each plant.
Caring for pumpkins in open ground
Pumpkin is an easy-to-grow plant, but it still requires proper care to produce a bountiful harvest. It requires careful watering, pollination, fertilization, and bush training.
Watering, loosening and mulching
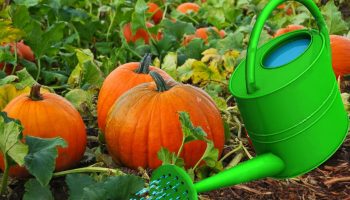
Drought is undesirable for pumpkins; the large leaf surface area causes the plant to quickly evaporate moisture. Initially, the seedlings need to be watered daily while they adapt to their new location. Once this occurs, reduce the amount of water. If the summer is rainy, it's best not to water the soil at all. Increase the amount of water as the number of ovaries and fruit sets increases. The recommended amount of water per plant is one bucket.
It's easier to loosen and weed when the soil is moist: after watering or rain. When seedlings emerge, dig to a depth of 9-12 cm, then reduce the depth to 5-8 cm after a month, repeating this process every 14 days. Conversely, weed between rows of plants in dry soil to allow water to reach the roots more quickly. To ensure better stability for young pumpkins, lightly hill them while weeding.
Mulching the substrate is most often used to retain moisture, especially in hot climates.
Pollination
Rainy weather can cause pollination problems, and a sure sign of this is rotting ovaries. To obtain uniformly round fruits, gardeners must do this artificially. To do this, pick several male flowers in the morning, remove their petals, and touch their anthers to the stigmas of flowers on the plants. These two species can be distinguished by their lifespan and opening time. Male flowers open early and wilt, while female flowers have a pistil and remain open for about a day.
In sunny weather, you can additionally attract insects by treating the bushes with sweet water: 1 teaspoon of honey per 10 liters.
Formation
Plant training is the foundation of pumpkin care, as it helps ensure a good harvest and large fruits. A properly trained plant looks like this: on the main stem, when it reaches a height of 1.3-1.5 m, a pair of shoots 60-70 cm long should be left, and the rest should be cut off. Removing the axillary shoots is called pinching.
Thus, each bush produces three fruits. To speed up ripening, lay the remaining vines on the ground and cover them with a 6-7 cm layer of soil. Another option is to keep two stems, with the main stem producing two pumpkins and the secondary stem producing one. After the fruits, leave three leaf blades and pinch off the tops. If everything is done correctly, you can harvest large, ripe pumpkins.
Top dressing
Fertilizing is an important aspect of care. To ensure proper application and the plant receives sufficient nutrients, follow these guidelines:
- When 3-4 true leaves appear, or 7 days after planting in open ground; if using the direct-seeding method, after 3 weeks. Nitrophoska, 10 g per bush, 1 tbsp ash per 10 liters of water. Manure or chicken manure diluted 1:4 are also suitable.
- Organic fertilizer can be added every week.
- When long shoots grow: nitrophoska at a rate of 15 g per plant.
To fertilize your pumpkin for the first time, make a 6-8 cm deep furrow in the soil next to it and add fertilizer, keeping it 10-12 cm from the bush. All subsequent fertilizers should be applied 40 cm further from the plant, making furrows 10-12 cm deep.
Sprinkling of whips
This procedure is usually performed when the shoots exceed 1 meter in length. To do this, the vines are untangled, straightened, and laid out in the garden. Then, in some places, they are covered with soil. This is necessary to prevent them from curling. Soon, the parts buried in the soil will develop a root system, which becomes an additional source of nutrition for the fruit. Remember to water them regularly.
Pests and possible diseases
Pumpkins are often susceptible to diseases and the same pests as other melons. This chart will help you quickly find a solution and keep your harvest healthy:
| Problem | Manifestation, features | Elimination measures |
| Powdery mildew | Thick whitish coating. | Watering only with warm liquid. Chemicals: Topaz, Strobe. |
| Peronosporosis | Light purple fluff, mushroom spores. | Preparations: Kartotsid, Kuproksat. |
| Bacteriosis | Ulcers on different parts of the bush. | Maintain crop rotation. Disinfect planting material. Add 10 drops of iodine and 1 liter of low-fat milk to 9 liters of water. |
| Cladosporiosis | Damage and rotting of stored fruits. | Good ventilation, maintaining temperature conditions, selecting healthy specimens. |
| Gray and white rot | Brown spots without clear contours. | Removing leaf blades, applying foliar fertilizers: 10 g of urea, 2 g of copper sulfate and 1 g of zinc sulfate per 10 l. |
| Flaky mold. | Sprinkle the affected areas with coal dust or ash. | |
| Mosaic | Contrasting coloring. | Potassium permanganate – weak solution, Farmayod -3: 300 g per 1 ha. |
| Anthracnose | Yellow-brown circles, appearance of mycelium. | Destruction of diseased specimens. Bordeaux mixture, Abigalik. |
| Spider mite | Light yellow dots. | Spraying with water or onion peel infusion: 200 g per 10 l. |
| Aphid | The shoots and ovaries curl up. | Regular weeding. Spraying with a soap solution (300 g per 10 liters). Karbofos (60 g per 10 liters). |
| Slugs | Eaten leaves. | Manual collection, setting traps. |
| Wireworm | Gnawed stems and spoiled seeds. | Loosening the soil, placing baits. |
Top.tomathouse.com informs: how to harvest and store pumpkins
It's best to harvest in dry weather before the first frost, when the leaves wilt. Pumpkins that have frozen don't store well and are more susceptible to rot. Make sure the pumpkins are ripe: you can tell by the firm, dry stems, which take on a cork-like texture, or by the appearance of a distinct pattern on the bark. Next, sort the pumpkins by size and quality, handling them carefully to avoid damage. Damaged or bruised pumpkins should be processed first; they won't keep for long; undamaged pumpkins should be prepared for further storage.
It's best to cut pumpkins with the stems 5-6 cm high and store them in a warm, dry place for two weeks. Once the rind has completely hardened, they can be stored for the winter. A loggia, balcony, or shed is suitable until frost sets in. When the thermometer reaches +5°C or below, bring the harvest indoors to a warm room with a temperature of at least +14°C to +16°C. After 14 days, select a location with a different humidity of 60-70% and a temperature of +3°C to +8°C; sheds, basements, or attics are suitable for this purpose.
Under these conditions, pumpkins can be stored all winter and even longer. At high temperatures, the fruits lose weight and may begin to rot.
If the harvest is large, it can be stored on shelves or racks covered with straw. The key is to keep the vegetables from touching each other. Another storage option is in boxes with moss. Another method is to dig a trench in the garden, line it with a 25 cm layer of straw and then cover it with soil. Holes are made in the soil for ventilation, closing them when the temperature drops. If you have a small number of pumpkins, whole ones can be stored indoors in a dark place, and cut ones should be kept in the refrigerator.
Fruits selected for seed should be ripe and uniformly colored. Avoid adding too much fertilizer to the soil around the intended specimens. This will ensure the planting material has time to ripen. To obtain a specific variety, it's best to plant the plant separately from other varieties and pollinate it artificially.
Next, the cut pumpkin should be stored in a cool place for about a month. However, don't leave it for too long, as the seeds will begin to grow inside. Late-ripening varieties that keep well can be stored longer. Don't cut the pumpkin in half; it's better to do so from the side. Scoop out the pulp and select the most suitable specimens for planting: undamaged, large, and firm. Be sure to check for rot. Afterward, rinse, spread them out on a surface, and allow them to dry. The shelf life of planting material is 7-8 years.
The basic storage conditions before spring sowing are: dry, moisture-free conditions, with an optimal temperature of 16°C. It's best to store seeds in paper bags, not plastic ones, as condensation can form on them. It's not recommended to store seeds in kitchens, bathrooms, or areas with high humidity.
It's important to remember that only true pumpkins can be grown this way. Hybrid pumpkins are easily identified by the F1 marking on the packaging; they cannot be reproduced at home.
Pumpkin is a vegetable crop whose fruits are rich in nutrients and whose taste is loved by both children and adults. Growing and caring for this plant is easy, even for novice gardeners. Careful and meticulous adherence to the rules will ensure a bountiful harvest and preserve it for next season.