Growing celosia from seed isn't very difficult; in this article, we'll walk you through the entire process step-by-step, so you shouldn't have any problems. But first, a few words about the flower itself.
Celosia is a herbaceous plant growing from 30 to 70 cm tall. The stems are ribbed, straight, and a rich green hue with a reddish tint. The small flowers are gathered in large, crested clusters. After flowering, a fruit—a capsule containing seeds—forms. The planting material is small—approximately 700 seeds per gram. The only way to propagate Celosia crested is from seed, especially since the seed remains viable for up to 5 years. This is the topic of this article.
Important points in growing celosia
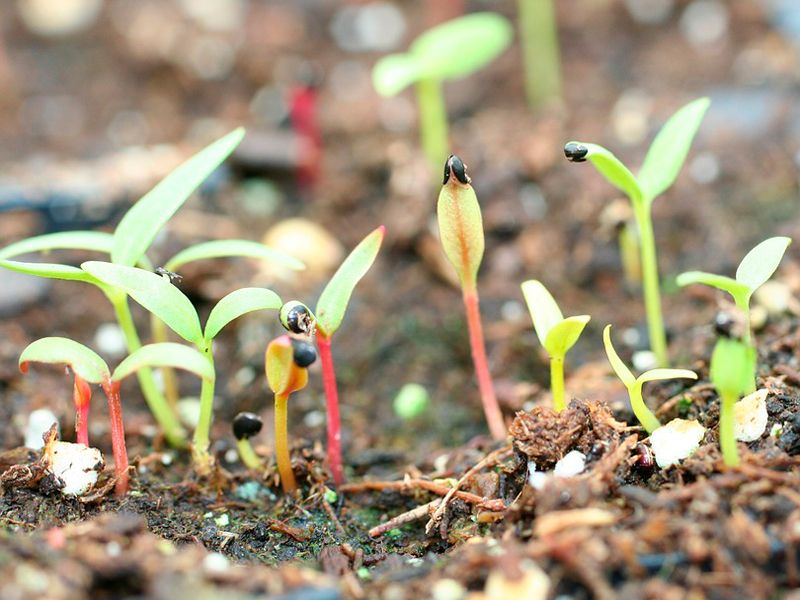
Celosia is grown using both seedlings and non-seedling methods. Celosia seeds are sown for seedlings beginning in May. The seedlings are sown under plastic in the garden or in individual containers indoors. With proper sowing (shallow) and proper care, seedlings appear within 6 days.
The main conditions for successful cultivation:
- good lighting;
- moderate temperature conditions;
- air access;
- careful watering (excess moisture leads to rotting of the root system).
For seedlings, choose a bright window, but one protected from direct sunlight. Celosia should be transplanted outdoors only after all frost has passed, as the plant is delicate and does not tolerate even slight cold.
Seeds are sown directly into the soil in spring or fall. The plant requires loose, well-drained soil, and mineral fertilizers are applied once a month.
Growing Celosia from Seed
Overall, the process is simple and doesn't take much time. The main thing is to follow the instructions. To collect the planting material, simply take a sheet of white paper and shake the flower over it.
Preparing Celosia Seeds
The plant is quite common, so it can be purchased at any specialty store. Before planting, pour the seeds into a glass, cover with clean water, add 1-2 drops of growth stimulant, and leave for five hours. After this, you can begin planting immediately, so the containers with soil should be ready by this point.
Sowing at home
In the wild, this flowering plant can be found in regions with subtropical and tropical climates. Therefore, celosia requires plenty of warmth and light to thrive. To ensure the longest flowering period, experts recommend planting the seeds indoors, as buds produced in the open ground are not as abundant.
The optimal time for sowing is the first half of spring. To germinate the seeds, you will need:
- soil made of humus, vermiculite and sand;
- container.
Make shallow furrows on the surface, no more than 1 cm apart. Sow the seed and press it lightly with your palm. There's no need to water the seeds; misting is sufficient. Watering will wash away the small seeds.
After planting, the container is covered with film or glass so as not to disturb the microclimate, and transferred to a bright place where the average daily temperature does not change or changes only slightly.
Seeds germinate best in a warm, humid room—a kitchen or bathroom. Maintain a temperature between 22 and 25°C.
The soil should always be kept slightly moist and sprayed with soft, low-lime water. It's best to spray the seeds in the morning, as evening watering can cause them to become too cold.
To ensure successful germination, the container must be regularly ventilated for an hour and any accumulated condensation must be removed. Once the first seedlings emerge, additional lighting should be provided.
Caring for seedlings
After germination, the soil should remain slightly moist. Allow the top layer of soil to dry out between waterings. Avoid standing water, so drain the tray after a few minutes, once the roots have had time to soak.
An alternative watering method is to completely submerge the celosia pot in a container of water. Keep it there until the release of oxygen bubbles stops. Remove the pot, let the water drain, and place it on a tray.
After a week, when the sprouts have grown a little, you should apply a complex fertilizer or one containing nitrogen.
If you plan to transplant celosia outdoors, move the container outside a few weeks beforehand to allow the seedlings to acclimate to the new conditions. This will speed up growth and reduce the risk of disease. Seven to 10 days is enough for young plants to acclimate to the sun and open air. Once warm weather sets in and frosts have passed, transplant the celosia into the garden.
Transplanting young seedlings (pricking out)
Pricking out is done in two stages. The first time, when the seedlings develop two full leaves, they are transplanted into separate containers filled with the same soil mixture. Fertilizer is not needed for the first few weeks after pricking out, allowing the plants to establish themselves and grow stronger. After two weeks, you can feed the seedlings with a complex mineral fertilizer designed for flowers.
The seedlings are pricked out again when they are fully established, which is another two weeks later. For this, use separate cups filled with a mixture of peat and humus. Once the plants have taken root, fertilize them again.
Planting seedlings in the ground
Preparing the landing site.
- Celosia is typically transplanted to the flowerbed once frost has been eliminated. In central Russia, this is not until the second half of May.
- First, you need to prepare the site. Since celosia is a heat-loving plant, choose a sunny, draft-free location.
- If the groundwater on the site is located close to the surface, drainage is necessary.
- The area is dug over and humus is added. If the soil is heavy, it is thinned with sand. After adding the humus and sand, the prepared area is left for one week.
- If the soil is acidic, liming is necessary 3-4 days before transplanting.
- To disinfect the soil, it is treated with a solution of potassium permanganate 1-2 days before planting.
Practical recommendations. The size of the hole is determined based on the size of the mature plant—for dwarf bushes, the distance between them is 15 cm, and for larger bushes, up to 30 cm.
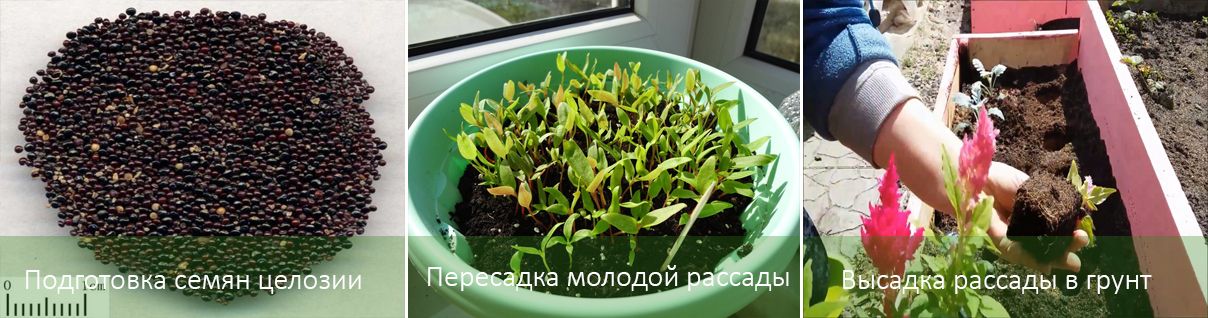
Young celosia seedlings are very fragile, so planting is done with a spoon—it's used to dig the seedlings out of their cups to preserve the root system without disturbing the root ball.
The roots in the hole should be evenly distributed across the entire area. A mound should not form around the stem, as this will impede normal growth and watering.
Sowing celosia seeds in open ground
Seeds can be sown directly into open ground. Planting is done before winter—in the second half of October or early November. Seeds can also be sown in early spring. The main requirement is that the soil be ripe and suitable for gardening.
The algorithm of actions is as follows:
- The bed is prepared in advance to allow the soil to settle well; this will take 7 to 10 days.
- The furrows should be shallow - up to 5 cm, the distance between them from 25 cm to 30 cm.
- The seeds need to be mixed with sand.
- The rows are covered with a rake (with the reverse side).
- Watering should be moderate, it is important not to over-water the soil and prevent crust formation.
- After each watering, the soil is sprinkled with a thin layer of humus.
- The seedlings are carefully thinned out so that the remaining plants grow strong and lush.
Celosia is grown primarily as an annual plant, so fertilizing it is not practical. If you're growing a perennial, apply liquid fertilizer once a month from early summer to early fall.
To prolong the flowering period as much as possible, regularly trim away dead parts of the plant. This will give the celosia a beautiful, lush shape.