Gladiolus is a plant native to the tropical forests of Africa and the Mediterranean. This member of the Iridaceae family is very popular among gardeners due to its bright, unusual flowers. Another name for gladiolus is the iris.
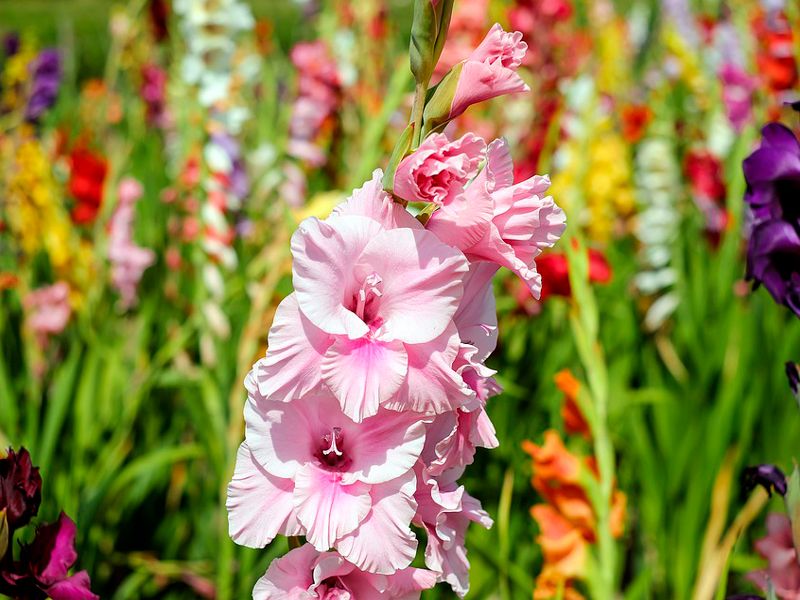
The flower has a lovely, fragrant relative—the acidanthera, commonly known as the fragrant gladiolus—but it belongs to the Iridaceae family. It is used in breeding with the gladiolus to produce new varieties with delicate scents.
Content
- 1 Description of gladiolus
- 2 Types and varieties of gladioli with photos and names
- 3 When to plant gladiolus bulbs in spring depending on the region
- 4 Preparing gladiolus bulbs for planting
- 5 Planting gladioli and subsequent care
- 6 Top dressing
- 7 When to dig up gladioli
- 8 How to store gladioli
- 9 Reproduction of gladioli
- 10 Methods of combating diseases and pests of gladioli
Description of gladiolus
Gladiolus is a perennial. Its rounded corm consists of numerous glossy scales and is renewed annually. These scales can be white, black, burgundy, or red. The stems are elongated, straight, unbranched, and arrow-shaped. They reach a height of approximately 50-170 cm. The elongated leaves are thin, tapering toward the tip, and grow to 40-90 cm. Their color varies from bluish to deep green, depending on the species and variety. They support the shoots by joining at the base. Inflorescences can be unilateral, bilateral, or spiral.
The shape resembles ears of corn up to 80 cm in size. The flowers have six interlocking lobes of varying sizes, shapes, and shades. The fruit is a capsule consisting of three valves, containing small, round seeds, black or brown.
Types and varieties of gladioli with photos and names
Gladiolus breeding is well developed, which is why the Gladiolus genus includes 280 species and even more varieties.
| View | Description | Varieties | Flowers. Peduncle |
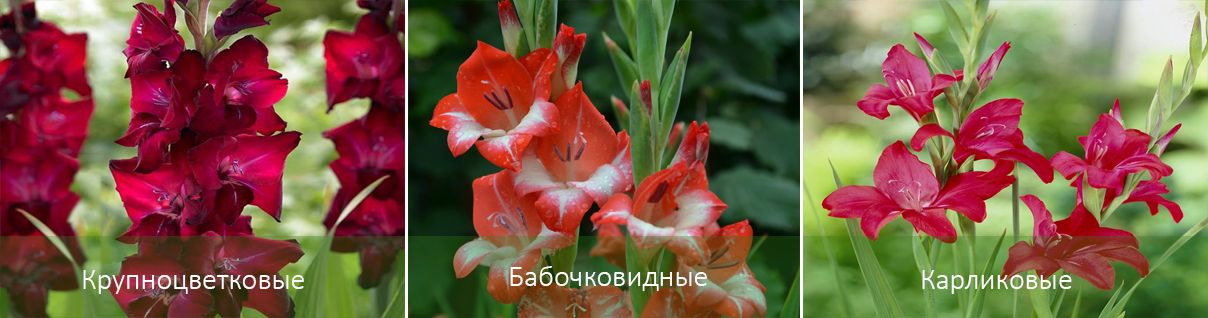
| Large-flowered | A thick, strong stem 90-150 cm high, the leaves are elongated, dark green, and have a glossy sheen. |
|
5-20 cm in diameter, triangular, with variegated petals, up to 28 in a single inflorescence. Purple, pinkish, red, and yellow petals with a white or gray base are common. Characterized by a large size of about 90 cm and an upright, spike-like shape. |
| Butterfly-shaped | 50-100 cm, strong, medium-height, greenish-gray stems, sometimes slightly swaying under the weight of the inflorescences. Large, sword-shaped leaves, elongated toward the tip, are yellow-green with a white sheen. |
|
Large, sessile flowers with intense coloring: yellow, pink, purple, burgundy, lilac-white with a slight orange tint. The petals are wavy, curved, and lacy. They are lighter near the throat. There are about 15-20 petals. They are elongated and thickened at the base. |
| Primrose-like | 70-120 cm long, compact plant with a resilient, unbranched stem. The leaves are thin, narrow, light green, and covered with plant wax. |
|
Most often, they are solid red, white, pink, or purple. Bright yellow (Leonora) is also found. 4-8 cm, triangular or rounded, the petals are thin, with slightly wavy edges, and the upper petals are slightly curved, resembling a hood. There are 18-23 flowers. |
| Dwarf | A small species (50-80 cm) with large, dark green, glossy leaves. The stem is dense, slightly rough, and arrow-shaped. |
|
Exotic, with pleated petals, in a variety of shapes. Orange, purple, red, yellow, and pink with a whitish sheen and a distinct throat. Compact, alternately arranged. |
When to plant gladiolus bulbs in spring depending on the region
Gladiolus is planted in late to mid-spring. Planting times vary depending on the region.
| Region | Period |
| Central Russia (Moscow, Moscow region). | To prevent the risk of disease and frostbite, it's best to plant the corms when warm weather arrives, typically between April 25 and May 10. However, given the continental climate, this could be done later, with temperatures ranging from 9 to 12°C. |
| The central zone, including the Leningrad region. | The weather is colder, with the possibility of severe frosts or unwanted precipitation, so the planting time has shifted from May 10 to July 1. There's no need to rush; it's important to allow the corm to establish and the soil to warm up. If frost does occur, smoke can be used for protection. |
| Siberian region and the Urals. | The climate is variable, with only 90-120 days between sudden temperature fluctuations, making outdoor planting challenging. The timeframe varies from May 28th to July 1st. To protect against frost, agrofibre or special film should be placed on flowerbeds. Plants in this region rarely survive until the following year. |
| Southern strip. | Growing gladioli isn't particularly difficult, as this region has the most favorable climate conditions. Planting time: March 20th - April 15th. Don't wait for hot weather, as the corms may fail to take root and die. |
Preparing gladiolus bulbs for planting
Preparation should be carried out 2-3 weeks before planting in open ground.
First, you need to carefully remove excess husk from the corms and carefully examine the surface to ensure there is no rot or malignant growths on it.
If any appear, they should be cut off, and the cut areas should be disinfected with brilliant green or a weak alcohol solution and covered with crushed charcoal or cinnamon. Also, check for any lesions or disease-causing ulcers, which should be treated with a weak iodine solution or brilliant green.
The base of the corms, the area where the roots grow, should be measured. A 2-4 cm diameter is considered ideal for planting. Young corms quickly establish themselves and are resistant to cold and disease. Older corms, with a base longer than 4 cm, are most often used for propagating shoots (pups) and for renewing the planting stock.
After carefully inspecting and selecting the corms, place them in a brightly lit area, layering them with damp sawdust and vermiculite underneath. A regular box can also be used, moistening the bottom regularly. Avoid drafts and temperature fluctuations. With proper care, sprouts will appear in 1-2 weeks.
It's important to divide the bulbs of particularly valuable varieties into two halves for greater productivity. This should be done so that the base and sprout are preserved on each half. The cut areas should also be coated with charcoal dust or honey.
One hour before planting in open ground, the corms should be soaked in a 0.5% potassium permanganate solution. Then, allow the corms to dry before planting them in the garden.
Planting gladioli and subsequent care
Flowerbeds should be placed on a sunny, well-lit side, at a slight elevation. The location of the flowers should be rotated annually to prevent pest infestations, diseases, or depletion of the nutrient medium. It is also not advisable to plant gladioli after corn and cucumbers, which cause fusarium. The most favorable soil is that left behind by potatoes and beets. Ash, sand, peat, organic matter, and mineral fertilizers should be added to the substrate.
It is worth considering the acidity of the soil: it should be neutral.
Site preparation should begin in late autumn: loosen and dig the soil to a depth of 40 cm, remove weeds and root debris, and weed the soil. This will loosen the soil and allow oxygen to pass through easily. Planting is carried out in several stages:
- In the selected area, dig holes 10-15 cm deep.
- Add nitrophos in a consistency of 80 g per 1 sq. m.
- The gaps between the corms are left at about 10-15 cm, taking into account that adult plants need to be tied up.
- The bulbs are planted no more than 13-14 cm deep in the ground. If planted deeper, the gladiolus will produce many inflorescences; if planted higher, a large number of baby bulblets will appear.
Another planting method is dense planting. This eliminates the need for staking, resulting in lush and vibrant flowerbeds. With this method, the distance between corms is reduced to 5-8 cm.
The soil is generously fertilized with pine needles, wood sawdust and phosphorus, nitrogen or potassium fertilizers.
Once the gladiolus plants have established themselves and adapted to their new conditions, they need proper care. Water them no more than once a week, ensuring that water doesn't stagnate, otherwise they will rot. Avoid dripping on the flowers. Regularly loosen the soil and remove weeds. Stake them, if needed, until flower stalks emerge. Regular wooden cuttings can be used.
Top dressing
During the entire growing season, gladiolus requires only five fertilizing sessions. These include various mineral, organic, and chemical substances.
| Periods of contribution | Fertilizers applied |
| First | Use organic matter, specifically humus. During rainy seasons and watering, it actively releases nutrients to the corm. |
| Before flowering | When at least three healthy leaves appear, apply nitrogen fertilizer. Nettle infusion also works well. As the plant develops further, you can feed it with a general-purpose garden plant mixture. You should also spray the shoots with a solution containing boric acid at a ratio of 2 g per 10 liters of running water. |
| Bloom | Once inflorescences appear, increase the amount of mineral fertilizers: potassium and phosphorus. Ash, sand, and pine needles are recommended to improve the soil's nutritional value. |
| After flowering | Prepare a solution of 15 g of superphosphate, 30 g of sulfate, and 10 liters of water. Water the gladiolus with this until the end of summer. |
| Final | Mix 5 g of potassium permanganate with 10 liters of water. Fertilize with this solution in early fall, before frost. |
When to dig up gladioli
Gladiolus should be dug up before the first frost sets in. This usually happens in mid-autumn, but each region has its own timing.
| Region | Period |
| Central Russia (Moscow, Moscow region). | This should be done between September 15 and October 10, or later if favorable climate conditions persist or flowering continues. Don't disturb the gladiolus until the temperature drops below 8°C. |
| The central zone, including the Leningrad region. | The weather here is more unpredictable, so the dates shift to September 1-20. |
| Siberian region and the Urals. | Gladioli should be dug up before the end of September, between the 10th and 15th of the month. |
| Southern strip | Since temperatures here drop slowly and fall still remains warm, corms are removed from the soil between October 20 and November 5. However, don't delay, otherwise rot will set in and the plant will die. |
How to store gladioli
After digging, the corms are placed in a well-heated room at a room temperature of 22 to 25°C. They should be turned daily to prevent damage. The corms should be dried for no more than three weeks; this allows the scales to dry and acquire a glossy sheen. After this period, the corms are moved to a cooler location. In an apartment, this could be the floor space next to the balcony door, or in a cottage, a basement or cellar.
It's best to store them in cardboard or plastic containers with ventilation holes. The corms can be placed in several layers, interspersed with newspaper or thin paper. The ideal temperature is +3 to +10°C, with humidity of at least 70%. Regularly check the corms and remove any diseased or dried ones.
It's worth remembering that at the end of winter, gladioli begin a period of active growth, which needs to be slowed down. To achieve this, you can add mint leaves and green apples to the container.
Reproduction of gladioli
There are several methods of propagating gladiolus, the most popular of which is vegetative:
- Using a disinfected knife, separate the ripe baby beet and sprinkle the cut area with charcoal dust or cinnamon.
- Dry the small corms and plant them in open ground at the beginning of May.
- Dig a furrow about 5 cm deep and place the babies in it.
- Sprinkle the soil with peat and ash, water generously.
- Cover the area from above with plastic wrap.
- After 1 month, when the stems reach the film, it needs to be removed.
Another method is dividing the bulb.
- Select a suitable corm with a large base and a small number of cormels.
- Cut vertically with a disinfected knife into 2 equal parts.
- Dry the lobes by placing them in a well-lit place for several hours.
- Treat the cut with charcoal or potassium permanganate solution.
- Plant the resulting corms in open ground.
Seed propagation is not as popular, but it is interesting. It is only feasible in favorable conditions.
- To begin, you should prepare a substrate consisting of sand and leaf humus; you can also add peat and pine needles (in equal quantities).
- Before planting, seeds should be placed in a 0.01% solution of sodium humate or heteroauxin.
- Sow seeds in containers with drainage holes at the end of February.
- With the onset of warm weather, the pots are placed in greenhouse conditions with a constant high temperature and bright light until fully ripened.
Methods of combating diseases and pests of gladioli
| Disease | Leaf manifestations and other symptoms | Methods of elimination |
| Fusarium disease | They turn yellow and become covered with a whitish coating. | If the disease occurs during the growing season, the plant is unlikely to survive, so it should be removed along with the surrounding soil. To prevent further damage, treat the bulbs with a potassium permanganate solution before planting. |
| Sclerotinia | They wither, dry out at the base, and the stem rots. | Dig up affected gladioli immediately to prevent spread. If the disease has just begun, treat the plant with a fungicide solution: Ordan, Hom, or Previkur. |
| Scab | Black marks on the corms and all parts of the gladiolus. | Increase soil acidity and remove infected flowers. |
| Viral infection. | The stem may become covered with brown lines. Black dots appear on the outer surface. | A complete cure is impossible. The infected plant should be removed to prevent spreading the infection. |
| Scale insect. | The shoots are dying and becoming covered in spots. | Use Permethrin, Bi 58, Phosphamide, Methylmercaptophos or soap solution. |
| Aphid. | Small green insects on the surface of the stem. The philodendron is dying. | Lemon juice tincture, Intavir, Actofit. |
| Spider mite. | The stem and leaves are covered with a thin, dense white web. | Water regularly, apply Neoron, Omite, Fitoverm according to the instructions. |
| Thrips. | Thin white stripes appear. The plant droops and wilts. | Use Fitoverm, treat with Aktara, Mospilan, Actellic or Calypso. |