Keeping an orchid indoors is intimidating for novice gardeners due to the fear of plant death. Inexperienced caregivers can actually cause the plant's root system to rot or dry out. Since the root system plays a vital role in the plant's life, damage to it directly impacts the condition of the pseudobulbs, leaves, and flowering.
But even if you have lost the maximum number of orchid roots, you can still grow them using several methods.
Content
How to tell if an orchid's roots are rotten
Rotting of underground and aerial roots is a common problem among houseplants caused by improper care or pest infestation. This process most often begins in winter, when daylight hours decrease and temperatures drop.
If the damage isn't too advanced, it can be treated. To determine whether a plant is diseased, it's important to distinguish healthy roots from those susceptible to rot. There are several principles for recognizing them.
By external signs
The first method is determination by general appearance and touch.
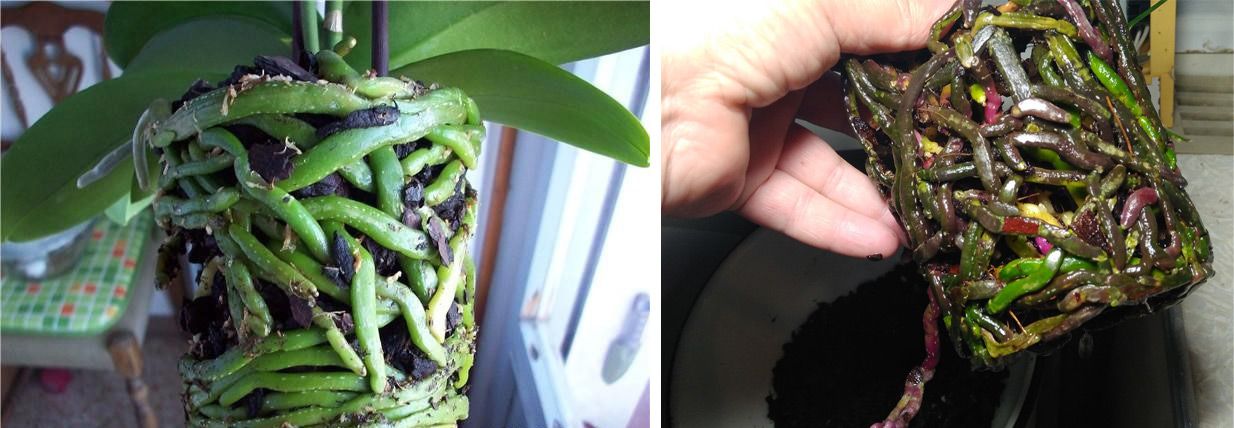
The orchid root system should be:
- dense consistency;
- silvery in color when normal and green when moist (chloroplasts, the main participants in photosynthesis, begin to show through); in older plants, they are yellow or simply brown;
- smooth and elastic.
If putrefactive processes have begun, the following signs appear:
- dark color, almost black;
- liquid, mucus;
- mold;
- putrid smell;
- filiform form.
Experimental method
Root viability can be determined not only by external signs but also by removing the plant from the pot, immersing it in water, and leaving it for 3 hours. Healthy roots will become nourished, firm, and plump, but if the shoots remain limp and pale, they are infected.
Causes of Orchid Root Root Rot
- Excessive moisture due to non-compliance with watering rules.
- Incorrect location, lack of light.
- Fungal diseases affecting the root system.
- Lack of oxygen supply due to poor quality soil or its strong compaction.
- Burn caused by excess fertilizer application.
Orchid has dry roots: reasons
Sometimes the opposite occurs, and the roots dry out. This can also be caused by poor watering practices, but only when the plant is dehydrated. If the situation isn't corrected, the flower stalks will begin to dry out, and then the leaves.
Orchid resuscitation options
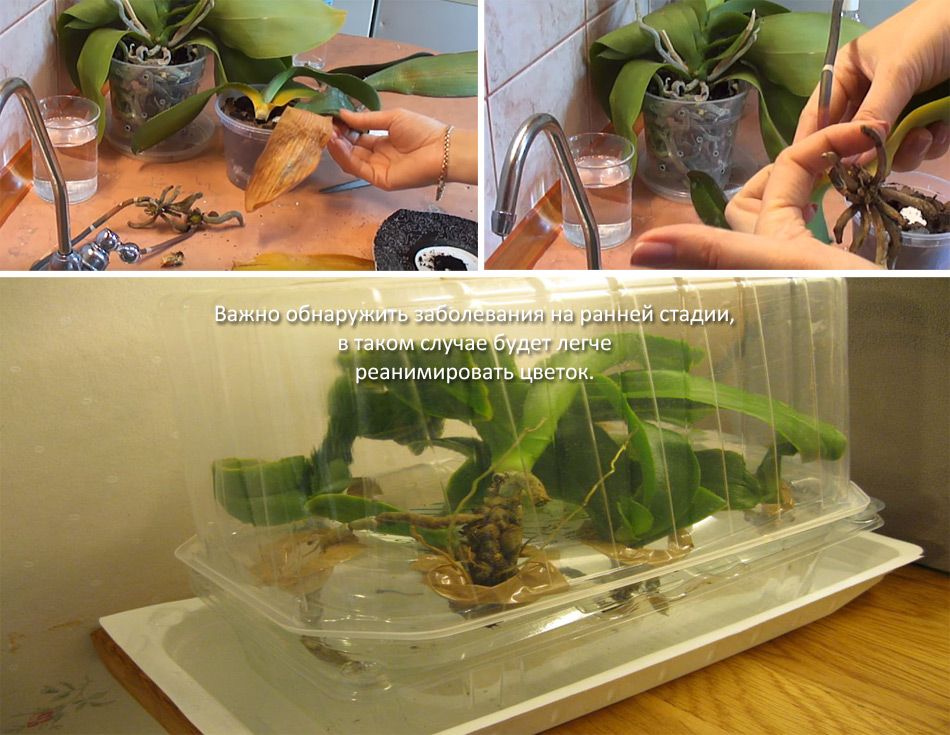
It is important to detect diseases at an early stage, in which case it will be easier to revive the flower.
First, you need to determine the extent of decay. Based on this, choose a method to revive the orchid.
A minor part is damaged
If only some small areas of the roots have been affected by the disease and new shoots are being formed, a method of changing the regime is used:
- The orchid is removed from the pot and carefully freed from the soil by rinsing.
- The affected areas are identified, removed, and the cuts are treated with charcoal or fungicides, Kornevin.
- Leave to dry, which usually takes 3 hours.
- Place the plant in a small pot (6-7 cm) with a substrate consisting of moss and expanded clay, and create conditions different from its previous location. Place the plant in a brighter location or provide additional lighting, extending the daylight hours (at least 12 hours). Also, increase the temperature (22…25°C).
- Water as the soil dries out. You can do this by submerging the plant container in water for half an hour, ensuring that the top layer remains moist but that no water remains at the bottom.
Severe damage
When a large part of the plant rots, a method of growing orchid roots in greenhouse conditions is used.
The initial stage of rehabilitation is the same as in the first case:
- The plant is removed from the pot, and the rotted roots are trimmed off very carefully. Remaining damaged areas can ruin all efforts, causing a new wave of rot.
- Afterwards, the cuts are treated with fungicides or charcoal. If mold is detected, the flower is placed in a weak solution of potassium permanganate for 20 minutes.
- The flower is then placed in a special vessel with a convex bottom, and soft filtered water is poured into it, ensuring that the rosette of leaves does not touch it and that the bottom of the rosette is submerged. Sugar syrup or honey is often added to the water, and the plant itself is treated with a growth stimulant called Kornevin.
- After 6-7 hours, release and dry the plant.
- The method itself involves creating a closed space for the diseased plant, where accumulated carbon dioxide stimulates chloroplasts to form new cells. A comfortable temperature of 25°C and constant humidity of at least 70% are maintained. These conditions can be achieved using any glass container. The greenhouse is periodically ventilated and watered sparingly.
- It is essential to provide the orchid with good lighting for at least 12-14 hours a day.
- Once a month, feed with fertilizers (Epin, honey solution).
Orchid resuscitation timeframe and post-resuscitation actions
The plant's recovery period can last from a month to a year, even if everything is done correctly.
The best time to revive a flower is spring or fall. In winter, the chances of survival are much lower.
When the orchid's appearance improves, the leaves turn green and new aerial roots begin to grow, stop fertilizing and reduce watering.
Following care instructions isn't a particularly labor-intensive process, especially for the unpretentious Phalaenopsis orchid. You just need to monitor the plant more closely to make timely corrective actions.
Top.tomathouse.com recommends: root growth for orchid babies
Methods of resuscitation and root growth in orchids can be used in cases where roots do not appear on babies for a long time during propagation.
For this, they use a home greenhouse method using sphagnum moss. They also float the plants on foam over water.
Rooting orchids is a fairly easy and not very labor-intensive process; even an inexperienced beginner gardener can handle it, provided they follow the rules.