Cambria is the general name for orchid hybrids specially bred by breeders and not found in the wild. These plants produce beautiful flowers in a variety of colors, depending on the variety. Due to their attractive appearance, they are often used to decorate the interiors of homes and offices.
Content
Description and distinctive features of cambria
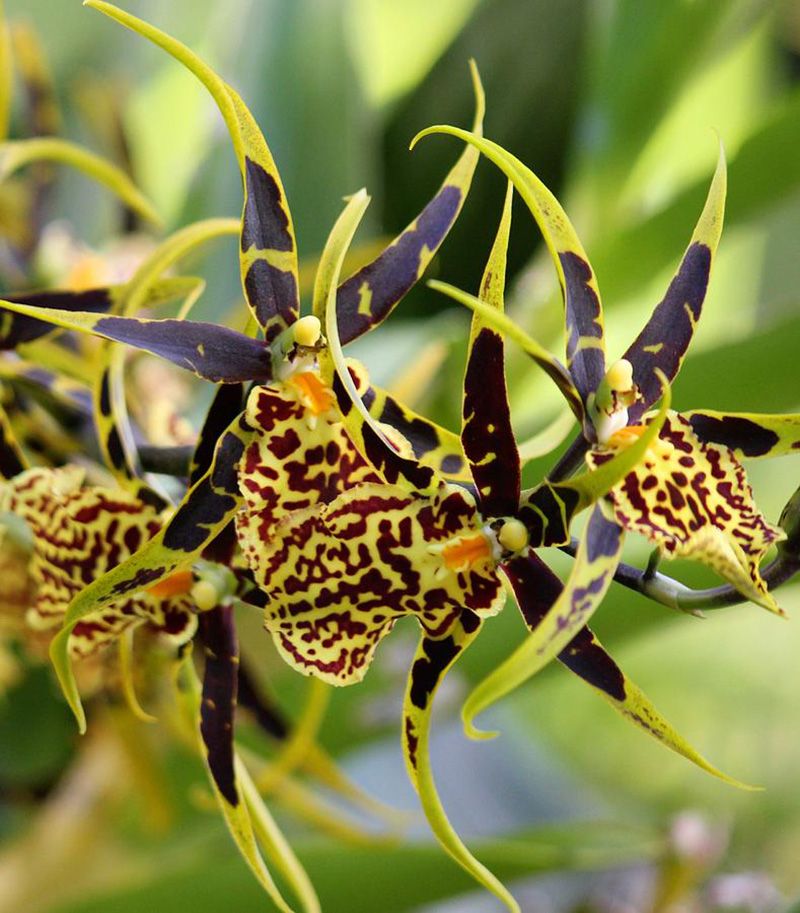
Cambria is also known as "star orchid" due to the shape of its flowers. Distinguishing features of this orchid include:
- pseudobulbs are round or oblong, up to 8 cm;
- narrowed leaf blades;
- shoot growth type;
- one of the lateral axes grows very quickly and becomes the main one, as a result of which the second one shifts or dies;
- on false bulbs there are two or three dark green leaves with a vein in the center, reaching 0.5 m;
- flowers of various shades with inclusions, diameter - 50 mm-10 cm.
Types of Cambria Orchid
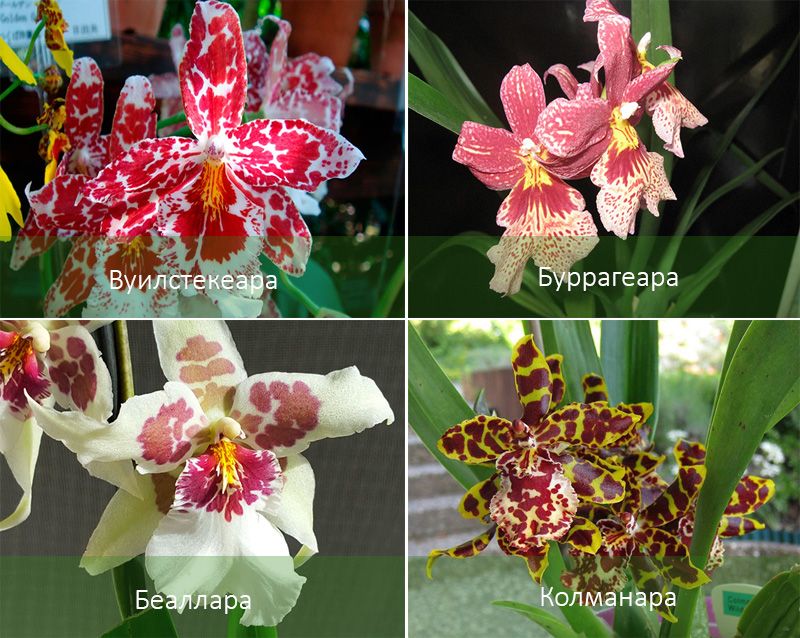
Popular varieties of Cambria orchids:
| View | Crossed species | Flower/flowering period |
| Vuilstekeara | Cochlioda, Miltonia, Odontoglossum. | A single peduncle bears between 5 and 20 large buds, which come in shades of pink, red, and yellow. Late February – early March, lasts eight weeks. |
| Burrageara | Oncidium, Cochlioda, Miltonia, Odontoglossum. | Reddish and yellowish tones. They emit a pleasant aroma reminiscent of roses.
Starts in January. |
| Beallara | Brassia, Cochlioda, Miltonia, Odontoglossum. | Beige or pinkish-white-purple with dots and spots of darker tones.
From July to the end of August. |
| Kolmanara | Oncidium, Miltonia, Odontoglossum. | Various shades of red and yellow.
It lasts from late winter to early summer. |
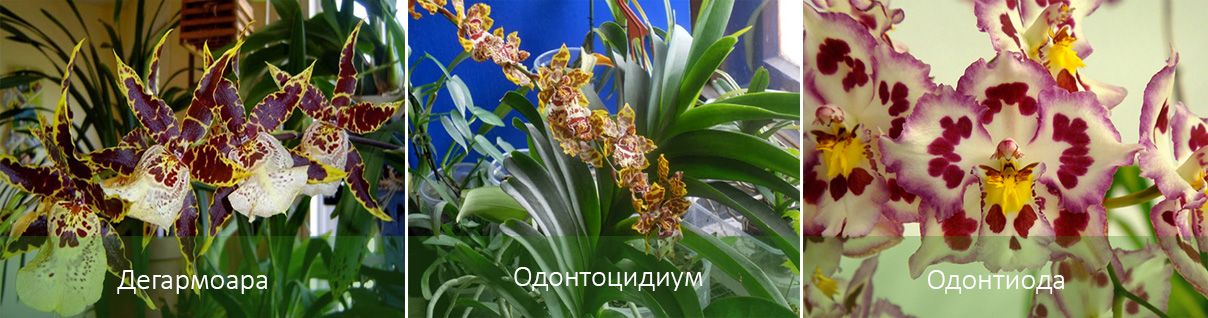
| Degarmoara | Brassia, Miltonia, Odontoglossum. | They grow up to 10 cm and have various shapes and shades. It starts at any time of the year. |
| Odontocidium | Mix of Oncidium, Odontoglossum. | Up to 50 medium-sized flowers in shades of red, orange, and yellow bloom on elongated peduncles. The petals are adorned with dark spots and patterns.
Any month. |
| Odontioda | Cochlioda, Odontoglossum. | Yellowish and reddish tones.
Any month of the year. |
Optimal conditions for growing cambria
Plant care at home according to seasons:
| Criterion | Spring/summer | Autumn/Winter |
| Temperature | Optimal temperature: +22…+26 °C. The difference between day and night temperatures is no more than +6 °C. | +16…+18 °С. |
| Lighting/location | Place the orchid near east, west, or northeast-facing windows, shading it from the midday sun. The plant requires bright but filtered light. | Place on east, west, or south-facing windowsills, protected from UV rays. If the orchid is blooming, additional lighting is required. Both phytolamps and regular lamps are used. |
| Air humidity | The optimum level is 25-30%, and during the flowering period, 35-40%. At temperatures above 22°C, spray twice a day with soft, settled water. | |
Landing, transplant
It is better to buy the planting substrate in the store, but you can prepare it yourself. Its composition: fern rhizome, moss, charcoal, pine or oak bark in equal quantities.
Before planting, soak the soil with soft, settled water. If the air is dry, add peat to the pot to retain moisture. If the humidity is high, sprinkle small pieces of pumice into the soil.
Cambria does not tolerate replanting well, so it should be done no more than once every two to four years.
Signs that a new pot is needed:
- the root system is cramped in the old one, shoots come out;
- the substrate has become rotten, moldy, and rotting;
- The flower was bought recently and does not produce buds.
Step-by-step transfer:
- Buy a ceramic pot slightly larger than the previous one, as orchids don't like a lot of space. It should have drainage holes.
- Place a 2 cm layer of gravel on the bottom and cover with pine bark on top.
- Carefully clean the roots from soil with a stick and place the orchid in a new pot.
- If the rhizome is highly developed, bend the shoots outward.
- Fill with substrate, do not bury the bulbs too deep.
- Do not water for five days to allow the soil to dry out thoroughly.
Watering and fertilizing
It's best to water using the immersion method: place the orchid in a container of water for 30 minutes. Then remove it and allow any remaining liquid to drain.
When watering shallowly, be careful not to overwater the plant, as this can cause root rot. Water as the top layer of soil dries. Use soft, moderately acidic water, preferably melted snow or rainwater. Tap water should be filtered and allowed to settle.
During the growing season, fertilize twice every two weeks. Special orchid fertilizer mixtures are available. The concentration should be half that indicated on the packaging. Fertilize the plants by adding the fertilizer to the moist substrate.
Features of flowering
It typically blooms in the fall and winter. However, if the orchid's development is optimal (temperature, humidity, and light), it can bloom year-round.
Each flower stalk blooms for 4-8 weeks (depending on the variety). Since there are several of them, the orchid produces buds year-round. The plant's life cycle is maintained by pseudobulbs. Before flowering, the bulbs thicken, sap surges, and peduncles form from the leaf axils. Afterward, the pseudobulbs dry up. Soon, shoots begin to form again at their base, marking the beginning of a new life cycle.
For mature plants, it's recommended to stimulate flowering by lowering the nighttime temperature by 6°C. Young plants don't need this. They first need to gain strength and become established.
You should also stop watering while the bulbs are forming. Once they ripen, resume watering the soil, then stop again after a few days. This accelerates the emergence of flower stalks.
Post-flowering care
Once the plant has finished flowering, cut off the dried flower stalks and stop watering. If the soil becomes very dry, you can water it with a spray bottle. When new shoots reach 3 cm in height, watering resumes.
Reproduction
Propagation occurs by dividing the bush:
- The bulbs are separated from mature, mature plants. This is done carefully so as not to damage the rhizome.
- The cut areas are treated with carbon powder.
- The cuttings are placed in pots so that the growth point is located in the middle.
- Unrooted bulbs do not hold well in the ground, so they are secured with small sticks.
- The shoots require the same care as mature specimens.
When dividing the bush, each section should have an equal number of pseudobulbs. For a week after planting, the orchid should not be watered, fertilized, or moved. The plant cannot be propagated by seed.
Mistakes in caring for cambria and their elimination
Cambria can develop problems if not properly cared for. Here are some potential problems and how to fix them:
| External manifestations | Error | Troubleshooting |
| Instead of a peduncle, a pseudobulb grows. | Excess moisture. | Stop watering for a few days until the soil is completely dry. |
| The bulbs are rotting. |
|
|
| The leaves are turning yellow. |
|
|
| Spots appear on the greenery. |
|
|
| Cambria grows in a "ladder" pattern. |
|
|
| The bulbs wrinkle or darken. |
|
|
| Snow-white coating on stems and leaves. |
|
|
| The leaves turn bright green. | Not enough light. | Move to a bright place. |
| The wrinkled leaves form an accordion and may turn yellow. | Low air humidity. | Spray more frequently with soft water, placing a bowl of cool liquid nearby. Do not increase the frequency of watering, as this will cause root rot. |
| The rhizome darkens and liquid comes out of it when pressed. |
|
|
Diseases and pests
| Pest | Signs | Treatment | Prevention |
| Spider mite | A fine web appears on the underside of the leaf blade. Small spots form where the insects suck the sap. The leaves wither and fall off. |
|
Maintain the required humidity. |
| Scale insect | Brown spots appear on the orchid. The foliage turns yellow and wilts. | Treat the plant with a cloth soaked in soapy water. | |
| Aphid | The plant stops growing. |
|
Resuscitation of Cambria
Under poor conditions and with insufficient care, the plant's root system rots and dies. However, it can still be revived:
- Remove dead and damaged root shoots.
- Treat the flower with Fundazol and place it in a new pot with different soil.
- Spray the orchid weekly with a fine spray bottle.
- Add Fundazol to the water for spraying once every three weeks.
Roots take a long time to recover. This can take several months or even years.