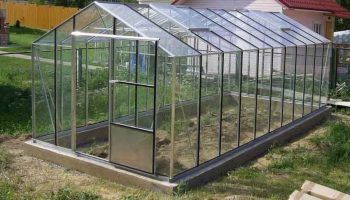
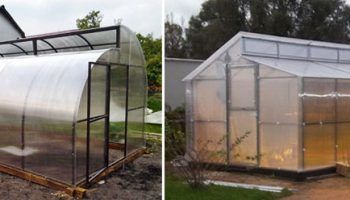
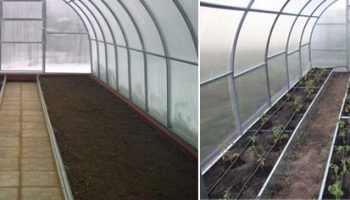
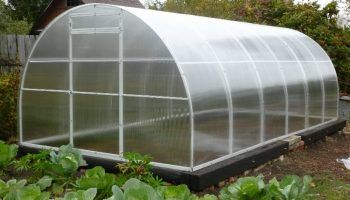
A hothouse and a greenhouse, despite their similar functionality and purpose, have fundamental differences. In this article, we'll discuss whether it's better to build a greenhouse or a hothouse for cucumbers. We'll explain our approach, and then provide step-by-step instructions for building different versions of both structures. First, let's explain the differences between a hothouse and a greenhouse.
Content
- 1 Differences between a greenhouse and a hothouse
- 2 What to choose for growing cucumbers – a greenhouse or a hothouse
- 3 DIY cucumber greenhouse
- 3.1 Greenhouse requirements
- 3.2 Material for making a greenhouse frame
- 3.3 Selecting a covering material
- 3.4 Determining the size of a greenhouse for cucumbers + drawings
- 3.5 Choosing a location for a greenhouse
- 3.6 Soil preparation
- 3.7 Greenhouse made from arches and film: step-by-step instructions
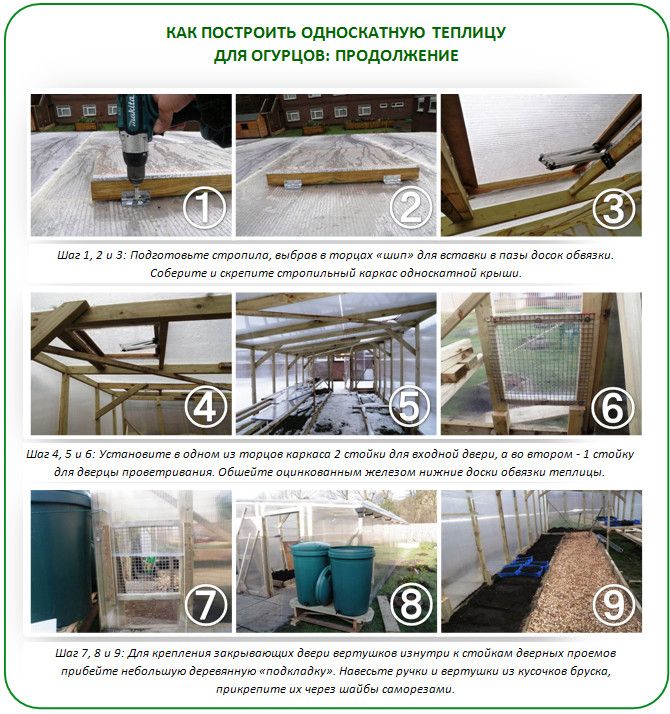
- 3.8 A lean-to greenhouse made of wooden planks and polycarbonate: step-by-step instructions
- 3.9 Building a recessed greenhouse from window frames: step-by-step instructions
- 3.10 DIY Cucumber Greenhouse: Step-by-Step Instructions
- 4 DIY cucumber greenhouse
Differences between a greenhouse and a hothouse
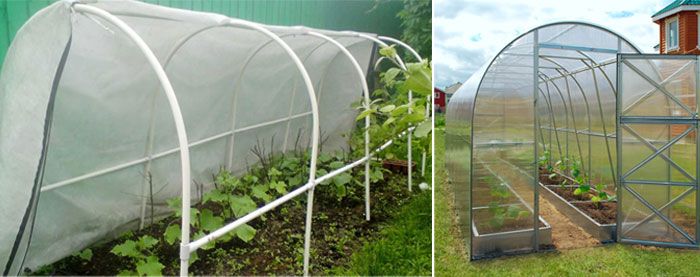
A greenhouse is a compact garden structure of small height (from 70 to 130 cm).
Sometimes it is used as a shelter for those plants that love warmth, as well as for seedlings planted in the ground that may not survive night frosts.
The convenience of a greenhouse lies in the simplicity of its construction, as well as the ability to be dismantled and stored until next year, without taking up space on the site.
The greenhouse never uses any additional artificial heat sources; due to its small area, the amount of heat generated by the daytime sun and biofuel in the form of humus and manure added to the soil is quite sufficient.
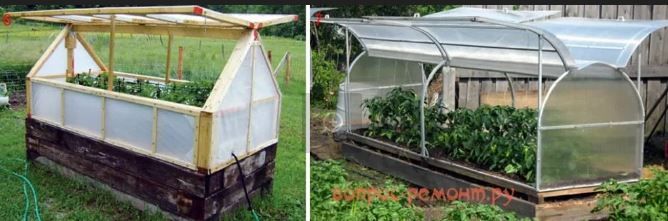
Naturally, there are no doors in the greenhouses, and ventilation is achieved by folding back the film or opening the top of the structure.
The greenhouse is a fundamental structure.
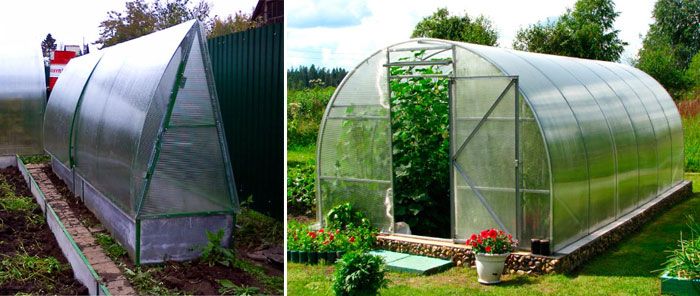
There's the option of building a collapsible greenhouse that can be stored for the winter, but more often than not, greenhouses are built to last for several years and aren't designed for regular assembly and disassembly. The average greenhouse is 2.5 meters tall, but some designs are large enough to accommodate garden equipment.
Small greenhouses are heated naturally by solar heat, but larger structures require additional heating sources. Specialty stores offer devices that not only heat the air in the greenhouse to the desired temperature but also maintain the required humidity in the air and soil. Artificial heaters can be gas, electric, or wood-burning; they allow seedlings to be planted in the greenhouse even during the cold season. The key is that the soil must also be well-heated. The heat supplied by the air alone will not be sufficient; a separate soil heating system will need to be installed, which will require significant additional investment.
What to choose for growing cucumbers – a greenhouse or a hothouse
If you're planning to grow cucumbers in your garden, you should prepare a suitable site for them in advance. You can plant them in either a greenhouse or a hotbed, but the greenhouse option will require significantly more material and physical effort.
In a greenhouse, the air cools much faster due to its large surface area and height. Cucumbers, as we know, don't tolerate temperature fluctuations and prefer to grow in warmth. Furthermore, their peak growth occurs at night. Therefore, it's best to use a hotbed for growing these vegetables. It will retain heat longer, and at night, heated air will rise but not escape, allowing the cucumbers to thrive in this environment.
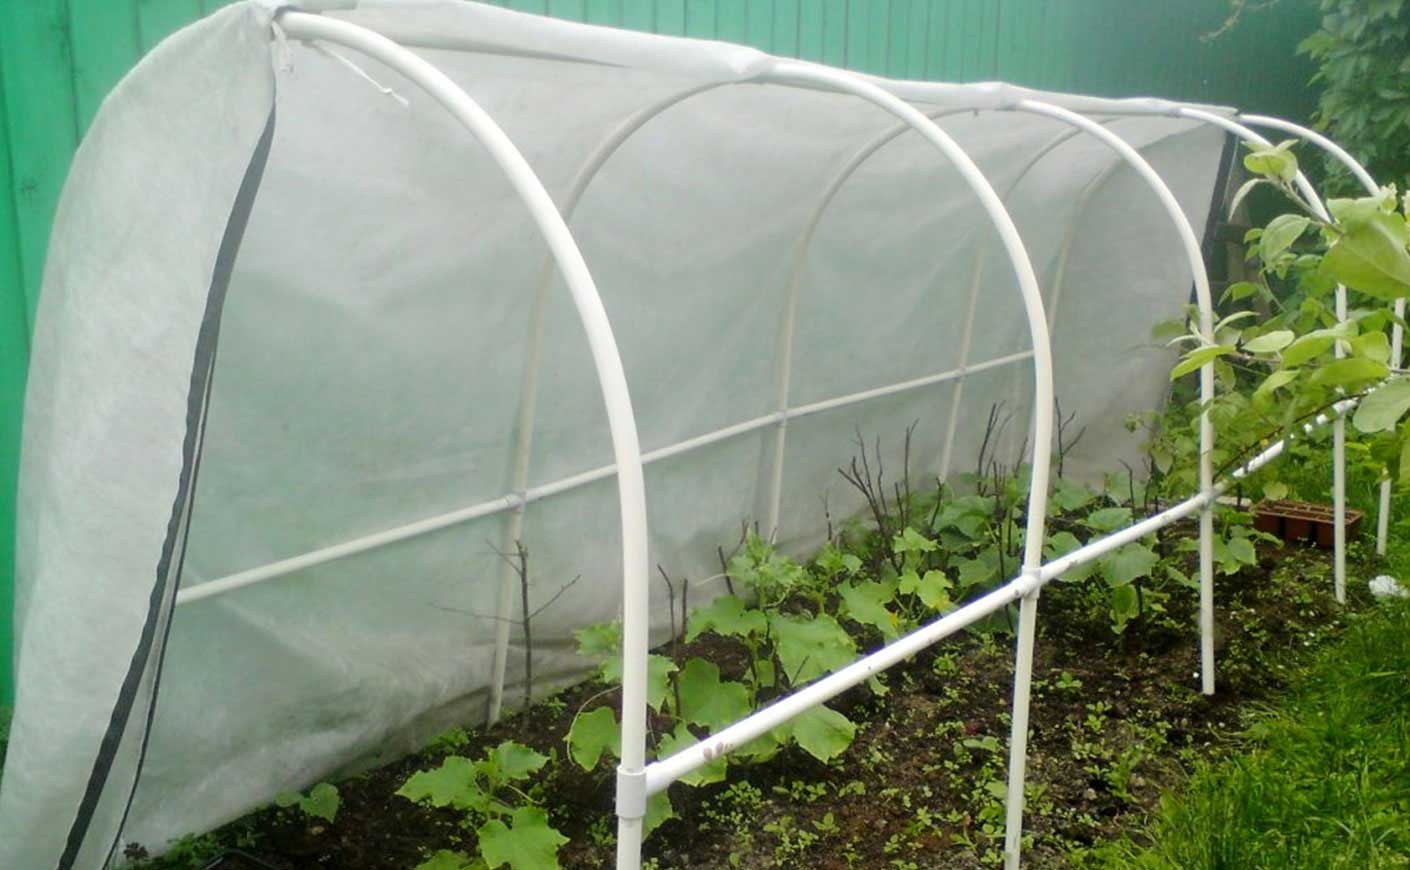
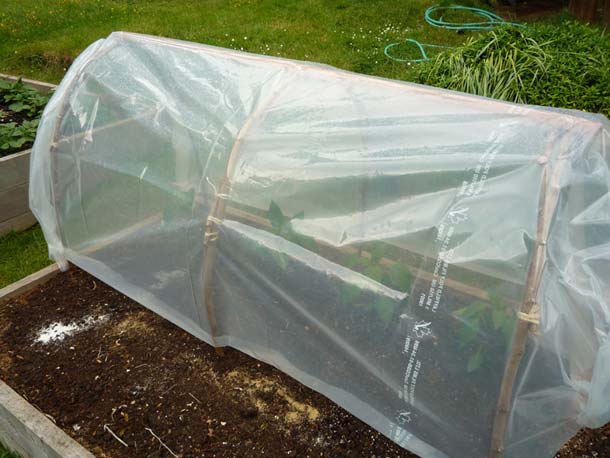
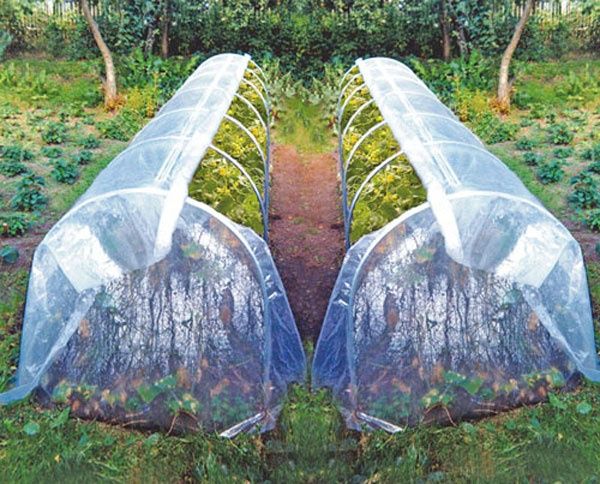
Many gardeners construct a greenhouse/covering for cucumbers when planting them directly in the ground, especially in the northwest. To do this, they install rods over the bed and cover them with thick film or a special material (such as spunbond or lutrasil) at night.
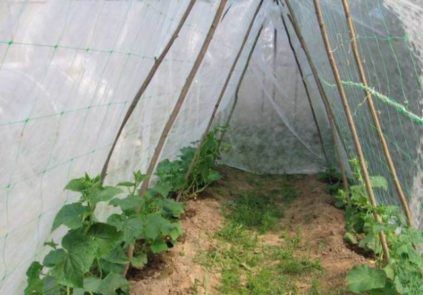
Some gardeners make arches from willow rods that have been previously stripped of bark—this requires no material costs, and if stored properly, the rods will last for several years.
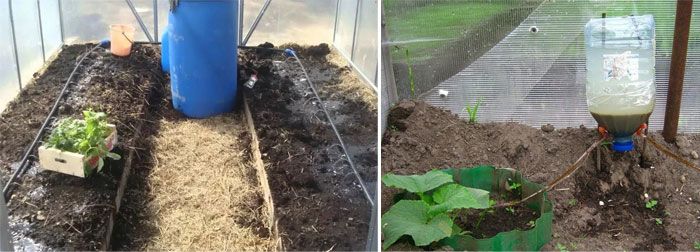
If you're planning to grow cucumbers in a dacha where you can't visit every day, you should plan ahead for a supplemental irrigation system, as cucumbers prefer moist but not overly waterlogged soil. Typically, gardeners use a drip irrigation system for this purpose, such as perforated hoses or plastic bottles.
DIY cucumber greenhouse
As mentioned above, a greenhouse is best for growing cucumbers because it retains heat well, doesn't require much space, and is relatively easy to assemble. Most often, a greenhouse is constructed using arches and covered with plastic. Arches can be purchased at the store, or you can use willow rods. Don't plant cucumbers in the greenhouse right away; it should sit empty for a few days to allow the microclimate to develop and the air and soil to warm up.
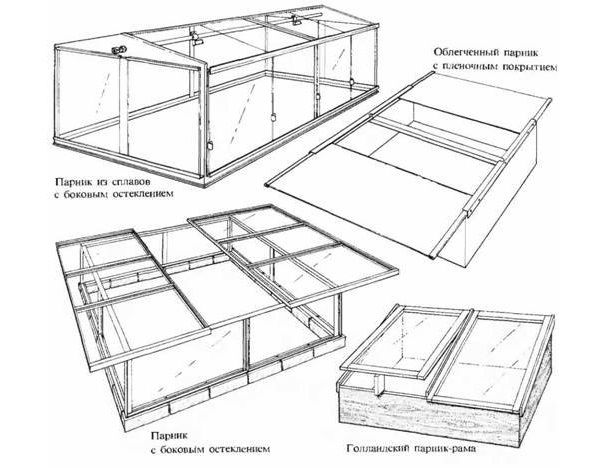
There are several types of greenhouses, differing in design:
- Arched;
- Gable;
- Single-pitched;
- In-depth.
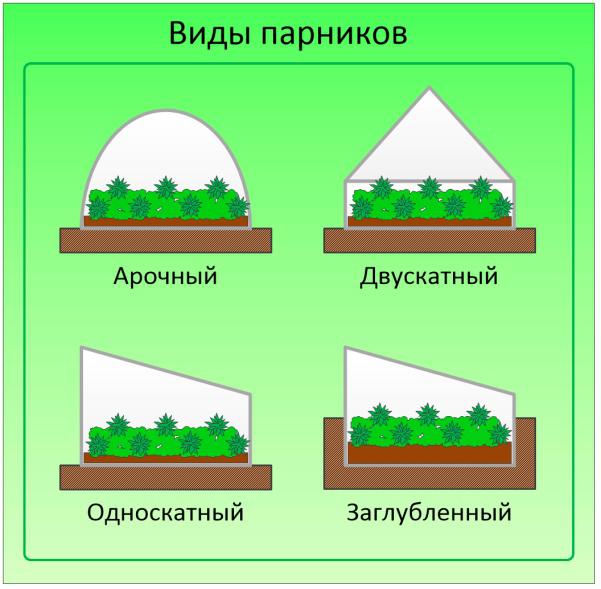
Arched greenhouse – the most popular type among gardeners, and most importantly, the easiest to construct. It's quick to build, long-lasting, and easy to disassemble. Furthermore, an arched structure can be erected only for the spring or during cool summer nights to shelter cucumbers. Some gardeners prefer permanent structures, in which case the arched greenhouse is placed on a prefabricated brick or timber frame. 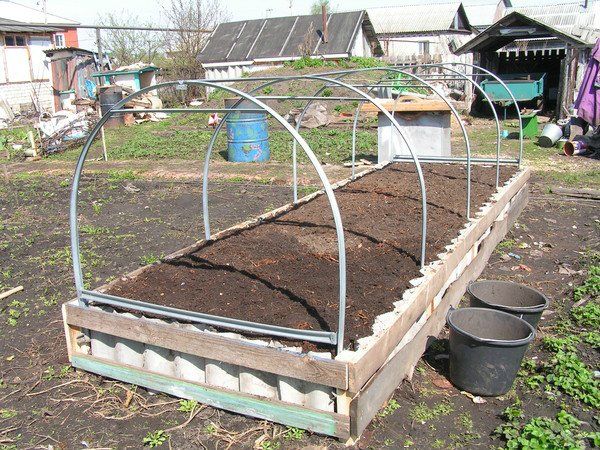
Gable greenhouse A greenhouse is a rather complex structure to assemble. It resembles a mini-greenhouse and is most often built if it is intended for regular use without dismantling during the winter. Although it is possible to build a greenhouse in the form of a hut, this is much simpler. We'll explain how to build one later in the article.
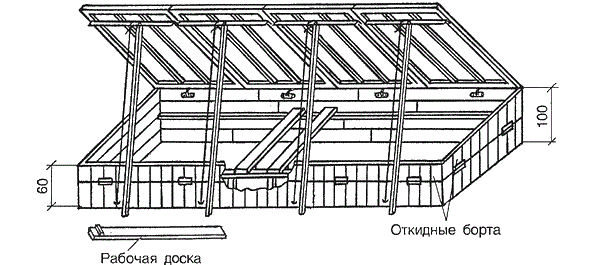
Lean-to greenhouse A porch can be attached to a fence, house, shed, or any other structure on the property. Wood, metal profiles, or polycarbonate can be used for its construction, and film, glass, or plastic can be used as a covering material.
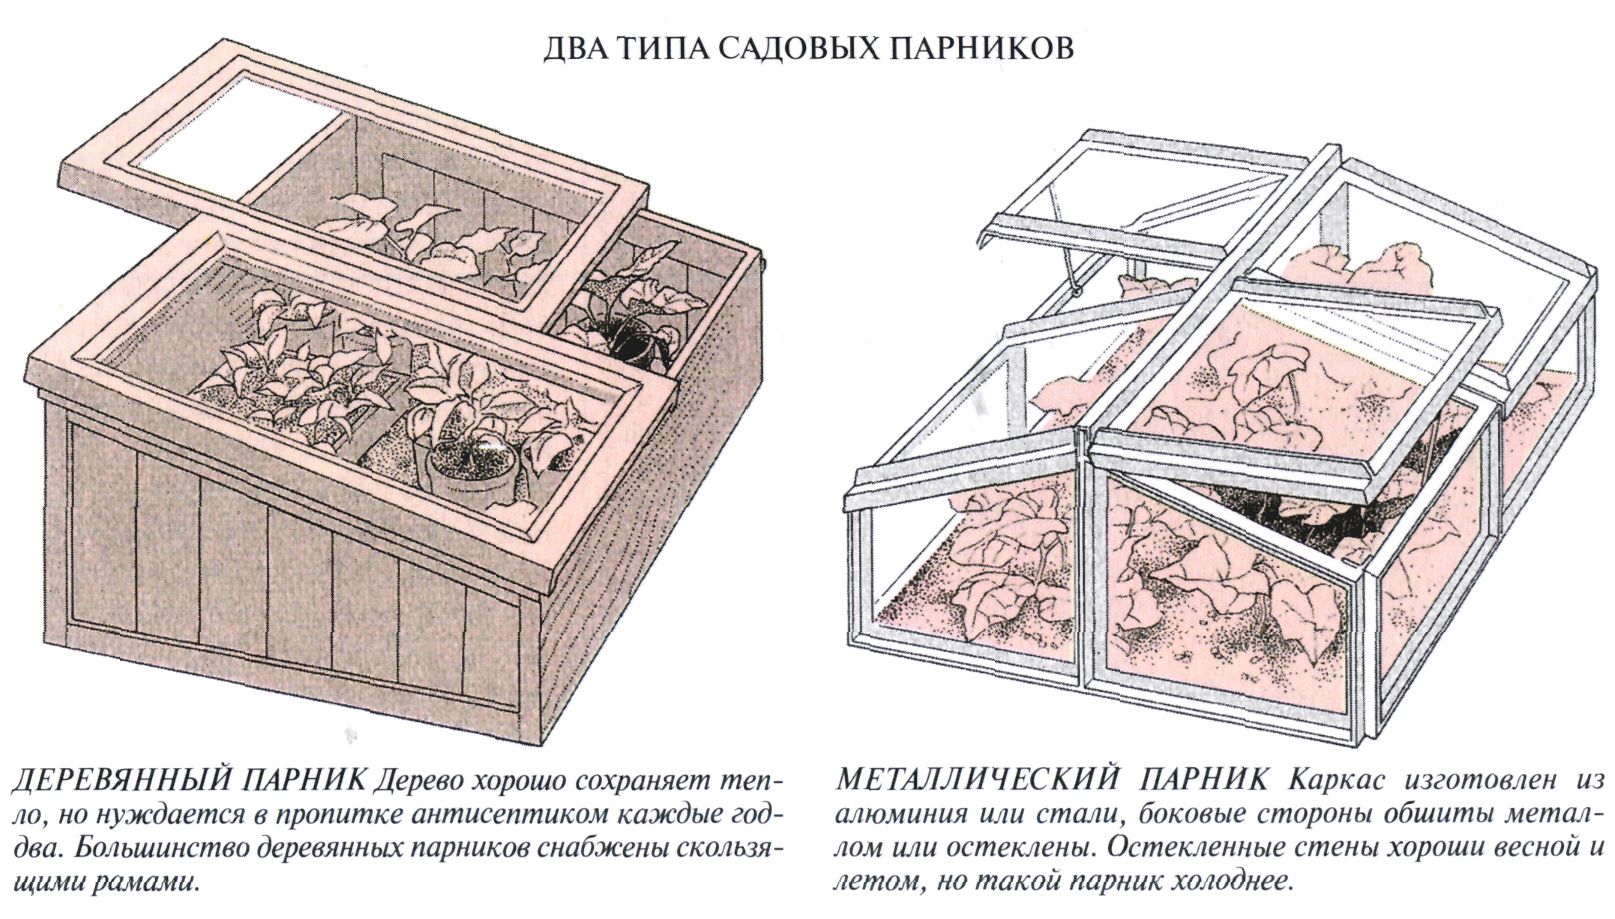
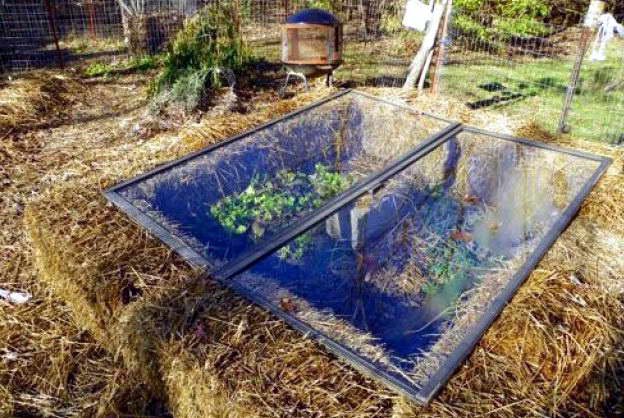
Deep greenhouses Ideal for cold regions. This design gets its name from its specific installation method: the greenhouse is sunk several dozen centimeters into the ground and lined with insulating material on the outside. This allows for better heat retention and allows for seedlings to be planted before the frost ends.
Greenhouse requirements
To ensure that your cucumbers thrive in the greenhouse you've built and produce an excellent harvest, the greenhouse must meet a number of requirements:
- The height of the frame should be between 70 and 130 cm, and the width should not interfere with access to the seedlings.
- The internal daytime temperature should be within the range of +23..+25 °C during the day and +17…+19 °C at night.
- Air humidity should not fall below 75% or exceed 8.5%.
- The earth should not cool below +18 °C and heat up above +35 °C.
- There should be 3 planting bushes per 1 square meter of greenhouse area.
When planting bee-pollinated plants, it is necessary to open the greenhouse during the day to provide access to insects.
Material for making a greenhouse frame
If your plantings aren't meant to be extensive and are limited to a few bushes, a small greenhouse constructed using wooden arches dug into the ground will suffice. For more substantial and robust structures, it's best to use durable polypropylene pipes, metal profiles, or wood.
Greenhouses are most often made of wood or wicker, as these materials are readily available in abundance in almost any garden. When working with wood, remember to treat it for mold and pests.
Polypropylene pipes are a fairly affordable material, just like metal profiles. Working with them requires more skill and training. Let's take a closer look at the advantages and disadvantages of each of these materials.
| Material | Advantages | Flaws |
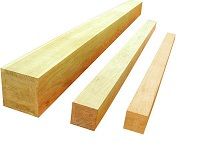
Wood (boards, beams) |
Capable of withstanding heavy loads in the form of any coating. Low thermal conductivity – wood cools very slowly and does not allow heat to escape. Eco-friendly material, does not emit toxins. It is easily attached to other structural elements, allowing you to vary the shape of the greenhouse. |
It spoils quickly without additional processing. Susceptible to the harmful effects of condensation. Not suitable for creating arched structures. Must be sanded thoroughly, otherwise it may damage the film. |
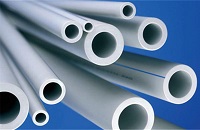
Polypropylene pipes |
Ideal for arched construction. Easy to install. They do not rot or deteriorate due to temperature changes and condensation. They have no corners or irregularities, which helps preserve the film. They have low thermal conductivity. |
Suitable for polyethylene coating only. Cheap pipes may have a specific smell. |
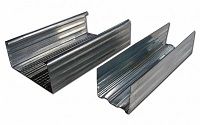
Metal profile |
Withstands any load. Does not spoil or rot. Easy to install. |
It cools easily and quickly, which has the effect of lowering the temperature inside the greenhouse. Sharp corners can damage the film. |
Selecting a covering material
Glass or polycarbonate are most often used for permanent greenhouses. These materials are highly durable and, if installed correctly, will last at least five years and perfectly retain all the required properties of the greenhouse.
In total, there are several types of covering material:
- glass;
- polycarbonate;
- PVC film (polyethylene film, although cheaper, is very short-lived, lasting no more than a season. There is also reinforced film, which is more durable (about 3 seasons) and is more expensive than polyethylene, but has poorer light transmittance. Polyvinyl chloride film transmits up to 90% of light, 80% of ultraviolet radiation, and blocks up to 95% of infrared radiation, meaning that at night and during frosts, a greenhouse is warmer than one made of polyethylene film);
- covering material (spunbond, lutrasil).
PVC film or spunbond are ideal for a greenhouse made from arches; they are lightweight and durable. Spunbond has recently gained immense popularity and widespread use among gardeners due to its ability to allow light, moisture, and heat into the greenhouse while still allowing oxygen to pass through.
PVC film is relatively inexpensive, offers high light transmission, and retains heat very well inside the greenhouse. It can be made in any thickness you like, and it's also breathable, promoting oxygen circulation.
The main condition when working with PVC film and spunbond is to ensure that they fit tightly to the ground (usually the edges of the material are pressed to the ground using long boards), and to promptly patch holes and repair damage.
Below we have compared the characteristics of the main covering materials, assessing their advantages and disadvantages.
| Material | Advantages | Flaws |
|
Film and covering material
|
A wide selection of materials with different characteristics. Reasonable price. Suitable for any type of frame. Easy to install. Suitable for multiple use. |
It quickly becomes unusable if not handled carefully and is susceptible to damage. Sag and deform over time. Does not provide the best thermal insulation. |
| Polycarbonate
|
Lasting. Easy to install. There are different types of colors and textures. Attractive aesthetic appearance. Good light transmittance and thermal insulation properties. Does not transmit ultraviolet rays. |
Relatively high cost of material. Requires care during installation and operation, susceptible to scratches and chips. |
| Glass
|
Availability. Excellent light transmission. Good thermal insulation. It easily withstands temperature changes and is not susceptible to biological damage (rot, pests, mold, etc.). |
Fragility of the material. Difficulty in replacing if damaged. Requires a fundamental frame due to its significant weight. |
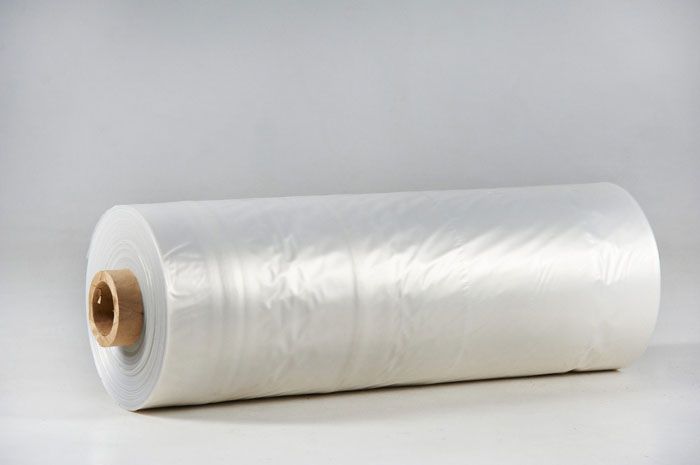
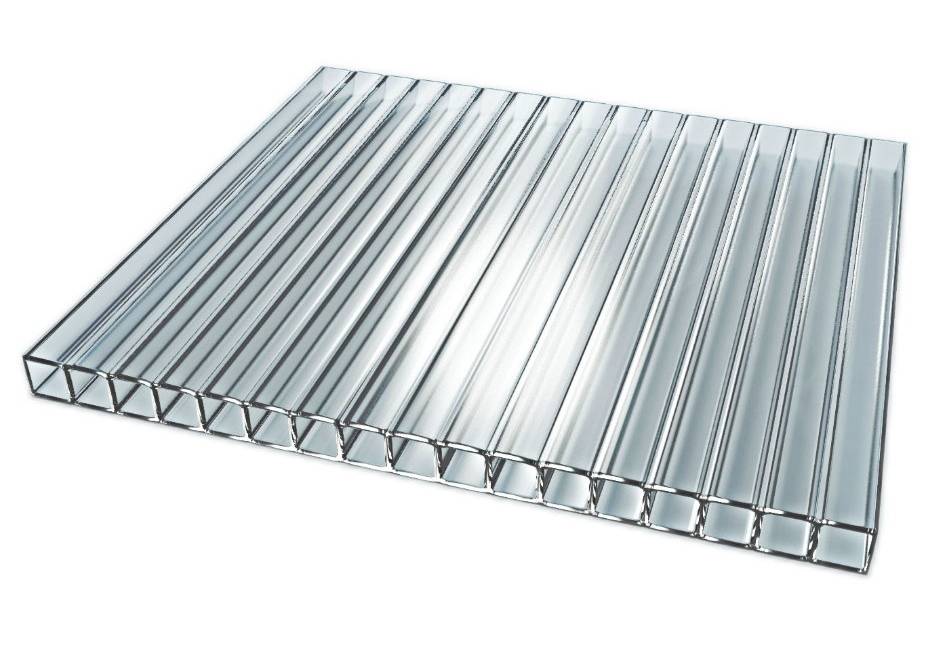
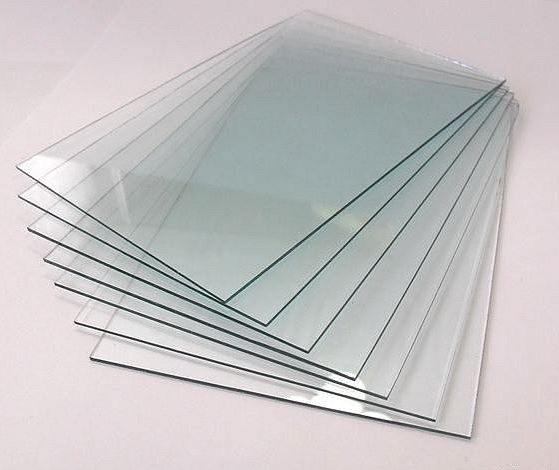
Many gardeners use a combination of coverings when building a greenhouse. For example, the walls can be made of glass or polycarbonate, and the top can be covered with film, which facilitates installation and ventilation.
Determining the size of a greenhouse for cucumbers + drawings
Each gardener determines the size of their greenhouse individually, based on the area of the plot and plans for the future harvest.
Key points to consider when calculating size:
- A maximum of 3 bushes can be planted per square meter; one cucumber bush will yield an average of about 7 kg of harvest.
- Calculating the width, height, and length of the greenhouse should be done after studying the standard dimensions of the material you'll be using. Find out in advance the dimensions of the polycarbonate you've chosen or the width of the unrolled covering film to avoid having to redesign anything later.
- The recommended height should not exceed 130 cm, but should also not be lower than 70 cm. A lower height is permitted in exceptional cases, such as a deep greenhouse or a specific variety. However, in such cases, the cucumber planting density should be reduced.
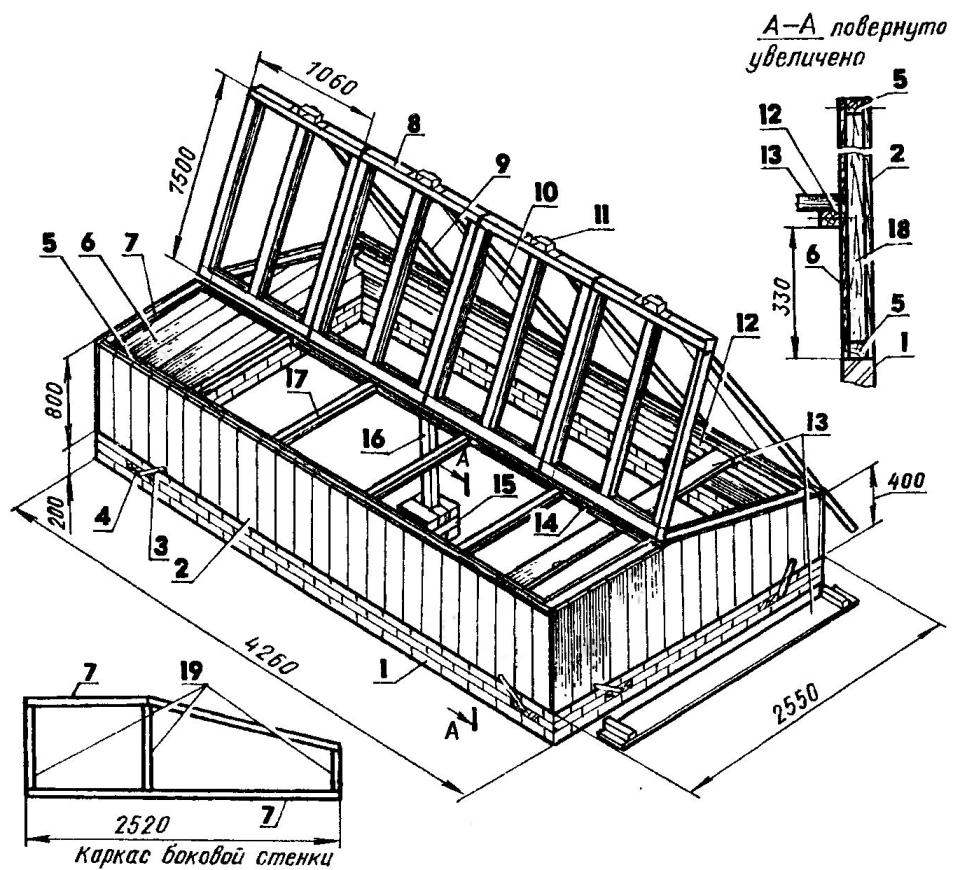
Choosing a location for a greenhouse
Cucumbers aren't the most demanding vegetable crops when it comes to planting location. While many plants thrive in a greenhouse that faces east to west, cucumbers thrive in a north-south orientation. In fact, they prefer light shade to blazing sun.
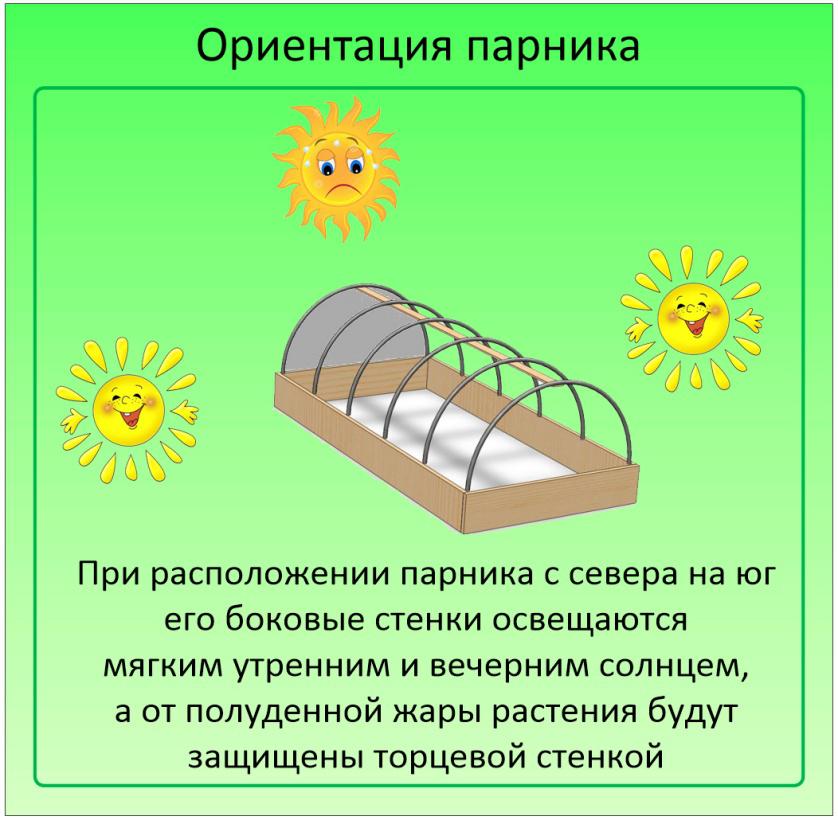
The main thing is that the greenhouse isn't in the shade of a house or other buildings for most of the day. If your site is fairly dark, the greenhouse walls can be made transparent. Conversely, if there's too much light, the greenhouse can be covered with opaque walls.
Soil preparation
Three weeks before setting up the greenhouse, prepare the soil. First, place a layer of manure and straw underneath the fertile soil. This bedding will not only prevent harmful insects but also provide additional soil warmth. Horse manure works best, but if you don't have any, cow manure or bird droppings will do. Place previously dug soil on top.
A couple of days before planting the cucumbers, the soil should be dug over again and fertilized with peat, humus, and rotted sawdust. This mixture will not harm the delicate roots and will provide the plants with all the nutrients they need for growth and development.
Below, we offer you to choose one of four DIY cucumber greenhouse designs. We'll describe the entire process step by step.
Greenhouse made from arches and film: step-by-step instructions
An arched greenhouse constructed from polypropylene pipes covered with PVC film is the simplest and most popular design among gardeners. It's easy to assemble in the spring, and in the fall, it's very easy to disassemble and store for the winter.
To make such a greenhouse you will need:
- wooden boards,
- wood treatment products,
- screws, nails and corners,
- polypropylene pipes with a diameter of 20 to 25 mm,
- reinforcement,
- wire,
- PVC film.
The amount of material is calculated based on the size of the future greenhouse. Experts recommend purchasing pipes in multiples of 3 meters in length. These are used to create optimal three-meter arches, spaced 50 cm to 100 cm apart.
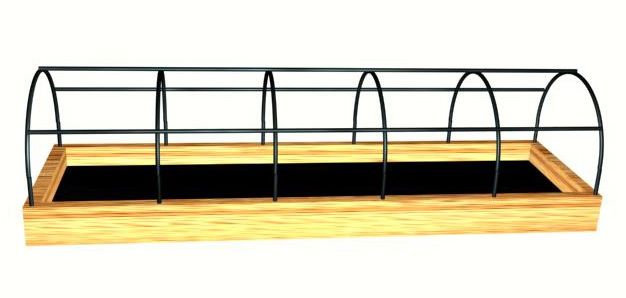
The PVC film should be at least 3.5 meters long, allowing its edges to easily dig into the ground at the sides of the greenhouse. Its length should be at least 3 meters longer than the greenhouse's side wall. It's best to draw a diagram of the greenhouse with its dimensions on paper in advance to accurately calculate all the necessary materials.
We offer step-by-step illustrated instructions for creating an arched greenhouse (click on the photo to enlarge it).
| Illustration | Stage of work | Description |
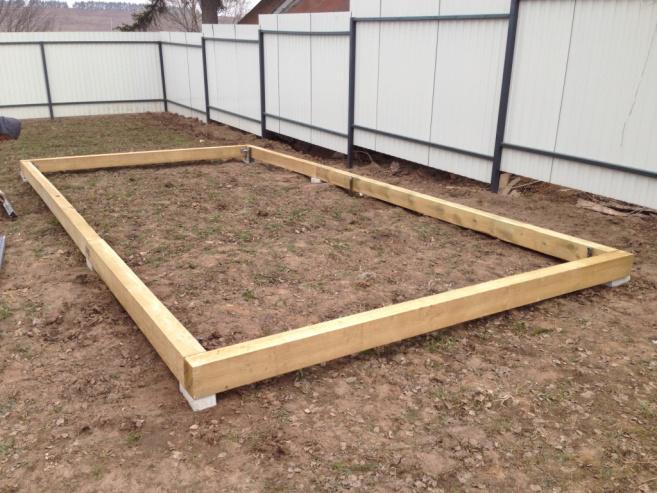 |
Installation of a greenhouse base | The greenhouse foundation is made from pre-cut boards or beams (recommended cross-section: 10 x 10 cm), which are fastened together with angle iron and screws. The boards must first be treated with a special compound to protect against mold and pests. A wooden foundation is used for permanent greenhouses; temporary structures do not require one. The foundation provides additional stability and reliability to the greenhouse and also acts as a barrier for the topsoil. |
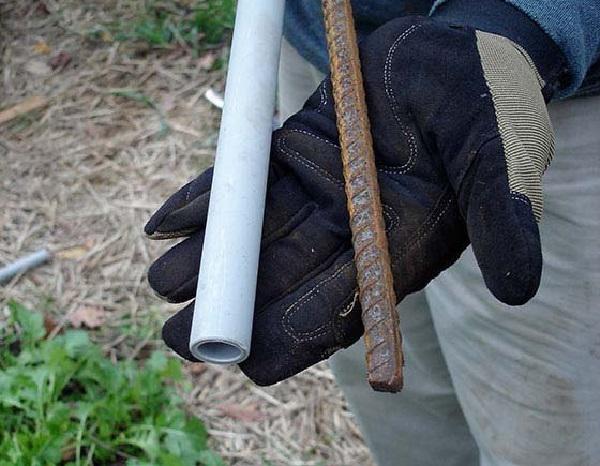 |
Cutting of fittings and pipes | To cut the rebar, you'll need a grinder. Pieces of rebar measuring 40 to 60 cm will be driven into the ground and will serve as pipe supports. Polypropylene pipes are cut into 3-meter lengths, and will be used to create arches that are 1 meter high, which is sufficient for the normal growth of cucumbers. |
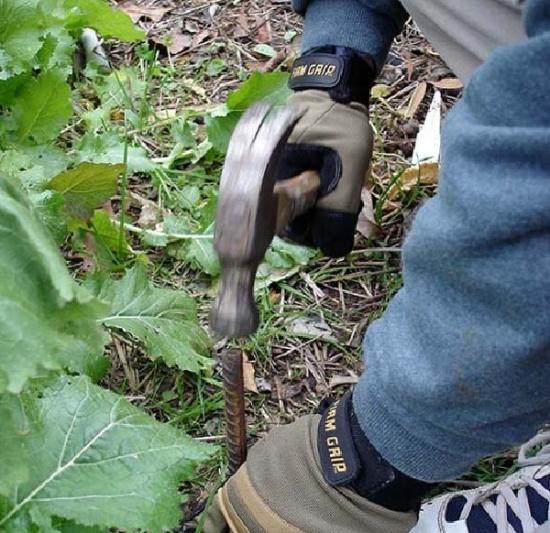 |
Installation of fittings | Along the perimeter of the foundation, pieces of rebar are driven into the ground from the side walls of the greenhouse, approximately 25 cm deep, spaced 50 cm to 100 cm apart. This is done using a hammer, following the preliminary markings. |
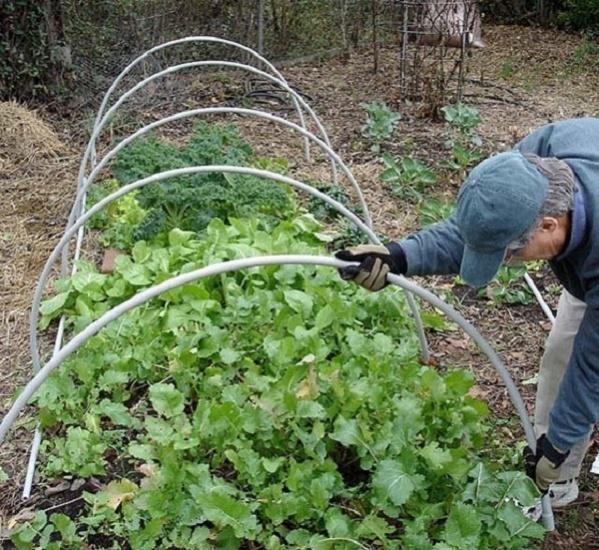 |
Installation of arches | The cut pipes are bent so that the ends fit into the driven-in rebar. The ends of the arches can be additionally secured to the stakes with construction tape. |
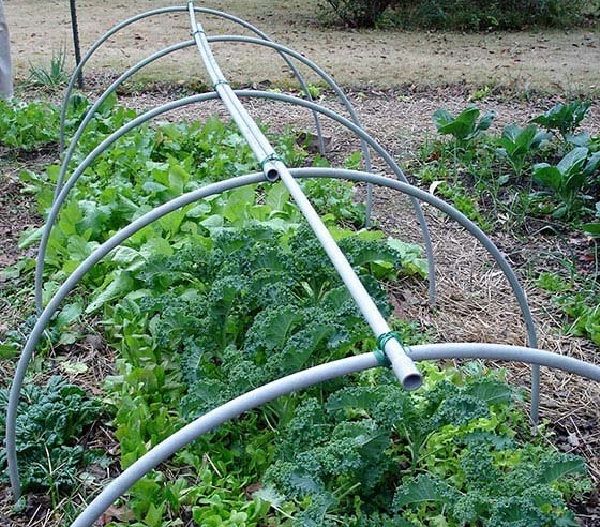 |
Attaching the ties | To further strengthen the structure and prevent the relatively light arches from warping or the film from sagging, the frame is reinforced with ties. It is recommended to make three ties using either thin wooden slats or plastic pipes. They are secured with wire or special cable ties in the center of the structure (like a ridge on the roof) and on the sides of each arch. |
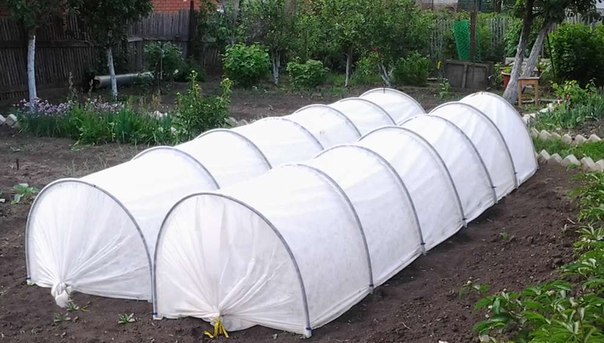 |
Laying the covering | A sheet of film is laid over the frame, with its ends either dug into the ground at the sides, or a wooden block can be attached to one side to add weight, or it can be simply pressed into the ground with bricks. This is suitable for structures that only require sheltering plants at night or during inclement weather. The ends of the film can be simply pressed into the ground, or the ends can be secured with cable ties and stretched over a pre-driven stake. |
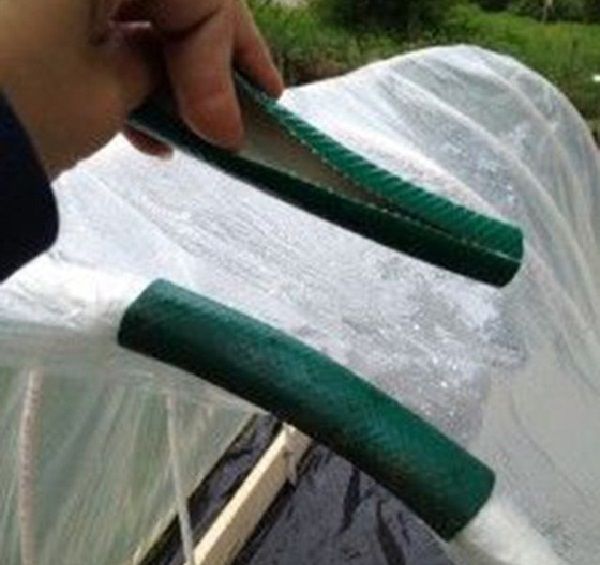 |
Securing the film | Film is very susceptible to various mechanical damage, so securing it to the arches with wire is impractical. Gardeners recommend making fasteners from an old hose, cutting it into small pieces 10-15 cm long and slitting them along the entire length. These fasteners are placed over the film on the arch; they will securely hold the covering material without damaging it. If you plan to fold the film down on one side of the greenhouse, place the fasteners on the opposite side. |
A lean-to greenhouse made of wooden planks and polycarbonate: step-by-step instructions
A lean-to greenhouse is typically used for growing seedlings and is built near the walls of existing buildings or a fence, but you can also construct a freestanding structure. Its construction requires more time and material costs, but the greenhouse will serve you for many years and will be distinguished by its good strength and high reliability.
To install it you will need:
- roulette,
- a screwdriver, classic self-tapping screws and self-tapping screws with a thermal washer,
- iron corners,
- wooden blocks for the frame (40*50 mm) and for the posts (40*20 mm),
- wood treatment liquid,
- polycarbonate and covering material,
- pegs for preliminary marking.
Any construction should begin with drawing up a plan indicating the dimensions of the future structure. For ease of planting, it is recommended that such a greenhouse be no wider than 120 cm.
The greenhouse roof should slope towards the southern side of the site, and if it is an extension to existing buildings, a location should be chosen where the blank wall will be located on the north side and will protect the plantings from cold winds.
Step-by-step illustrated instructions for building a greenhouse are provided in the table (click on the photo to enlarge it):
| Illustration | Stage of work | Description |
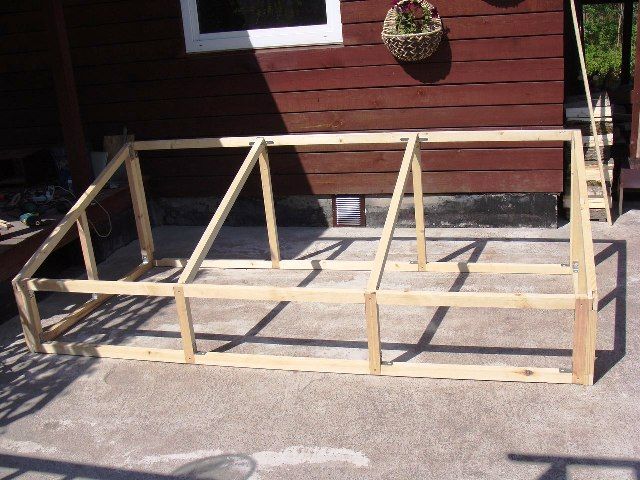 |
Manufacturing a wooden frame | The timber, pre-treated with a special compound, is cut to size. The base of the structure is made from large 40x50 mm timber. The side posts are also made from these timbers; their size should ensure a sufficient slope angle. The pitched roof itself can be made from 40x20 mm timber; these will easily support the weight of the covering material and will not compromise the stability of the greenhouse. All elements are fastened together using pre-made grooves, corners and self-tapping screws. |
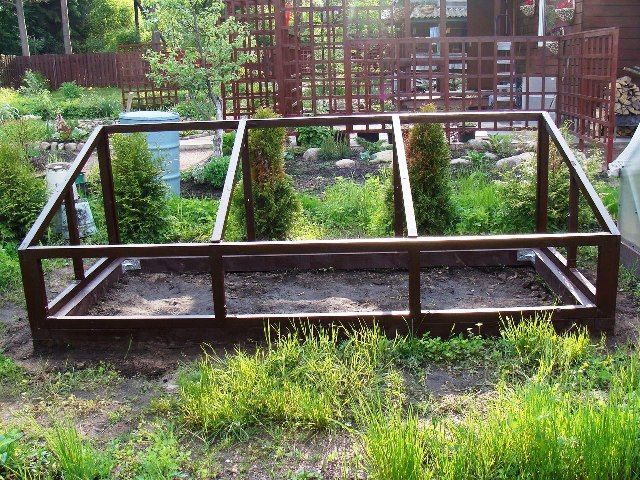 |
Installing the frame | The frame requires additional support and a pre-prepared site. The site is first leveled by removing the sod and filling the area with approximately 5 cm of soil. If you have leftover bricks from construction, you can use them to build the frame support. If not, take thick boards, treat them with a special compound, and construct a support base using angle brackets and screws. The greenhouse frame will be attached to this base. |
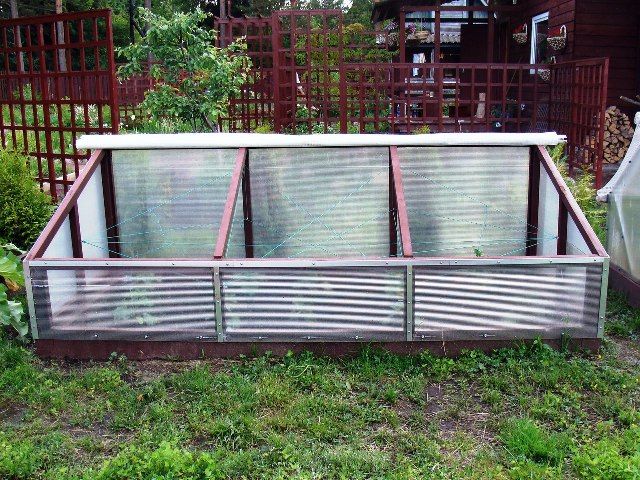 |
Fastening of polycarbonate covering | If a lean-to greenhouse is attached to an existing structure, its back wall can be covered with leftover wooden planks. Polycarbonate is attached to all other sides. If you're using cellular polycarbonate, ensure that the inner strips are aligned vertically. A jigsaw can be used to cut the material, and it is recommended to cover the exposed edges with either caps purchased from a specialist store or metal adhesive tape. The polycarbonate sheets are attached to the posts using thermal washers; if these are not available, a thin metal sheet can be used as a spacer. |
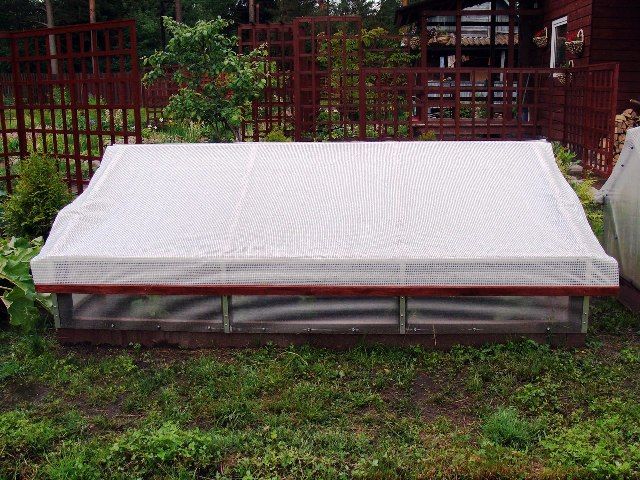 |
Stingray shelter | If desired, the greenhouse roof can be made partially detachable and lined with polycarbonate, but it's simpler and more convenient to cover the slope with PVC film, which can be easily folded back for ventilation and seedling handling. One edge of the film is firmly attached to the slope on its longer side, and the folded edge is located at the bottom. To add weight to the structure, a wooden block is attached to the free end of the film to prevent it from flapping in windy weather. The edges of the film should extend 10 cm above the greenhouse frame on all sides. |
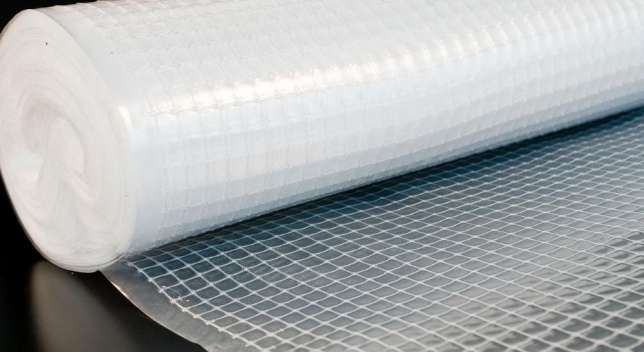
Important! If you don't have polycarbonate, this isn't a reason to abandon the idea of building a lean-to greenhouse. For the side walls, you can use reinforced film; it's thick enough to resist mechanical damage, yet offers good thermal insulation and light transmission.
Building a recessed greenhouse from window frames: step-by-step instructions
For cold regions with unstable temperatures, it's best to choose a naturally heated, sunken greenhouse, additionally insulated on the outside with straw. This can also be used to start early seedlings. It's convenient to build such a greenhouse from old window frames, which are sure to be found in almost any garden plot.
To make it you will need:
- straw (for insulation),
- wooden boards (for the frame),
- window frames,
- organic materials for heating (manure, droppings).
A deep greenhouse isn't particularly convenient to use; it's built in extreme cases when other structures aren't up to the task. It's not recommended to plant large numbers of plants there, as working with them will require an extremely awkward position, and harvesting won't be the most comfortable.
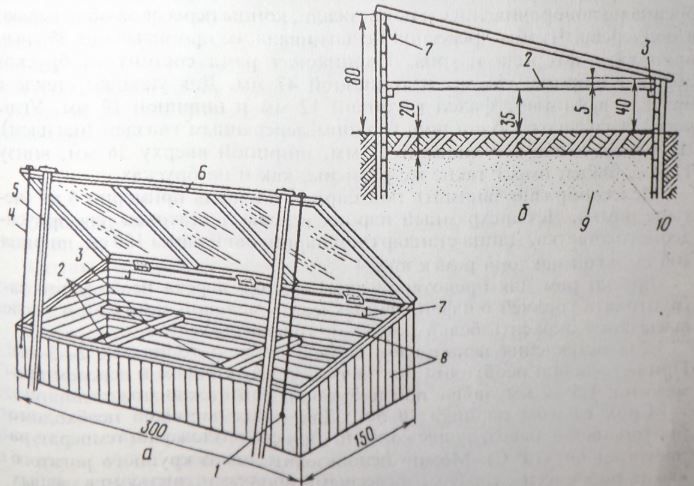
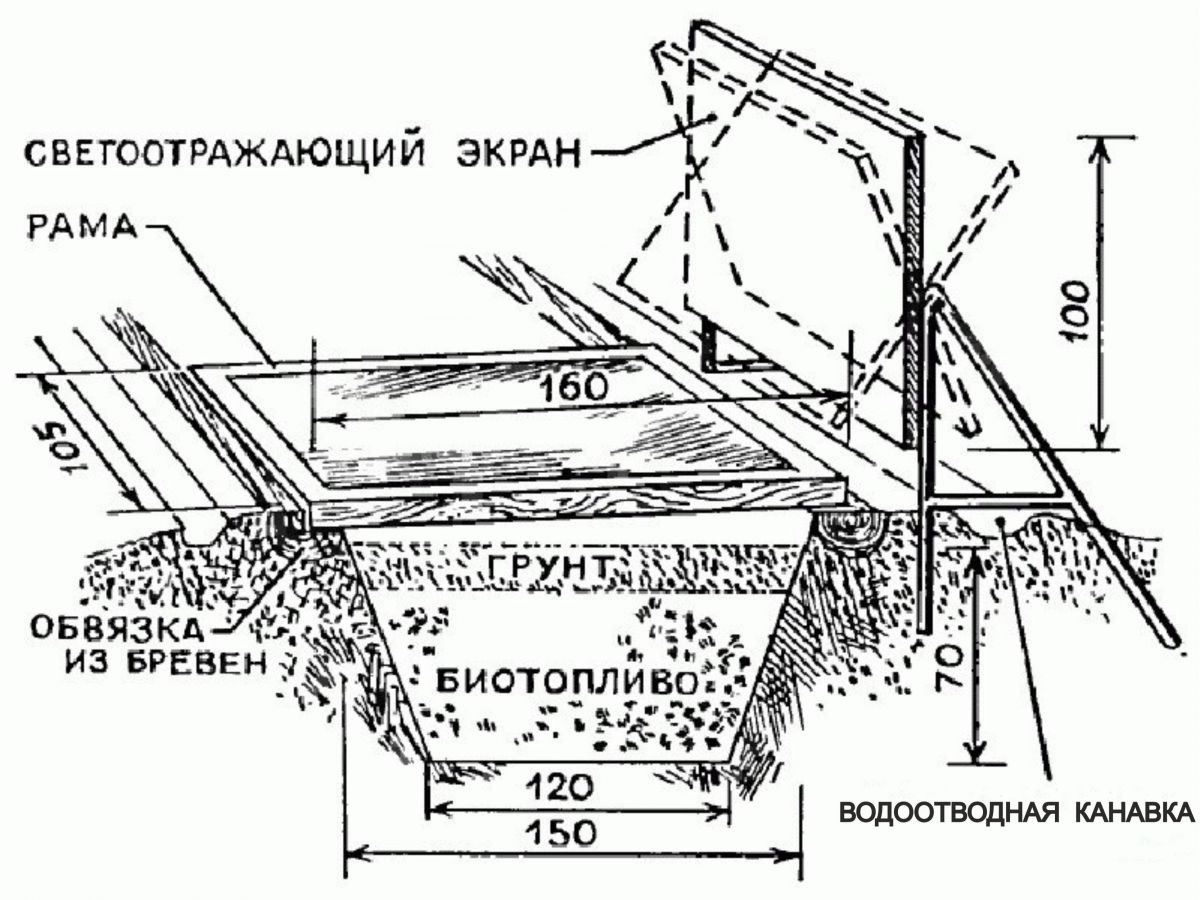
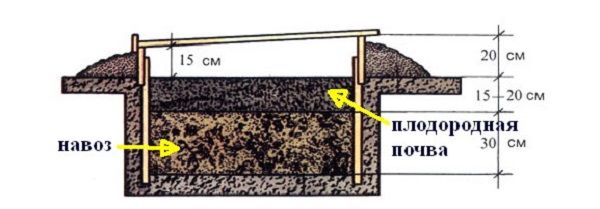
The figure below shows a schematic of a recessed greenhouse:
Step-by-step instructions in the table (click on the photo to enlarge it):
| Illustration | Stage of work | Description |
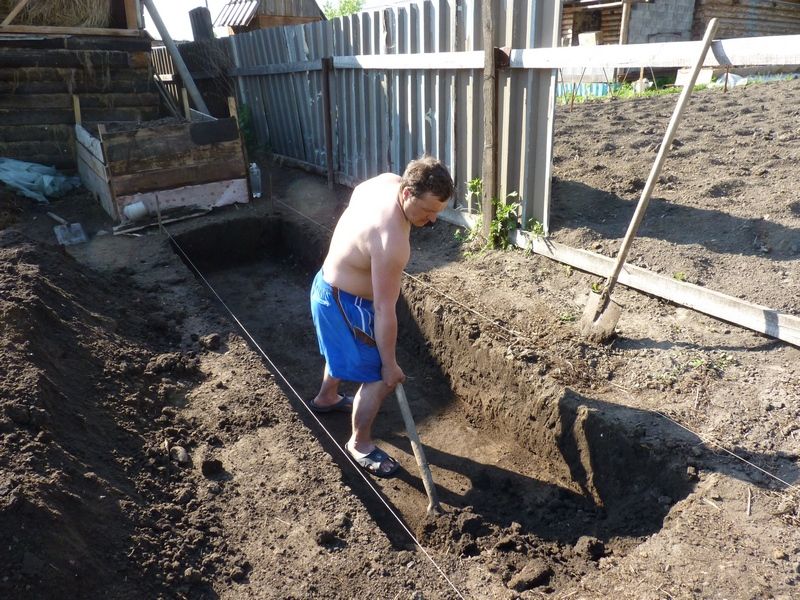 |
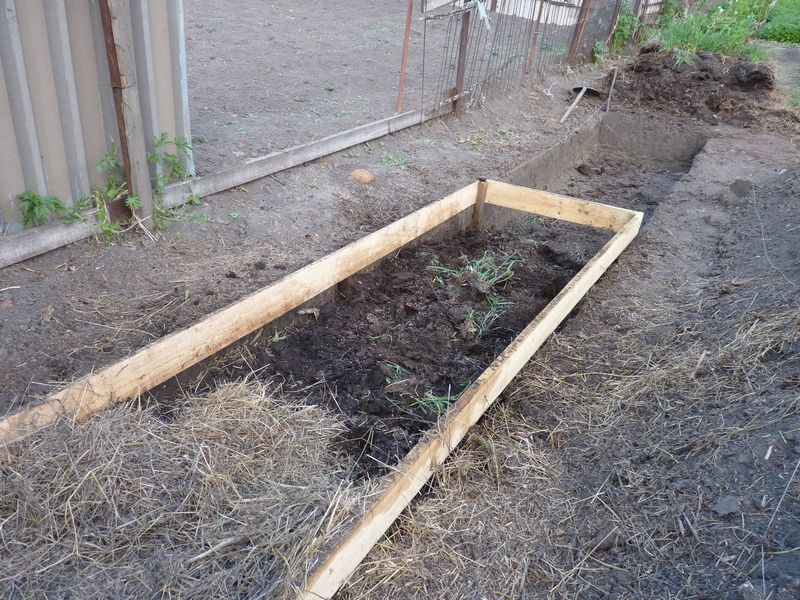
Digging the foundation | You can begin building the greenhouse once the top layer of snow has melted and the ground has thawed. Determine the size of the structure in advance based on the materials available and the number of plants to be planted. Mark the perimeter of the foundation with stakes in the ground and begin digging a trench. For an average greenhouse, a depth of 60 cm and a width of 100 cm is sufficient; the length is up to you. Consider the soil quality on the site as well: if it is loose and crumbly, the trench walls should be reinforced with boards. |
 |
Laying organic fuel | Biofuel should be applied approximately two weeks before planting. To make it, take one part manure and mix it with two parts straw or rotted sawdust. This layer should be approximately 30 cm thick. Then, add about 20 cm of topsoil, covering it with a small layer of straw to create a weed barrier. |
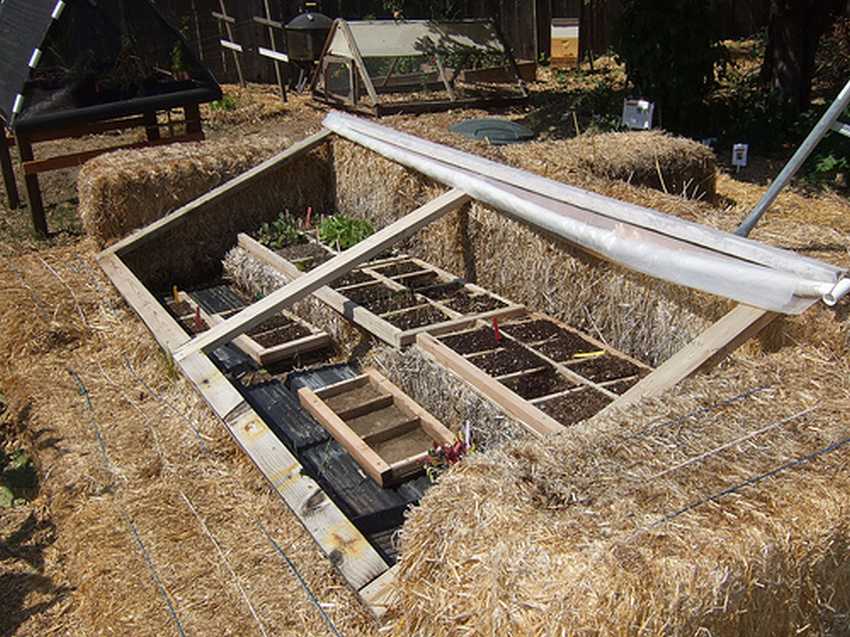 |
Making a box | A recessed greenhouse box can be made from any readily available material. The main requirement is to properly insulate the structure with straw bales, which will be essential for perfect thermal insulation. You can construct a frame from roof boards and position it at an angle, with one side resting on the straw and the other resting on the ground, creating a single-pitched recessed greenhouse. In this case, the roof surface can be covered with thick plastic film. Alternatively, you can create a rectangular box and place old window frames on top. |
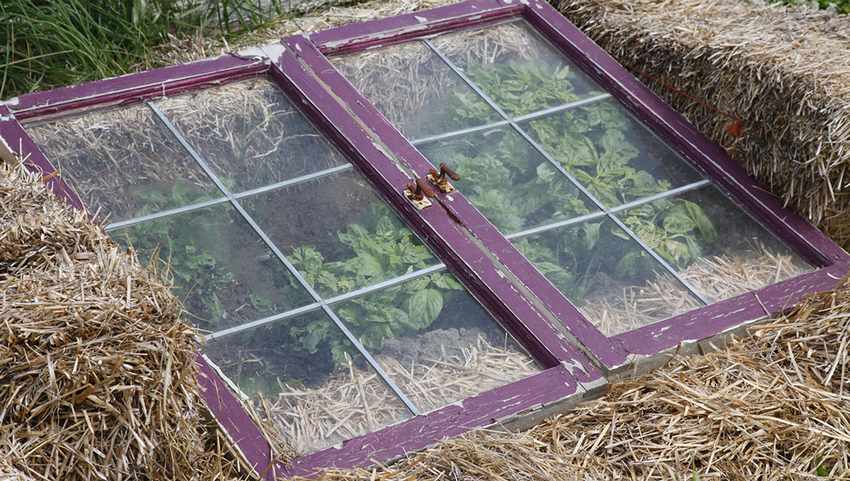 |
Fastening window frames | If your frame is securely constructed, the straw bale walls will definitely support the weight of a window frame placed on them. If you're using multiple frames, you'll need to build a wooden frame to support them. If you don't have any old frames, you can cover the greenhouse with polycarbonate. |
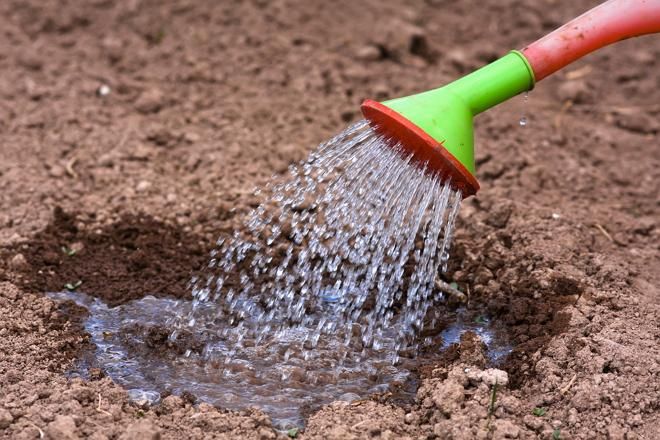 |
Heating the greenhouse | To create the desired climate inside the greenhouse, pour hot water over the soil and seal the structure tightly. For added security, the window frames can be covered with plastic film. After this, the greenhouse is left undisturbed for approximately three weeks. During this time, the organic fertilizer will boil and the soil and walls will warm up to the point where even the most fussy seedlings will feel perfectly comfortable. |
Important! Cucumbers can be planted in properly prepared, deep-seeded plots as early as March. Self-pollinating varieties are essential. With proper care and following the instructions, you can harvest your first crop of crispy cucumbers as early as May.
DIY Cucumber Greenhouse: Step-by-Step Instructions
You can also build a cucumber greenhouse with a gable roof, creating a tent-like structure (it looks like a triangle on both sides). The frame can be made from wooden beams or metal profiles.
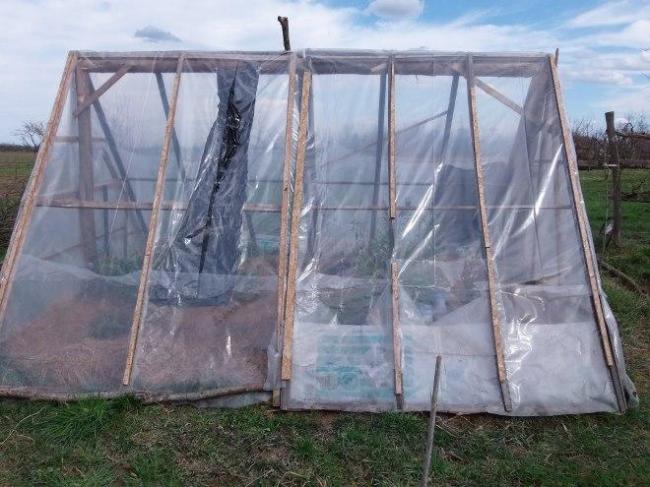
To make a hut like the one in the photo, we will need:
- beam 40x40 cm;
- thin rods or slats;
- leg-split;
- nylon mesh;
- PVC or reinforced film.
Step-by-step instructions:
- Choose a location and mark out the layout of the future garden bed. Typically, the width is up to 1 m and the length is about 3 m.
- The greenhouse should be at least 1.7 m high, so the two side corner supports should be constructed from timber at least 2.5 m long. Once installed, secure the supports at the top with a 3 m long vertical crossbar made from timber. For added strength, install 2-3 timber supports under the crossbar.
- Next, install support strips throughout the greenhouse to secure the film. The strips and rods should be secured with twine. You can also immediately drape and attach nylon garden mesh over the frame – this will serve to secure the greenhouse base and will also be used to tie up the cucumbers.
- Cover the resulting frame with the chosen film (it's better to use PVC rather than polyethylene or reinforced plastic, as mentioned above). Secure the film along one side of the length with slats or glazing beads, and press the other side down with a board or stones to make lifting the cover easier. Secure the film securely along the width of the greenhouse as well.
- Next, prepare the bed: lay a 5-centimeter layer of sawdust mixed with wood ash (1 cup of ash per bucket of sawdust). Top with 15 cm of humus or compost, followed by 25 cm of soil mixed with humus and sand. Water the bed thoroughly and cover. After just a week, you can plant seedlings in this greenhouse or sow cucumbers directly from seeds.
DIY cucumber greenhouse
A greenhouse in a garden requires more space than a hothouse, but it can yield a significant harvest. Experts recommend arranging the structure so that the beds run in a straight line from east to west. Doors and windows should be strictly avoided on the north side, as it is unsuitable for ventilation due to the cold winds.
To determine the size of a greenhouse for growing cucumbers, several factors are taken into account:
- how many plants will be planted,
- what type of attachment for tying will be chosen,
- how the beds will be located,
- What is the area of the garden plot?
Many novice gardeners make a serious mistake when designing a tall greenhouse: they don't install crossbars for tying up cucumbers. While freestanding netting is certainly possible, it's much easier and more productive to attach the netting and string to pre-fabricated supports, such as a longitudinal beam.
Gardeners use two main greenhouse designs on their farms, which are best suited for growing cucumbers:
A narrow greenhouse with a central bed. This bed is divided into two parts, and either a special large-mesh trellis is attached along the central part, parallel to the side walls, from the ground to the roof, for the plants to climb, or ties are stretched along its entire length.
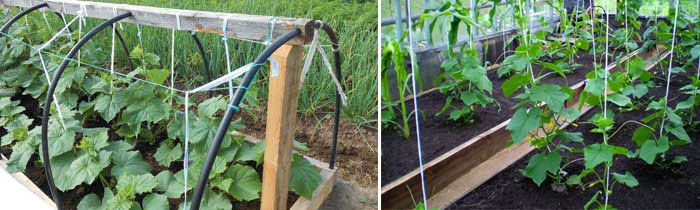
A classic greenhouse with beds on the sides and a passageway in the middle. In this design, cucumbers are often supported not by a trellis, but by regular, thick twine, to ensure sufficient light is retained inside.
Advantages of a polycarbonate greenhouse for cucumbers
Polycarbonate has become widely popular and recognized among most gardeners.
This material has a number of undeniable advantages that make a greenhouse made from it the best place for growing vegetables:
- planting of plants can begin in March,
- honeycomb carbonate refracts and scatters light better,
- retains heat well, which helps avoid temperature fluctuations even when there is a sharp change outside,
- protects from UV rays,
- easy to install,
- does not allow direct sunlight to pass through,
- has high strength.
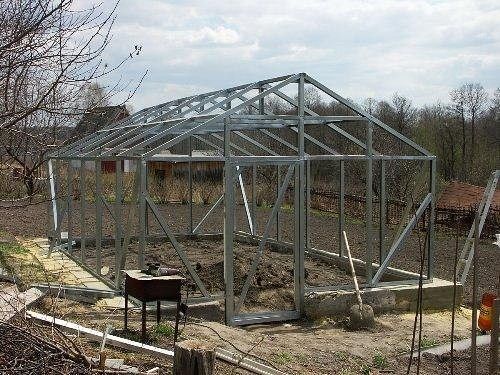
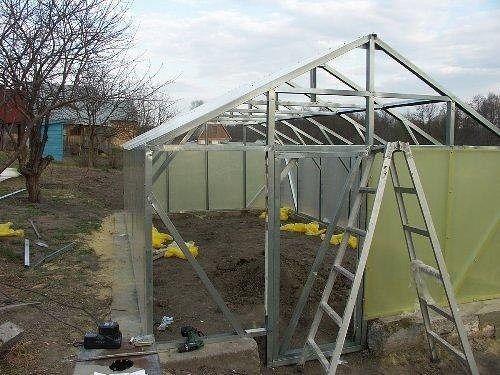
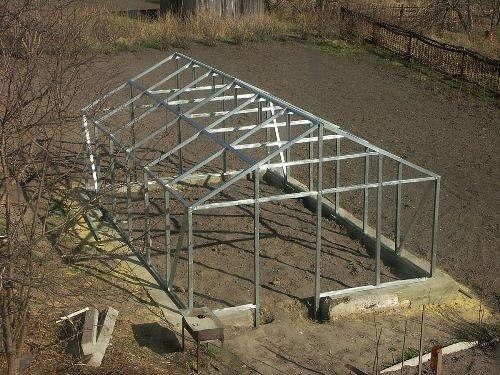
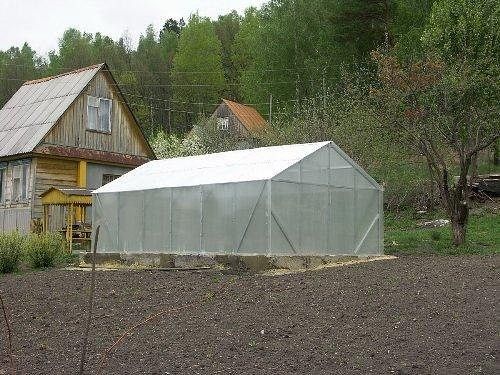
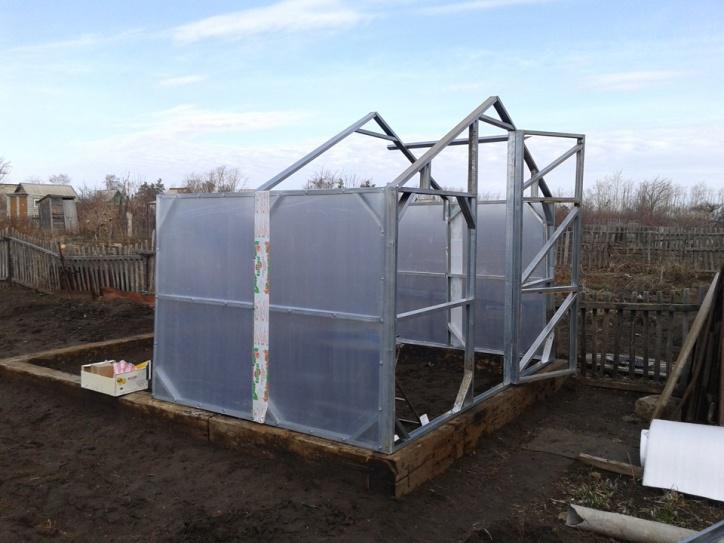
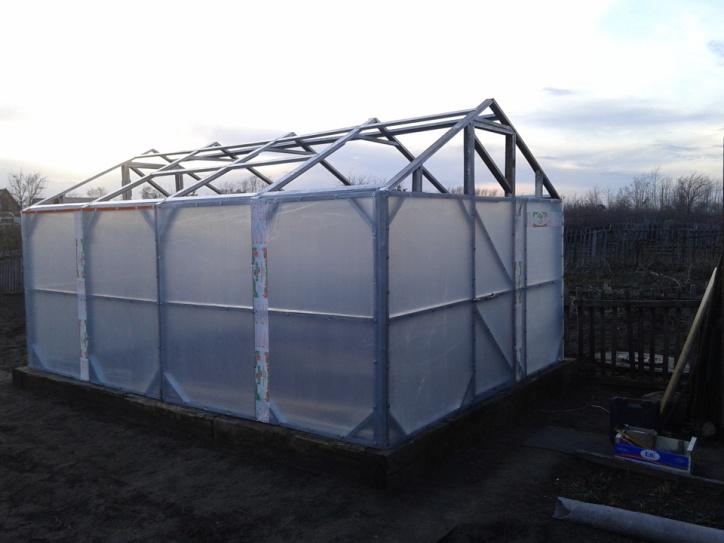
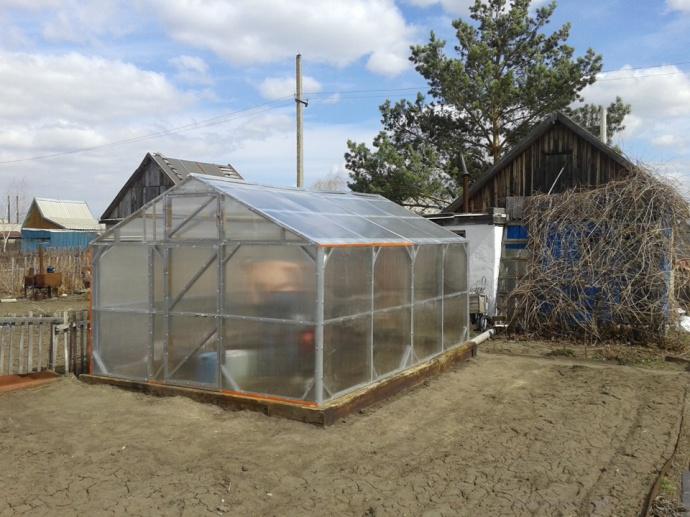
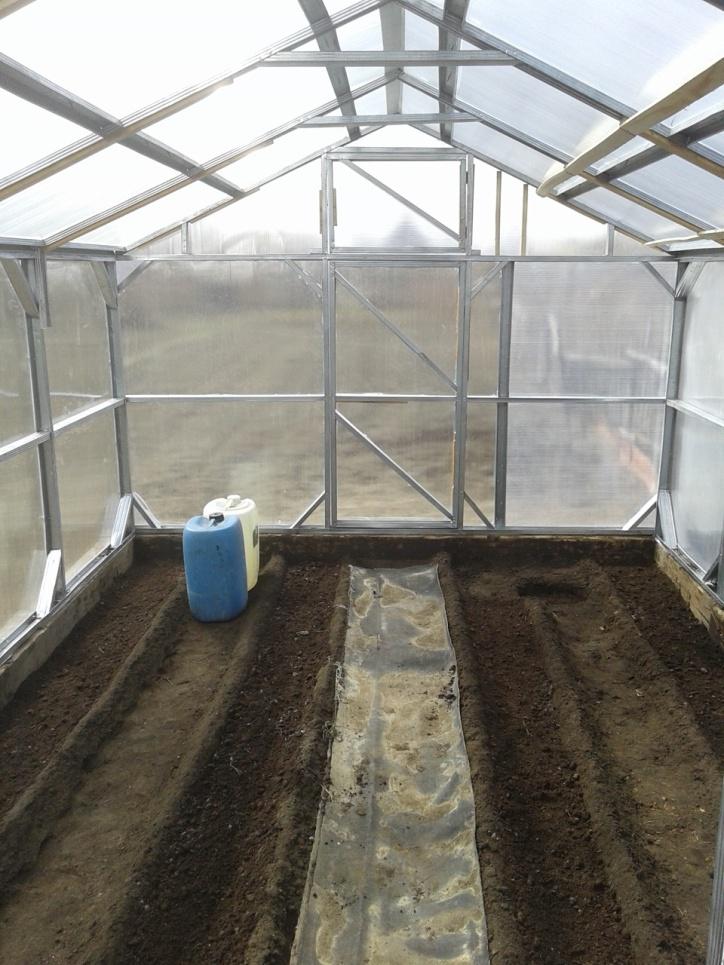
Cucumber greenhouse made of metal profiles and polycarbonate: step-by-step instructions
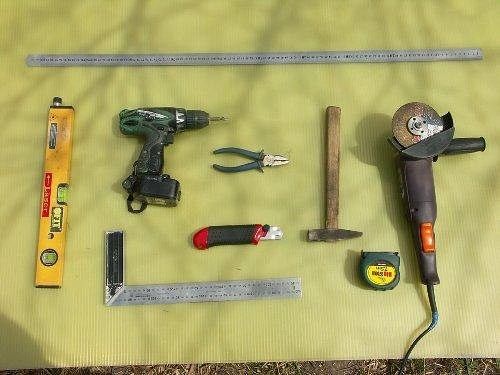
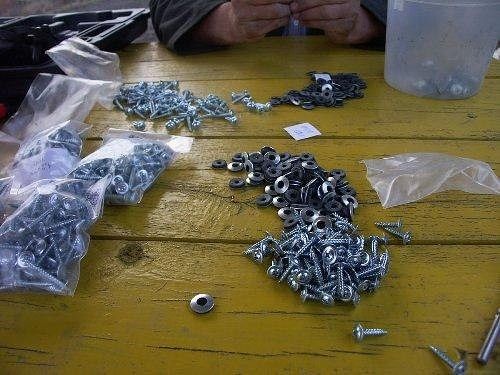
A ready-made greenhouse of this type, made of metal profiles and polycarbonate, will cost gardeners approximately 13,000-15,000 rubles, while building one yourself will take several days and approximately 6,000 rubles.
Illustrated greenhouse installation instructions (click on the photo to enlarge):
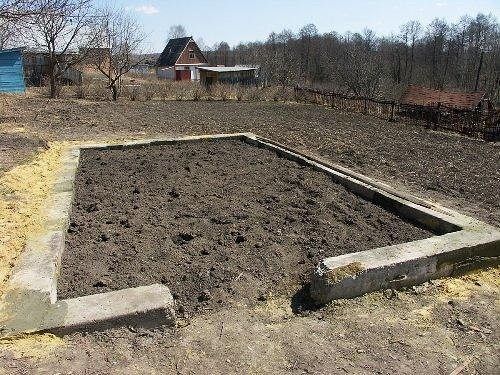
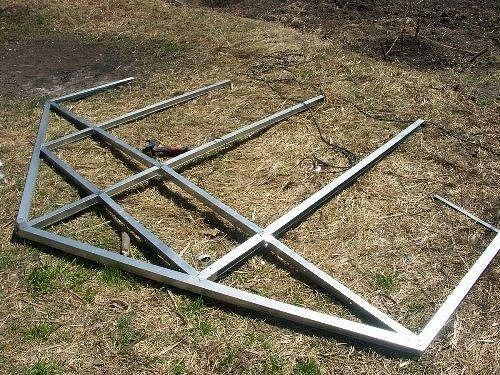
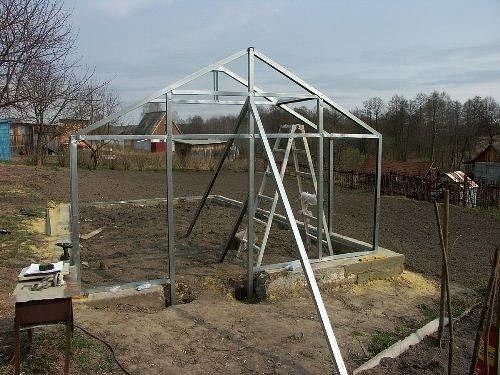
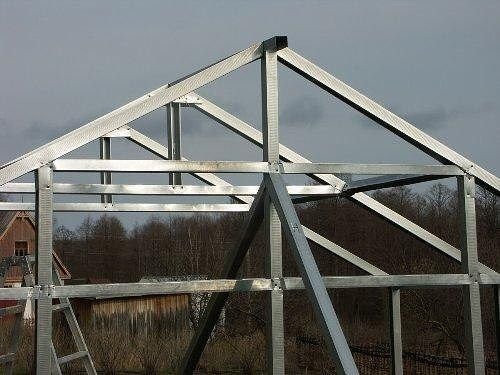
If your region experiences heavy snowfall, this greenhouse option is not suitable for you; the metal profile will not withstand the weight of snow on the roof and will become deformed.
For less favorable regions, it is better to make wooden greenhouses.
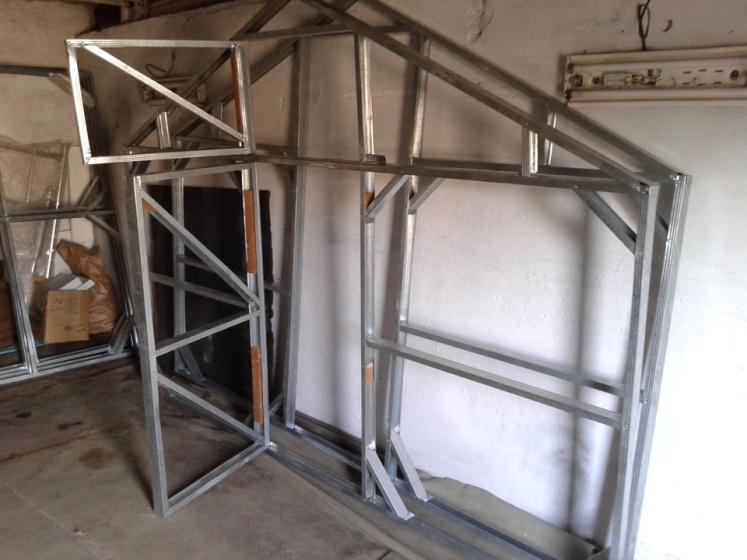
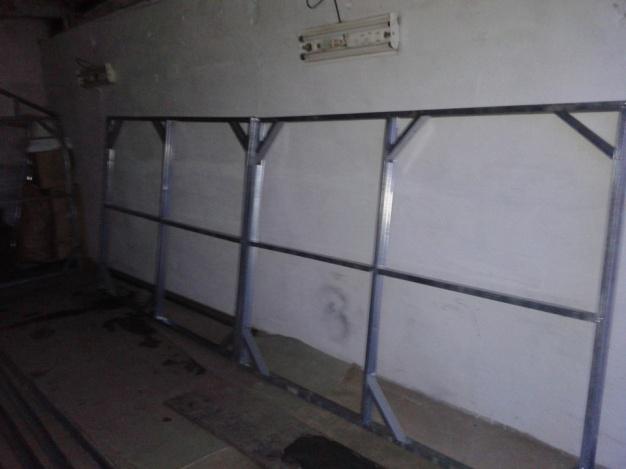
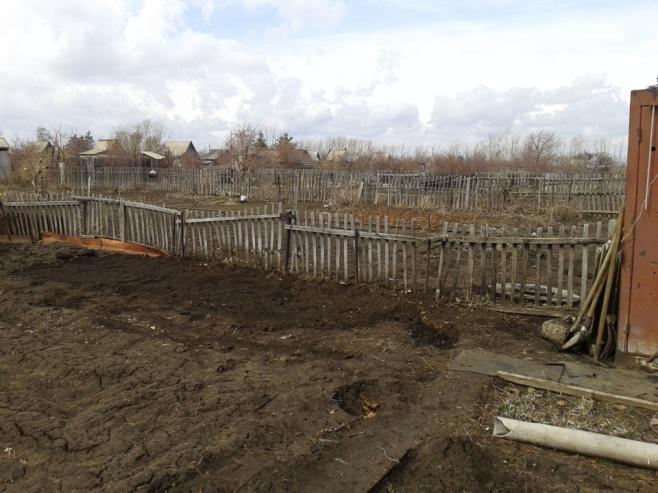
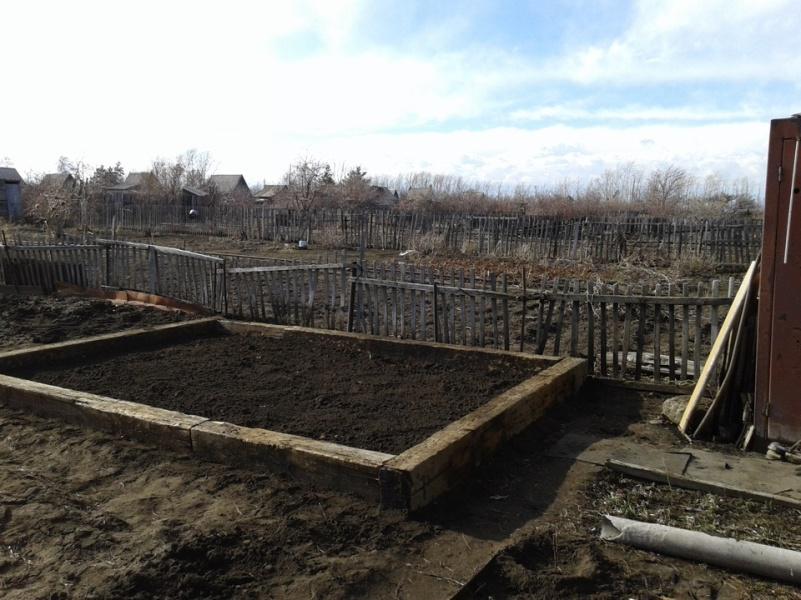
Here is another greenhouse construction option in photographs:
The question of tying
Before planning your greenhouse, be sure to determine one important aspect: how you will support your vegetables. This will determine the layout of your greenhouse.
Many modern structures have no sign of beams or other elements beneath the roof to which cucumbers can be tied. Therefore, it's important to plan ahead for the crossbar depending on the layout of the beds.
Naturally, staking cucumbers isn't a requirement for their growth, but it does help them yield a larger harvest. However, if you can't visit the greenhouse daily to water the beds and only visit the plot on weekends, it's best to leave the cucumbers on the ground instead of staking them. Large leaves will prevent moisture from evaporating quickly from the soil and will also protect the fruit from sunburn in extremely hot weather.
There are several basic elements that are most often used for tying up cucumbers:
- trellis,
- net,
- twine.
Trellis
You can buy a ready-made trellis, but making your own is very simple. Rebar of the desired height is inserted into both outer ends of the bed. For added stability, additional rebar can be dug into the center of the bed. A strong cord is stretched across the top between the supports. Freely hanging wire or rope sections are attached to it at regular intervals. The result is a kind of thread curtain with sparse threads. The shoots will find their own support and cling to it.
Here's a detailed process for building a greenhouse with sturdy beams designed specifically for trellises:
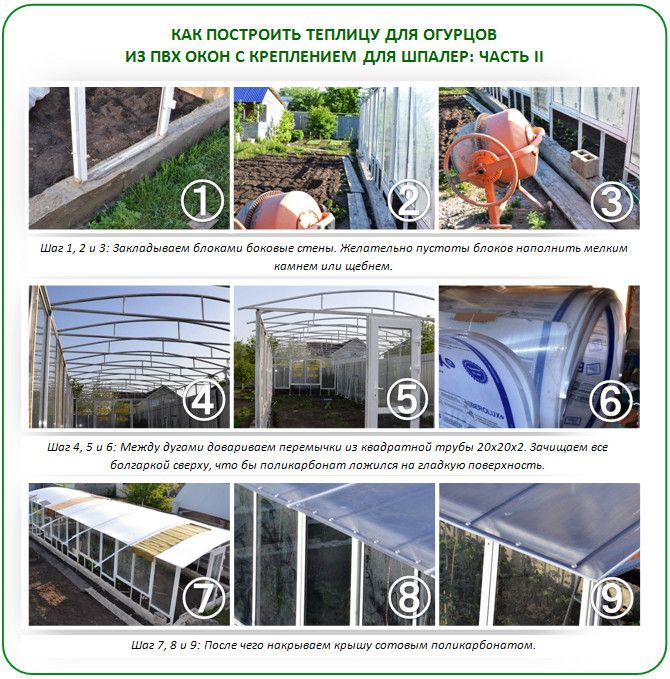
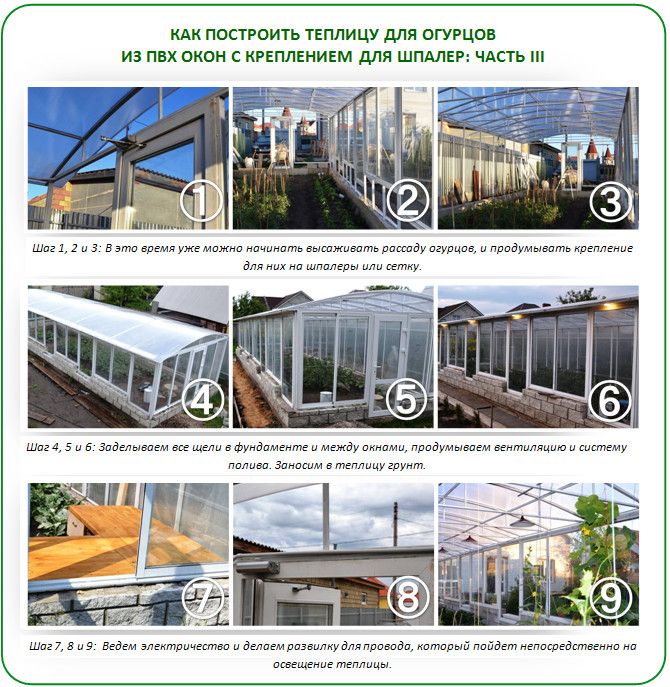
Net
In modern stores, you can buy ready-made cucumber netting; it is not too expensive and is sold in 2-meter wide rolls.
The beams under the greenhouse roof are especially useful for securing it. The netting is stretched along the bed, its upper ends secured to the top beam with wire or rope, and the lower ends are tied to pre-driven rebar stakes, the end of which can be bent to form a ring for security. With ample room to maneuver, cucumbers thrive, grow well, and produce fruit that remains clean, doesn't rot, and doesn't get damaged by soil. Gardeners don't have to bend over to harvest.
Here's how to build a structure that's convenient for installing mesh:
Another version of a greenhouse made of wooden beams:
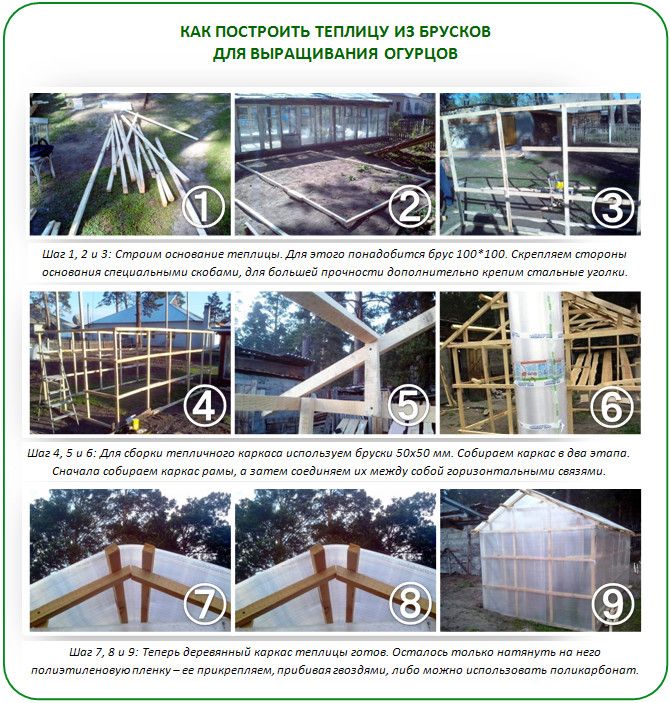
Twine braid
This method is also called "twine web" due to the specific nature of its implementation. The beds can be either side or centrally located. This fact isn't particularly significant. At planting time, metal arches are placed over the seedlings and covered with non-woven fabric. The result is a sort of arched greenhouse. At the beginning of the first month of summer, the covering material is removed, and the arches are loosely braided around the perimeter with twine or string.
This design prevents cucumbers from moving beyond the area of their garden bed and also provides access to the soil during watering.
Which method is best for you depends on your preferences and the specific features of your greenhouse. For example, in a lean-to greenhouse, all fastenings should be made near the larger wall, while the lower section can be used for storage.
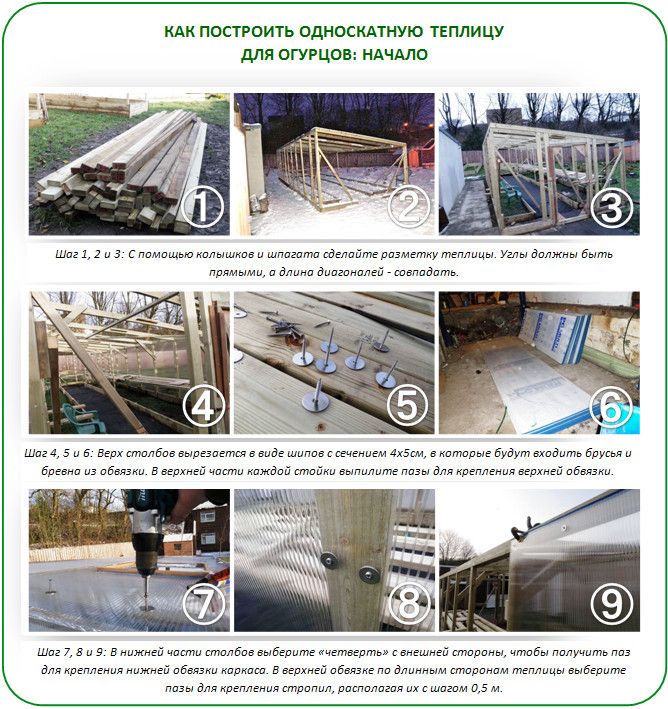
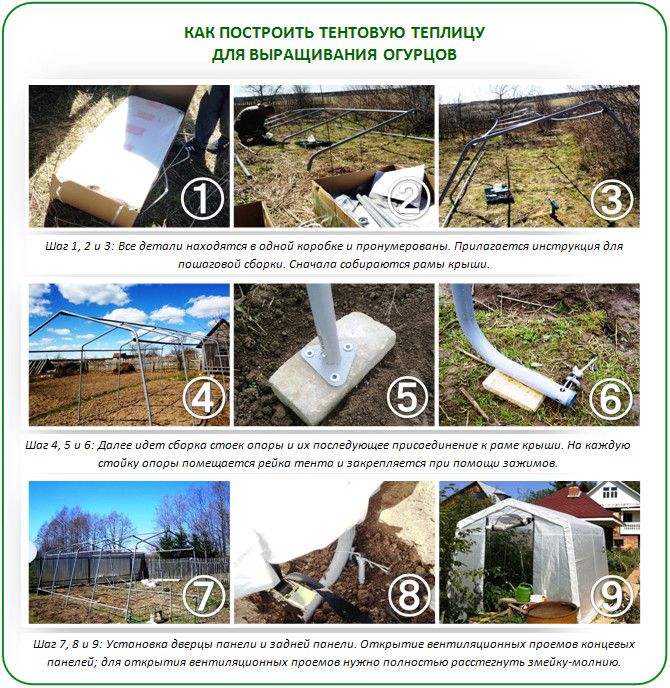
DIY tent greenhouse
Cucumbers, like most other vegetable crops, don't tolerate direct sunlight or scorching sun, so tarpaulins have become increasingly popular. They're very easy to work with, and their ability to diffuse sunlight will be appreciated by all the plants covered.
Greenhouse for cucumbers made from ordinary bottles
If a summer resident has a lot of free time and even more plastic or glass bottles, then they can build an excellent greenhouse.
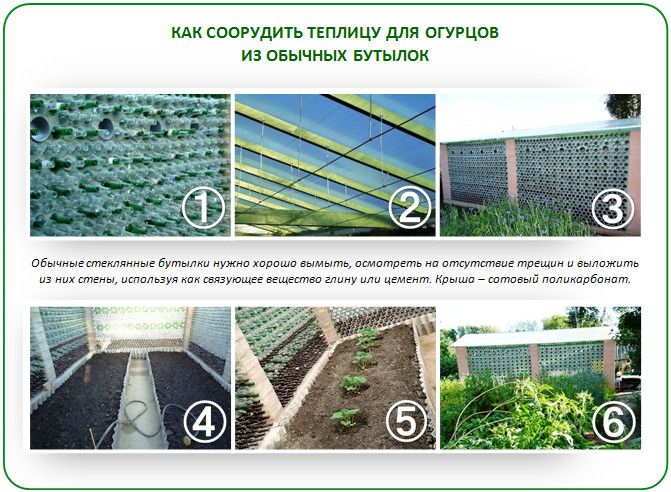
It will retain heat well and allow sufficient light into the structure. The bottles are secured together with cement mortar.