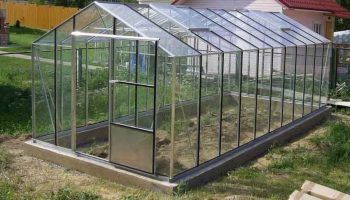
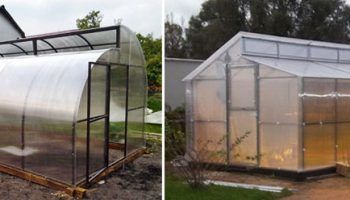
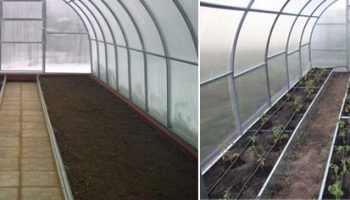
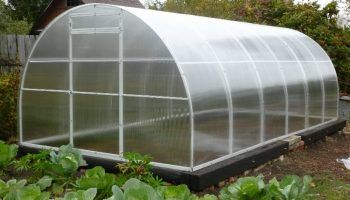
To build a polycarbonate greenhouse yourself, you need to understand the different types of this material. It comes in two types: monolithic and cellular. For greenhouses and hothouses, the latter is typically used. In this article, we'll discuss not only polycarbonate itself and its installation rules, but also how to choose the right foundation and frame construction method. We'll provide all the information with step-by-step instructions and photographs.
Advantages and disadvantages of a polycarbonate greenhouse
Polycarbonate is a single- or double-chamber plastic sheet with parallel-oriented stiffening ribs. It comes in a variety of colors, but transparent ones are used for greenhouses because they allow more light to pass through. It can also be cellular or solid. The former is usually chosen for greenhouses.
It has the following advantages:
- Durability. These greenhouses can withstand heavy loads, such as heavy snowfall or hail.
- Good light transmittance (92%).
- Low UV transmittance. This property is due to the fact that the rays are scattered within the honeycomb. This eliminates the need to shade the crops in hot weather.
- Good thermal insulation properties (better than films and glass).
- Resistance to temperatures from -35 °C to +50 °C.
- Dust-repellent properties.
- Lightweight (weighs 15 times less than glass).
- Flexibility, which allows you to create a greenhouse of any shape.
- Non-flammable. Polycarbonate simply melts, releasing no harmful emissions.
- Easy installation. Cutting or drilling the required piece requires little effort.
- Practical size (sheet 6 x 2.1 m). It takes 3-4 sheets to build a structure. And if you're building a mini greenhouse, even fewer.
- Aesthetic appearance.
- Low cost.
Polycarbonate also has disadvantages:
- Fading. If the sun is too hot all summer, the material will look worn after just 3-4 years. However, in the central Russian climate, such heat is rare.
- Rapid melting. This property can make it difficult to install heating devices in a greenhouse during cold weather. The material will melt if in close contact. Therefore, the heaters must be constantly monitored.
- Softness. It's durable, but if the frame isn't strong enough, it can bend under heavy pressure.
Caution! The ends of the structure must be sealed to prevent liquid from entering, which will lead to microbial growth and clouding.
How to build a polycarbonate greenhouse yourself: step-by-step instructions
There are many greenhouse projects, but they all have an identical structure:
- foundation;
- frame (made of wood, metal, profile, PVC);
- polycarbonate walls.
It is advisable to draw a drawing of the structure or save one of those that we offer.
Types of polycarbonate: which is best for greenhouses?
As we have already said, polycarbonate comes in monolithic and cellular forms.
The first option is similar to glass, only more flexible. It comes in various thicknesses and shades. It has a long service life. It is more expensive than cellular glass. It is used in the construction of fences, canopies, and awnings.
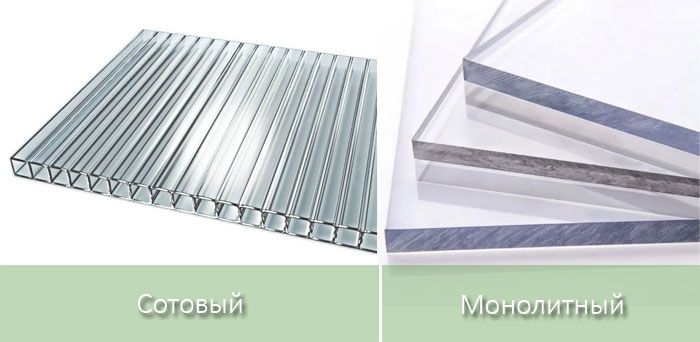
Honeycomb-shaped material consists of two sheets connected by ribs spaced evenly. Their interiors are filled with air, providing high-quality thermal insulation. It's less expensive, but has a shorter lifespan.
Basic designs of polycarbonate greenhouses
Greenhouses can be:
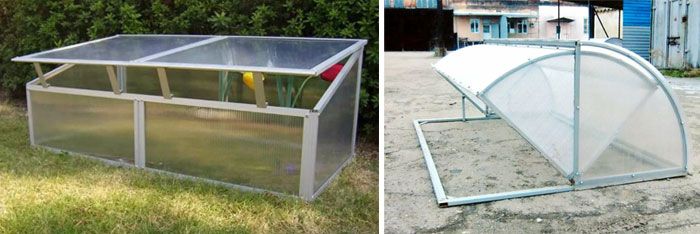
- Recessed – this option is rarely chosen because it is difficult to construct and is not portable. It consists of a trench with perimeter framing and a covered frame. The advantage of this design is its efficient energy savings due to the smaller area it needs to cool.
- Portable – this option is very mobile, allowing it to be moved to a new location each year and stored for the winter. However, it is unstable and still requires a foundation to secure it.
Popular types of greenhouses for cucumbers, eggplants and other crops that can be made
| Photo | Name | Description |
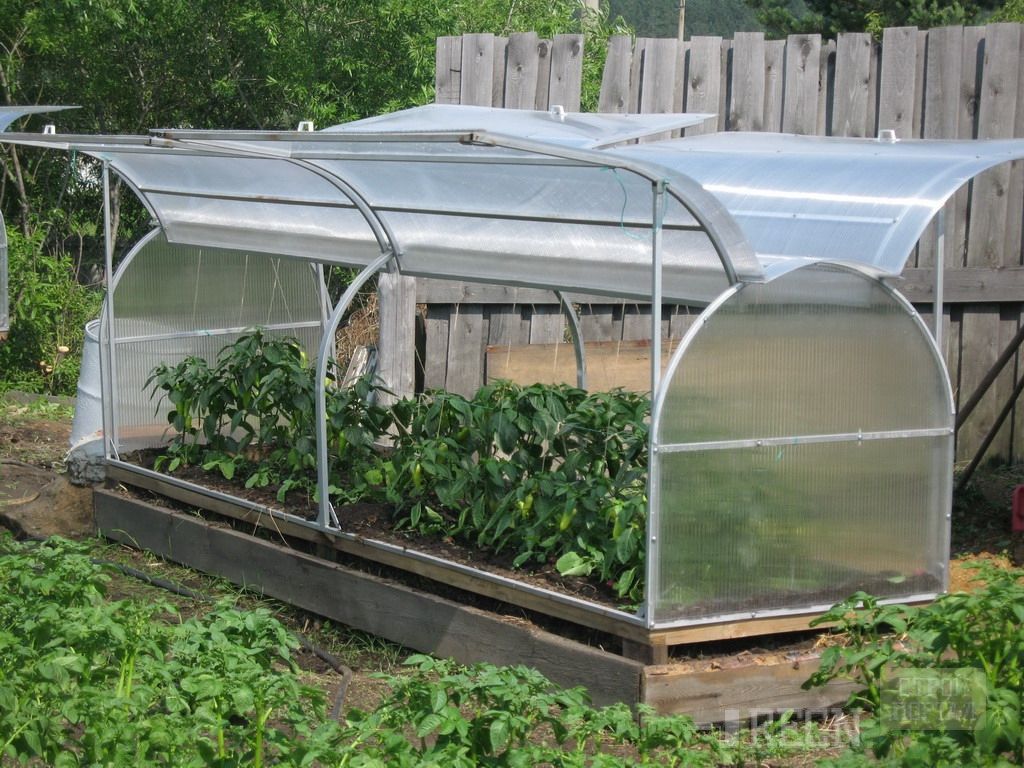 |
Butterfly greenhouse | The doors open on both sides, resembling wings. This improves ventilation. It can be accessed from both sides, making it very convenient for agricultural work. |
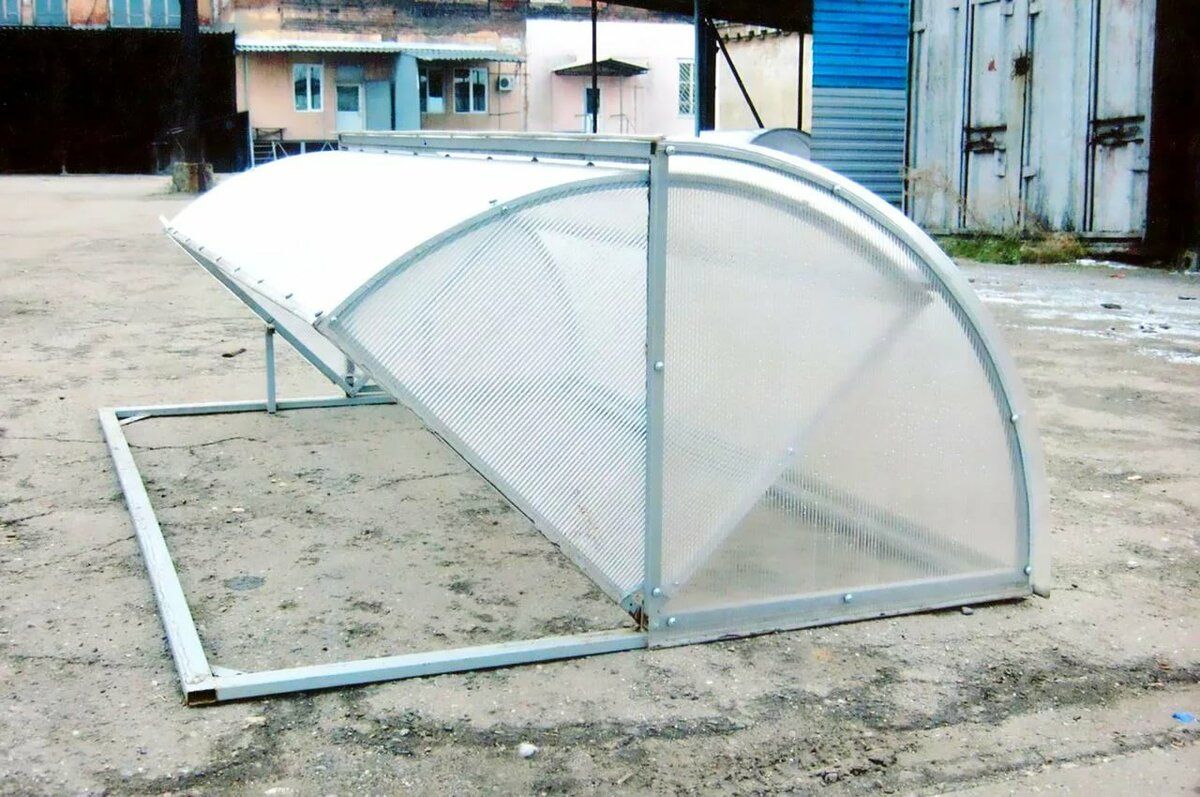 |
Greenhouse breadbox (shell) | It's arched. It consists of two semicircular walls. They slide easily, allowing full access. There are varieties with one or two movable walls. |
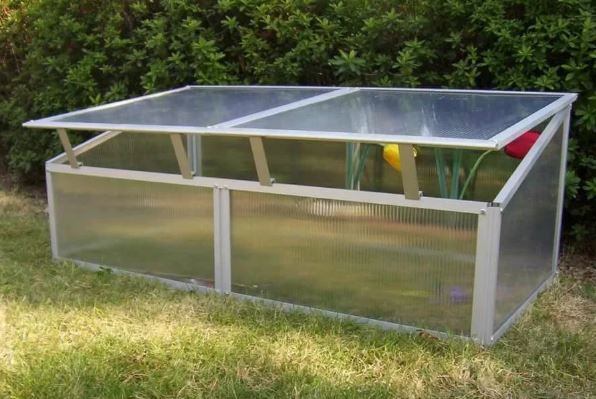 |
Belgian | A single-pitched structure with a flat roof. It rises like a chest. To keep the roof open for ventilation, supports are used. This type is used for tall crops, including some varieties of tomatoes. |
Making the foundation
A foundation is necessary because polycarbonate is a relatively lightweight material and can be blown away by strong winds. Building a foundation doesn't take much time, but it will ensure a secure installation.
To quickly create a foundation, you will need:
- wooden beam 12*12 cm;
- roofing felt;
- self-tapping screws;
- hand saw;
- roulette;
- antiseptic;
- shovel.
Step-by-step instructions:
- Dig a trench for the timber with a small margin (0.5-0.7 cm wider and deeper than the timber).
- Place roofing felt inside.
- Prepare pieces of timber of suitable length and treat them with an antiseptic.
- Place them inside, fold the edges of the roofing material inward (they can be fixed to the beams with a construction stapler).
- Connect the beams with screws.
When constructing such a foundation, the structure will be easy to dismantle and move if necessary.
Making the frame
The frame type is selected based on the shape and design features of the greenhouse.
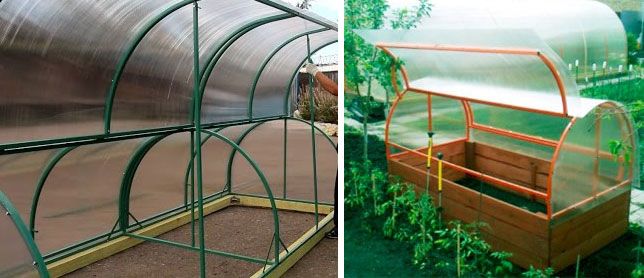
The easiest way to build a structure is in the form of an arch. To create this frame, you only need 50 mm thick beams equal in length to the greenhouse. Two beams are required. The polycarbonate is then attached to the beams at the bottom, bent into arches, and secured at the top with an overlap. Keep in mind that the polycarbonate is 2 m 10 cm wide, so it's convenient to build a greenhouse this way.
The frame can also be made from PVC pipes, bent into an arch and secured with polycarbonate sheets on top. However, with this type of construction, it will be quite difficult to ensure the doors open properly.
The ideal option would be to create a frame from galvanized steel or wood of the required shape. However, the metal will need to be welded.
Let's take a closer look at how to build a frame for a gable greenhouse using:
- beam 5*5 cm;
- boards (thickness 2.5-3 cm, width 1-1.5 meters);
- slats 30*20 cm;
- antiseptic;
- metal-plastic pipes (diameter 2-2.5 cm);
- furniture corners for fastening;
- self-tapping screws.
| Illustration | Step-by-step actions |
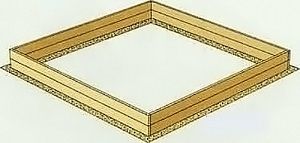 |
Build a box out of planks on the foundation or a level surface. Fit them tightly together, and make shields out of slats. |
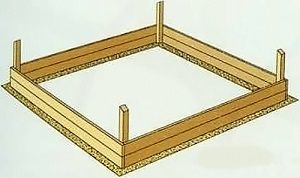 |
Build corner vertical posts from timber. Attach the ends of the panels to them. Cut the tops of the posts at a 45° angle. Treat the frame with an antiseptic and let it dry. |
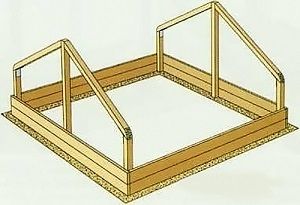 |
Attach a beam to the center of the end partitions (this will become the middle post). Place the beam on the top ends of the corner and middle posts and cut it to the required length. Secure it with angle brackets (135° for corner posts, 45° for middle posts). Paint the steel fasteners to prevent corrosion. Galvanized steel is corrosion-resistant. |
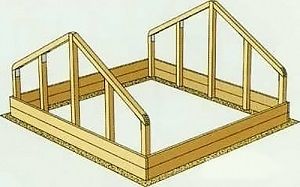 |
Make intermediate posts from timber. Place them evenly around the perimeter (0.4-0.5 m apart) and secure them from the inside with perforated strips. |
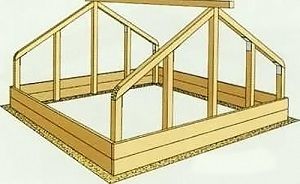 |
Make a ridge from a block and secure it to the middle posts. |
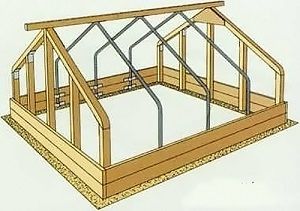 |
Make rafter frames from pipes. They can be bent to the required shape without losing their shape. The frames are installed at 0.5-0.8 m intervals. The pipes are bent using a spring pipe bender. |
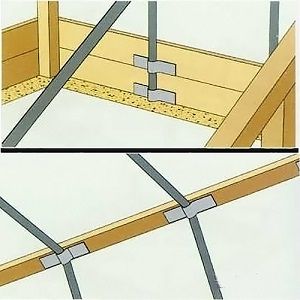 |
Secure the rafter frames with steel strip and self-tapping screws. |
Installation of polycarbonate
To install polycarbonate sheets you will need:
- perforated and insulating tape;
- marker pen;
- polycarbonate sheets;
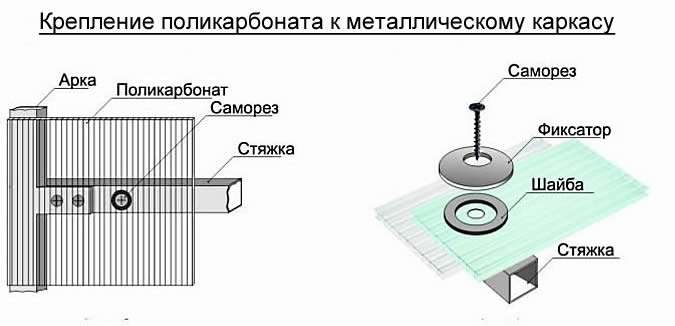
- self-tapping screws with thermal washers.
Step by step actions:
| Materials and diagrams | Instructions |
|
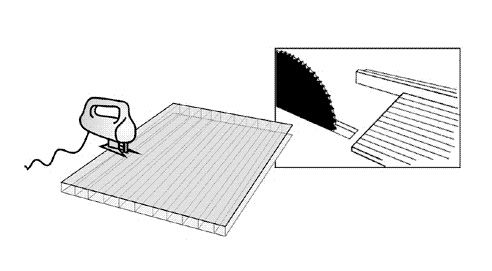
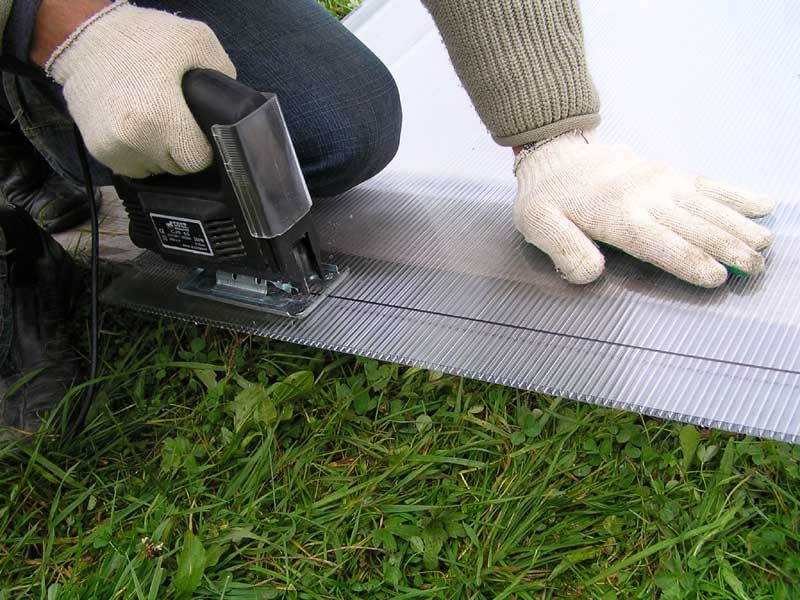
Carefully cut the polycarbonate to size using a sharp knife or circular saw. |
|
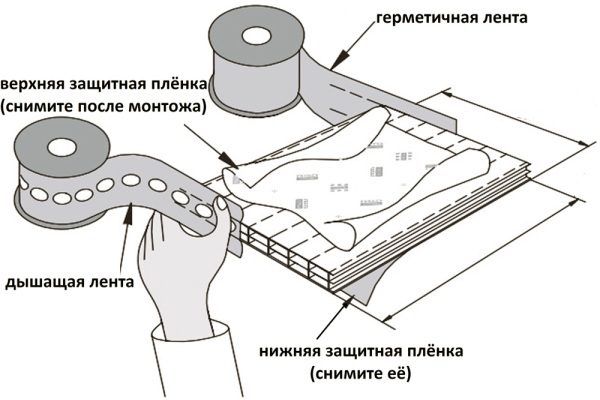
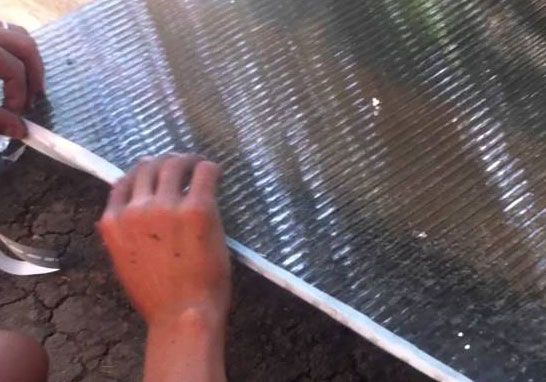
Seal one end with insulating tape to prevent liquid and debris from getting in. Failure to do so will darken the polycarbonate and reduce light transmission.
Seal the other end with perforated tape. This will prevent condensation. Remove the protective film from the polycarbonate to prevent it from getting under the fastener ends. |
|
Arrange the sheets so that the protective film is on the outside of the greenhouse. Secure the polycarbonate with screws and thermal washers. Remove the protective film completely. |
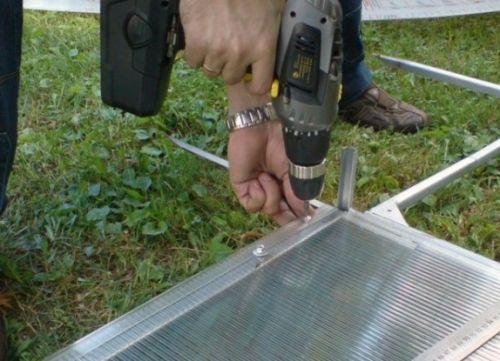
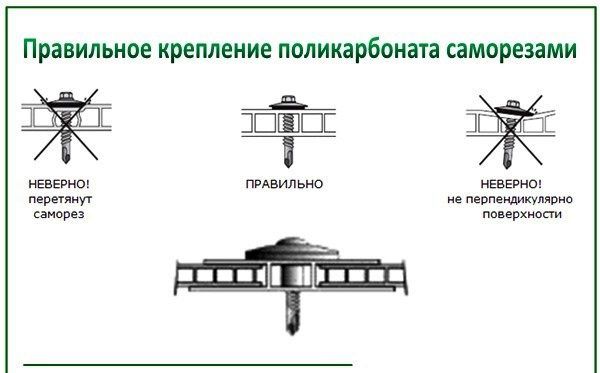
For your information! The thermal washer must not overtighten the screw. This is crucial. If the fastener is too tight, it will cause the sheet to collapse. Cracks will appear, significantly reducing its service life. The screw must not be too tight or too loose. This will result in a loose fit, and the sheet will begin to move. The thermal washer creates a gap. Without it, the polycarbonate will deform in cold or hot weather due to contraction or expansion. This will reduce its service life and spoil its appearance.
Some tips
Helpful tips:
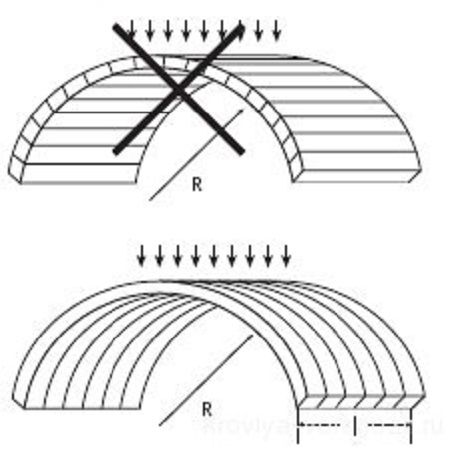
- When the design involves bending polycarbonate sheets, this must be done across the stiffeners.
- Don't skimp on the frame. If it's made of wood, it should be leveled and dry. If it's made of metal, galvanized is recommended.
- You can’t leave cracks and gaps, as warm air will escape from there.
- The best time to construct the shelter is April or late October. During this time, temperatures range from 10 to 12°C, which is ideal for the work.
Polycarbonate is a modern, high-performance greenhouse material. It's significantly stronger than glass or film. It's flexible enough to be molded into a variety of shapes. Its affordability makes it a leading choice for greenhouses for a variety of vegetables, from cucumbers, peppers, tomatoes, and herbs.