It's a long-held stereotype that to enjoy juicy, ripe watermelons and melons, you need to travel to the Krasnodar region or elsewhere in the south. But that's not true. Even residents of the Urals and Siberia can easily grow their own melons, provided they have all the necessary conditions.
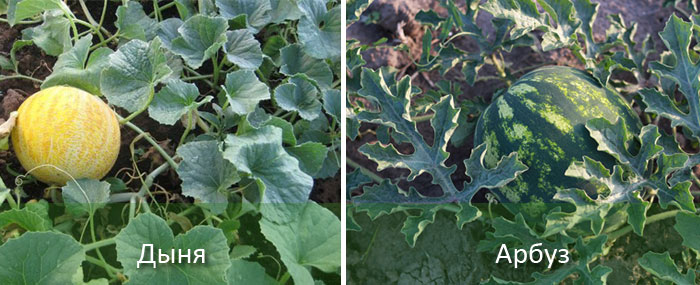
By the way, here are some excellent watermelon varieties for Siberia: Ogonyok, Crimson Sweet, Sibirskie Ogni. And here are some melons: Altai, Luna, Rosinka, Nezhnaya, Galilei, Kolkhoznitsa 749. Take note.
Content
- 1 Is it possible to plant melons and watermelons together and at what distance?
- 2 Selecting soil
- 3 Planting watermelons and melons with seeds in a greenhouse or open ground
- 4 Caring for melons and watermelons after planting
- 5 Planting watermelons and melons as seedlings in open ground or a greenhouse
- 5.1 Seed preparation
- 5.2 Seedling growth
- 5.3 Choosing a location for planting watermelon and melon seedlings in the ground
- 5.4 Preparing seedlings for transplanting into the soil
- 5.5 Planting scheme for watermelon and melon seedlings in open ground or a greenhouse
- 5.6 Caring for watermelons and melons after planting seedlings in the ground
- 6 Formation of melons
- 7 Lunar calendar for planting watermelons and melons for 2021: table
- 8 Pests of watermelons and melons
- 9 Helpful tips for growing watermelons and melons
Is it possible to plant melons and watermelons together and at what distance?
Melons and gourds thrive alongside each other, so they can be planted side by side. They require similar growing conditions:
- Since they come from hot countries, they love the sun and warmth;
- They require approximately the same care;
- Cross-pollination usually does not occur.
But it is important to remember a few nuances:
- Careful planning of planting locations is essential, as melons tend to grow extensively. The distance between plants should be at least 70 cm.
- In addition, they are susceptible to various diseases, so regular preventive measures should be taken as a rule.
Selecting soil
The area for planting melons and watermelons should be well-protected from the wind and receive ample sunlight. The key to success is proper soil that provides the plants with sufficient nutrients.
- The ideal option is sandy, sandy loam or light loam soil.
- The hydrogen level is important; it should reach 6-7 units.
- The soil for melons should be light and neutral, and it is important to have an abundance of various organic compounds.
- Excessive moisture and acidic soil are absolutely not suitable for growing melons and watermelons.
Planting watermelons and melons with seeds in a greenhouse or open ground
The earliest time to sow melons is April, but in colder regions this may shift slightly into summer. Residents of southern regions should ensure that nights are warm enough and the soil is well-warmed before planting.
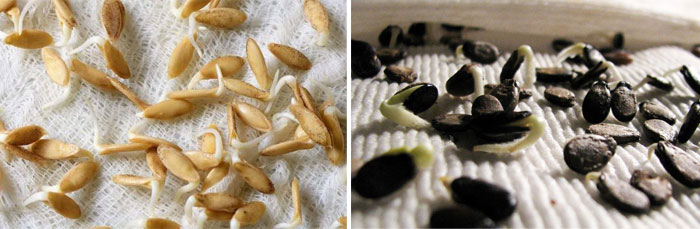
If residents of cooler regions undertake to grow melons, it is better to opt for the seedling method.
Preparing seeds for sowing
Before planting, you can treat the seeds. This not only increases germination, but also results in faster growth and stronger, healthier seedlings. It also ensures the development of female flowers, which will eventually produce fruit.
Processing:
- First, you need to manually sort the seeds and discard any obviously defective ones. Then, place the seeds in a small cotton bag and soak it in hot water for three and a half hours.
- After this, the bag is placed in a cool, weak solution of potassium permanganate for half an hour. This procedure will disinfect the seeds.
- The next step is to carefully remove the treated seeds with tweezers and place them on paper towels, which have been previously placed on the bottom of a plastic container. The towels should be pre-moistened with settled water.
- The result is a kind of miniature greenhouse. Place it in a warm place for a day or two; you can use a radiator. After this time, the main root will emerge. After this, you can plant the seed either in open soil or in a greenhouse.
- There is no need to process purchased seeds, since the manufacturer has already performed all the necessary manipulations.
Sowing watermelons and melons with seeds in a greenhouse or in open ground
First, you need to prepare the site where the melon patch will be located. A south-facing area, well protected from the wind, is ideal. The site should be dry, with no close groundwater table.
You can artificially drain it by making beds up to 20 cm high and sloping them towards the south.
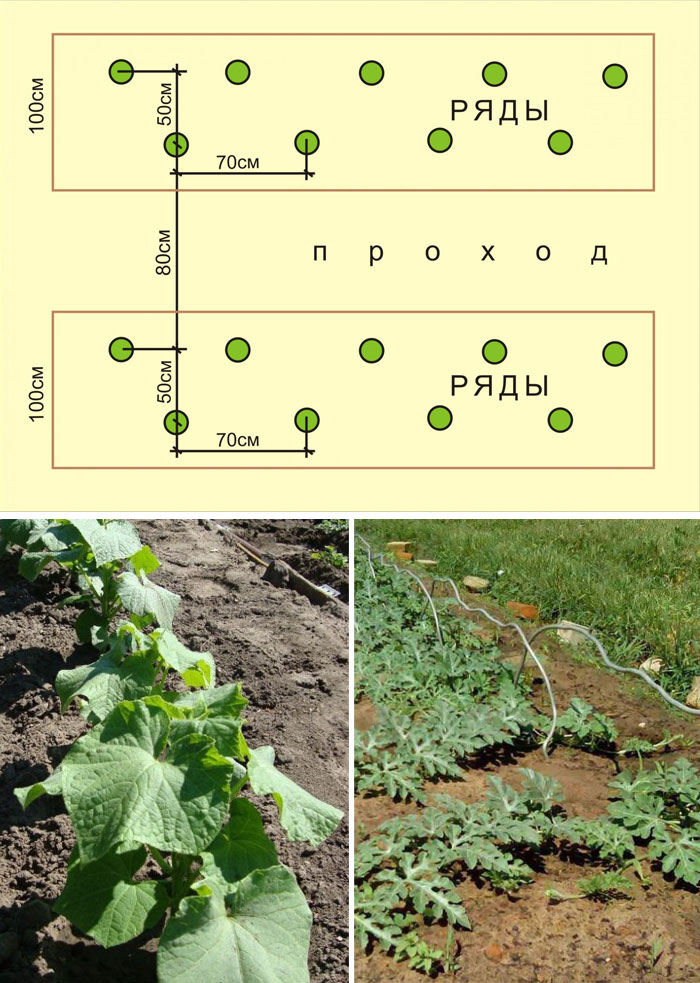
There are two common sowing options: furrow sowing or pit sowing. There should be a significant gap between seedlings—at least 70 cm—to ensure the seedlings don't interfere with each other and have enough room to grow.
- Furrow plantingThey should be spaced approximately one to one and a half meters apart. Leave 3-4 cm between seeds. This method is typically used in cold climates, where not all seeds germinate. If germination is good, the seedlings can be thinned or transplanted later.
- Planting in holesIn this case, it's necessary to maintain a distance of at least half a meter, or better yet, a meter. Plant no less than two and no more than five seeds in each hole.
After the seedlings have emerged, it is necessary to remove excess shoots.
Caring for melons and watermelons after planting
A good harvest is only possible if the plants are cared for promptly and thoroughly. Don't neglect soil loosening, weeding, and watering. It's important to apply fertilizer on time and take disease prevention measures.
Watering
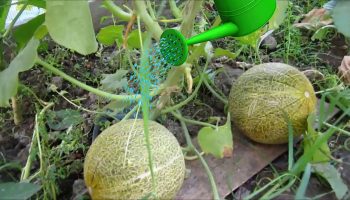
Watermelons and melons are moisture-loving plants. Their juiciness depends on timely and adequate watering. At least 30 liters of water per square meter should be used, and the water should be allowed to settle for 24 hours beforehand.
Watering should be done once every seven days. If dry weather occurs, water twice a week.
Additionally, the melon patch should be superficially irrigated and fertilized. It is recommended to alternate fertilizing, using both root and shoot fertilizers.
As the fruit gains weight, watering should be reduced. It should be stopped completely a week before harvest. This trick has a noticeable effect—sugar accumulates in the pulp during this time, resulting in a very sweet and aromatic fruit.
After watering, the soil must be loosened to prevent rapid evaporation of moisture.
Top dressing
This manipulation is carried out 14-15 days after sowing the seeds.
The first fertilizer is ammonium nitrate. Use 20 grams of ammonium nitrate per bucket of water. Add two liters of the resulting solution to each hole.
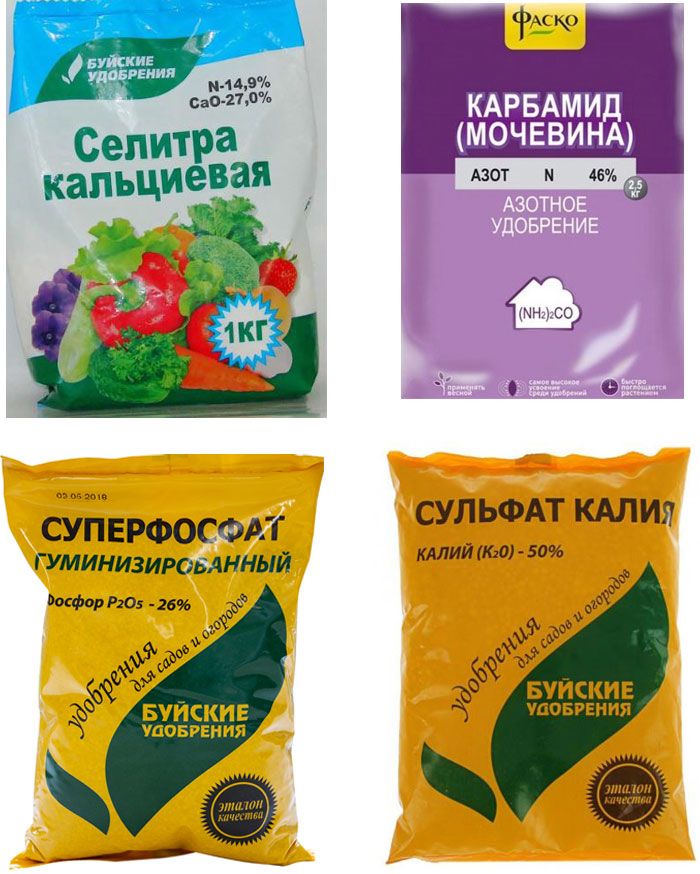
The second feeding is necessary when buds begin to form. During this period, each plant requires 4 grams of calcium chloride, the same amount of ammonium nitrate, and 6 grams of superphosphate.
Planting watermelons and melons as seedlings in open ground or a greenhouse
Now let's consider the option of growing melons using seedlings.
Seed preparation
To achieve good results, planting material must be prepared in advance. Seeds should be purchased in early spring, at least two months before planting. An important point: choose seeds that were collected five years ago.
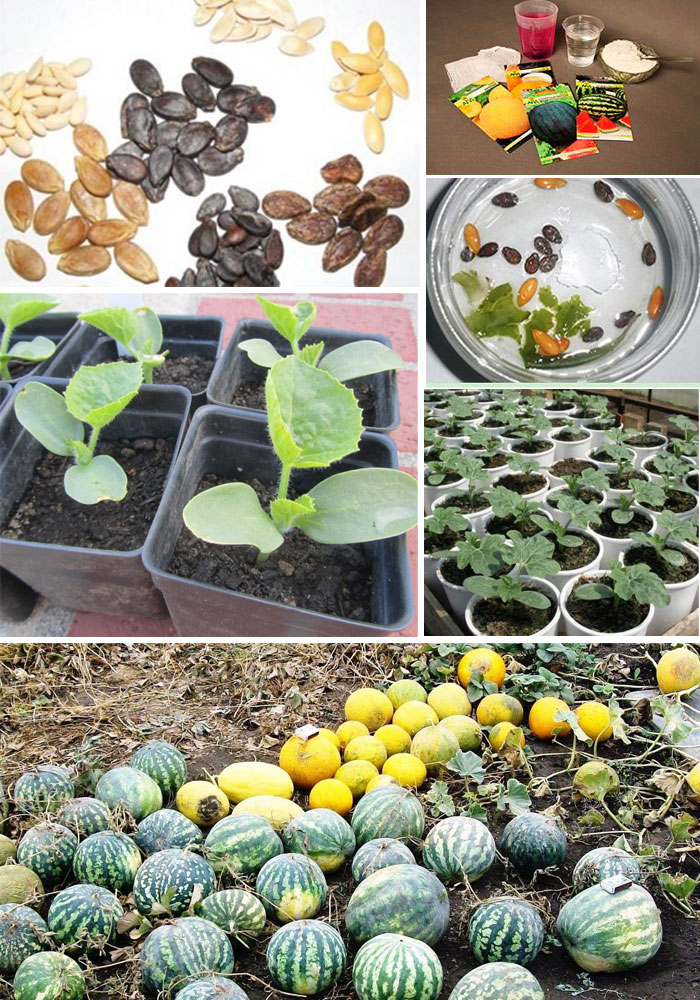
When choosing a variety, you need to consider the climate. The colder the region, the earlier the variety should ripen.
It is ideal to choose hybrids that already have built-in adaptability to various unfavorable factors.
Purchased seeds should be tested for germination. To do this, place them in a container of water. Any that float to the surface should be discarded immediately, as they will not sprout. The remaining seeds can be planted in soil to produce seedlings. Watermelon seeds have a harder shell, so germination takes significantly longer. To shorten this time, you can pour boiling water over them.
First, the seeds need to be soaked. First, they should be sorted by variety, then wrapped in several layers of cheesecloth. The entire package is placed in a container with a small amount of water at the bottom. The seeds are soaked until the first sprouts appear.
If a significant amount of time has passed and sprouts haven't appeared, the seeds can be set aside for next year. They should be dried and stored in the refrigerator.
Seedling growth
The next step is preparing the pots. There should be as many as there are seeds. The containers should be no more than 10 cm in diameter. Fill them with high-quality peat soil. You can add beneficial organic matter, such as humus, sawdust, and turf. These additives help retain heat, which is extremely important for melons.
Plant two sprouted seeds in each container, burying them 5 cm deep. Afterward, mist the surface with a spray bottle, cover with clear plastic, and place in a warm place. Keep the pots at a temperature of approximately 25 degrees Celsius for one month (melons) to one and a half months (watermelons).
Once the sprouts appear, remove the film and move the pot to a sunny location. A week after planting, apply mineral fertilizer. At this time, you can begin preparing the mullein and superphosphate infusion; it will be ready to use in another seven days.
Choosing a location for planting watermelon and melon seedlings in the ground
Growing melons requires a lot of patience and attention. Particular attention should be paid to the site. If you can't find a warm, sunny, and wind-protected spot, it's best to use a greenhouse to ensure a good harvest.
Preparing seedlings for transplanting into the soil
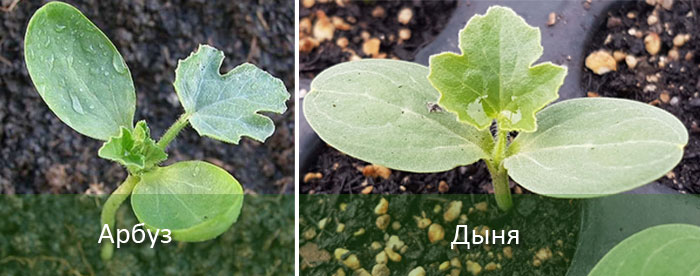
Once the seedlings have formed 5-7 leaves, you can begin preparing to transplant them into the ground. The optimal time is late May. However, if the nighttime temperature drops below 15 degrees Celsius during this period, it's worth waiting a few more days.
A week before planting, hardening off the seedling begins. The plant is kept at temperatures between 16 and 20 degrees Celsius. This will allow it to gradually acclimate to the new conditions.
Planting scheme for watermelon and melon seedlings in open ground or a greenhouse
A healthy plant will ensure a good harvest. To achieve this, follow a few simple rules:
- Careful preparation of the site is essential. Holes should be spaced at least 50-70 cm apart. Leave approximately 70 cm between rows.
- The holes are arranged in a checkerboard pattern, which provides access to each plant and room for development.
- When planting, the top leaves are left exposed, the soil around the seedling is compacted, and a layer of sand is sprinkled on top. This is necessary to prevent rot.
- After planting, the sprout is watered with warm, settled water.
For the first few days, each seedling is covered with a moistened plastic cap. The weak and tender seedlings are initially very sensitive to the sun's harsh rays.
Caring for watermelons and melons after planting seedlings in the ground
After the seedlings are planted in the soil, they should be lightly covered with sand. It takes a few days for the plants to establish themselves. During this period, they should be given some shade and watered daily with warm water. Gradually reduce the watering.
Fertilization takes place in three stages.
- Seven days after planting, dissolve approximately 25 grams of ammonium nitrate, 50 grams of superphosphate, and about 20 grams of potassium nitrate in a bucket of water.
- During the shoot formation period, add mullein to the water at a ratio of 1:10 or chicken manure (1:20), add 20 grams of superphosphate and 30 grams of potassium salt.
- The third feeding is done when the first fruiting buds appear. Add 15 grams of ammonium nitrate, 30 grams of potassium nitrate, and 10 grams of superphosphate to a bucket of water.
Melons are unproblematic when it comes to pollination. This is facilitated by approximately 150 different species of insects, including ants. Many gardeners, unaware of this fact, try to eliminate the ants, thereby reducing the chances of pollination.
Formation of melons
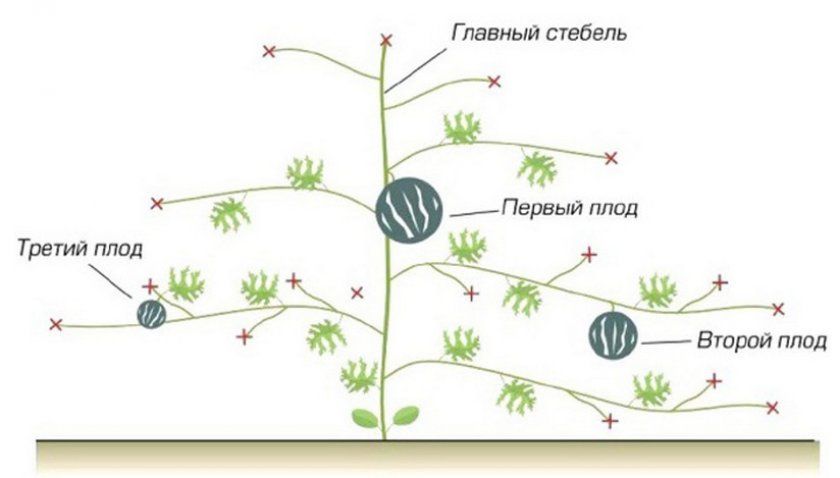
After the first two or three fruits appear on the watermelon shoot, the central shoot is pinched. The side shoots are also pinched above the fifth or sixth leaf. All other shoots will drain resources, hindering development, so they should be removed.
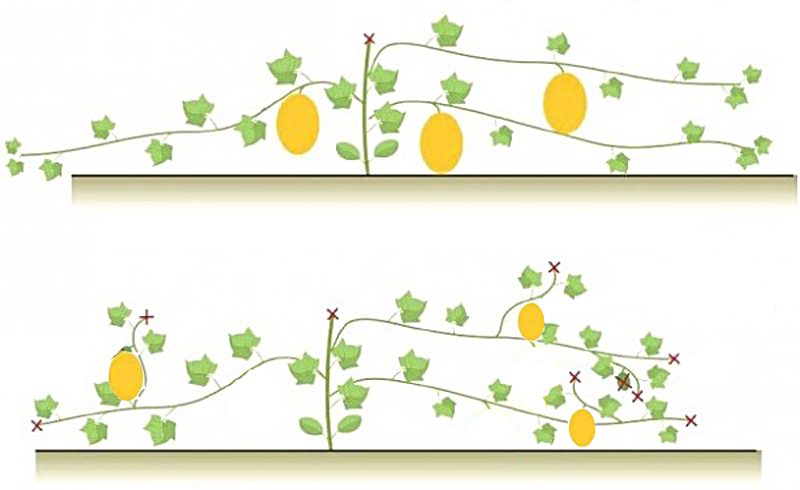
The melon's central shoot also needs to be pinched. This is usually done above the 3rd or 4th leaf. The lateral shoots should be carefully examined, and the two strongest should be preserved. These should also be pinched, doing so above the 5th or 6th leaf.
After the ovary has formed, pinch the fruit again, 3-4 leaves above the ovary. Weak shoots are removed. The optimal number of fruits per shoot is no more than 5-6.
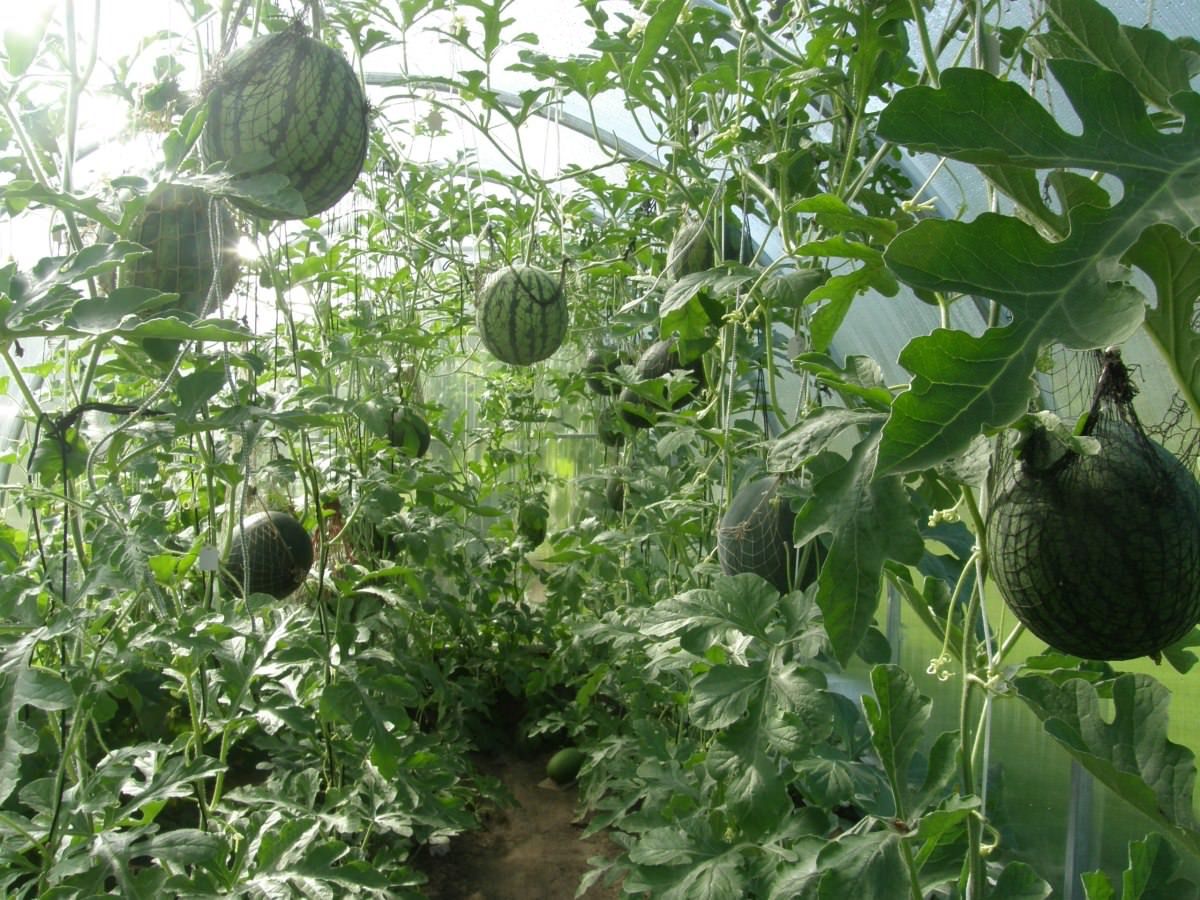
You can train the plants on a trellis. The vines need constant tugging, as watermelons quickly gain weight. The fruits should be hung in a convenient net to reduce the strain on the plant.
Lunar calendar for planting watermelons and melons for 2021: table
Using the 2021 Lunar Sowing Calendar, you can determine favorable and unfavorable days for planting melons and watermelons.
| Month | Favorable days | Unfavorable days |
| January |
3-9, 13 16, 17 20-23 25-27 30, 31 |
2, 3, 10 14, 15 25 and 31 |
| February | 4, 7-9 12-14, 17-25 |
10, 11, 21 22, 26 and 27 |
| March | 3, 5, 8 13-22 24-28 |
9-11, 19-21 25 and 26 |
| April | 3, 5, 8, 9 24-28 |
3, 4, 15-17 20-22 and 30 |
| May | 2, 5-7 12-17 19-22 24-26 28 and 29 |
3, 4, 8, 9 30 and 31 |
| June | 2, 3, 6-8 15-26 29, 30 |
1, 4, 5, 14 15, 27 and 28 |
| July | 4, 7, 13-17 19-23 27 and 28 |
1-3, 10, 24 25, 29 and 30 |
| August | 5, 6, 10-15 17-19 23, 24 27-31 |
7-9, 20 21, 25 and 26 |
| September | 1, 2, 8-13 15, 16 19-21 24-30 |
4, 5, 7, 17 22 and 23 |
| October | 7-13, 16 17, 21 and 27 |
15, 28-30 |
| November | 6-14, 17-19 23 and 24 |
5, 15, 16 25 and 26 |
| December | 1, 5-11 14-21, 29 and 30 |
3, 4, 12, 13 22 and 23 |
Pests of watermelons and melons
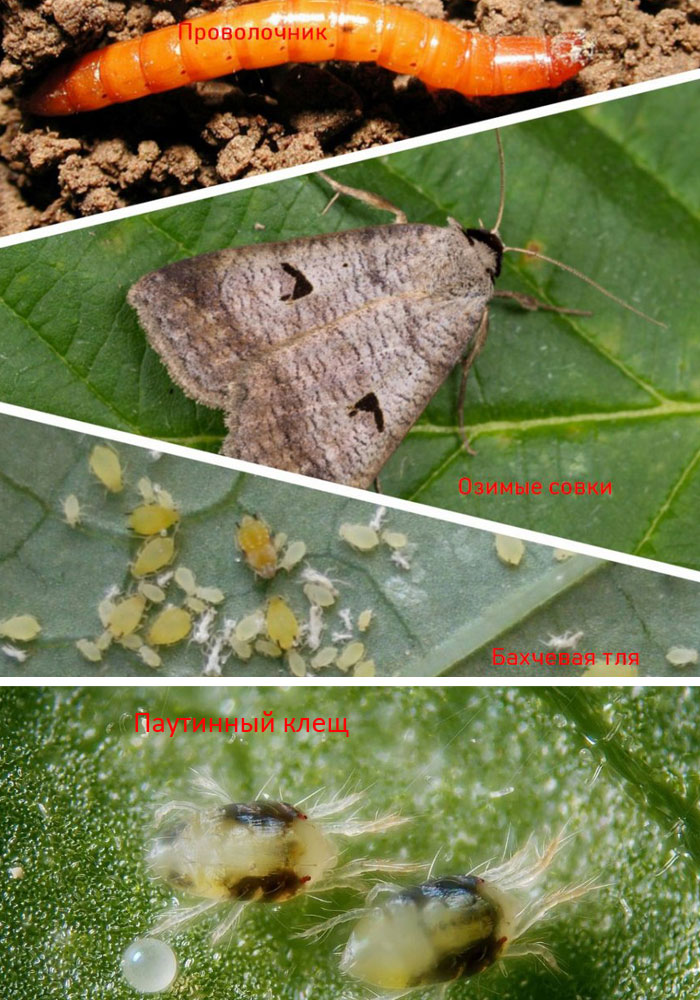
| Name | Damage caused | Method of struggle |
| Aphid | Colonies of these insects settle on leaves and destroy ovaries and flowers. Aphids spread especially actively during warm and humid weather. | Garlic, onion, or mustard infusions produce good results. To prepare them, pour 300 grams of onion into a bucket of water and let it steep overnight. Then strain the mixture and apply it to the affected plants. |
| Wireworm | These pests are small, brownish worms covered in a hard shell. They live in the soil and cause severe damage to the root system. | Wireworms thrive on the roots of perennial weeds, so it's important to weed the area regularly. Plants such as mustard greens and beans are effective deterrents. |
| Winter moth | It develops in two generations; the caterpillars overwinter in the soil, then rise to the surface in the spring and pupate in the upper layers of the soil. At the end of May, the flight of the butterflies begins, which lay eggs from which the caterpillars emerge. | Cutworms are nocturnal insects, so their caterpillars should be collected at night using a bucket of soapy water. This should be done twice a week throughout the summer. |
| Spider mite | The spider mite prefers dry, hot weather. It attacks leaves, causing light-colored spots to appear. | Leaves should be carefully inspected. If any affected areas are found, they should be removed and burned. |
Helpful tips for growing watermelons and melons
Oxygen is essential for melons. To ensure adequate oxygen supply, loosening the soil to a depth of at least 10 cm is essential. Once side loops appear, regular hilling is incorporated into the care regimen.
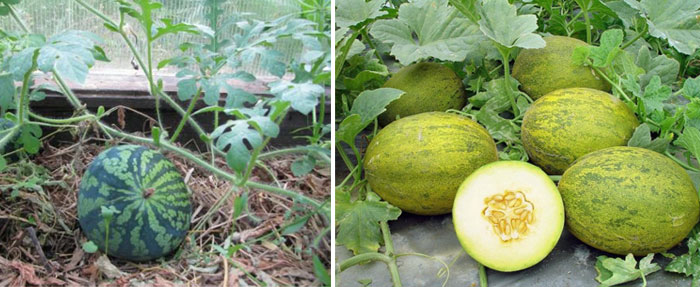
During active growth, melons often devote all their energy to fruit development. This causes the plant to suffer and weaken. To prevent this, the main stem is pinched. Ensure that no more than three fully developed shoots develop on each plant, and remove any excess shoots promptly.
Particular attention is needed during the fruit set period. No more than six of the strongest and most vigorous fruit sets should be left; the rest should be removed.
During ripening, the plant experiences significant stress as it gains significant weight. To protect the plant, the fruits are placed in netting and hung. They must be covered with foil, otherwise, contact with the soil can cause the fruit to rot.
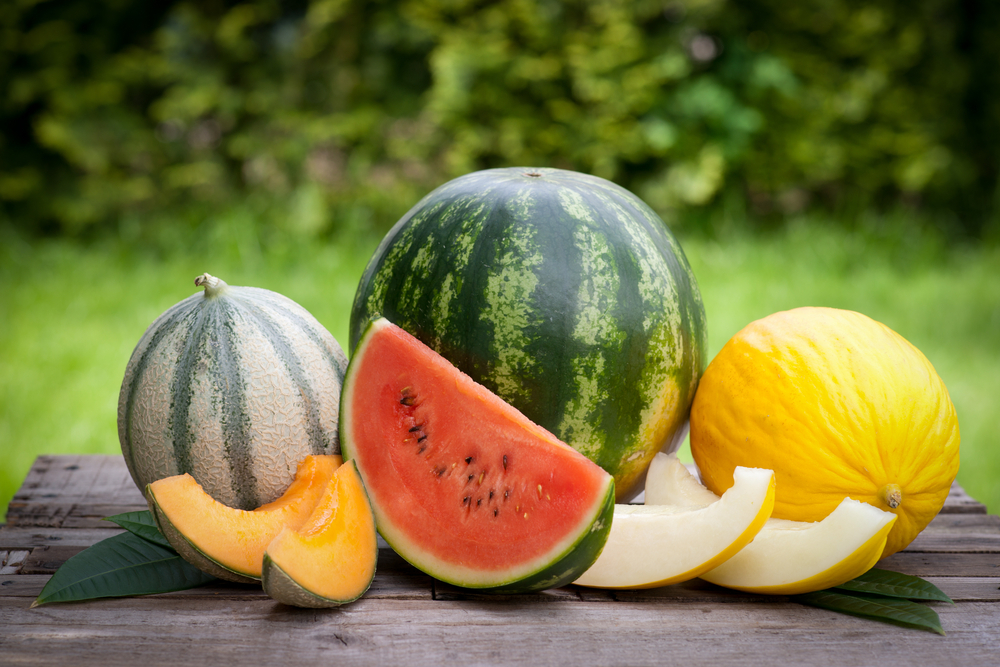
To ensure a juicy, sweet, and flavorful watermelon or melon, stop watering it a week before harvesting. Harvest the fruit only when it's fully ripe. The exception is when transporting the crop or planning long-term storage. Then, even unripe berries can be picked; this way, they'll withstand the long journey and have time to ripen.