A heated greenhouse is an excellent option for those looking to increase their yield and extend the growing season. There are several effective ways to install heating in a greenhouse yourself. To choose the optimal one, consider the size, purpose, and materials needed. The systems are simple, so it's entirely possible to build one yourself.
Content
- 1 Greenhouse heating options and their comparison in the table
- 2 Solar heating of a greenhouse (solar air collector)
- 3 Biological heating of a greenhouse
- 4 Air heating of a greenhouse
- 5 Hot water heating of a greenhouse
- 6 Steam heating of a greenhouse
- 7 Stove heating of a greenhouse
- 8 Gas heating of a greenhouse
- 9 Electric heating of a greenhouse
- 10 Criteria for choosing a heating system
- 11 Internal thermal insulation
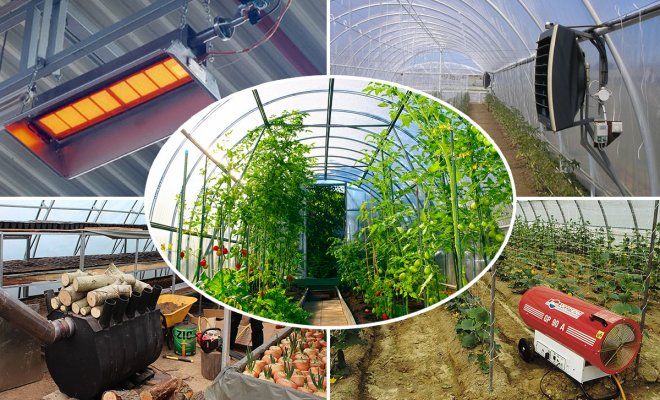
Greenhouse heating options and their comparison in the table
Not every greenhouse requires heating. A heating system is recommended if it will be used year-round or if you plan to grow vegetables early.
| Heating method | Pros | Cons |
| Solar heating
|
This is a fairly simple and easy-to-implement option. Of course, you won't build everything for free, but it won't require expensive materials. Heating is natural, with heat released gradually. | This method is directly dependent on climate and weather conditions. Increasing or decreasing the temperature will not work. |
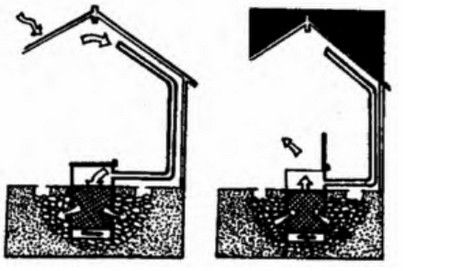 |
The method involves placing biofuel beneath the fertile soil layer, which warms the soil through natural decomposition processes, releasing the heat gradually. This reduces the need for fertilizing and watering. | This method also depends on the climate. Without additional heating, plants won't survive in winter, and they may become damp in summer. It's impossible to regulate the temperature. |
| Air heating
|
The system is easy to install, and the greenhouse warms up quickly. There is no condensation due to constant air movement. | When the system is turned off, the temperature drops sharply, so the process must be maintained for as long as necessary. |
| Water heating
|
The system operates reliably and safely. The air is not overdried. The temperature can be adjusted as needed. | The best option would be to install a separate boiler room or heat the water using electricity, so this method cannot be called economical. |
| Steam heating
|
The desired temperature is reached very quickly. Fuel consumption is economical. Materials are inexpensive. Large spaces can be heated. | Heating devices and components become very hot, so they often need to be replaced. |
| Furnace heating
|
Inexpensive, easy to build yourself, effective, temperature can be changed, fuel is readily available. | Such a system must be monitored all the time. |
| Gas heating
|
The air is heated quickly and evenly, the system does not require large financial outlays, and is practical to use. | The system's operation must be constantly monitored, as the gas is quite hazardous. Furthermore, the project must be coordinated with relevant authorities at all stages of construction. |
| Electric heating
|
There is no need for control, no need to build a chimney, the process can be automated, there is no risk of fire, and no problems with purchasing and storing fuel. | The air becomes too dry, requiring a power source. This is a fairly expensive option, as it requires a lot of electricity. |
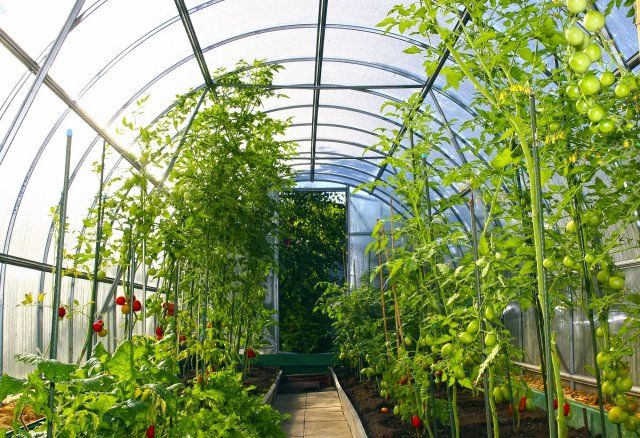
Solar heating of a greenhouse (solar air collector)
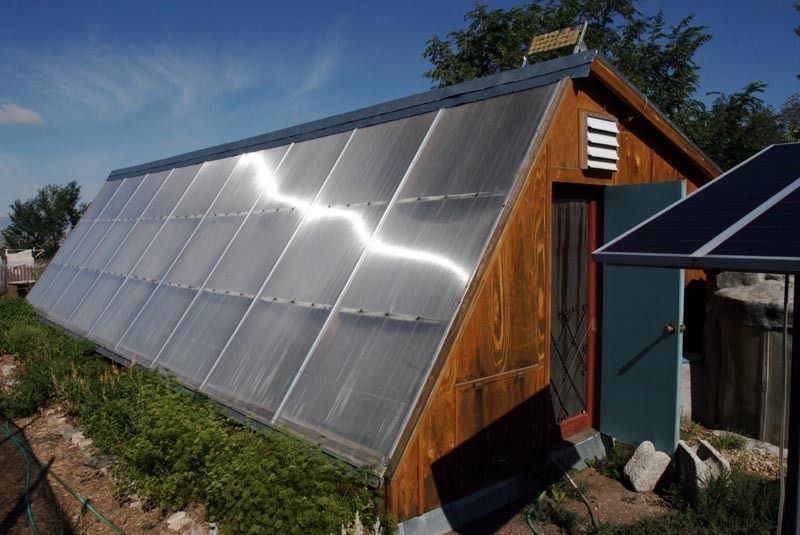
To create such a system, it's necessary to carefully consider the placement of the air collector to ensure air circulation. To ensure the air masses move independently, the inlet should be positioned higher than the outlet. This will allow warm air to rise and enter the greenhouse, while cooled air will return to the collector, where it will warm up and repeat the cycle.
If forced air circulation is desired, fans should be installed near the inlet. This will ensure more even heating of the soil.
To keep the air warm during the dark hours of the day, an additional circuit is needed, for which a fan heater can be used.
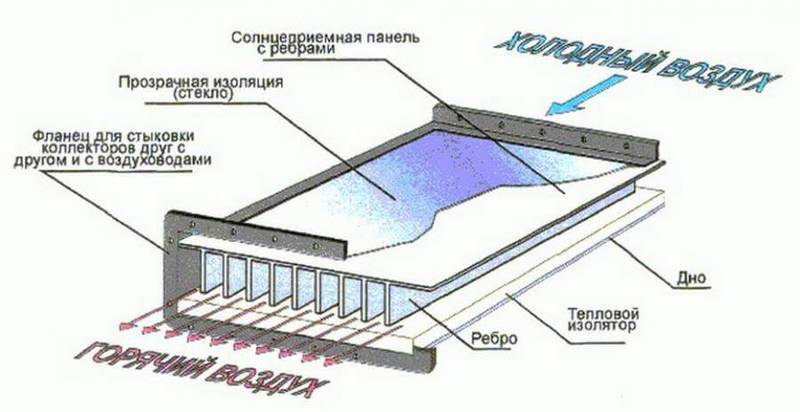
Making a collector is easy. Just build a fiberboard box about 15 cm high. You can reinforce it with stiffeners. Place a layer of mineral wool on the bottom, then cover it with absorber material.
All seams must be sealed and the interior painted black. The sides must be fitted with pipes for air to enter and exit. The box is then covered with tempered glass and the joints sealed again.
The box is secured to the roof, and the air ducts are routed through openings in the greenhouse walls. Several similar collectors can be installed. The air temperature in them will be approximately 50 degrees Celsius.
Biological heating of a greenhouse
This type of heating is incorporated when designing greenhouse beds. A 30-60 cm layer of biofuel (manure, peat, straw, or other organic material) is placed under a 20-30 cm layer of soil. It gradually burns inside, releasing heat and supplying the plants with nutrients.
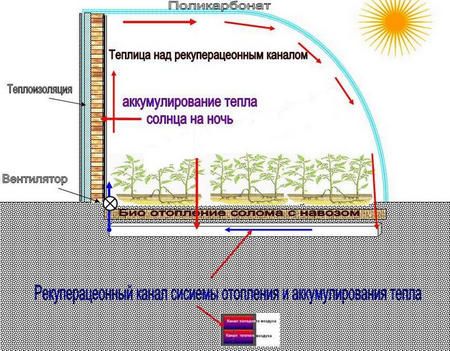
Previously, horse manure was used as biofuel, as it was the hottest. However, the concern wasn't frost, but rather the risk of rotting plants. Ventilation was impossible on a windy day; the heat would immediately escape. The manure burns constantly, raising the temperature, which is impossible to regulate. Mixing it with straw slows the combustion process, lowers the temperature, and makes the biofuel last longer.
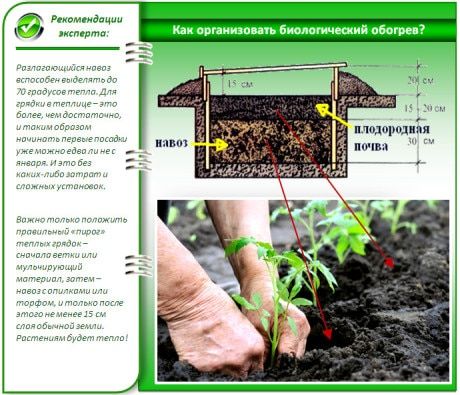
Another drawback is that this is a rather labor-intensive process, requiring a lot of excavation work. But if done correctly, the soil will remain warm even in freezing temperatures.
The benefit of this fuel is not only warmth for the soil but also nutrients for plants. Furthermore, evaporation produces moisture, which allows for reduced watering.
Air heating of a greenhouse
Air has very good thermal insulation properties, so when building a greenhouse, it is worth using polycarbonate or considering double glazing.
In the greenhouse, it is necessary to install air ducts to ensure uniform heating of the soil and air.
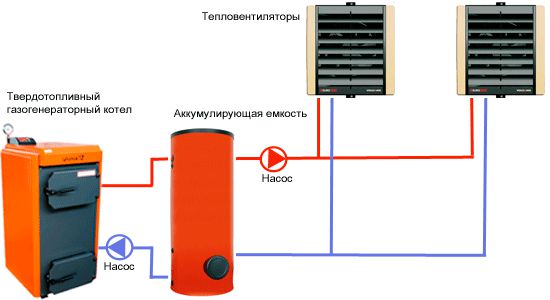
It can be heated using wood, gas, or electricity. There are several ways to set up such a system.
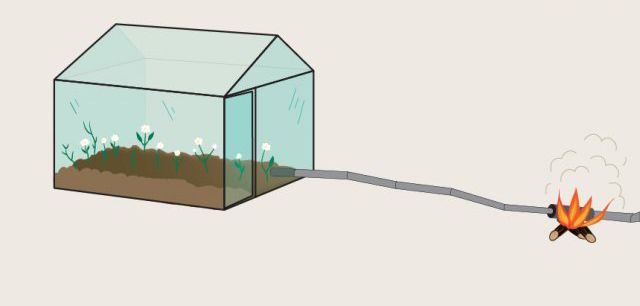
- The simplest and most primitive option would be supply of air heated by a fireTo do this, a pipe approximately half a meter in diameter and 2.5 meters long is installed in the center. One end extends outside the greenhouse, and hot air is supplied into it.
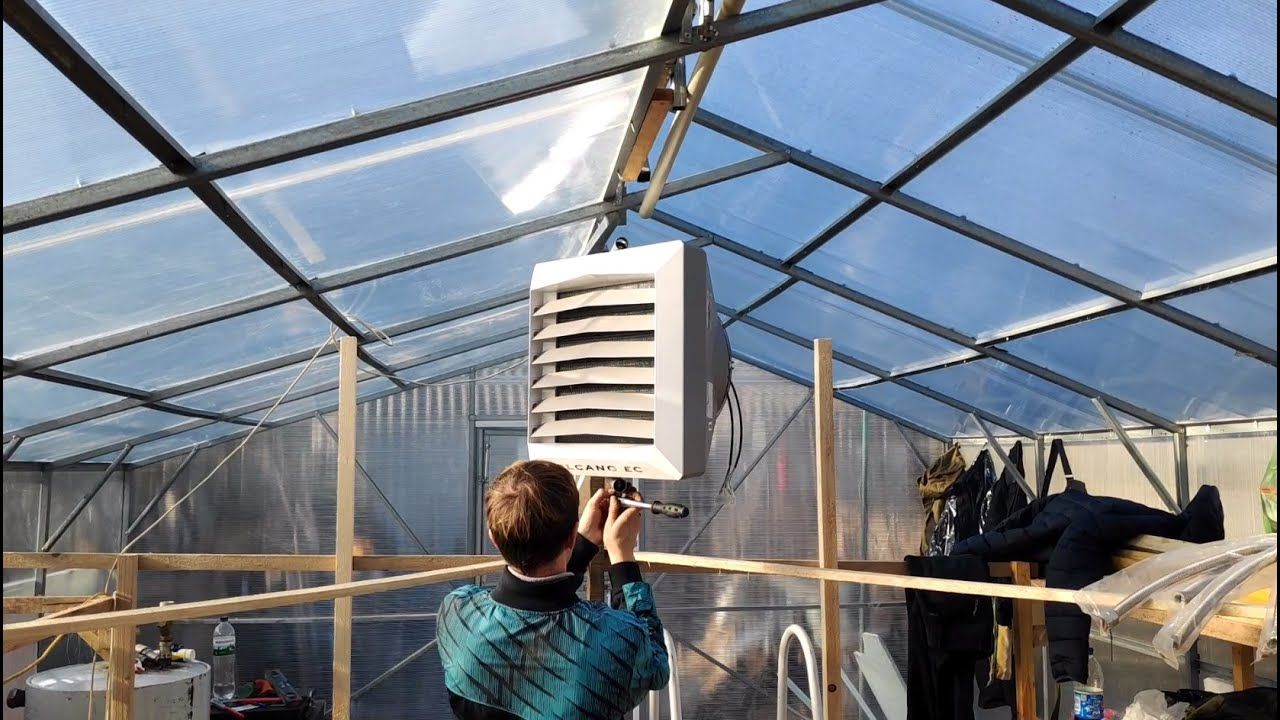
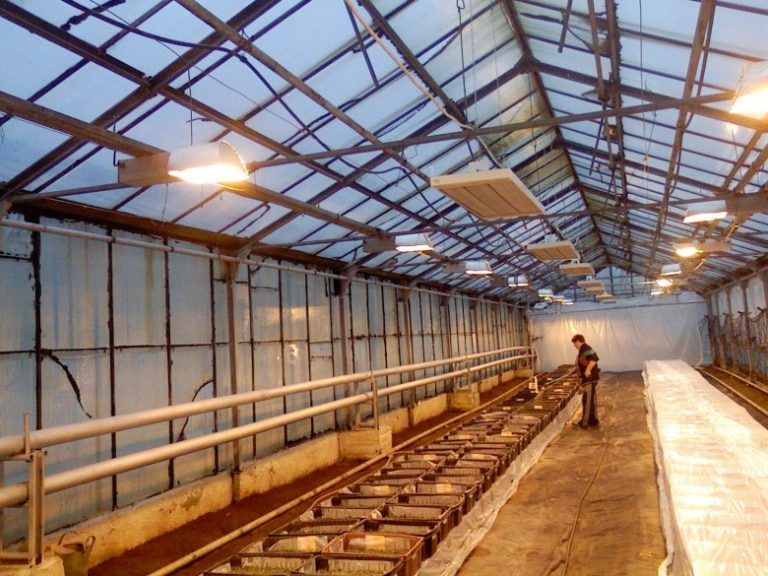
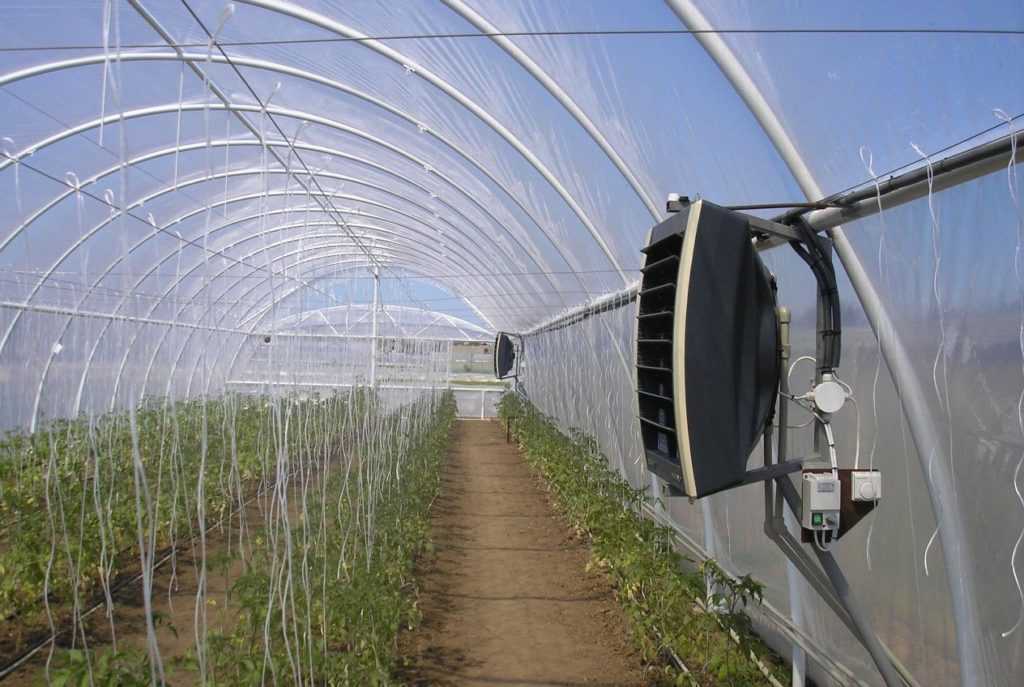
- Can be used heat generator, which delivers warm air through a polyethylene sleeve. It is mounted on the ceiling and has perforations. The main drawback of this option is the inability to effectively heat the ground with air.
- Another way is to use gas convectorIt creates an air flow that circulates throughout the greenhouse. The disadvantage of this method is that gas pipes must be installed, and the plants must be placed at a sufficient distance from the convector. Furthermore, this method burns oxygen, so proper ventilation is necessary.
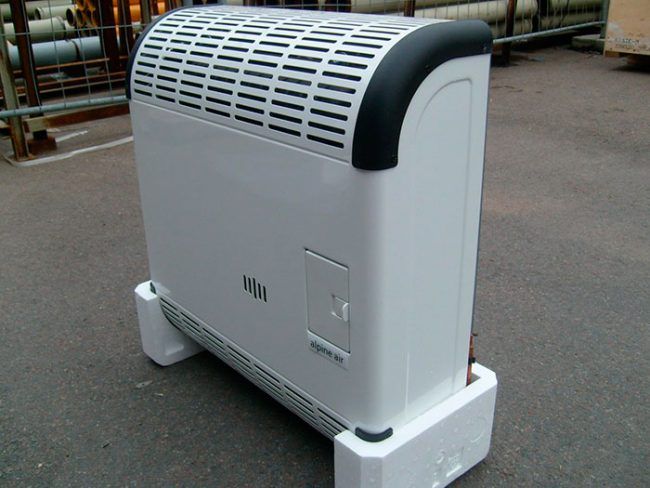
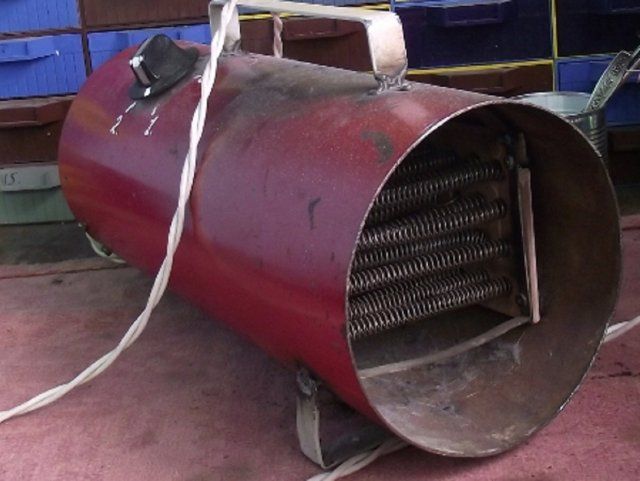
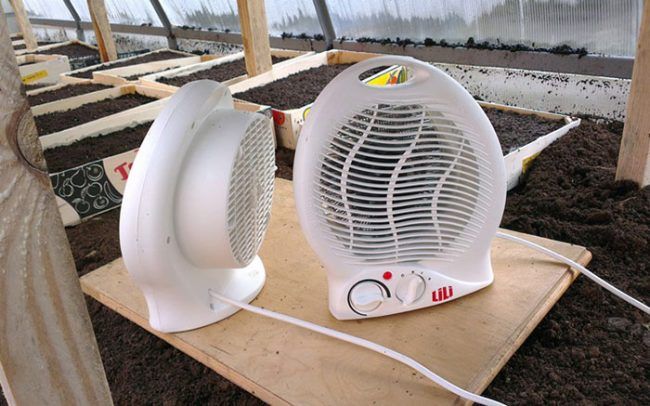
- You can use heating devices - fan, heat gunTo prevent damage to the plants, the pipe is laid under the beds and brought out to a designated location, where a heat source is attached to it.
DIY heating for a 5th-generation greenhouse
Innovative technology in 5th-generation greenhouses distributes airflow through air ducts, providing precise climate control. CO2 concentration is uniform throughout the greenhouse, with temperature variations in both horizontal and vertical planes of 1-2°C, which in itself is a significant technological achievement.
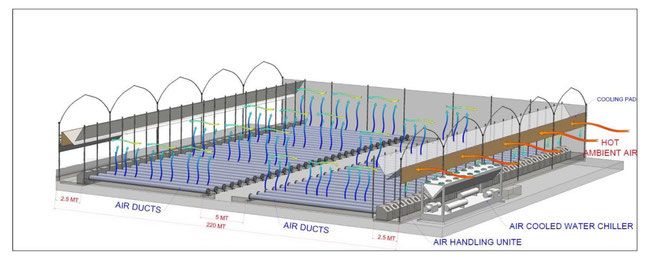
This technology allows to reduce heating costs by 25%.
Hot water heating of a greenhouse
There are two methods that can be used. If the house is heated using the same principle, the greenhouse is connected to the house's system.
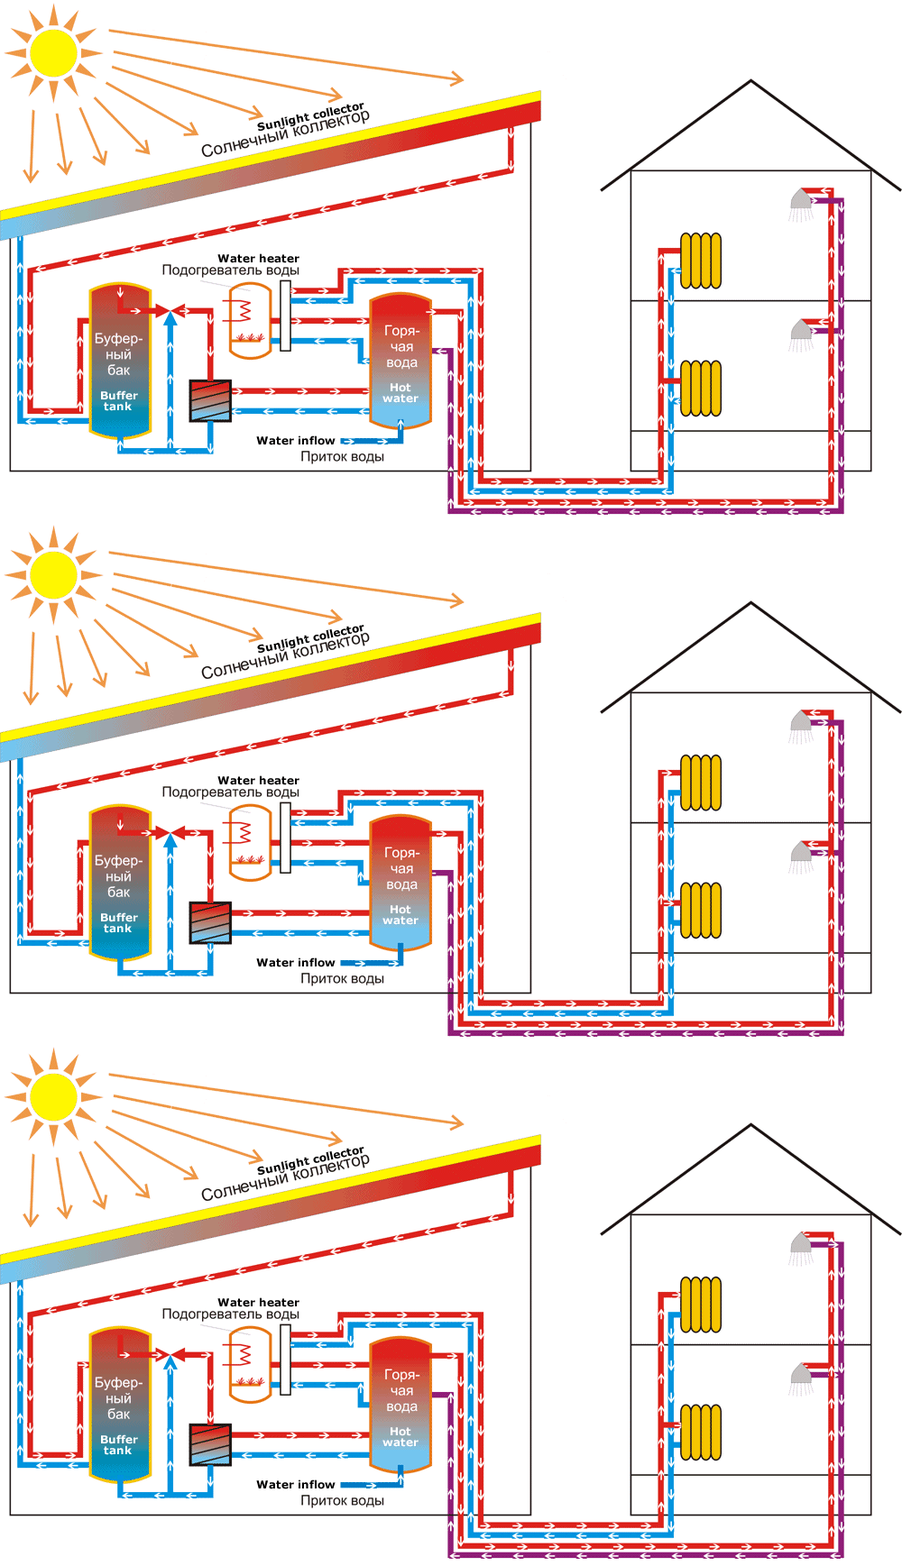
A diagram of a greenhouse's water heating system connected to a common system (using a solar collector as an example)
It is essential to provide the ability to shut off and drain the water.
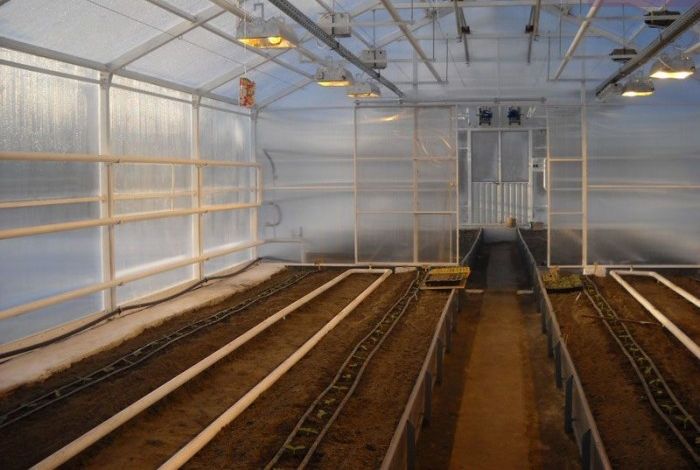
Another option is to install a separate boiler.
If a separate system for heating a greenhouse is being installed, it is necessary to install a boiler that can run on gas, electricity, or solid fuel.
A gas boiler is the least expensive to operate. It can be set to automatically maintain the desired operating mode. To ensure combustion products are removed from the greenhouse in a timely manner, a chimney must be installed.
A solid fuel boiler can be fueled by coal or wood. This design requires constant monitoring.
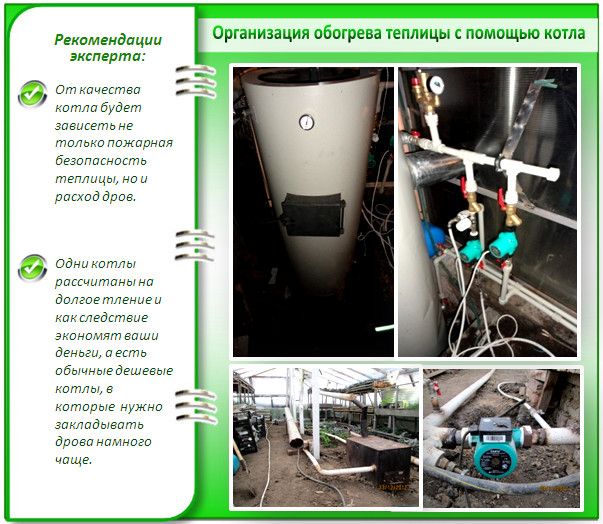
The electric boiler has only one drawback: electricity is expensive.
If the site has a gas supply, it's best to choose a gas boiler. If this isn't possible, you'll need to choose between other options. It's worth noting that a large greenhouse is best heated with a solid fuel boiler, while a small electric boiler will suffice for a smaller space.
To determine how many radiators need to be installed, you must first calculate the area of the greenhouse by multiplying its length by its width.
Then the estimated thermal power is calculated by multiplying the greenhouse area in square meters by 120.
Next, divide the greenhouse's thermal output by the thermal output of one radiator section (this parameter can be found in the product's technical data sheet). This will determine the number of sections that need to be evenly spaced within the greenhouse.
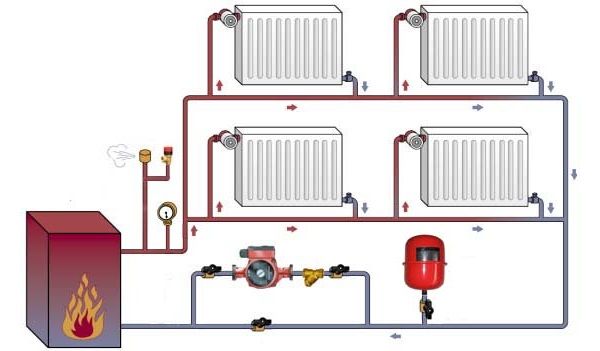
Hydronic heating systems are always assembled according to a specific design. The system includes the following components:
- boiler;
- circulation pump;
- coarse filter;
- balancing valve;
- pipes and radiators;
- expansion tank;
- collector unit (necessary if there will be several circuits in the system);
heat accumulator (for boilers operating on solid fuel).
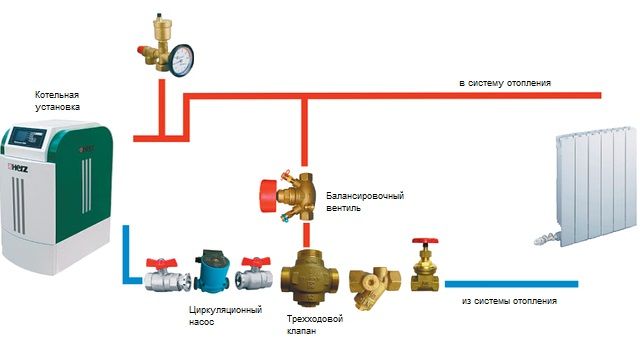
DIY Hydronic Greenhouse Heating: Step-by-Step Instructions
Let's consider connecting the system step by step.
Boiler installation
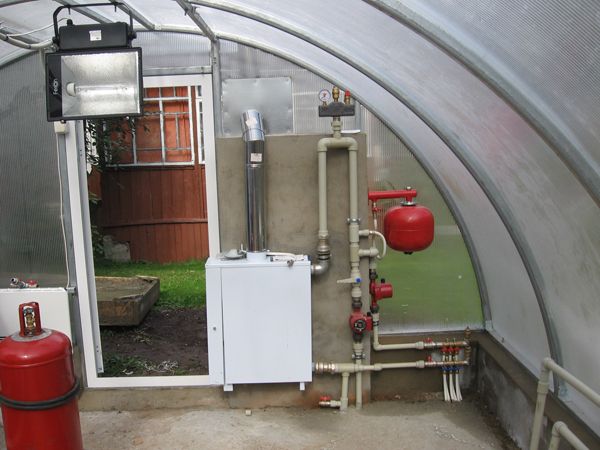
This will require either a separate boiler room or a small vestibule. If the boiler runs on gas or electricity, it can be installed directly in the greenhouse.
There are two options: mounting the boiler on a wall, which should be solid, or installing it on the floor. This requires a level base. A foundation is ideal.
Connection to the chimney
This stage is necessary if the boiler operates on solid fuel or gas.
The chimney for solid fuel boilers is made of stainless steel and is led outside.
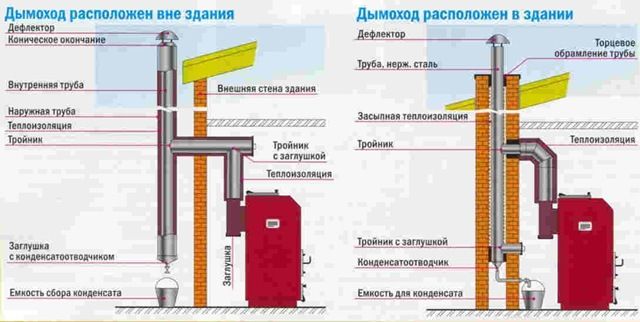
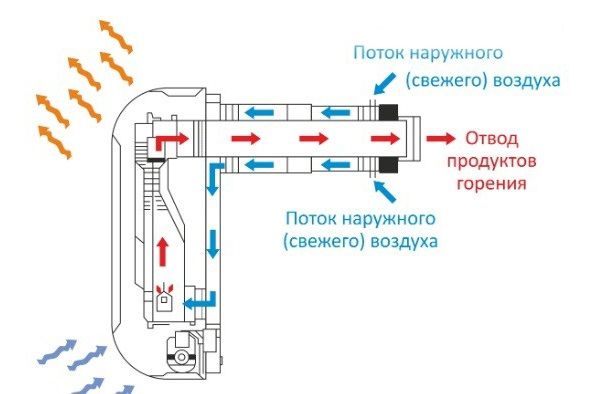
If a gas boiler is planned, the chimney must be coaxial. The outside outlet is installed directly next to the boiler.
Connecting radiators
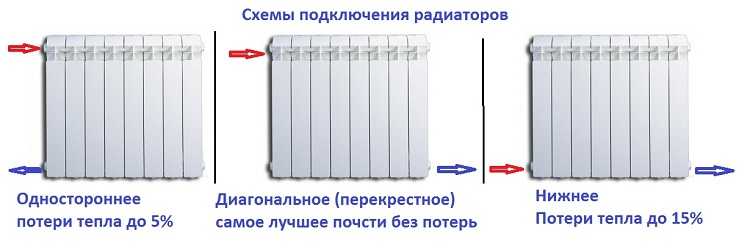
They are mounted on the walls at approximately equal distances to ensure uniform heating. Each radiator should be equipped with a Mayevsky valve and an individual shut-off valve. The pipe cross-section should be 20-25 mm.
Installation of an expansion tank
If forced water circulation is planned, a closed membrane expansion tank is required. It is necessary to maintain constant water pressure in the system, achieved by compressing air through a membrane inside the tank.
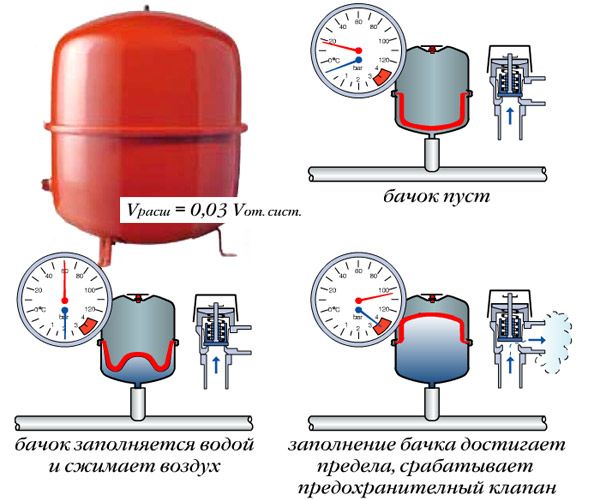
The tank can be installed anywhere, and it is connected from below using a valve.
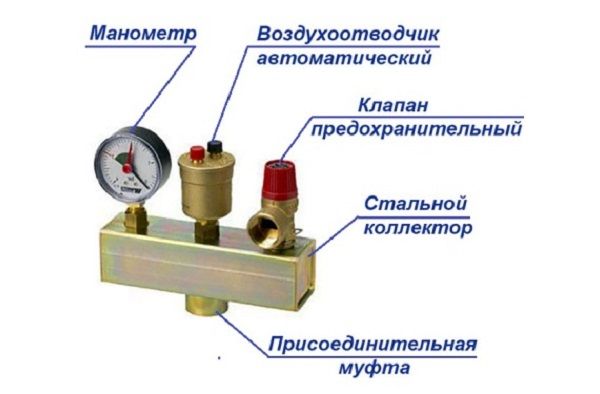
Installation of a safety group
It includes a pressure gauge, a safety valve, and an air vent. All of this is mounted on a special metal manifold, which is connected to the system via a coupling. This system should be located immediately downstream of the boiler, where the temperature and pressure are highest.
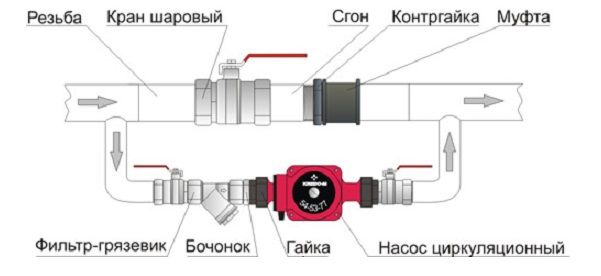
Installation of a circulation pump
It is necessary to ensure that the pressure in the system is stable and within the specified limits. The pump is installed on the return pipe before it enters the boiler. To prolong the pump's life, a coarse filter should be installed upstream.
Air pressure testing
This is a test designed to detect errors and defects made during assembly. After the system is assembled, the compressor is connected and pressure is applied. Before this, all valves and taps must be closed. The pressure must be increased to the values specified in the equipment's technical data sheet. After the pressure has stabilized, all joints and components must be checked for leaks. This can be done using ordinary soapy foam applied to the joints. If bubbles appear, there is a leak.
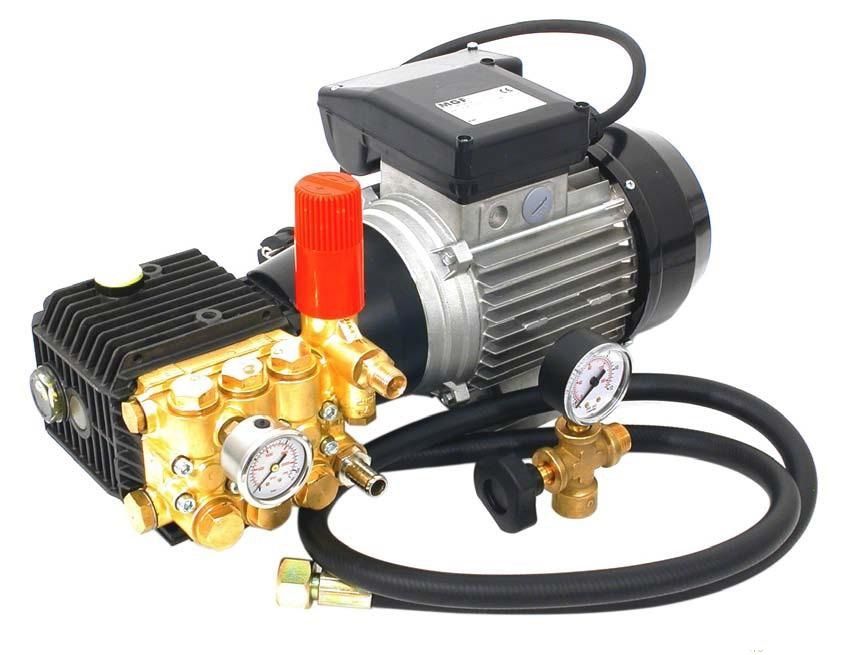
If the pressure test is successful, the entire system is filled with water and a test run of the boiler is performed. During this time, all air must be vented from the system using the Mayevsky valves and the pressure must be balanced using the balancing valves.
Steam heating of a greenhouse
The main advantage of this method is the uniform heating of the greenhouse, which is beneficial for plants. The air is heated by the steam that appears after the water in the boiler boils.
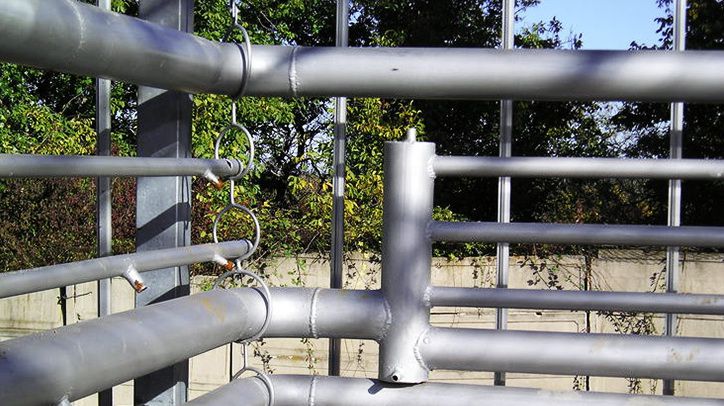
Hot air enters radiators connected by pipes.
Composition of the steam heating system:
- boiler for heating water;
- exhaust valve;
- radiators;
- pump;
- pipes;
- firebox.
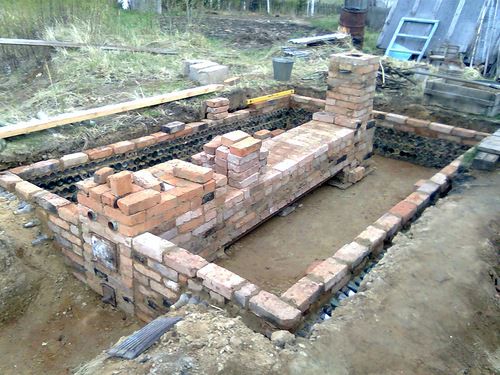
The system can be of two types: closed and open. In the first type, condensate is returned to the boiler using a special pump. In the second type, the pipes are slightly inclined, allowing the condensate to flow back into the boiler automatically.
The system can be high-pressure (170 to 600 kg/m²), low-pressure (100 to 170 kg/m²), or vacuum-steam. This parameter is influenced by the length of the pipes and some other system characteristics.
The piping system can be single-pipe, where both steam and condensate are contained in the same pipe, or double-pipe, where the steam and condensate are separated but both pipes form a closed circuit. The second option is preferable because it allows temperature control by turning a valve.
This heating system can run on wood, coal, fuel oil, diesel fuel, or natural gas. Boilers also vary. They can be gas-tube, which has a lower power output, or water-tube, which is safer.
Water-tube boilers can be vertical (with drums located at different heights) or horizontal (with drums equipped with manifolds). The boiler consists of a burner, firebox, ash pan, and drum.
What to pay attention to during installation
- It is necessary to install only metal pipes, as plastic ones will not cope with heavy loads.
- Particular attention must be paid to reliability. All components must be manufactured in a reputable factory.
- It is necessary to correctly calculate the boiler capacity.
Stove heating of a greenhouse
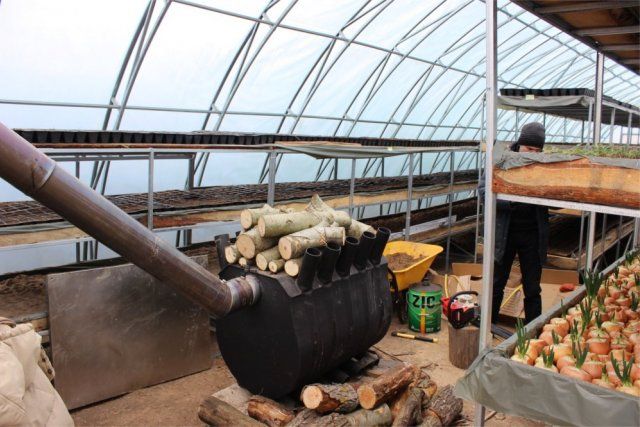
The main source of heat in this case is a solid fuel boiler that runs on wood or coal (Buleryan-type stoves have recently become popular).
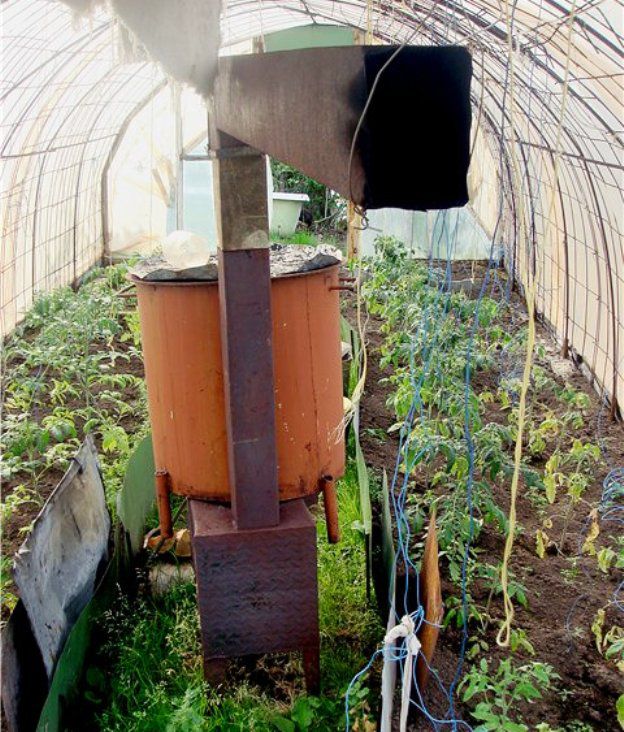
The easiest way is to install a boiler and a chimney to remove smoke and combustion products. You can also add pipes and radiators, which will significantly improve heating quality. Remember to regularly clear the chimney of ash and soot.
One of the drawbacks of this option is that it can dry out the air too much. To maintain the required humidity level, you can simply place a large container filled with water in the greenhouse.
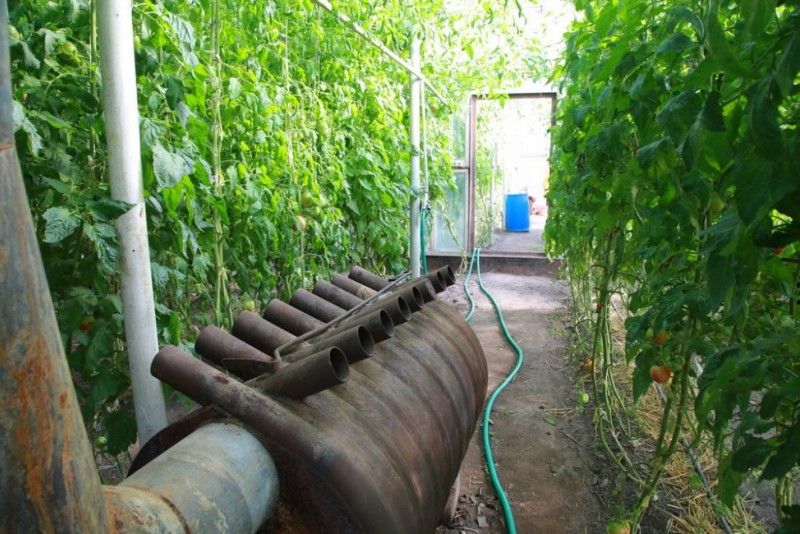
A major advantage of this system is its ease of installation, which even an inexperienced professional can handle. Furthermore, stove heating is significantly cheaper than electric heating.
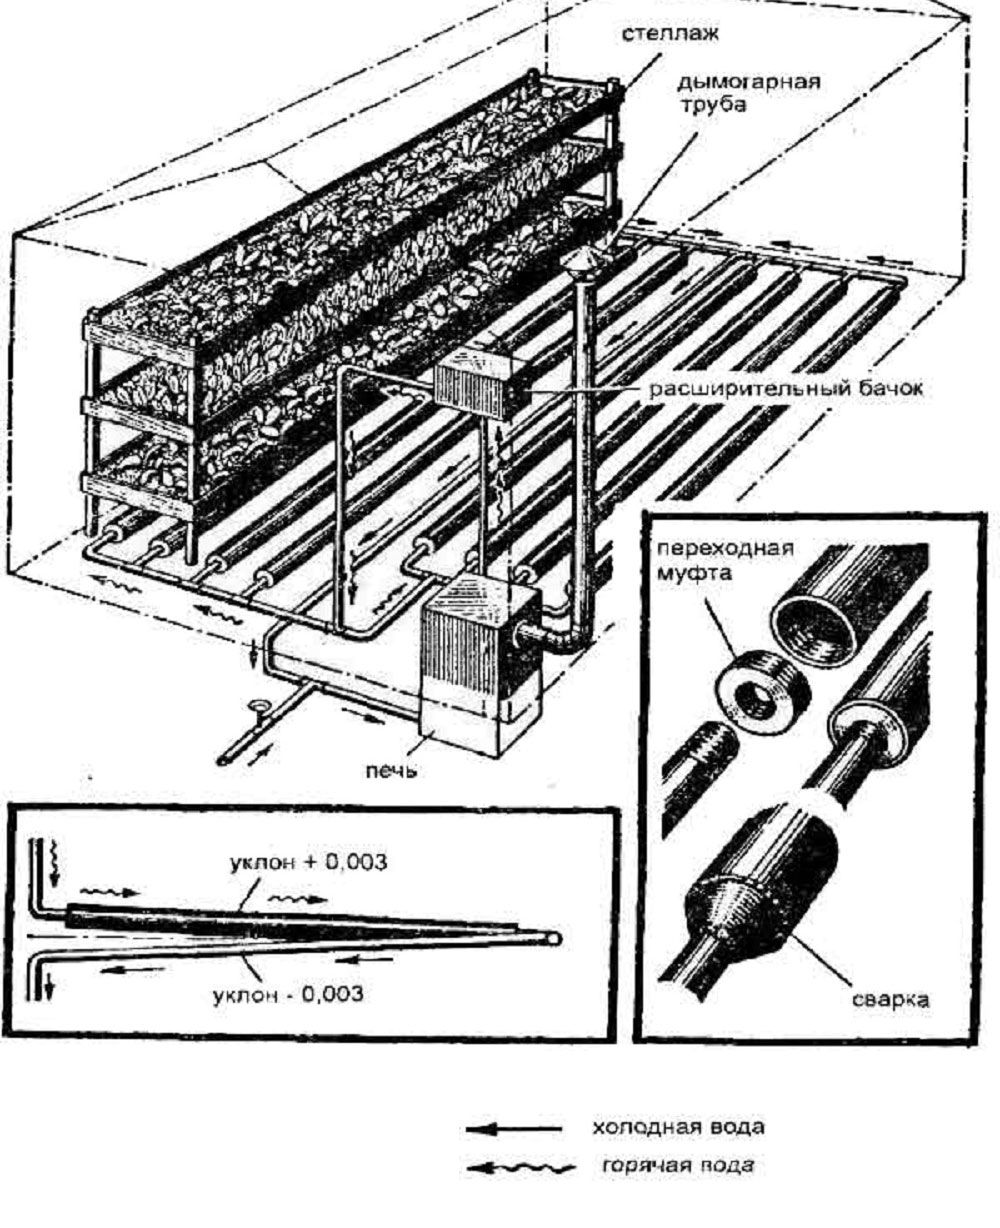
Stove Heating for a Greenhouse: Step-by-Step Instructions #1
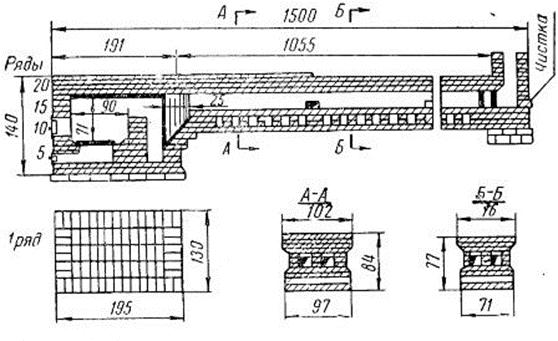
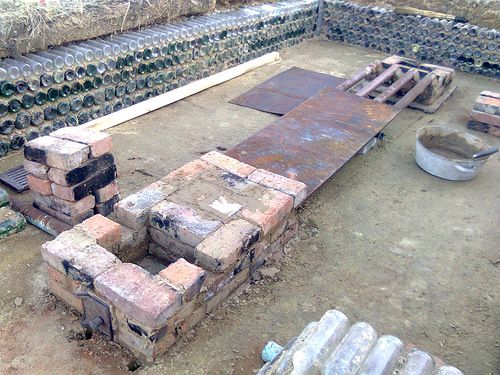
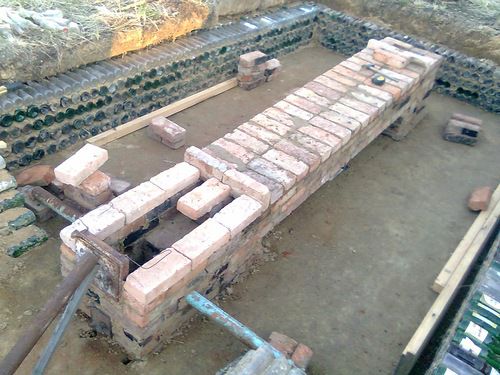
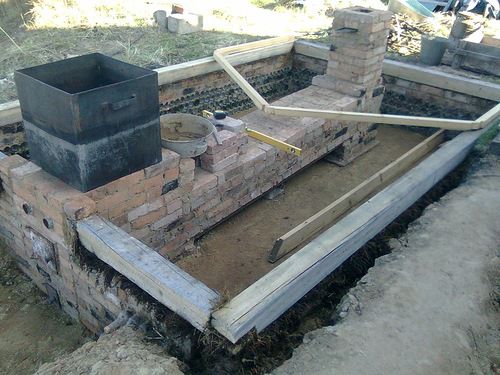
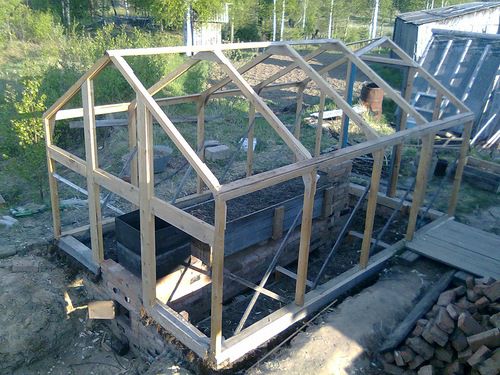
The first stageA foundation must be built in the greenhouse vestibule, on which a brick firebox will then be laid.
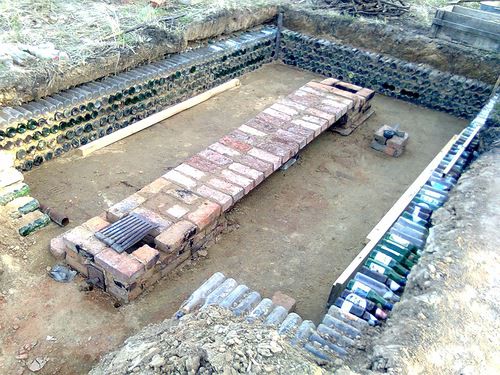
The second stageThe chimney is laid out along the entire length.
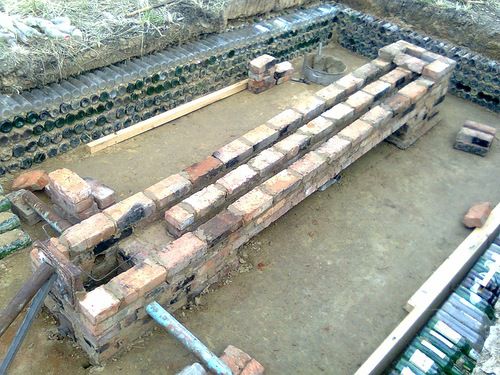
The third stageA smoke exhaust pipe is installed on the opposite side of the greenhouse. This design ensures that all combustion products are removed, and the room remains warm.
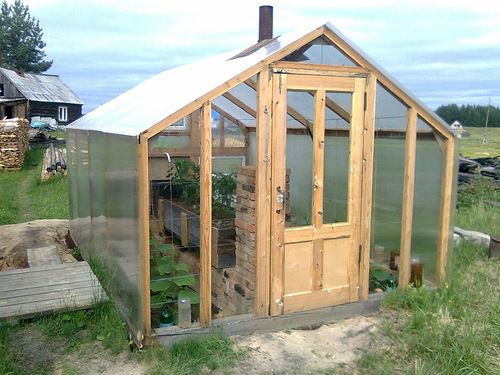
Stove Heating for a Greenhouse: Step-by-Step Instructions #2
Heating system diagram:
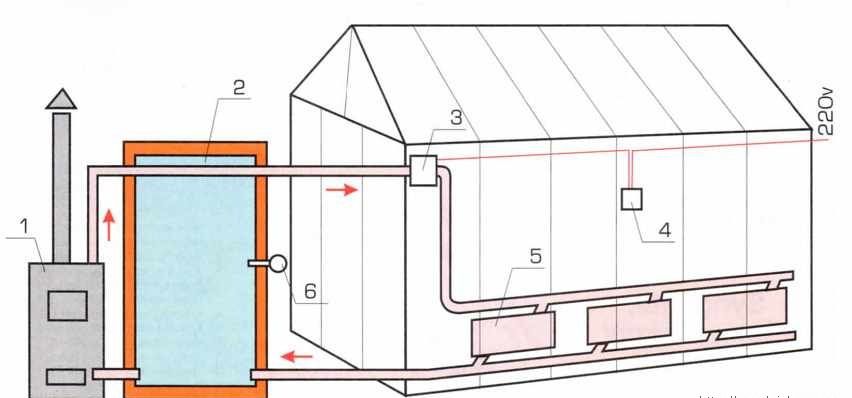
- 1 - heating boiler;
- 2 — thermos tank;
- 3 - circulation pump;
- 4 — relay regulator;
- 5 - registers;
- 6 — thermocouple.
The first stageYou'll need a large metal barrel. Its interior must be protected from corrosion. To do this, paint it, preferably in two coats.
The second stageSeveral holes are punched in the body. One of them will be needed for connecting the chimney, the others for the faucet and expansion tank.
The third stageThe stove itself must be welded, using sheet metal. It is then inserted into the barrel.
The fourth stageA section of pipe is welded to the opening in the barrel intended for the chimney. The total length of the smoke exhaust structure must be at least 5 meters.
The fifth stageAn expansion tank is mounted on the barrel. The optimal capacity is 20-30 liters.
The sixth stagePipes are routed throughout the room. They can be laid directly on the ground, spaced 1.2 meters apart.
The seventh stage — a pump is installed to ensure the movement of water in the system.
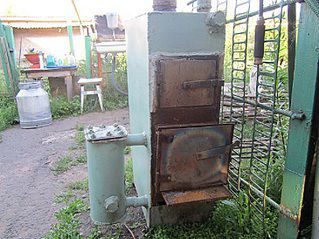
Once the entire system is assembled, turn on the water and check all joints for leaks. If there are any leaks, fix them immediately. After that, you can test the furnace.
Gas heating of a greenhouse
Systems that provide this type of heating can be divided into three types:
- Infrared.
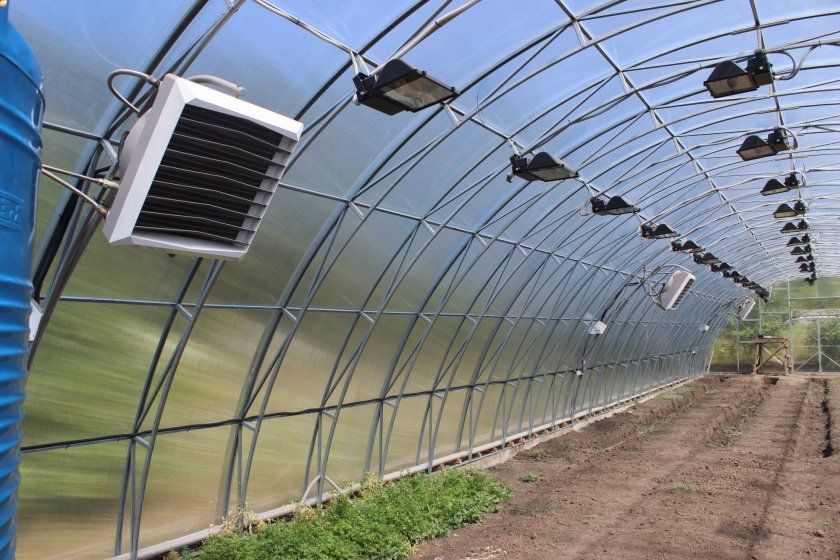
- Catalytic.
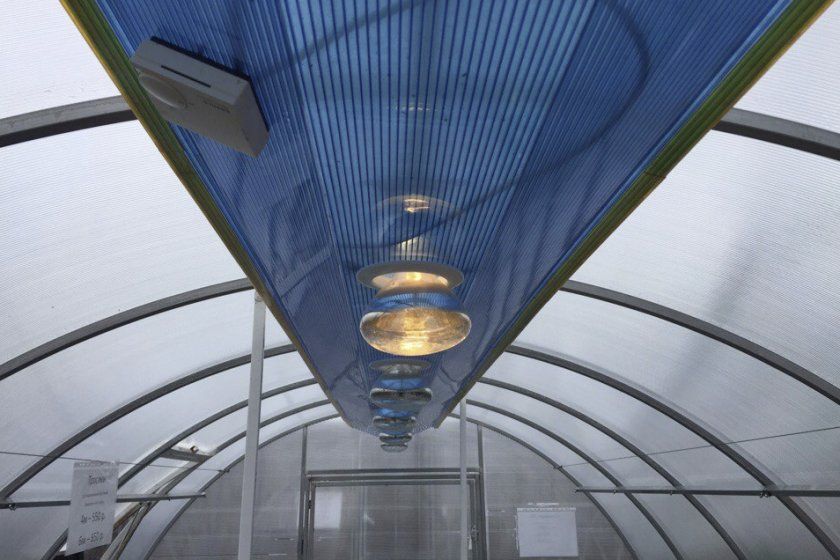
- Convector.
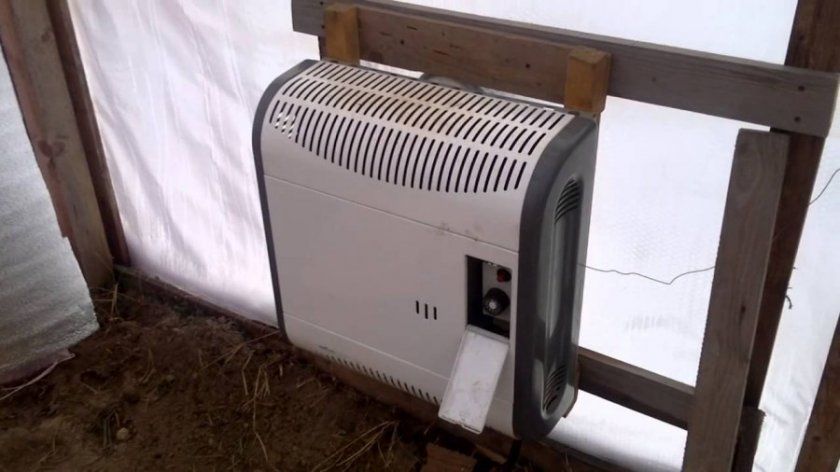
Gas-air and gas-water systems can also be distinguished. Heaters with open burners, convectors, and systems with infrared burners are ideal for greenhouses.
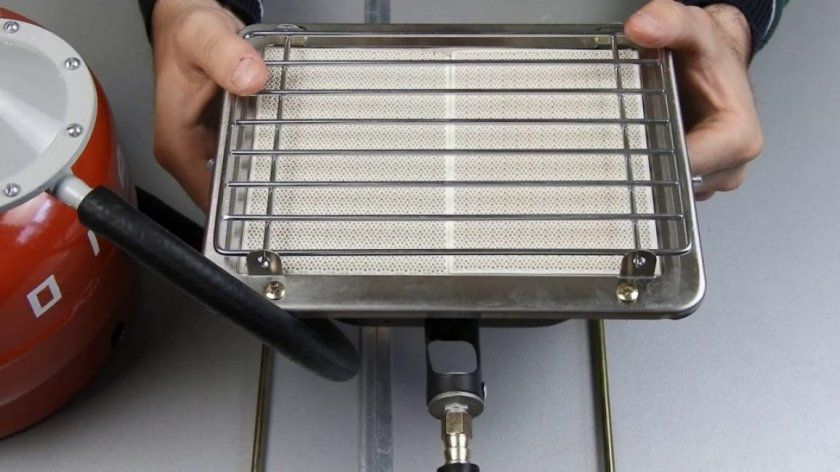
Heaters with open burners
The design includes a thermostat, a main burner, and a pilot burner. The system is connected to a gas cylinder. The downside of this method is that it burns oxygen, requiring ventilation.
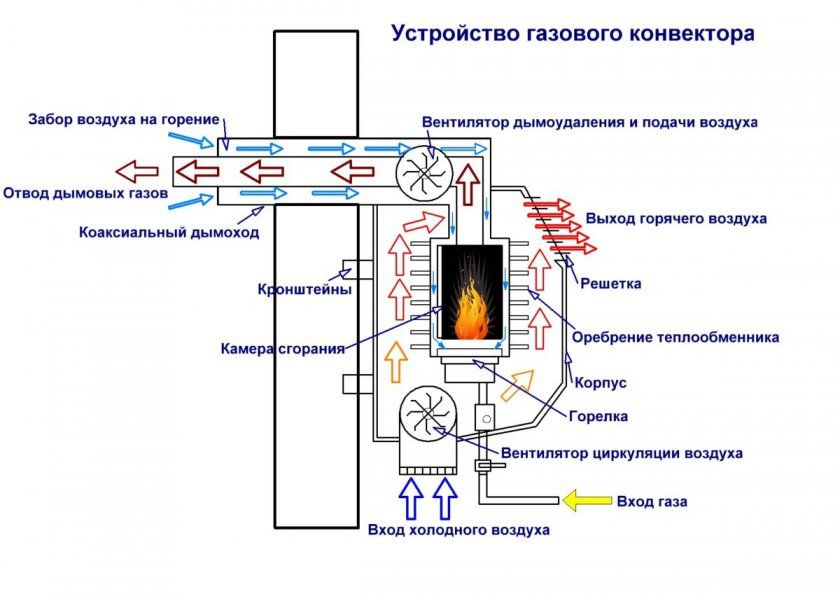
Gas convectors
This equipment consists of the following parts:
- A fire-resistant enclosure. It must be heat-resistant.
- A heat exchanger that heats the air.
- Gas burner located inside the heat exchanger.
- A combination valve that regulates pressure.
- A system that removes combustion products.
- A thermostat that controls the microclimate.
- Automation that controls the operation of the system.
Combustion products can be removed using two different systems.
The fireplace system includes a vertical chimney, which serves to remove combustion products to the outside.
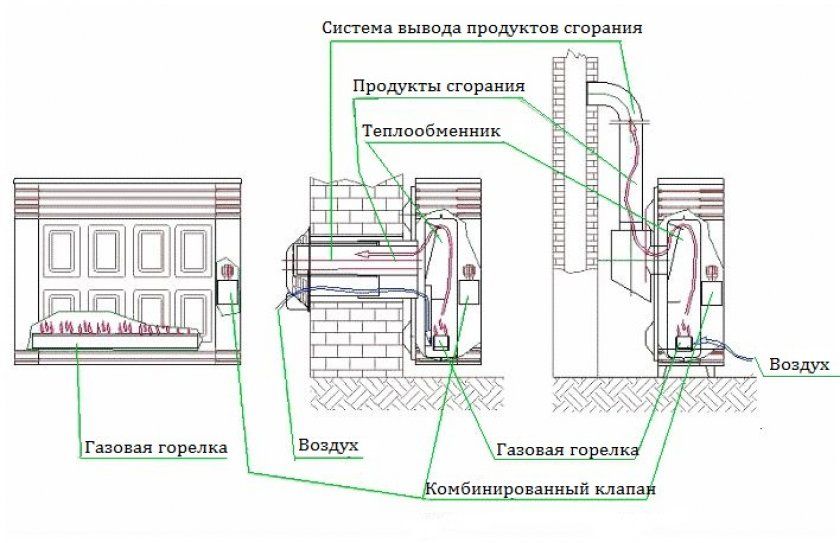
Parapet system - combustion products enter a coaxial pipe, which is laid through the outer wall.
Gas heaters with infrared burners
This design is ideal for heating a large room. When choosing equipment, it's important to choose heaters designed for outdoor use.
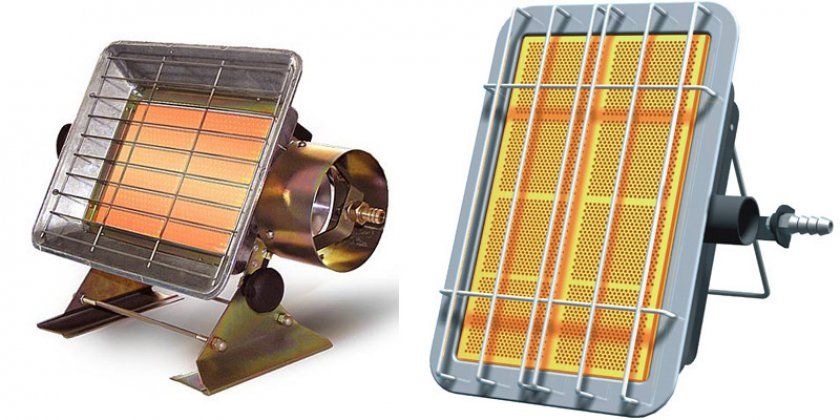
This device consists of the following parts: a cylindrical body with a built-in gas cylinder; a stand and hose for connecting the cylinder and the burner; a large-section, cylindrical mesh to which the control panel is attached; and a gas burner umbrella.
The device runs on propane. Weighing just 11.5 kg, it provides 15 hours of trouble-free operation.
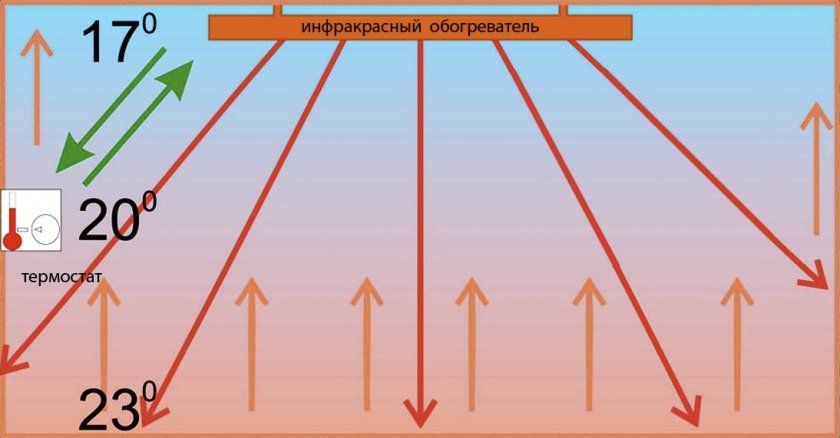
An important difference between heaters of this type is that it is not the air that is heated, but objects located at a certain distance.
How to install gas in a greenhouse yourself
It's important to remember that connecting to the main gas pipeline must be done only with the assistance of the relevant authorities. Any independent work is prohibited.
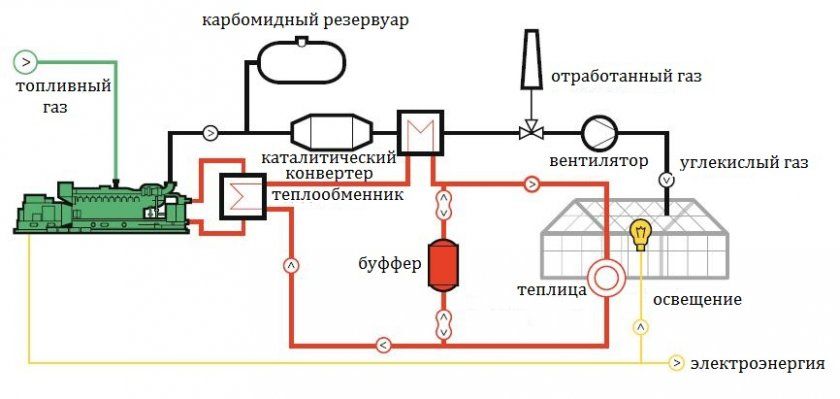
To install gas heating in a greenhouse yourself, it's best to choose an option with infrared burners. First, consider where the unit will be mounted—on the floor, walls, or a parapet.
Then ventilation is installed, which can be assembled from PVC pipes.
After this, the equipment is installed. It's important to follow a few rules:
- There should be a distance of 1 m from the ground to the device.
- The same distance is maintained between the plants and the device.
- Several infrared devices are placed no closer than half a meter from each other.
After this, a hose is attached to the regulator on the cylinder, the other end of which is secured to the device. The joints are secured with clamps.
Electric heating of a greenhouse
There are several options:
- Air: heat guns, fan heaters or oil radiators.
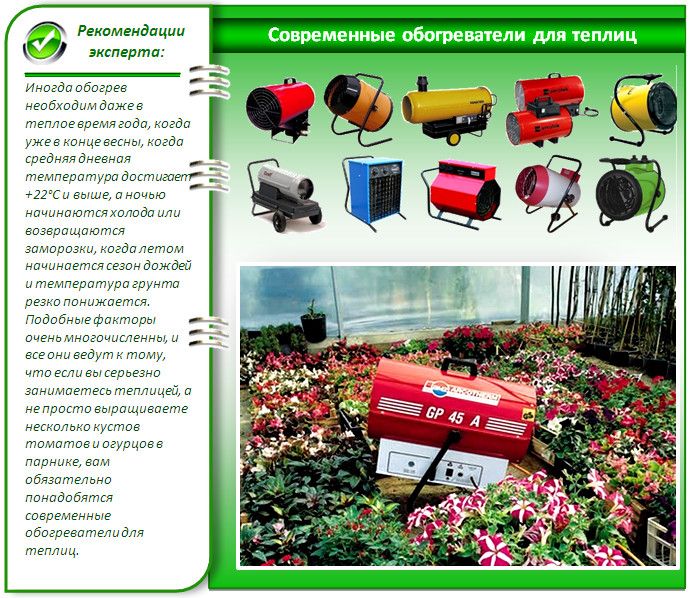
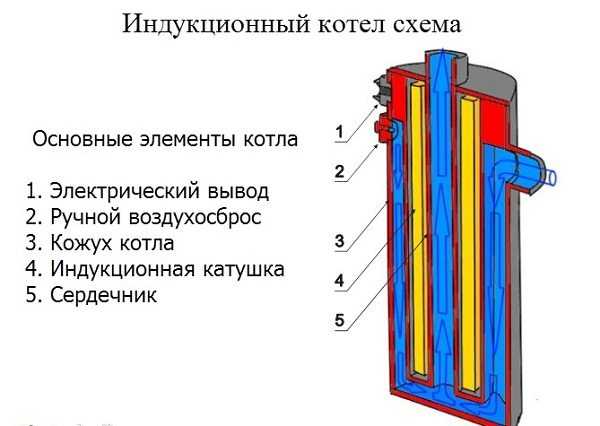
- Water: boilers with heating elements, operating on electrodes or using the induction principle.
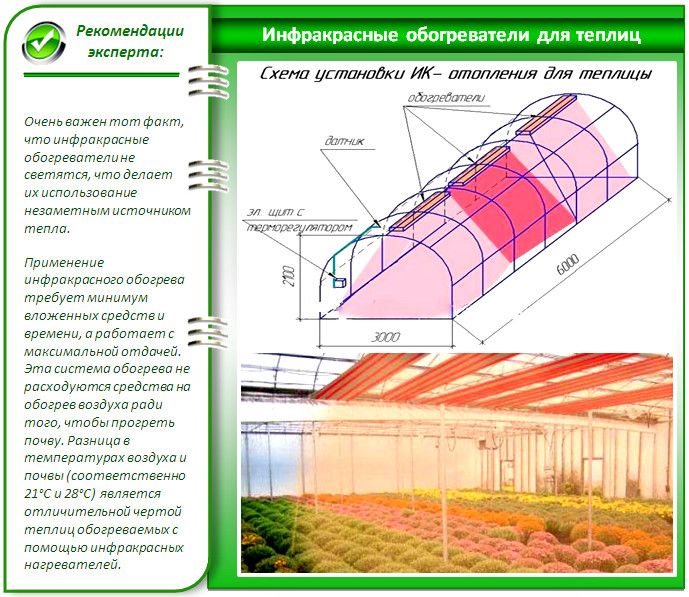
- Electric infrared heaters (they are different in that they heat objects directly, not the air, reducing electricity costs by 30%);
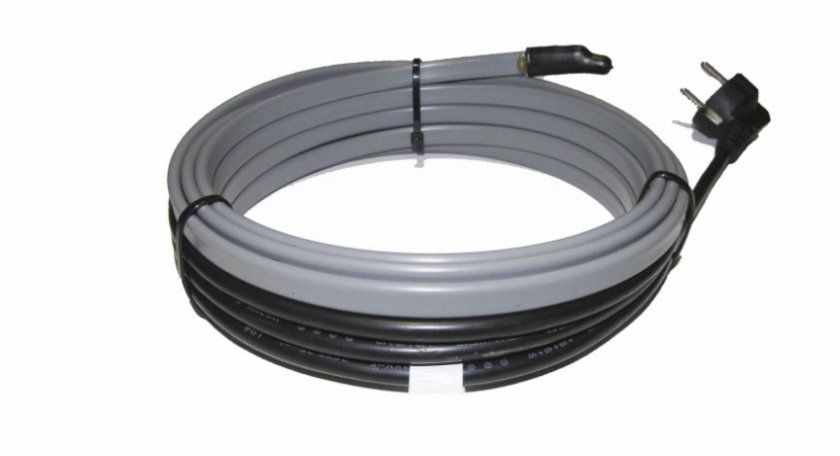
- Heating cables that are laid directly into the soil.
We have already discussed the first three options in the article, now we will consider the last method of heating a greenhouse - using a heating cable.
Heating cables can be of different types:
First type — resistive cables. They are relatively inexpensive, but can lead to either overheating of the ground or insufficient heating.
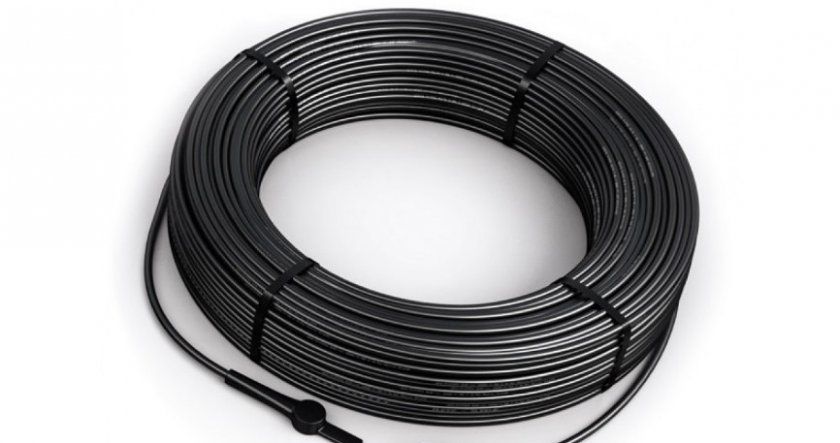
Second type — a self-regulating cable. It consists of two carbon strands separated by a semiconductor. It saves energy and regulates soil heating.
Installation of cable system
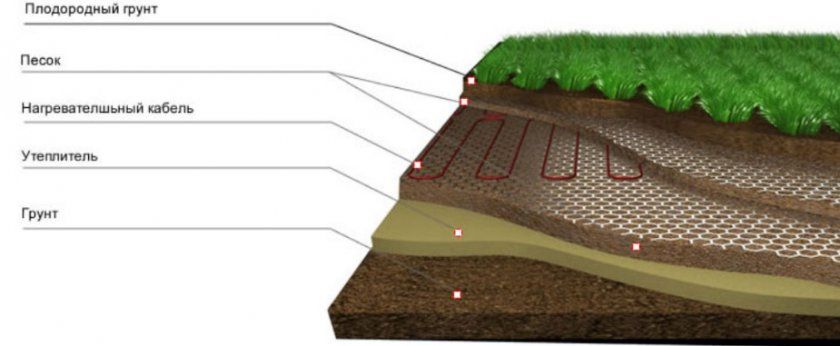
The better the cable installation, the more efficient the system will be. Its installation involves the following steps:
- It is necessary to remove a layer of soil approximately half a meter thick.
- Add a small amount of fine sand. The layer should be about 5 cm thick.
- Lay down thermal insulation, such as penoplex.
- Lay waterproofing - polyethylene.
- Add another 5 cm of sand on top.
- Lay down fine-mesh metal mesh.
- Then, lay the cable in a serpentine pattern. It's important to maintain a spacing of approximately 20 cm.
- The cable can be secured with plastic ties.
- After this, 5 cm of sand is added again.
- The structure is covered with a protective mesh made of plastic or stainless steel.
- Now you can lay 40 cm of soil.
- The sensor, which will be used to regulate the temperature, is mounted approximately one meter above the soil surface.
Criteria for choosing a heating system
What should you consider before installing a greenhouse heating system?
- Finances. It's important to understand that a winter greenhouse will require certain expenses.
- Plants. It's important to consider what crops will be growing in the greenhouse and what level of heat they require.
- Fuel availability.
- Features of the climate.
- Arrangement of a greenhouse and its purpose.
- Size of the room to be heated.
- Location of the greenhouse.
- Possibility of continuous monitoring.
Internal thermal insulation
To make heating more efficient and less expensive, it is necessary to pay attention to thermal insulation.
The base can be lined with a suitable material, such as penoplex or polystyrene foam. Then, polycarbonate is installed on top and covered with foil insulation or simply foil.
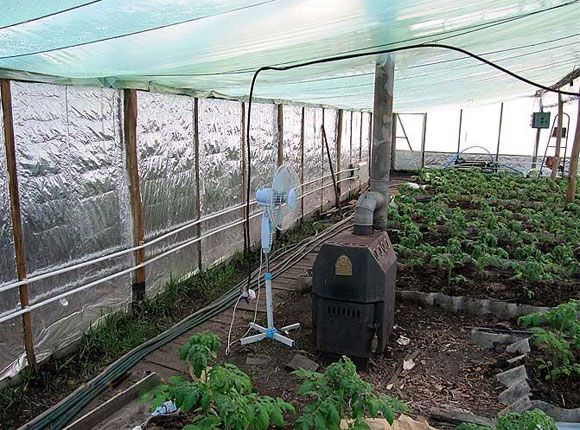
The frame section can be insulated with double glazing. Polycarbonate is ideal. The interior can be additionally lined with bubble wrap.