Pushkinia, or dwarf hyacinth, is an ornamental perennial plant from the asparagus family. Native to the high-mountain meadows of the Caucasus, this primrose is now widely grown in garden plots and used in landscape design.
Content
Description
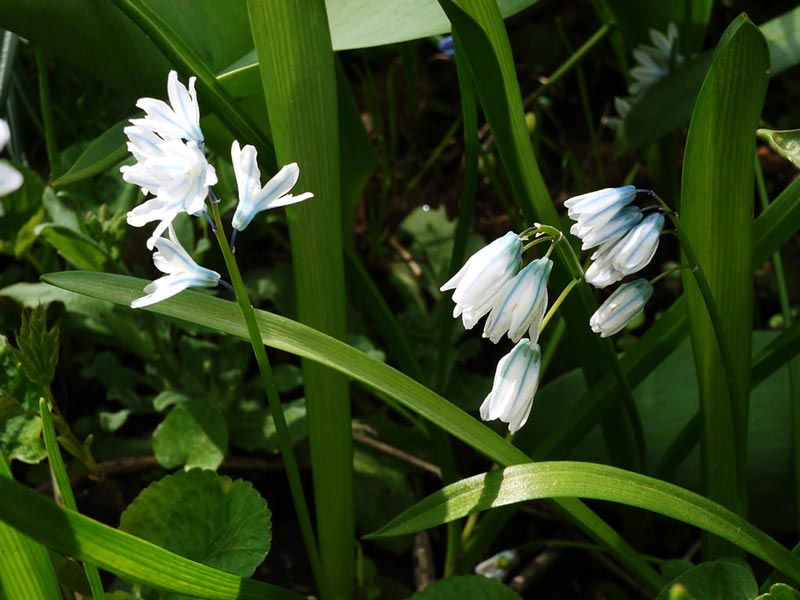
The bell-shaped flowers of the Pushkinia are gathered in racemes on a 15-20 cm tall stem. They range in color from pale blue to white, with a bright blue or light blue stripe along each of the six petals. They have a faint but pleasant scent. Two or three dark, glossy, sword-shaped leaves are located near the ground. The rhizome resembles a scaly bulb.
Types and varieties
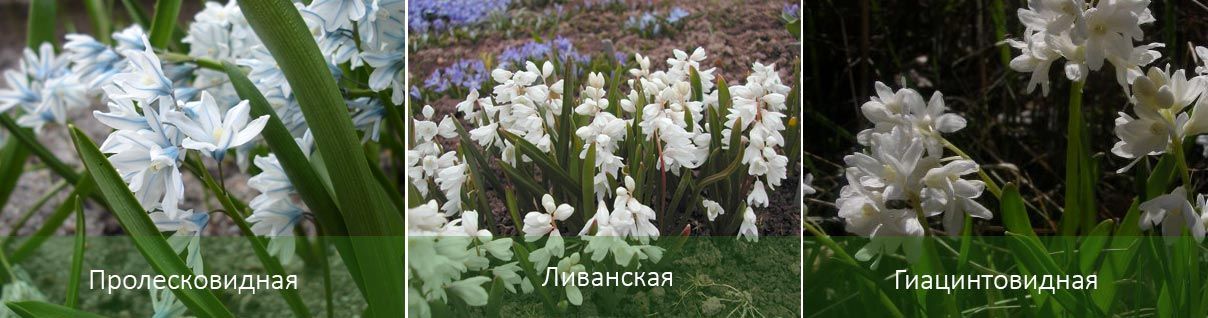
There are three main species of this plant used in gardening:
- Pushkinia scilloides (var. scilloides) has small flowers, about 2 cm in size. It blooms in late April and May for 15-20 days.
- Pushkinia scilloides var. libanotica, a subspecies of the Scilloidea family, is distinguished by its larger flowers and six-toothed crown formed by fused lobes. This subspecies includes the popular cultivar "Alba," distinguished by its rather large (up to 8 cm) pure white flowers.
- The Hyacinthoidea Pushkinia (Puschkinia scilloides var. hyacinthoides) is slightly smaller in height (10-15 cm), but can produce up to four flower stalks covered with smaller, hyacinth-shaped flowers. This species typically blooms a week later than the Scilloidea Pushkinia.
Planting in open ground
Pushkinia is a perennial plant, and at 4-5 years of age, a "nest" of several young bulblets forms around the mother bulb. These should be dug up in early fall, before they separate from the nest.
Preparation of planting material
Bulbs ready for planting should be separated, cleared of soil and excess scales, and thoroughly dried. However, keep in mind that they cannot be stored for long – they should be planted outdoors as soon as possible.
Planting dates
The optimal time for planting is from September 15 to October 15.
Place and soil
Pushkinia prefers full sun, so choose a planting site that's not shaded but also sheltered from the wind. Also, avoid planting near groundwater, as it can damage the root system.
The plant is demanding of soil quality, so if the soil in your area is not nutritious enough for growing pushkinia, it would be a good idea to purchase a ready-made enrichment mixture for planting.
Correctly planted bulbs will root in about two weeks.
Planting diagram
Once the soil is prepared – well moistened and loosened – you can begin planting:
- Dig a hole 15 cm deep – the size will depend on the number of bulbs prepared.
- Sprinkle the bottom with sand, cover with compost and add gravel or expanded clay drainage on top.
- Distribute the bulbs at a distance of 5-10 cm from each other.
- Cover the seedlings with soil, keeping in mind that they should not sit too deep.
- Compact and water the soil.
Gardening
Despite the increased requirements for planting and soil, pushkinia is quite unpretentious in care.
Watering
The plant doesn't need to be watered too frequently, except during dry weather, although more frequent watering is needed during flowering. The soil should be thoroughly loosened after each watering.
Top dressing
To ensure good growth in early spring, nitrogen and potassium fertilizers are applied directly to the snow where the pushkinia will emerge. The second stage of fertilizing is carried out after bud formation, using mineral complexes.
Peculiarities of care
The more the climate differs from what Pushkinia is accustomed to, the more careful care it requires:
- In June and July, the faded plants fade. Dead above-ground parts should be removed immediately, but the area containing the bulbs should be maintained for the remainder of the year: loosen the soil, weed, and water occasionally. For ease of reference, you can mark the location of the bulb.
- Considering the reduced frost resistance, in September-October the planting site is prepared for winter using mulching.
- Plants that have reached the age of five years must be dug up and the resulting “nests” must be separated for replanting.
Reproduction
Pushkinia can reproduce in two ways:
- Bulbs are the most convenient method for gardeners. Any plant that is 4-5 years old is ready for this method.
- Seeds are less reliable. Firstly, the substances secreted by mature seeds attract ants, leading to the loss of many seedlings. Secondly, seedlings sprouted from seeds are very sensitive to adverse environmental factors, require more care and protection, and begin to flower only in the fourth year after germination.
Storing bulbs
Mature bulbs can be removed only when all the leaves have completely died, but not too late. The dug-out nest is divided, dried in a shaded area, and then cleared of soil.
Next, the bulbs are sorted for storage into two categories:
- Large, scaly ones can be stored in a dry room at a temperature below room temperature, but not for long - their protective layer is very thin and should be planted as soon as possible.
- Young, smooth bulbs need to ripen in certain conditions – for this, they can be placed on moderately moist wood shavings or a peat bed.
Pests and diseases
There are three main dangers that await the plant on the site.
| Problem | Description | Solution |
| Rodents | Field mice and other small rodents eat bulbs and young shoots. | Installation of baits with special poisons on the site. |
| Ticks | Root mites damage the bulb. | Pre-planting soil treatment with specialized substances and their subsequent dissolution in water for irrigation. |
| Fungal infections | Dark spots on leaves, yellowing and premature wilting. | Before planting, treat bulbs with a weak solution of potassium permanganate, and the leaves and stems with copper preparations. Immediately destroy infected plants along with the soil to prevent the spread of infection. |
Forcing
Pushkinia can be easily forced indoors. To do this, you'll need a regular flowerpot filled with a mixture of turf, sand, and compost in a roughly 2:1:1 ratio. In November, place 3-4 bulbs in the prepared mixture and keep the pot in a cool, dark, and humid place for a couple of months.
After this, move the plant to a bright, cool room and water it regularly. This simulated spring results in the plant sprouting and blooming, delighting the eye during the winter.
Top.tomathouse.com recommends: use in landscape design
The dark green leaves harmonize well with coniferous plants.
Designers recommend using it not only in flowerbeds, but also to decorate alpine slides and garden paths.
Since pushkinia blooms quickly, it's wise to combine it with summer-blooming perennials. This approach will allow you to witness a complete seasonal transformation of the garden: the delicate spring sky-blue blooms on snow-free flowerbeds will give way to a riot of summer colors, camouflaging the wilted primroses.