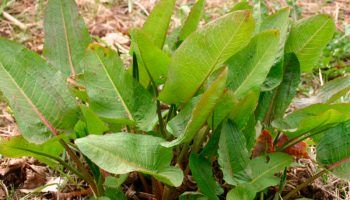
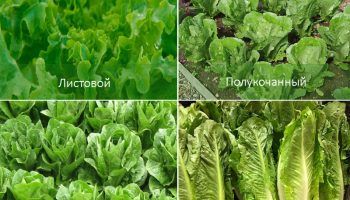
Celery is a healthy plant, and depending on the species, its roots, leaves, or petioles are eaten. This widely known product is used for medicinal purposes and in dietary nutrition. Care is easy even for novice gardeners, making it a highly sought-after crop among summer residents in central Russia.
Types of celery and their cultivation
A perennial herbaceous plant of the Apiaceae family, celery is distinguished by its bright, pleasant aroma and unique flavor. Native to the Mediterranean, it is now grown throughout the world.
There are three types:
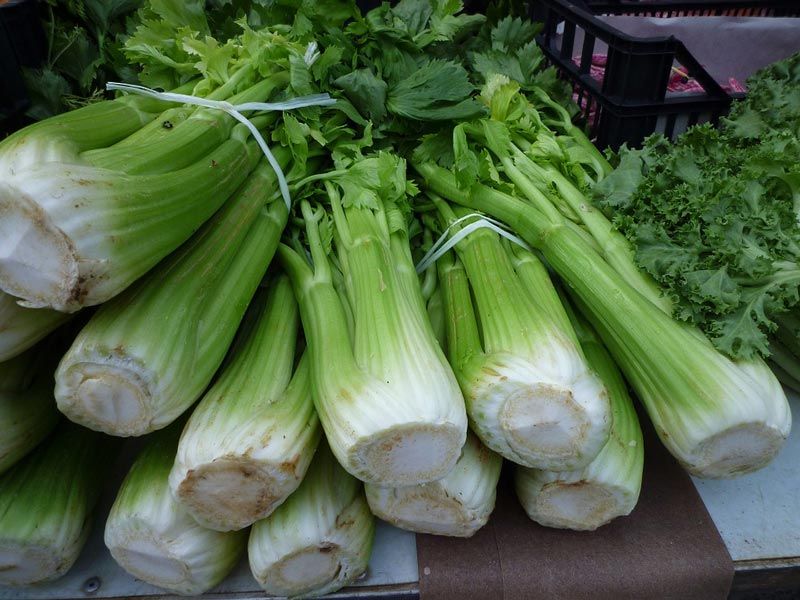
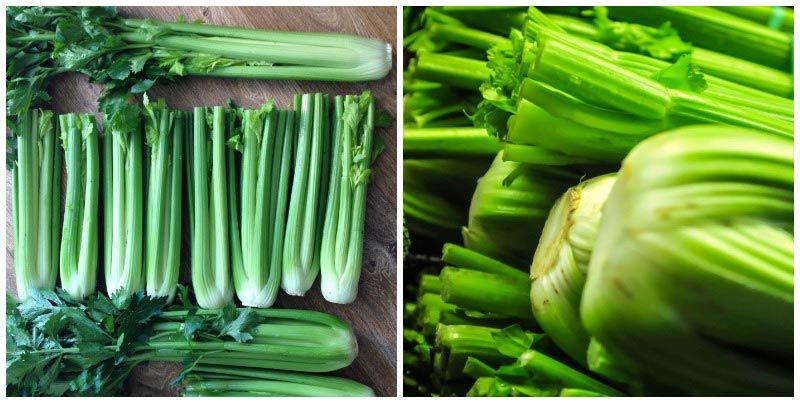
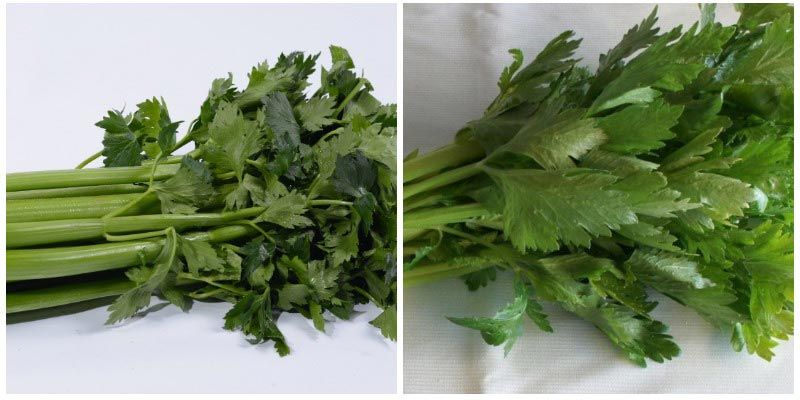
- Stem or petiole grapes are distinguished by their long shelf life and beneficial properties. They are characterized by succulent shoots of a light green color, which vary depending on the cultivation method, not the species. Sometimes, even white stems can be obtained if the plants are well-earthed and regularly covered with soil.
- Leaf celery is widely used in cooking. It grows throughout the summer and fall, has a pleasant flavor, and a vibrant aroma. It's hard to imagine canning without this green stuff.
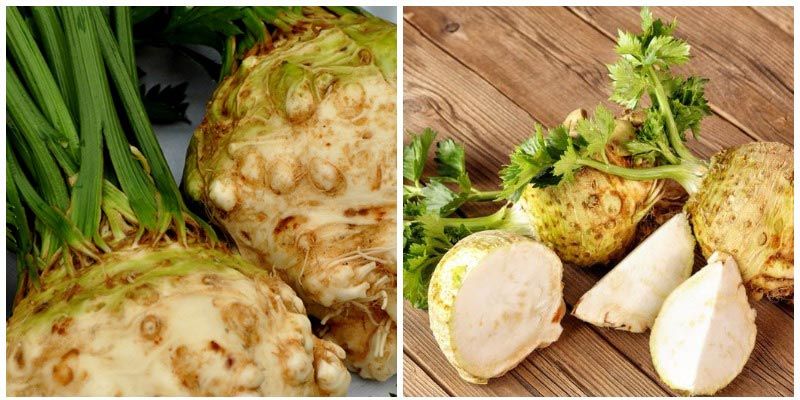
- The root is eaten raw and stewed. It's used instead of potatoes in dietary entrees. It's combined with apples and carrots in salads.
Depending on your taste preferences, you can plant one type of plant or several.
Timing of planting celery
Celery can be planted in spring or fall, depending on the method used. Seedlings are transplanted into the ground when they reach a height of 15 cm and have 4-5 leaves. Seeds are prepared in the fall. Celery is sown before winter to make care easier during the growing season. Experienced gardeners still prefer to germinate the seeds at home, as this results in a higher yield. Root vegetables are grown exclusively from seedlings.
The month of planting directly depends on the region. The closer to Siberia, the later the plants are transplanted. For example, in the Urals, it's May or early June; in the Moscow region, it's April or May.
The main requirement for weather conditions is a constant temperature of +10 °C and no frost.
According to the lunar calendar, celery is planted: root seedlings - April 26-30, May 1-4; seeds and seedlings of leaf and petiole celery - May 8-10, 14-17.
Location
Given that celery is native to the south, it requires plenty of sun. Accordingly, when choosing a planting site, warm, brightly lit spots, away from trees and buildings, are preferred.
The beds are prepared in the fall. The soil is dug over and cleared of weeds and plant debris. It is then covered with peat or humus and left until spring.
This aromatic herb protects against many types of pests, so it's recommended to plant it next to cabbage, tomatoes, cucumbers, beans, and lettuce. This combination will help increase and preserve the harvest, and it won't interfere with celery at all. Conversely, it's not recommended to combine it with potatoes, parsley, and carrots in garden beds.
Seedling method of cultivation
For seedlings, you need to select seeds. The crop doesn't have a high germination rate because it contains a large amount of vegetable oils, which prevent swelling. Planting material is often purchased in excess, and it's important to pay attention to the expiration date, as germination rates decrease further after two years from harvest.
Before planting, the seeds are prepared by rinsing them in a weak solution of potassium permanganate (a slightly pinkish tint). After soaking for two hours, the seeds are placed on a damp cloth or napkin, wrapped, and transferred to a dry, warm place. To improve germination, a few drops of growth stimulants or aloe vera juice are added to the water. Experienced gardeners create extreme conditions by immersing the bag of seeds alternately in hot and cold water.
The sowing soil can be prepared at home or purchased from a store. To mix it yourself, you'll need equal parts sand, peat, humus, and all-purpose soil. After mixing the substrate, it can be steamed, heated in the oven, or frozen for disinfection. The soil surface can be moistened with a spray bottle.
Spread the seeds evenly over the surface, lightly covering them with peat or sand. After re-wetting the seeds, cover them with glass or plastic to create a greenhouse effect. Keep the soil surface moist throughout the growing process.
For two weeks, and sometimes longer, the boxes containing the future seedlings are kept in a dark and warm place. The temperature should be between 18 and 20°C. When the first shoots appear, the containers are moved to a bright location, the cover is removed, and the temperature is lowered a few degrees. At night, the temperature can be lowered to 10 to 12°C. For the root variety, temperature control is crucial; if it is not maintained, the celery will bloom, which is undesirable. Daylight hours should be at least 10 hours, so artificial lighting will be needed if necessary.
When the young plants have formed two full leaves on a thin, delicate stem, they can be pricked out. To do this, take the same soil with a little wood ash added and place them in separate containers. Transfer each seedling to each container, pinching the main root to allow it to develop (for petiole and leaf roots only).
Seedlings require moderate watering. After watering, the soil is loosened to prevent crusting. Two weeks after transplanting, celery is fertilized with special fertilizers for the growth and development of food crops.
During the first month and a half, plant growth is slow; if there's insufficient light, the shoots will stretch excessively upward, which is unacceptable. Stems are ready for planting when they reach 25 cm in height and have 4-5 full leaves. If sowing was done on time, the seedlings will be ready by mid-May. Before planting, harden off the celery by briefly placing the container outside and gradually increasing the time spent outdoors.
Planting seedlings in open ground
The seedlings aren't planted immediately. They're kept in a shaded spot outdoors for a while. Only when six leaves appear can the celery be transplanted into the ground.
If pre-pricking hasn't been done, it's done immediately before planting. This is done as follows: after thoroughly soaking the root ball with water, pull out the seedlings, carefully separating the roots.
The area prepared in the fall for the garden bed is carefully loosened and seedlings are planted depending on the type as follows:
- Root - at a distance of 15 cm from each other, keeping the row spacing of 0.4 meters.
- Petiolate - planted at a depth of 6 cm, leaving 20 cm on each side of a row, with 0.3 m between rows.
- Leaf - 10 cm deep, no need to keep a distance between plants.
Having planted the seedling deep, the planting site is pressed down and watered generously.
Direct sowing into open ground
If you don't have seedlings or don't want to bother with young plants, sow them outdoors. This usually happens in late fall, before the first frost.
If the bed isn't fertilized, prepare it: dig it up, clear away debris and weeds, and add fertilizer. There's no need to prepare the seeds as for seedlings, but it's important to choose fresh seedlings, preferably from this year. After planting the seeds 2 cm deep, cover the area with plastic wrap. When choosing a location, ensure the plant's needs are met: good light and moist soil.
You need to sow thickly before winter, many seeds will not sprout, and it is not difficult to thin out the excess in the spring.
The advantage of this planting method is that fresh greens will appear early in the spring. Otherwise, the risks are too great. Experienced gardeners advise playing it safe and growing seedlings anyway.
Speaking of species, leaf celery is the most frost-resistant. It often emerges after long winters.
Caring for celery in open ground
Each plant variety requires its own specific care:
- Root weeds are averse to weeds, as they grow quickly and interfere with germination. Particular attention to weeding is recommended. Fertilize the plant three times, the first time two weeks after planting. A little later, when the stems begin to actively grow, fertilize again. The final time is when the roots have formed in the initial period.
- Petiolate plants require proper planting. In the beds prepared in the fall, make 30-cm-deep holes, leaving 0.4 meters between rows. Fill the holes with fertilizer. The trenches are designed to cover the petioles so they remain white and don't taste bitter. There are specially bred varieties that don't require hilling, but they are less tasty and are sensitive to cold. After planting, the first feeding is done a month later. As the stems grow, cover them with soil, carefully monitoring soil moisture. After watering, be sure to loosen the soil. When the bush reaches 30 cm in height, the shoots are carefully tied into bundles and wrapped in dark paper, leaving only the leafy tips exposed.
- The leafy variety is the most undemanding. It requires regular watering, weeding, and loosening. To prevent crusting after watering, dry grass is placed at the base, a short distance from the center of the bush to maintain growth.
Diseases and pests of celery
Plants in garden beds are not protected from diseases and pests, so it is recommended to carefully monitor the harvest, taking prompt action if problems are detected.
|
Problem |
Signs and causes |
Elimination measures |
| Rust | Small, reddish-brown spots appear densely scattered across the surface of leaves and petioles. The affected areas gradually dry out. | For treatment, spray the area with Fitosporin-M at a concentration of 4-5 mg per liter of water. A small amount of the product is not required per square meter; only 100 ml of solution is required. |
| Septoria | During cool, damp weather in the last days of summer, yellow spots with whitish centers appear on plants. Brown, sunken lesions appear on the stems. | Topsin-M and Fundazol are used for treatment. These products are toxic, so they are discontinued 20 days before harvest. |
| Cercospora leaf spot | A sign of the disease is light spots with a brown border on the surface of the leaf; in advanced cases, the petioles become covered with a purple coating. | |
| Downy mildew | With strong temperature fluctuations and cold dew in the morning, celery becomes covered with a white, web-like coating; as the condition worsens, a film with black specks appears. | It's treated by spraying with an infusion of field sow thistle. The remedy is prepared as follows: 300 grams of the crushed plant is poured into half a bucket of water and left to stand for 8 hours. |
| Cucumber mosaic | The virus is transmitted by pests, aphids, and mites. Spots or rings of varying sizes and shapes appear on the plant. | If signs of the disease are detected, the bushes are destroyed. The disease is incurable. |
| Borscht fly | The pest is most dangerous in May, arriving to lay eggs under the skin of leaves. This process causes tubercles to form. As the larva matures, it eats long tunnels inside the shoot, leaving it bitter and fibrous. | The only protection against the fly is onions planted between the rows. As a preventative measure, it's recommended to carefully keep the beds clean. |
| Carrot fly | Lays eggs under the roots. The larvae eat greenery and shoots, roots and leaves. | Affected bushes and neighboring crops are treated between rows with a mixture of sand, dry mustard and tobacco dust, combined in equal proportions. |
| Bean aphid | It is dangerous for crops, it drinks the juices from plant leaves, and is also a carrier of diseases. | Spray with a decoction of potato, tomato, or dandelion tops. You can also use an infusion of citrus peels in water at a ratio of 10:1. Keep in a dark place for 2-3 days, then spray the affected bushes. As a preventative measure, it is recommended to promptly clear the area of weeds and plant debris. |
Top.tomathouse.com advises: how to harvest and store celery
Each type of celery ripens at its own time and should be harvested accordingly:
- Stem - the harvest is collected at the end of autumn, and during the summer, a couple of petioles are broken off selectively.
- Root crops—root crops should be dug up before frost. Growth continues until mid-autumn, so thinning and consuming part of the harvest is acceptable. Dig the plants carefully, avoiding damage to neighboring plants.
- Leafy—the greenery is broken off; pruning isn't very beneficial for the plant's health. The fine roots are removed, and the main rhizome is dried and stored.