The climate in most regions of Russia doesn't allow for growing many beloved vegetables outdoors—the risk of temperature fluctuations is too great, leading to the death of the plants. Cucumbers, tomatoes, and other crops thrive in warmth and stable temperatures, which can only be achieved by planting them in a greenhouse. In this article, we'll explore how to build one of the simplest structures—a wooden greenhouse—at home, affordably.
Content
- 1 Advantages and disadvantages of a wooden greenhouse
- 2 Choosing wood
- 3 Selecting a covering material
- 4 Choosing a construction site
- 5 Types of structures
- 6 Calculation of sizes
- 7 Step-by-step instructions for building a wooden greenhouse with drawings and dimensions
- 8 Wooden greenhouse according to Mittlider + drawing
Advantages and disadvantages of a wooden greenhouse
Wooden boards and beams are the best materials for building reliable and durable greenhouses and hothouses. Wooden structures offer a number of undeniable advantages:
- Ease of assembly. Wood is pleasant and easy to work with; the boards are easily sawed and fastened together without much effort.
- An environmentally friendly material. Wood is highly permeable to oxygen and does not release substances that could harm plants when heated.
- Low cost. Lumber can usually be found at any garden site. Even if you don't have enough, you can buy wooden planks and beams at any hardware store for a relatively low price.
- Reliability. When properly assembled, a wooden greenhouse is impervious to gusts of wind or heavy rain, and its sturdy frame can withstand absolutely any covering material, from film to glass.
- Long service life. Pre-treated wood used to construct a greenhouse will serve gardeners for a very long time – up to 7 years. And with timely maintenance, this lifespan can be doubled.
- Choose your own size. A wooden greenhouse can be built to strictly custom dimensions, depending on the size of the site and the planned plantings.
Like any material, a wooden greenhouse structure has a number of specific disadvantages:
- Moisture sensitivity. Wood does not tolerate regular exposure to moisture and therefore requires additional treatment. Furthermore, direct contact with the soil is undesirable; it's best to provide an additional foundation for the frame, raising the greenhouse at least 10 cm off the ground.
- High biosensitivity. Wooden greenhouse frame elements are easily susceptible to rot and mold, especially on the interior. Careful treatment and the proper selection of wood (if you're purchasing it specifically, rather than using leftover wood from renovations) can help solve this problem.
- Regular treatment. Wood requires special care and must be treated regularly. Fortunately, a wide range of specialized products are available in stores.
- The need to use narrow boards. If you have boards that are too wide after renovation, a frame made from them will provide too much shade, which can adversely affect the growth of your crops.
- Difficulty in creating arches. If you're planning to build an arched greenhouse, wood is the least suitable material. It's impossible to bend planks at home, so the arch can only be constructed from small pieces of wood, which complicates the assembly process and makes the structure more vulnerable.
Choosing wood
If you're using scrap lumber from your dacha, choose the smoothest, most even lumber without chips or cracks for the frame. The optimal size is 50x50 for the main elements and 100x100 for the frame. Make sure the lumber shows no signs of rot; one damaged element will require extensive repairs to the entire structure.
If you plan to purchase wood from a specialty store, choose industrial grades, such as larch and pine. There's no point in spending a fortune on beech or oak—they're more difficult to work with and don't last much longer than other woods. Pay attention to the moisture content—it shouldn't exceed 22%.
But even if you've purchased fresh wood that doesn't seem to require any additional treatment, you should still plan it and treat it with a special solution beforehand. The finished greenhouse structure will need to be painted or treated with drying oil.
Selecting a covering material
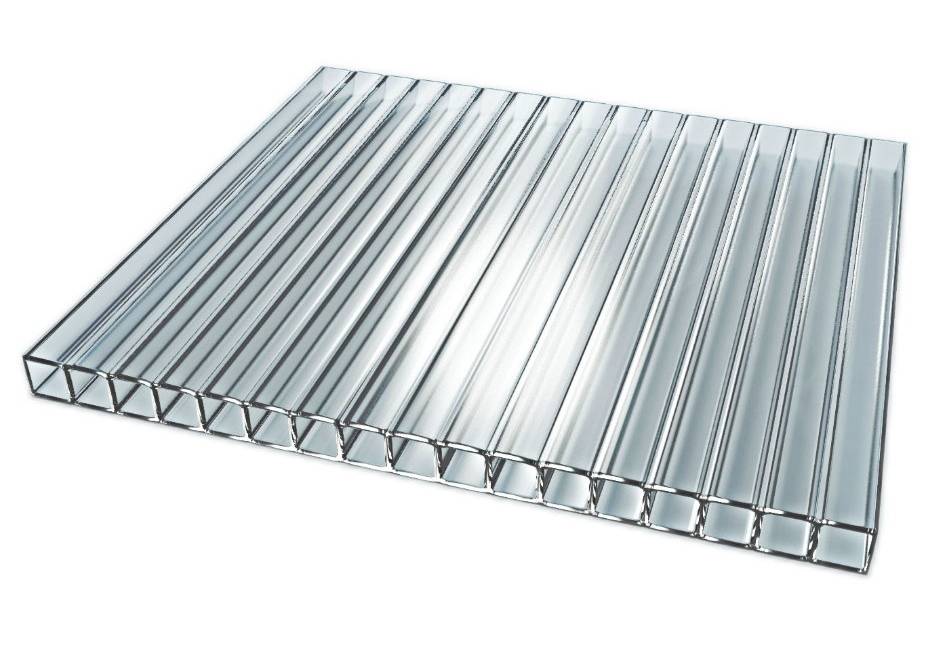
A wooden greenhouse frame is advantageous because it allows for the use of virtually any covering material, depending on the builder's preference. Below, we've provided a comparison chart to help you make your choice.
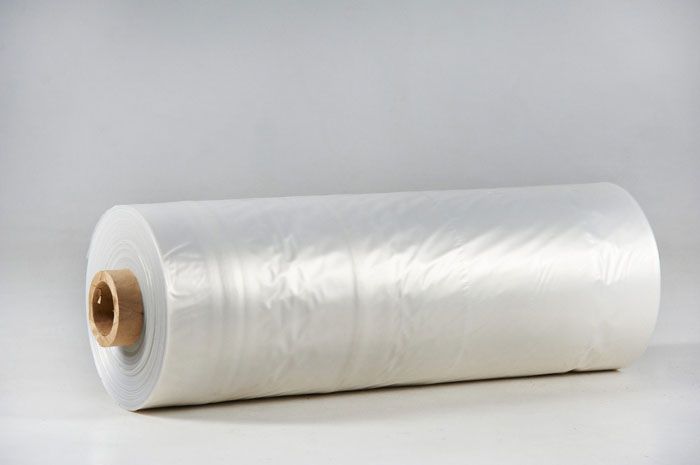
| Type of coating | Advantages | Flaws | Cost of materials |
| Polyethylene film
|
Affordable price (a greenhouse with film will be the cheapest).
Easy to mount. Easy to replace if damaged. Light weight. |
Short service life (up to 3 years).
Fragility of the material and susceptibility to damage. Low light transmittance and thermal insulation. |
From 30 rubles per linear meter or from 3000 per roll (1 m * 100 m) |
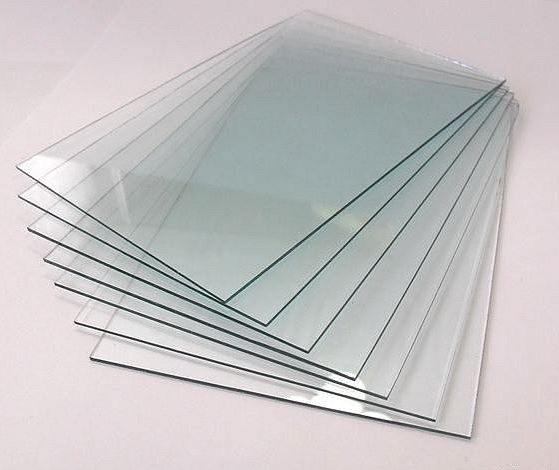
| Glass
|
Available in many areas after renovation.
Good thermal insulation. High transmittance for solar rays. Eco-friendly material. Fire resistance (for those structures that are additionally heated). Low sensitivity to temperature changes. Easy to care for. |
Difficulty of installation.
High fragility. In hot weather it lets in too much light, and in cool weather it cools the greenhouse too much. Heavy weight. |
Window glass – from 800 rubles per square meter. |
| Polycarbonate
|
Variety of textures and colors.
High strength. The ability to take the desired shape. Ease of installation. Fire resistance. Good thermal insulation and light transmittance. Durability. UV protection. |
High cost. Thermal expansion rate. |
From 1000 rubles per sheet |
Choosing a construction site
The main rule for choosing a greenhouse location is not a centimeter of shade! The structure should be located away from major buildings and tall trees that could create additional shade. This can be detrimental to many plantings, even if it only covers them for an hour a day.
Another important rule: the door to the greenhouse should be located on the side that is least exposed to wind. Never place it on the north side of the site, as the plants will constantly freeze and die when exposed to air.
Types of structures
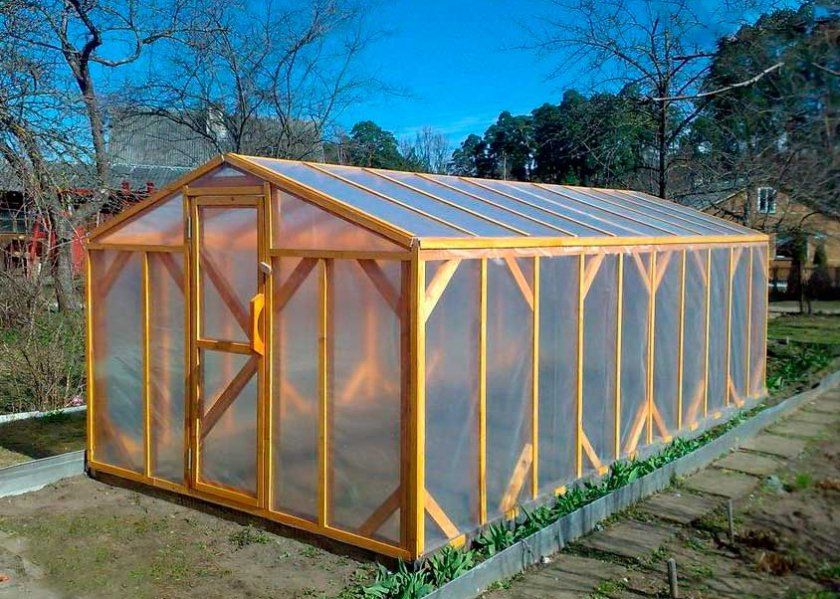
The most popular type of greenhouse is the gable roof. However, other types of greenhouses can be built using wooden elements.
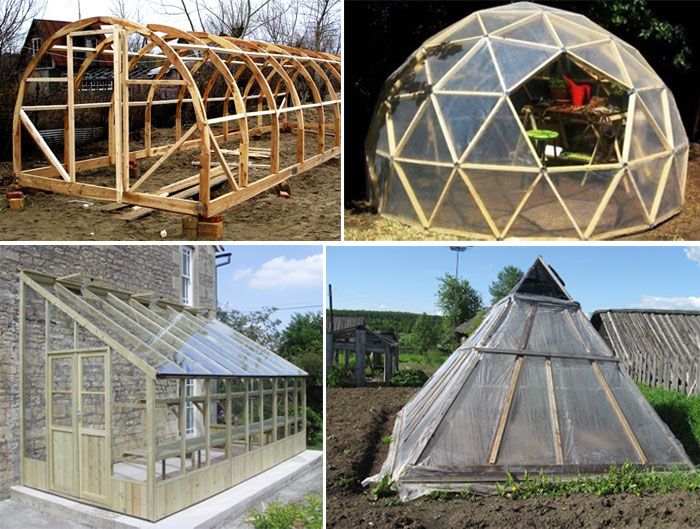
Arched
As mentioned above, it's practically impossible to build an arched greenhouse entirely out of wood in a domestic setting. Its installation requires additional elements, such as metal or durable plastic arches. Only the frame can be made of wood, designed for ease of installation and secure anchorage. Arched greenhouses are typically used for low-rise greenhouses; they offer excellent light transmission and are inexpensive to construct. However, tall greenhouses can also have arched roofs, allowing for the cultivation of open-sided crops. A drawback of this type of structure is its practical unsuitability for growing seedlings, as it lacks the necessary maneuverability to harden off the plantings. Another disadvantage of arched structures is the need for additional snow removal from the roof, as snow cannot slide off the arched roof on its own.
Dome-shaped
In central Russia, such a greenhouse would be an unnecessary luxury, as it requires a rather complex and costly installation process using triangular cladding elements. However, in seismically vulnerable areas of our country, this type of structure is the safest and most resistant to ground vibrations. Furthermore, a domed greenhouse looks very stylish and blends seamlessly into any exterior. This structure requires additional insulation and sealing due to the large number of joints.
Single-pitched
Lean-to greenhouses resemble half a house. They are typically built for planting seedlings on the south side of a property. Lean-to greenhouses are convenient because they can be attached to any existing structure on the property, be it a shed, garage, or gazebo. The key requirement is good lighting. It is recommended to cover the roof slope with glass or plastic, which provide good light transmission.
Pyramidal
The pyramid has long been considered a mythical place of power. Many gardeners believe that plants will grow and bear fruit better and more abundantly in such a greenhouse. A regular square is used as the frame for its construction. Wooden beams extend upward from the base of each corner, intersecting at a single point at the top of the structure. The entrance to such a greenhouse, surprisingly, is best located on the north side. The greenhouse requires special precision in construction – for small garden plots, a diagonal of 2 meters, a height of 3.2 meters, and square sides of 1.42 meters are considered optimal. These calculations are based on the "golden ratio" rule; a pyramidal greenhouse is built according to the principle that the height of the structure should be exactly 1.57 times smaller than the side of the square frame of the base.
Calculation of sizes
A wooden greenhouse structure can be built in any size to suit your site. There are several calculation guidelines to follow when constructing the structure to ensure its strength and reliability:
- Tall crops require a wall height of at least 2 m.
- The supporting beams must be secured to the ground by digging them to a depth of up to 50 cm and should be placed around the perimeter of the future greenhouse at least every 1.5 meters.
- If you plan to build a gable-roof greenhouse, you'll need to reinforce it with additional beams, which are driven into the center of the greenhouse from the inside. They're approximately 3.3 meters high and spaced 2.5 meters apart.
- If you plan to use film as a covering material, you will need to make additional wooden fastenings at the ends of the greenhouse.
- Beams are attached to the top along the entire perimeter of the frame, which will serve as a supporting structure for the future roof.
- Rafter pairs must be attached strictly to the supporting structures of wooden walls.
- If your greenhouse is small, it will be enough to have one door and a window, but in a larger structure, two entrances will be needed for better ventilation.
Step-by-step instructions for building a wooden greenhouse with drawings and dimensions
So, here's a step-by-step guide to building a DIY wooden greenhouse. We'll walk you through the entire process step by step, complete with drawings and photos.
Sizing
The greenhouse size must be determined in advance. It depends on many factors, and most gardeners make the mistake of not taking into account the standard sizes of the materials they use. For example, the optimal size for polyethylene film is a roll with a sleeve width of 3 meters. Based on this, the dimensions of the future structure are calculated. We propose building a greenhouse measuring 2 x 5.4 meters, with walls 1.5 meters high. We will use a gable roof with rafters. This project will require a reliable reinforced strip foundation.
In such a greenhouse, you can grow vegetables from the onset of warm weather until the autumn cold snap.
Preparing the foundation
Wood is a fairly heavy material, and the planned greenhouse will be quite heavy, so the foundation must be solid.
Having determined the location of the future structure in advance, it's necessary to mark the foundation using pegs and string. Next, a trench is dug around the entire perimeter, the depth of which depends on the soil quality. A depth of 55 cm is considered optimal. The trench is then filled with concrete, after which the foundation is raised an additional 25 cm above the ground using formwork. To make it more reliable and durable for many years, it's necessary to use reinforcement and consider a waterproofing system. This type of foundation can be used to build a greenhouse with any covering material; it will support both glass and polycarbonate.
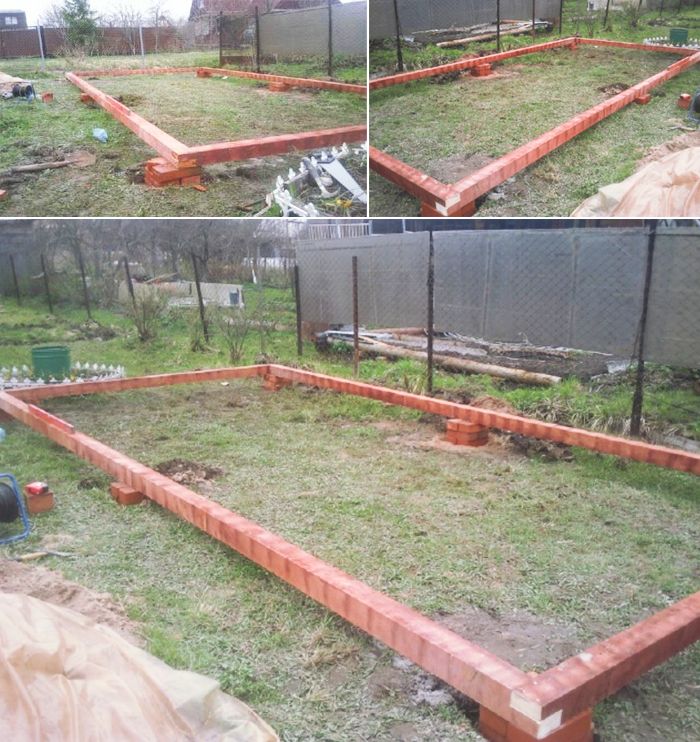
At the stage of pouring the foundation, it is necessary to secure metal corners to it, to which the supporting beam will later be attached for mounting the frame.
Building the frame
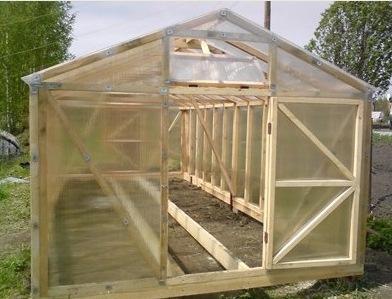
The photographs below clearly show the frame diagram of the future wooden greenhouse.
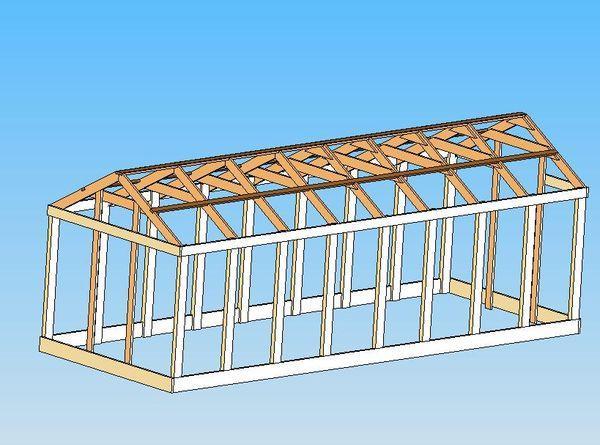
The trapezoidal design is the most popular greenhouse shape among gardeners.
Initially, the frame has a solid structure, but an additional structure for a window and a door will later be assembled in one of the end walls.
In the photo below, you can see what the assembled frame of a wooden greenhouse looks like in a real garden plot.
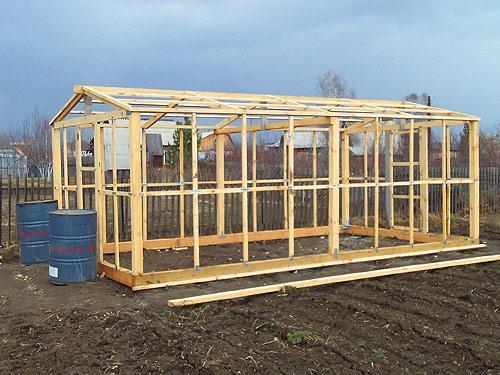
Assembling the frame
Step-by-step instructions for building a wooden greenhouse frame yourself.
Connecting the foundation to the supporting beam
To ensure the greenhouse frame is level and stable, place a beam wider than the frame base on the foundation. It should be a uniform length, not made up of boards of varying sizes; otherwise, the greenhouse will not be as stable as desired. It is secured to the pre-fabricated metal corners you installed when pouring the foundation. Before installing the supporting beams, lay a fine mesh fence around the entire perimeter of the greenhouse. This will help prevent moles and other rodents from damaging the plants.
Construction of walls
The key to an easy job is taking accurate measurements and ensuring all pieces fit perfectly. Frame assembly begins with the side walls, which are the heaviest and most labor-intensive.
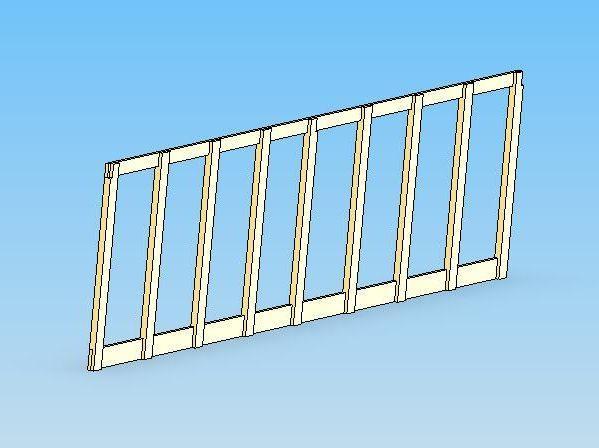
The diagram shows the assembled side wall of the greenhouse, measuring 5.4 m long and 1.5 m wide. As you can see from the diagram, it is recommended to pre-drill the grooves to make the structure stronger and more load-bearing. You will have two of these walls, and to attach them to the rest of the structure, you will need screws, clamps, metal profiles, and angles.
Construction of the rafter system
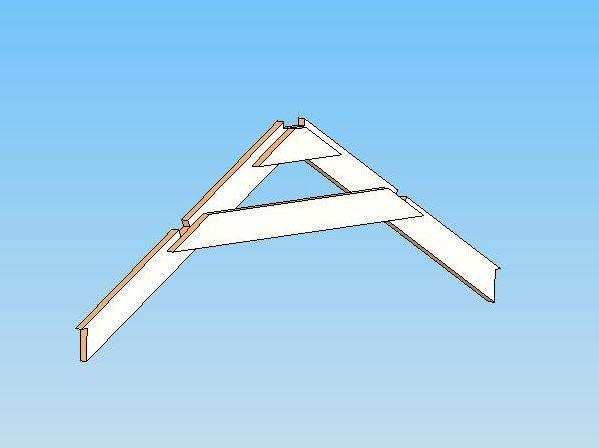
The roof is a crucial part of the greenhouse. It must be resistant to wind and snowfall in winter, and it must have sufficient support points to ensure a tight fit of the film. A pitched roof requires a rafter system. It uses grooves into which rafters are inserted. The length of the rafter depends on your height. Typically, 1.27 meters is sufficient, but if you're taller than average, 1.35 cm rafters are better. It's recommended to strictly adhere to these dimensions; they are based on the width of the covering film sleeve, which is 3 meters. Therefore, if we unroll the roll, its width will be 6 meters. This is the combined length of the rafter and side post, so the film won't need to be cut or adjusted.
Two rafters form one rafter pair, which must be further reinforced with a wooden angle bracket at the top where they join and a beam, which are also inserted into pre-prepared grooves. The number of such pairs must correspond to the number of studs on the side walls. This is what a rafter pair looks like:
Roof assembly and installation of wind boards
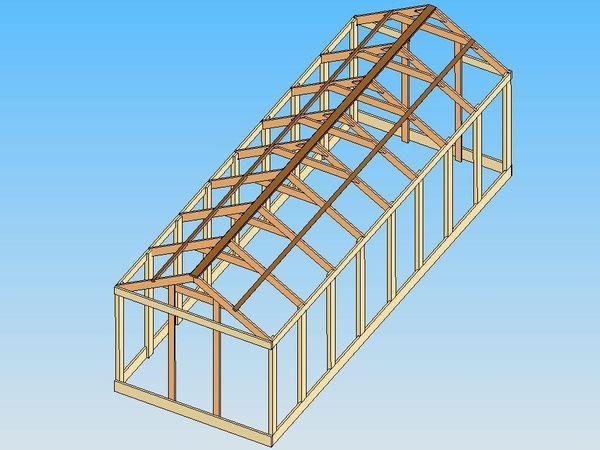
To assemble the roof, you'll need three long boards. Never use multiple short boards, as this will significantly reduce the roof's strength. The ridge cap and wind boards are inserted into the grooves of the rafter pairs. Before installation, they must be thoroughly sanded and treated with a special rot- and pest-resistant compound. Installing the wind boards is essential; they will prevent the membrane from deforming in the wind and causing mechanical damage.
The picture below shows a schematic of the greenhouse frame; we have marked the roof ridge and wind boards in a darker color.
Door and window structure
The number of doors and vents directly depends on the size of the greenhouse. For a greenhouse 5.4 meters long, one door and vent are sufficient. For installation, choose the less-ventilated side and avoid the north side. After determining the end wall, use boards of the appropriate size to create a base for the vent and doorway. The door itself is made from four boards slightly smaller than the frame and further reinforced with ties and angles. It is mounted on metal hinges pre-treated with an anti-corrosion compound. The vent is made in the same way; it should open outward, like the door.
Covering a wooden greenhouse
Covering a wooden greenhouse begins with the roof. For this, a thick, light-stabilized film is used, with a minimum sleeve width of 3 meters (100–120 microns). The first layer of film is secured over the beams using tightly stretched cables. This provides additional support and protection from the elements.
For the second layer of covering material, a thinner film (60-80 microns) is used, which is secured from below with nails and shingles. This is done not only to ensure the coating's security but also to create a small air gap between the layers of film, which will help retain heat better within the structure.
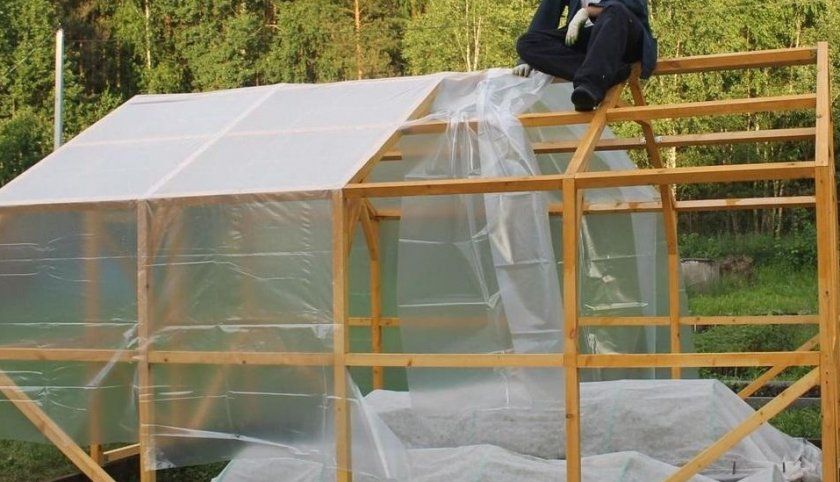
The walls are covered in the same way: the bottom edge of the film is dug into the ground. A door and window opening are left at the end. The door is covered with film using the same technique.
The most important thing is to remember to additionally treat all wooden structure elements, as the greenhouse interior will be hot and humid, which is detrimental to wood. With proper treatment and maintenance, such a greenhouse can last for at least 10 years.
Wooden greenhouse according to Mittlider + drawing
Jacob Mittlider is an American vegetable grower, consultant, and agricultural expert, as well as a Doctor of Agricultural Sciences. He developed a unique greenhouse design, which was named after him, "Dr. Mittlider's Greenhouse." It is characterized by a sturdy frame, excellent ventilation, and a proper microclimate. This greenhouse can also be built independently, including from wood.
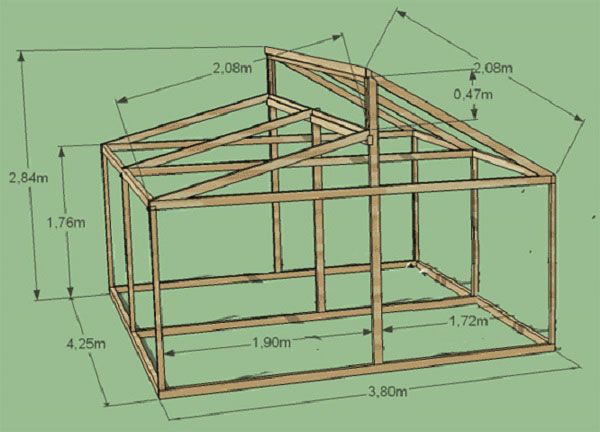
The drawing shows a wooden greenhouse with transoms. The support beams are made of 10 x 10 cm beams, the rafters are 5 x 7.5 cm, and the window transom frames are 5 x 5 cm. Film or polycarbonate can be used as a covering material.