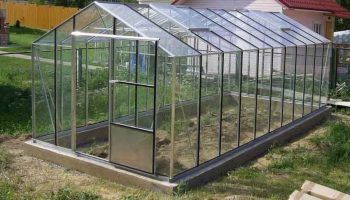
When the need arises for a greenhouse or hothouse, plastic polypropylene pipes are often the material of choice, primarily due to their ease of installation and the low cost of the finished structure. In this article, we'll explain how to build a greenhouse yourself using polypropylene pipes. We'll also discuss the general selection of plastic pipes for greenhouse construction.
Content
- 1 Choosing plastic pipes for building a greenhouse
- 2 Advantages and disadvantages of using polypropylene pipes for greenhouse construction
- 3 Choosing a location for building a greenhouse from polypropylene pipes
- 4 Types of greenhouse structures made of polypropylene pipes
- 5 Selection of polypropylene pipes
- 6 Rules for working with the material
- 7 Selecting a covering material
- 8 Calculation of the required number of polypropylene pipes
- 9 Calculating the required amount of polycarbonate or film for covering
- 10 Calculating the foundation for a greenhouse made of polypropylene pipes
- 11 Calculation of the required amount of reinforcement for the foundation
- 12 What other materials will be needed?
- 13 Tools
- 14 Step-by-step instructions for building a greenhouse from polypropylene pipes yourself
- 15 Options for ready-made greenhouses
- 16 Useful tips for beginners
- 17 The price of a homemade greenhouse made from polypropylene pipes
Choosing plastic pipes for building a greenhouse
Building supply stores offer a huge selection of plastic pipes, from very inexpensive to far from cheap. How can you navigate this diversity and make the right choice? First of all, keep in mind that these pipes are intended for cold or hot water, as well as gas. Therefore, additional super characteristics such as a perfectly smooth interior surface and resistance to pressure and pressure shouldn't concern you at all. The important things are the diameter and wall thickness. That's all.
Of course, metal-plastic pipes will last longer, but even they will still need to be supported in winter to prevent the structure from deforming under the weight of the snow cap.
The tables below provide information on the various types of pipes for comparison. Which one to choose is up to you, but don't overpay for features you'll never need in your greenhouse.
| Material + its price per meter, rubles. | Advantages | Flaws | Installation Features | Recommended size for film/polycarbonate, mm
Recommended wall thickness, mm |
| HDPE (low-density polyethylene)
From 39 |
Low cost, easy installation, flexibility and durability, light weight | Sensitive to UV radiation, deforms at low temperatures, bends under snow | Welding, fittings | From 15/from 25
From 4 |
| Polypropylene From 45 |
Durability, light weight, easy installation | May deform under the weight of snow | Fittings, screws, soldering | From 15/from 25
From 4 |
| Polyvinyl chloride (PVC)
From 45 |
Lightweight, inexpensive. | Not rigid enough, doesn't bend very well | Clamps, glue, fittings | From 20/from 32
From 4.2 |
| Cross-linked polyethylene
From 400 |
Durability, flexibility, absolute resistance to UV rays and temperature changes | High cost | Crimp metal couplings | From 20/from 32
From 2.9 |
| Metal-plastic
From 170 |
It bends well, is elastic, durable, and is not affected by temperature changes. | High cost | Fitting | From 20/from 32
From 3 |
As you can see, the required wall thickness, pipe diameter, and other characteristics will still be roughly the same for different materials. However, the price can vary significantly.
If you plan to work with polycarbonate, it's best to choose thicker pipes, as they will bear considerable loads. For film, you can choose less powerful and, therefore, cheaper pipes.
Advantages and disadvantages of using polypropylene pipes for greenhouse construction
General requirements for materials used in the construction of greenhouses and hotbeds include durability and the ability to withstand adverse weather conditions. When evaluating polypropylene pipe structures according to these criteria, the following are clear advantages:
- operation up to 50 years;
- ease of installation;
- resistance to air temperature changes (-15…+97 degrees);
- no corrosion when exposed to high humidity for a long time;
- does not emit substances harmful to plants or people;
- fire resistance;
- the possibility of mechanical processing during the assembly process of structures of various shapes;
- the possibility of designing collapsible structures;
- low weight of the finished structure;
- low cost;
- no need to apply paints and varnishes or protective agents.
The vulnerability of the structures includes low resistance to strong gusts of wind and heavy snowfalls, which can cause the greenhouse to collapse.
Choosing a location for building a greenhouse from polypropylene pipes
Before drawing up a plan, you need to decide on the location of the greenhouse on the site. To do this, there are a number of rules to consider:
- The future greenhouse should be located at least 5 meters away from other buildings, otherwise a shadow will fall inside, which can destroy the plantings, even if it creates shading for only an hour a day.
- Plants in the greenhouse should be given maximum light, which can be achieved by arranging the greenhouse in the south-east or south-west direction.
- If you happen to have walnut trees growing on your property, you shouldn't build a greenhouse near them. Firstly, their crown creates additional shade; secondly, the tree produces phytoncides, which are toxic to many plants; and thirdly, its roots absorb a lot of moisture, which significantly dehydrates the soil.
Types of greenhouse structures made of polypropylene pipes
Polypropylene pipes are flexible and can be equipped with various tees, making it easy to create even the most creative greenhouse designs. However, there are a number of classic shapes that are most commonly found in garden plots:
- arched;
- pointed-arched;
- with a pitched roof;
- greenhouse-house with a gable roof.
A single-pitched roof greenhouse is rarely built as a stand-alone structure. It's most often an extension to existing structures on the property. Its dimensions are typically modest, and construction costs are minimal due to the existing wall, which, incidentally, provides additional heat.
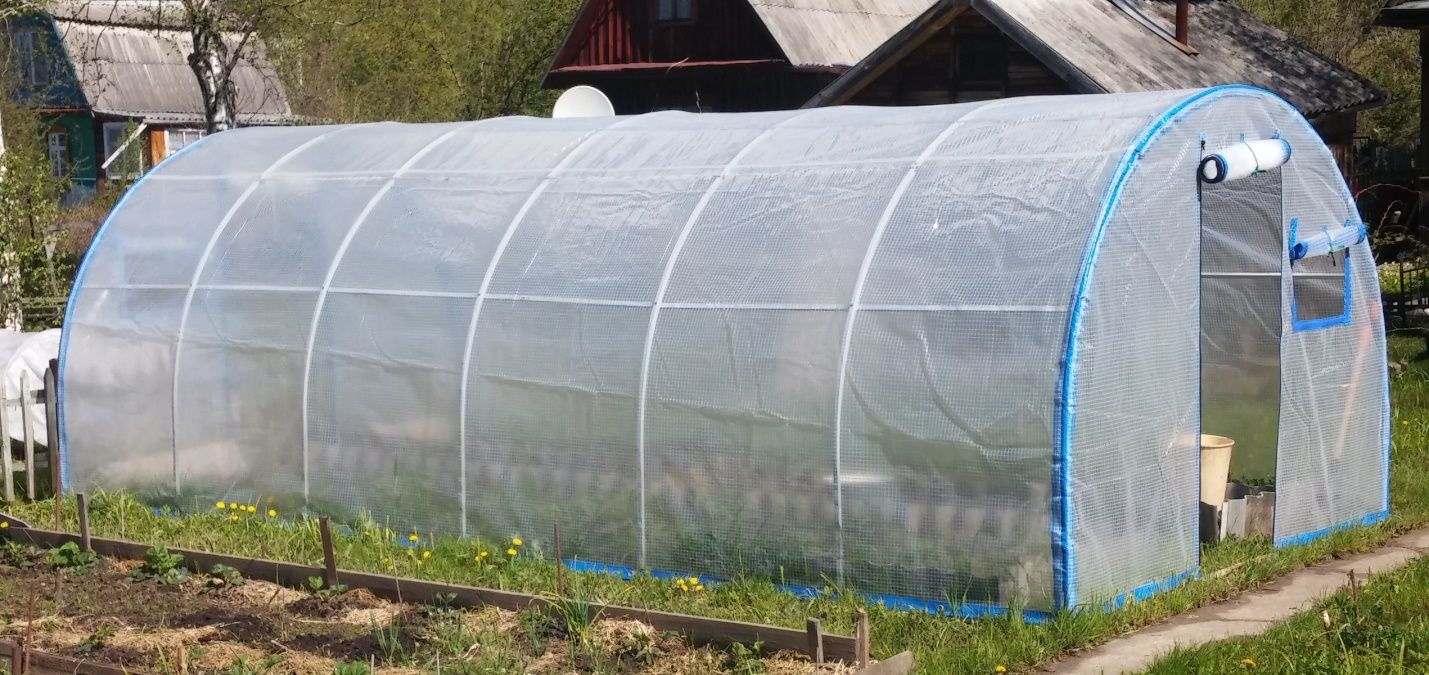
The simplest and most popular design among gardeners is the arched greenhouse. If the soil on the site allows, it can be erected in a matter of hours without the need for a foundation. The key is to provide additional rigidity and select the appropriate pipes. However, an arched greenhouse will have to be dismantled for the winter; it won't withstand the weight of the snow and will become deformed.
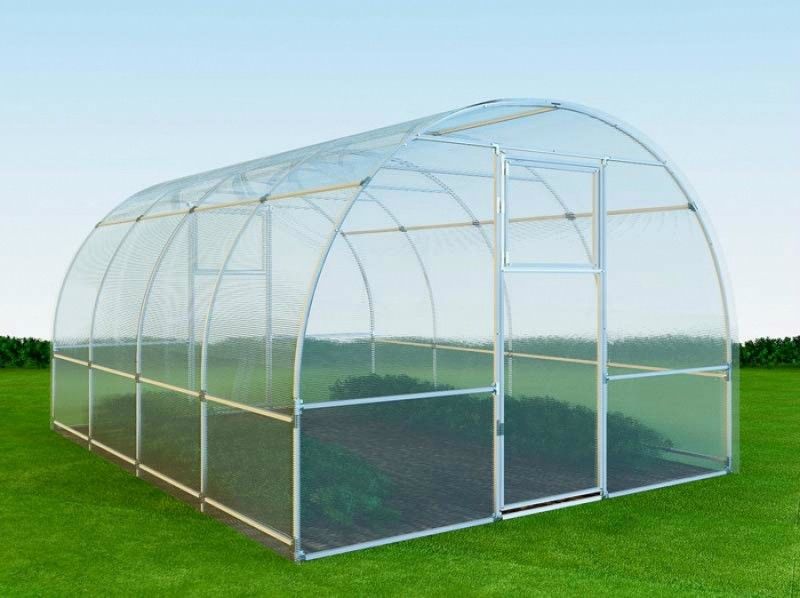
A pointed-arched greenhouse is ideal for winter. Its installation is more complex and painstaking, and the specially designed walls and ends prevent snow from lingering on the greenhouse surface, allowing it to slide freely. This type of greenhouse will last for many years with proper care.
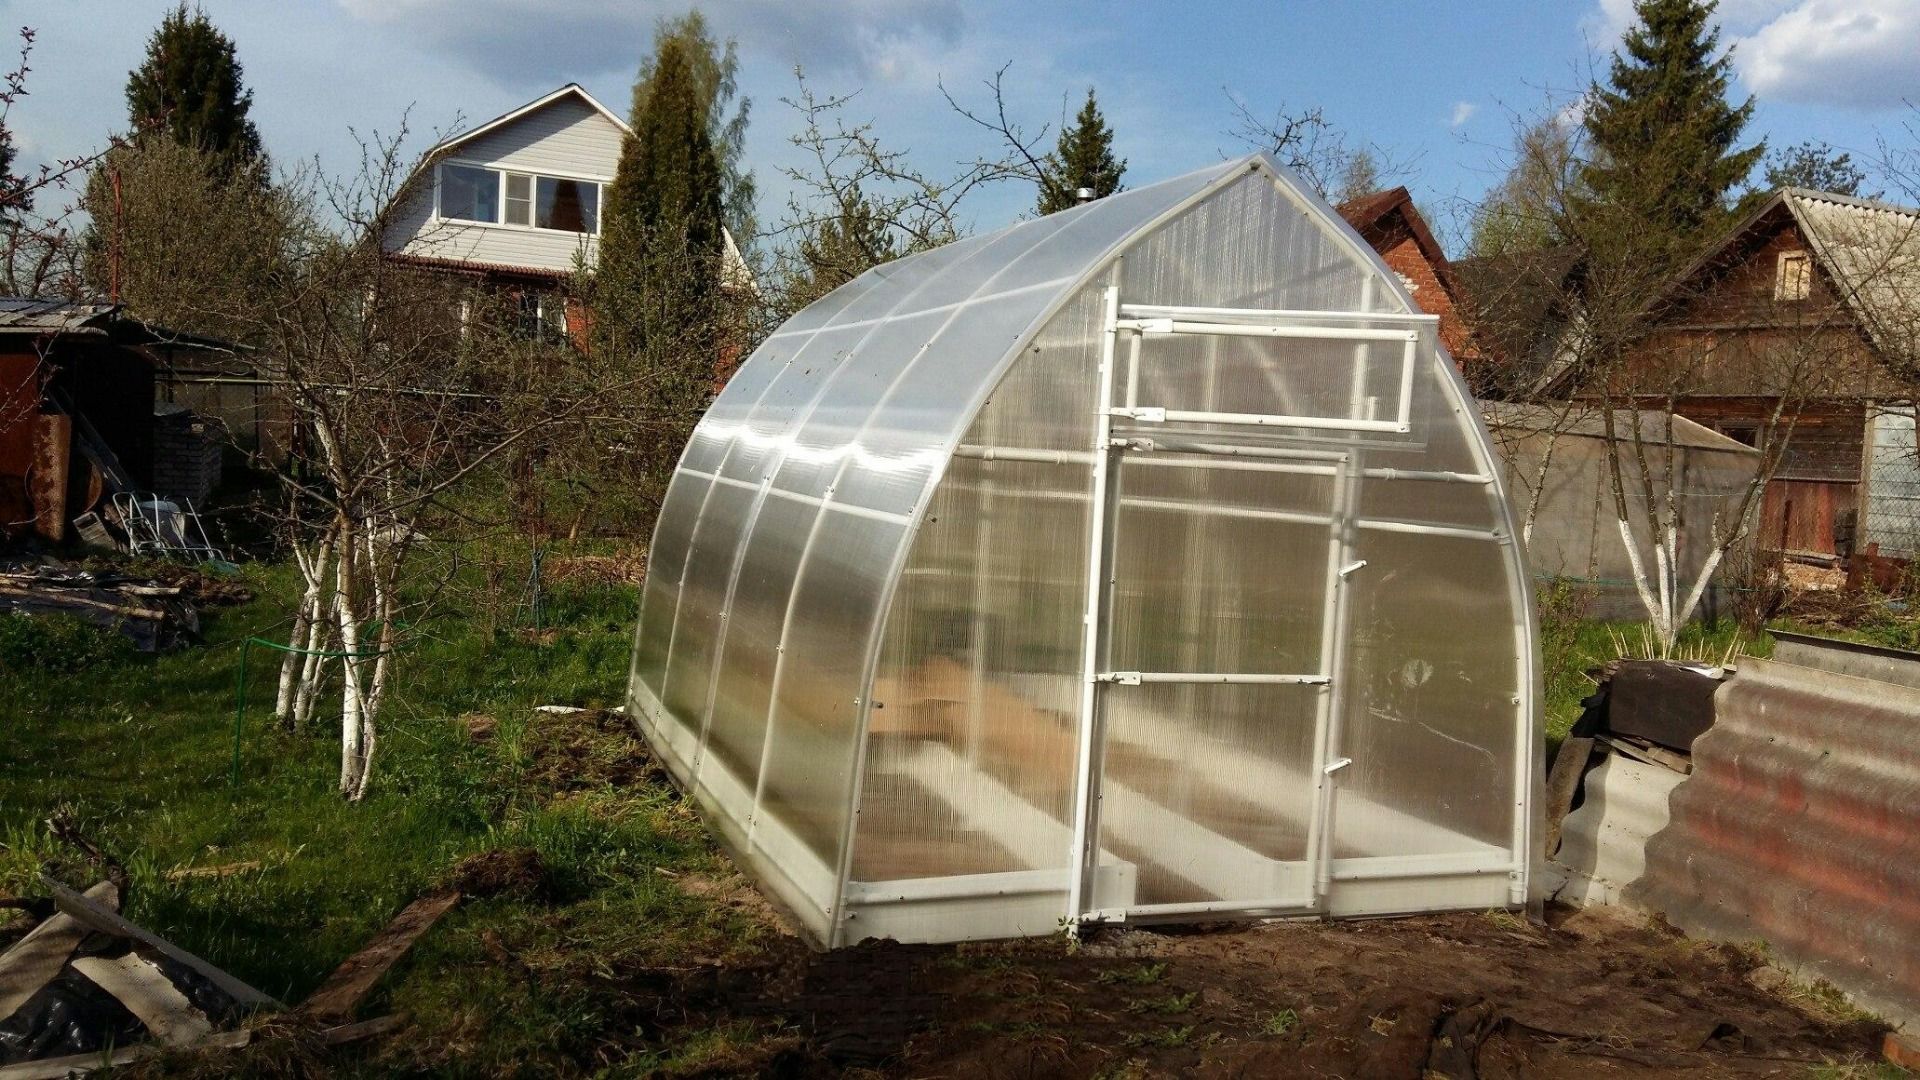
A gable-roof greenhouse will blend harmoniously into any garden. It's more complex to install than an arched greenhouse, but no less popular among gardeners. If you live on the property year-round and can regularly clear snow from the roof, there's no need to dismantle the greenhouse for the winter. If you rarely visit your dacha after the season, there's a risk of the structure deforming under the weight of snow. If the snow load isn't too heavy, propping it up can help support the load.
Despite a number of drawbacks, such as the need to dismantle it for the winter, the arched greenhouse is the most common type of greenhouse used. Apparently, the secret lies in its ease of installation, which is incredibly simple and straightforward, even for a novice.
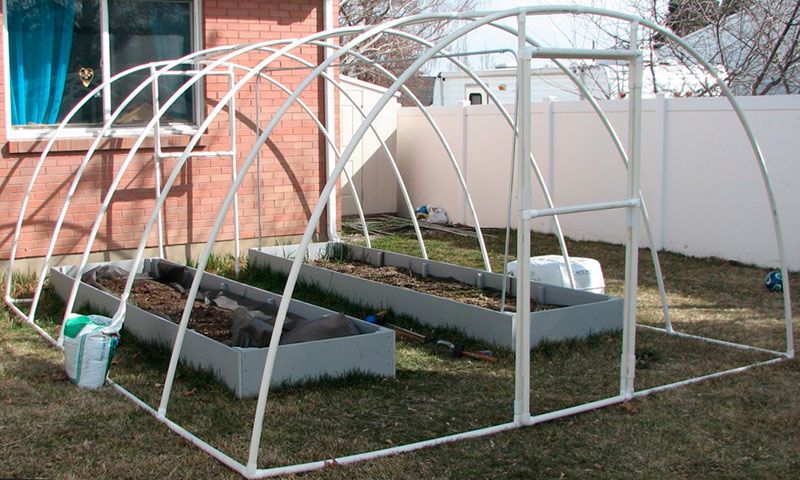
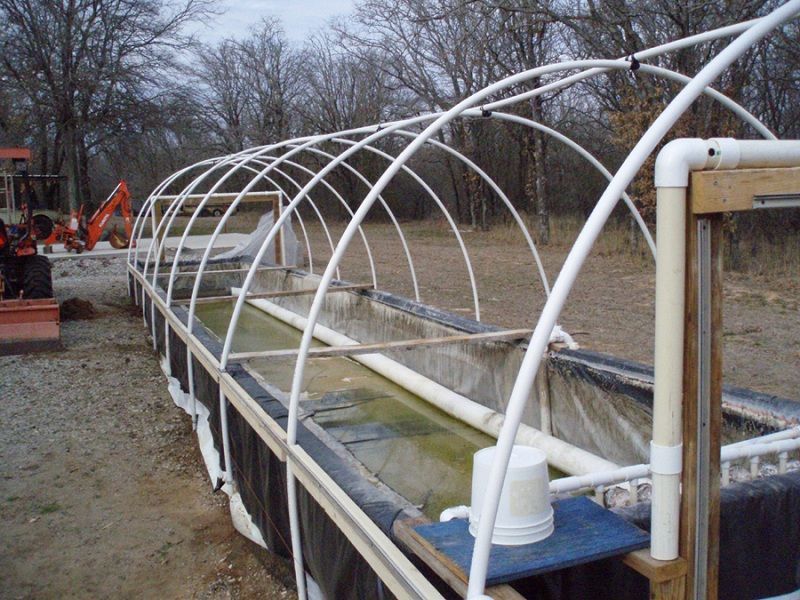
All the gardener needs to do is create the correct drawing based on the width of the beds and paths inside. The recommended distance between the arches in a greenhouse is 50-80 cm. The smaller the distance, the more stable the structure will be. The path width is 35-50 cm.
The beds inside are arranged depending on the crop being grown and your preferences. There may be two beds with a path down the middle, or one in the center of the greenhouse with paths on the sides, which we recommend filling with sawdust.
Selection of polypropylene pipes
When choosing pipes, it's important to know that there are single-layer and multi-layer types. Single-layer pipes have markings that can be read on their surface. Below is an explanation of these intricate letters.
| Marking | Purpose |
| RRV | Cold water supply, ventilation shafts |
| PPR | Hot and cold water supply |
| RRN | Industrial cold water supply, reservoirs |
| RRS | General-purpose pipes with high temperature resistance |
In principle, there's no significant difference between these pipes specifically for greenhouse construction; the only caveat is that cold water pipes can be too sensitive to heat from sunlight. However, experts still recommend choosing universal pipes (marked PPS).
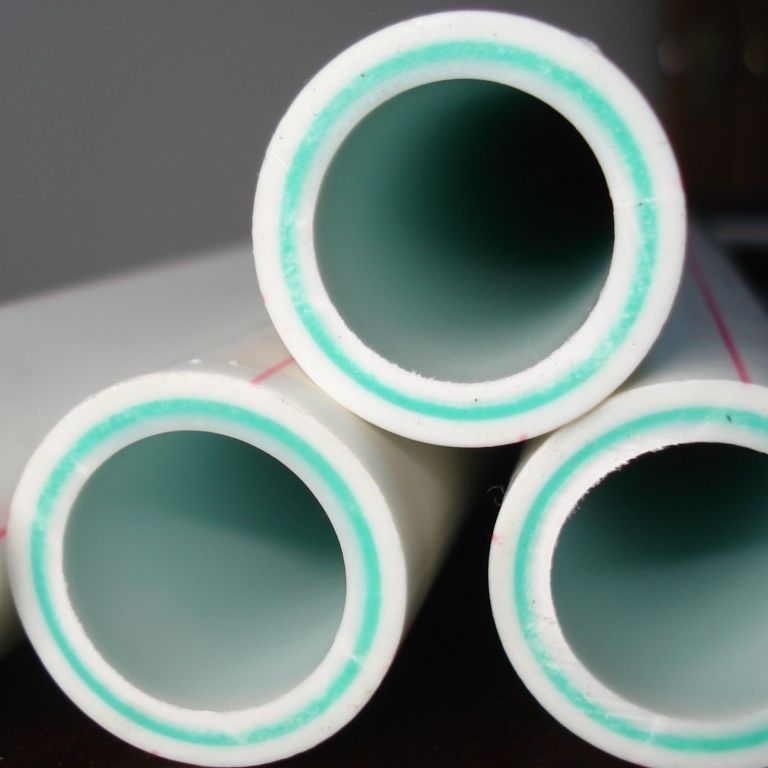
Multilayer pipes are typically additionally reinforced with a special material. There are also fiberglass-reinforced options. These are correspondingly more expensive, but they offer more reliable performance and a service life approximately three times longer. A structure made from these pipes will be heavy, strong, and weather-resistant.
Sometimes aluminum foil is used as a layer. When handling this type of pipe, extreme care must be taken to avoid damaging the material.
The presence or absence of a layer can be seen with the naked eye on a cross-section of the pipe:
- Single-layer pipes have a uniform color;
- In multilayer pipes, the layers are usually painted in a different color from the pipe itself, which immediately catches the eye.
Multilayer pipes also have their own markings:
| Marking | Material |
| PPR-FB-PPR | Reinforced fiberglass |
| PPR-AL-PPR | Foil |
| PPR-AL-PEX | Foil |
We've selected the most popular plastic pipe manufacturers for you, who have earned the trust of their customers:
- Ecoplastic Fiber;
- About Aqua;
- Pilsa;
- Banniger;
- Blue ocean.
Rules for working with the material
Once you've purchased the pipes and are ready to build your greenhouse, it's important to learn how to work with this material. There are a number of general recommendations that apply to all types of plastic pipes.
It's best to begin installing the frame in warm weather, with temperatures no lower than 17°C (63°F) and no higher than 23°C (73°F). This temperature is the most comfortable for plastic; it will bend easily and, in general, exhibit all its best properties, making it as easy as possible to bend it into the desired shape.
Don't chase cheapness and buy pipes and fittings from different manufacturers and stores. Make sure to purchase these components from a single source to avoid installation issues. The strength and reliability of your future greenhouse depends on the quality of the connections.
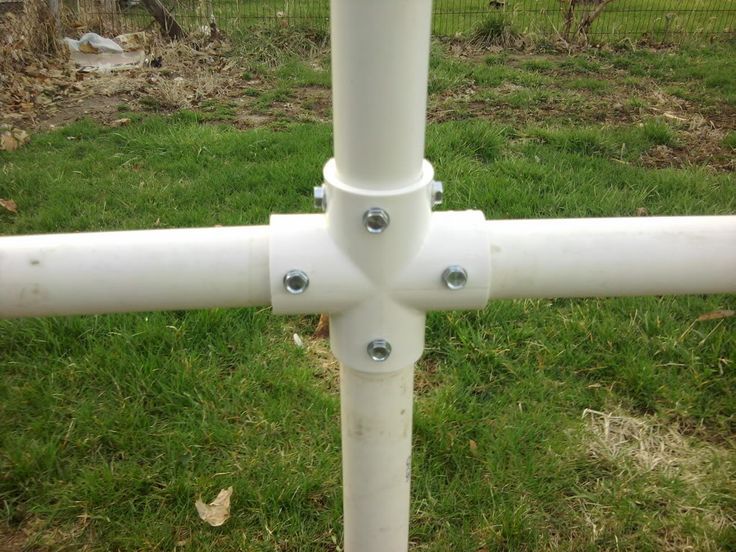
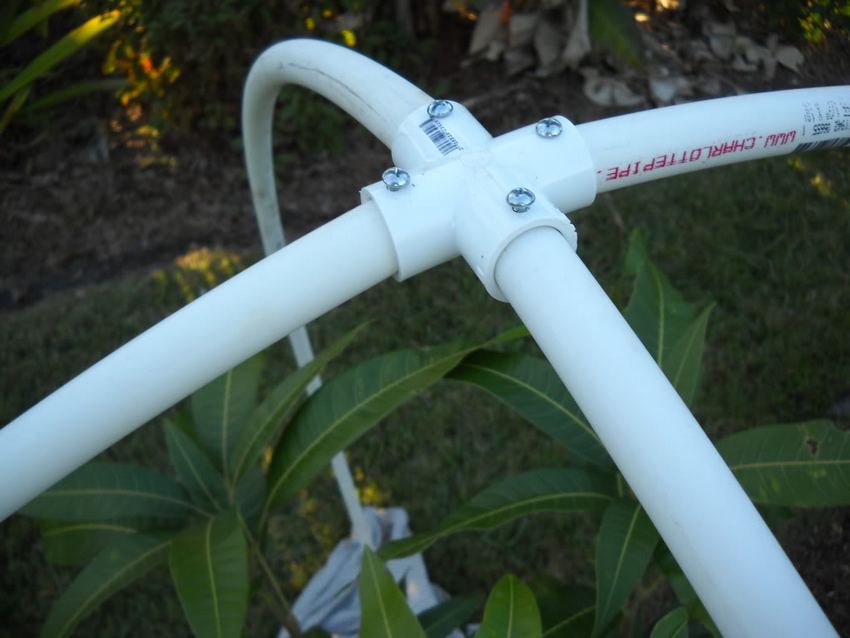
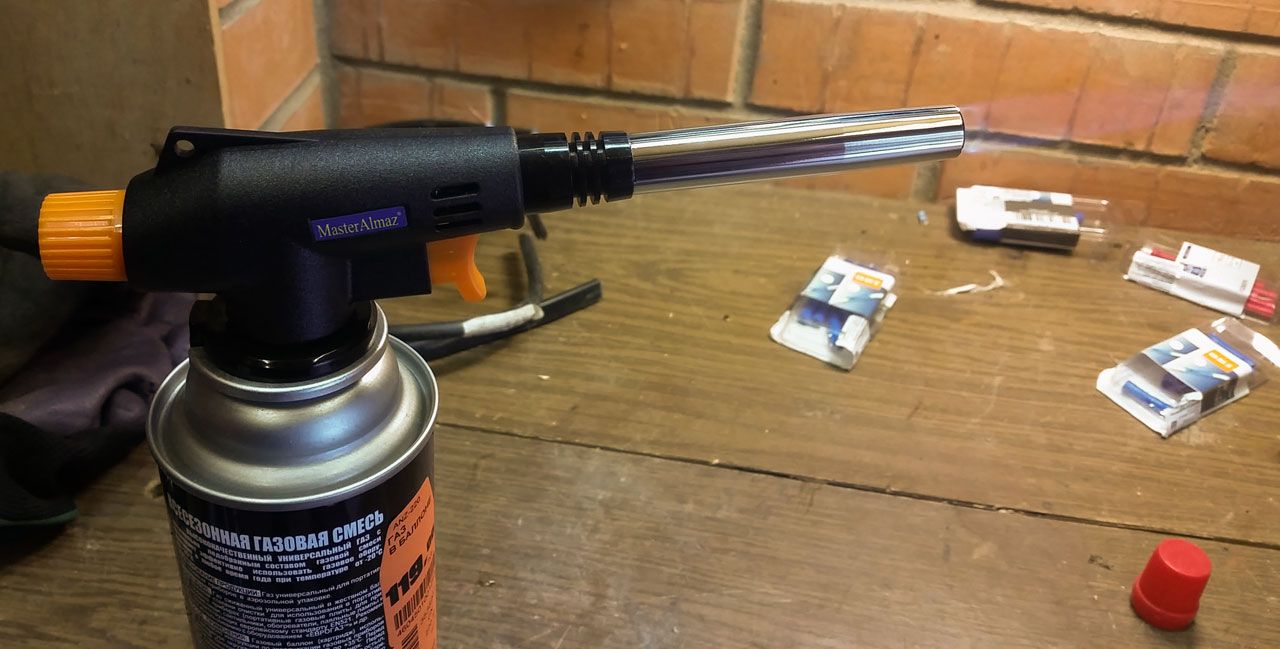
If you're planning to create a monolithic structure that you won't dismantle for the winter, it's best to connect the pipes using welding. Some materials only adhere to each other thanks to a strong alloy. This type of equipment can be rented at a construction market, but if you're completely out of options, you can use a gas torch as a heating device—the key is to be careful not to overdo it.
It's also recommended to trim the pipes with a special tool to avoid burrs. Alternatively, you can use a sharp utility knife and simply sand down any uneven ends.
Selecting a covering material
The covering material for a future greenhouse must meet a number of specific requirements:
- Possess high thermal insulation properties, especially if the use of the greenhouse is not limited to the warm season.
- It should be light-permeable and ideally have a protective layer that filters out harmful UV rays that can be detrimental to plants.
- Be resistant to temperature fluctuations and natural disasters. Russian weather is extremely unpredictable, so even the most reliable frame cannot guarantee protection for plants if the covering material is blown away by wind or hail.
- Withstand snow loads if dismantling the structure during the winter is not planned.
- Be light enough so that the frame does not deform under its weight.
Not all types of covering are suitable for greenhouses made from polypropylene pipes. Despite the relative ease of installation and durability of the structure, it is unable to support the heavy weight of glass. Therefore, it is impossible to attach old double-glazed windows or frames with glass to it. For the same reason, heavy plexiglass is also unsuitable. Lighter glass elements are highly likely to be damaged.
White agrofibre is also available. It's modern and versatile, but typically lasts only a season, and only with proper care. It has several advantages: it's breathable, eliminating the need for ventilation, prevents condensation from accumulating underneath, and offers excellent light transmission. The material is secured either with special connectors or by pre-sewn pockets along the width of the pipe, into which it is inserted. The agrofibre is secured to the foundation using corners and screws.
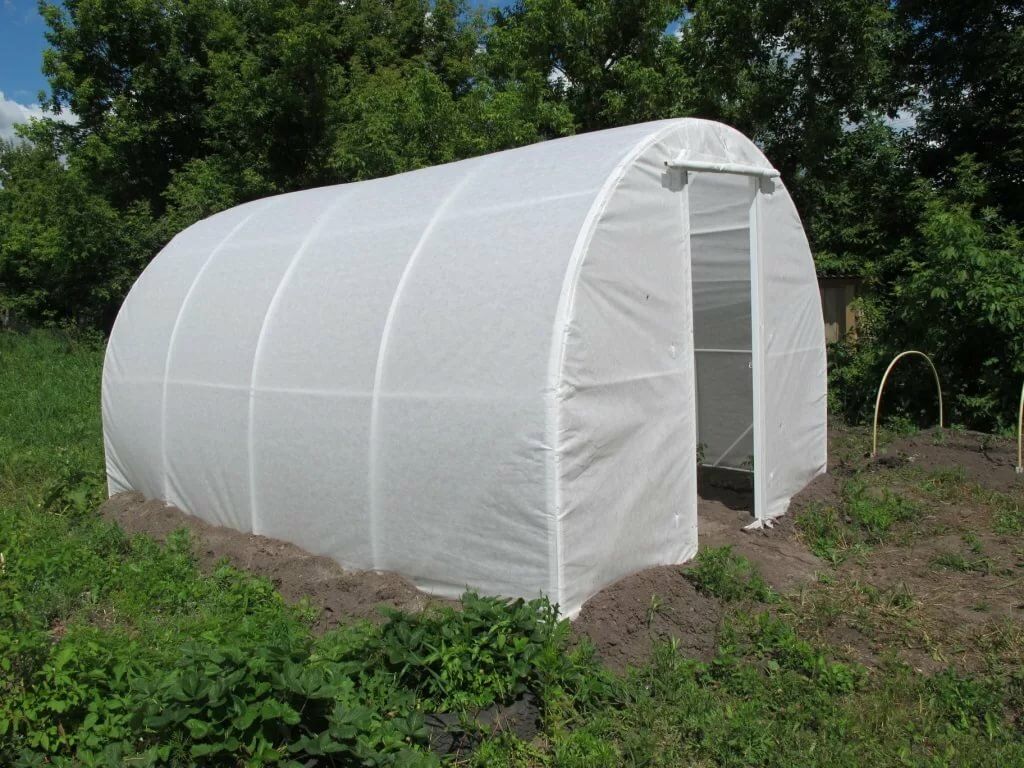
There are also two types of covering that are easy to install on pipes and are relatively lightweight. These are polyethylene film and polycarbonate, which we'll discuss in more detail.
Polyethylene film
It's the most cost-effective covering material option, making it popular among gardeners. It has a number of undeniable advantages:
- Easy installation. Indeed, what could be simpler than stretching the material around the perimeter of the greenhouse? It doesn't require much effort.
- Good light transmission. The film perfectly transmits sunlight, the amount of which can be adjusted in advance by choosing the option with a tinted coating.
- Weather resistance. Temperature fluctuations don't affect the film's strength; its high density makes it resistant to wind and rain. However, a thick layer of snow can cause it to rupture, so it's best to remove the film during the winter, let it dry thoroughly, and store it away until the following season.
- Good thermal insulation. The greenhouse film creates a greenhouse effect, preventing the soil from cooling even when the nighttime temperature drops sharply.
- Relative safety. Specialized polyethylene does not harm plants or affect soil quality even when in contact with it, as it does not decompose.
- Lightweight. The film can be attached to absolutely any type of greenhouse frame; it bears virtually no weight load.
- Low cost. Compared to other types of covering material, film is the most cost-effective.
Of course, the film also has a number of disadvantages:
- Low damage resistance. Any careless swing of a tool can cause a tear in the coating, which, however, can be easily repaired with ordinary tape.
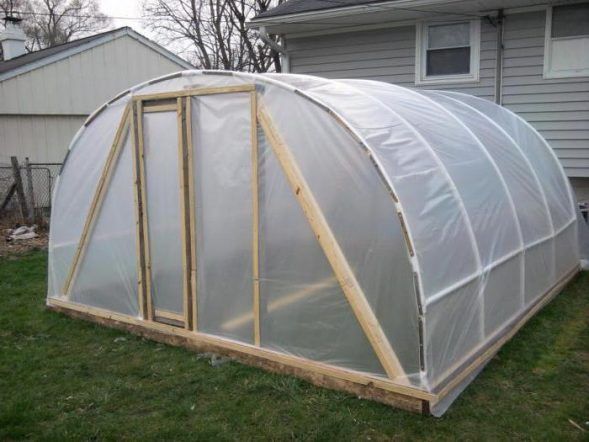
- Short service life. When exposed to sunlight, the film becomes thinner and more vulnerable, so its lifespan is extremely short—only 2-3 seasons with proper winter storage.
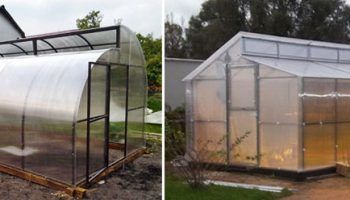
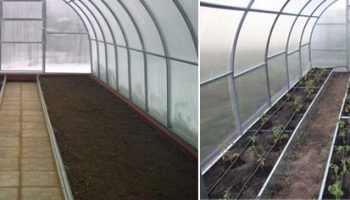
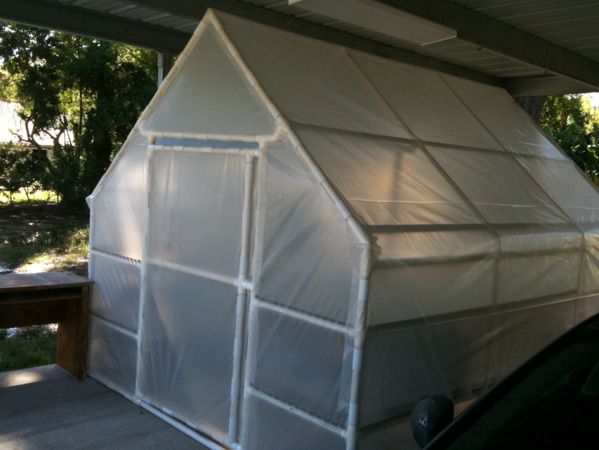
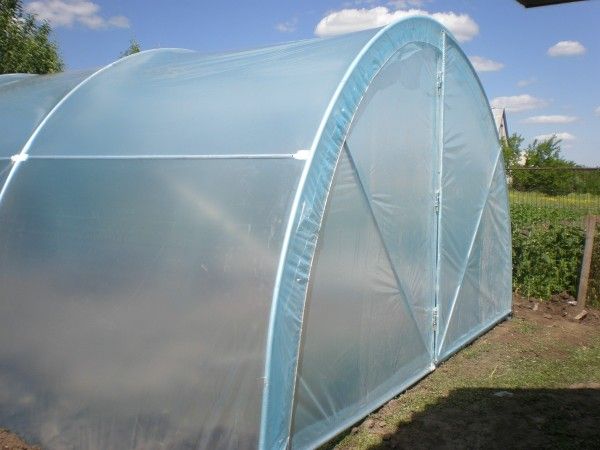
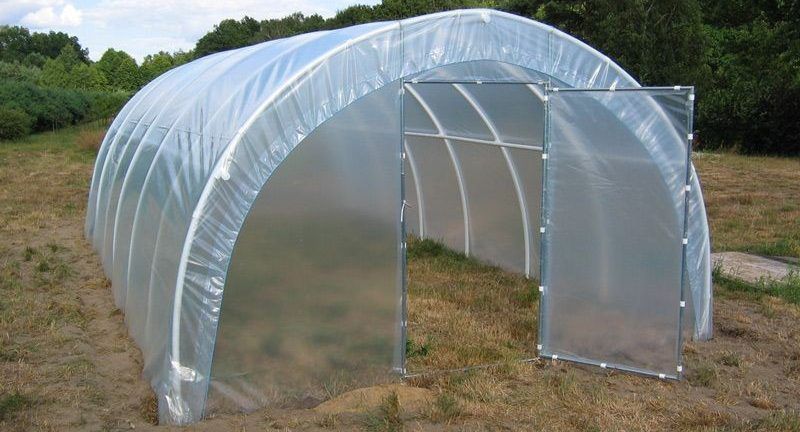
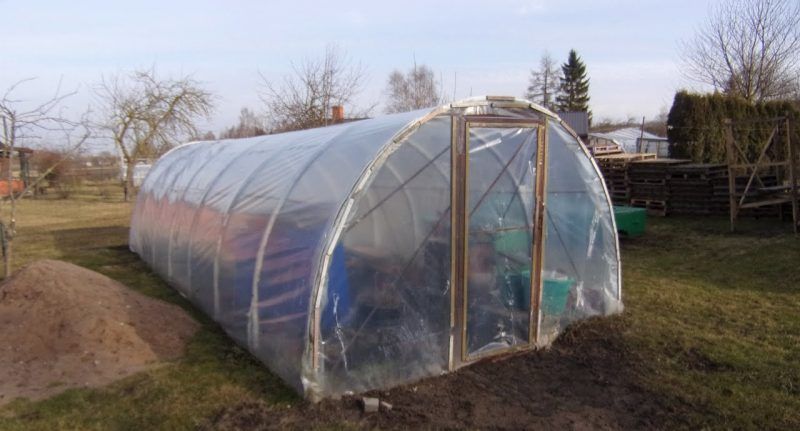
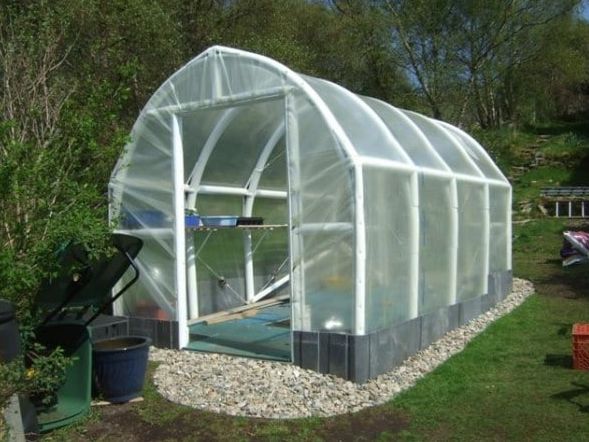
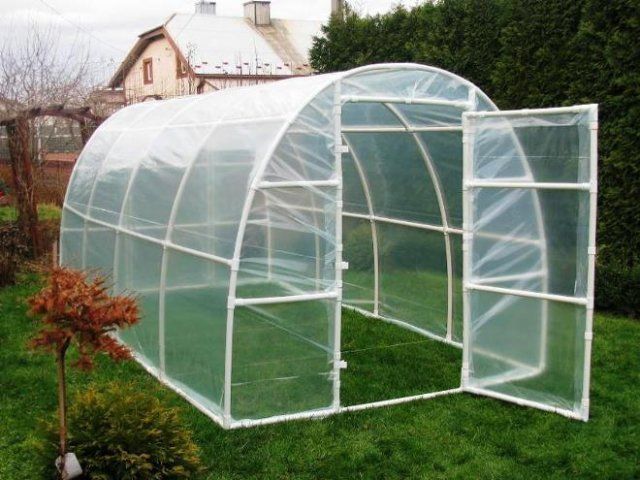
Photo gallery of greenhouse options with film covering:
Polycarbonate
The best covering material is polycarbonate. Its advantages fully justify the price.
- High light transmission. Polycarbonate transmits light very well, comparable to glass. Additionally, some manufacturers apply a special coating that blocks harmful UV rays. Sheets are available in completely transparent, opaque, or multicolored versions, in various thicknesses and textures.
- High strength. Polycarbonate is impervious to wind, hail, and even snow. It can withstand the weight of snow even in winter. Furthermore, it is quite resistant to various types of mechanical impact, as well as high humidity and rot.
- Flexibility. When handled correctly, polycarbonate can be bent, allowing it to be attached even to arched greenhouse structures. However, its capabilities are still limited, and it cannot be bent very far.
- Long service life. According to manufacturers, with proper care and handling, polycarbonate will serve faithfully for up to 20 years.
- Aesthetic appearance. Polycarbonate greenhouses blend seamlessly into any exterior, and you can choose a color that complements existing structures.
Like any other material, polycarbonate has a number of disadvantages:
- The material expands when heated and contracts when cooled, which is important to take into account when installing and drilling holes for fasteners.
- When working with polycarbonate, special thermal washers are required.
- The cost of the material is relatively high.
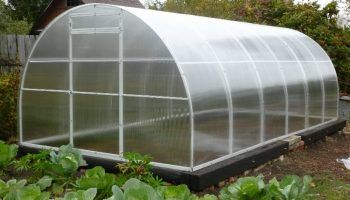
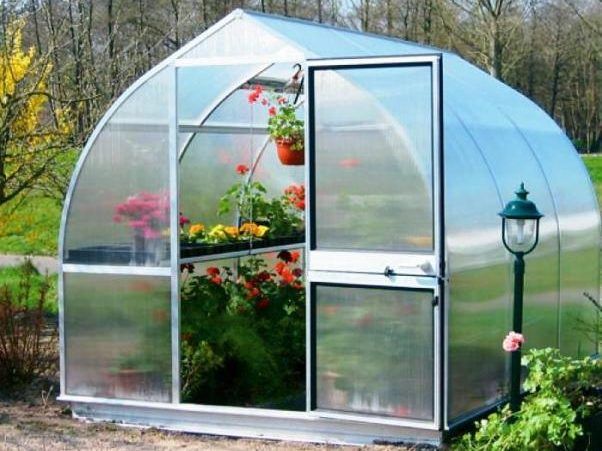
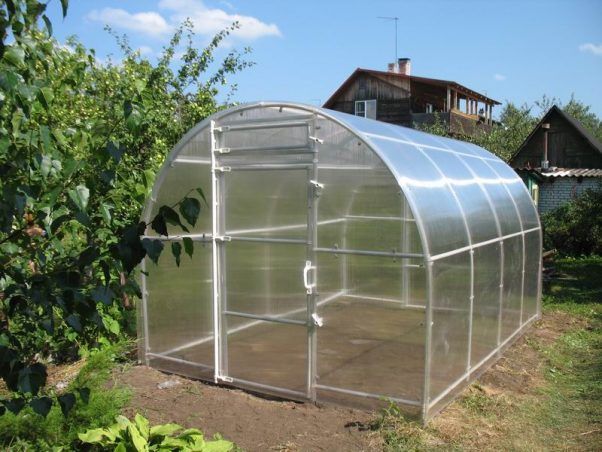
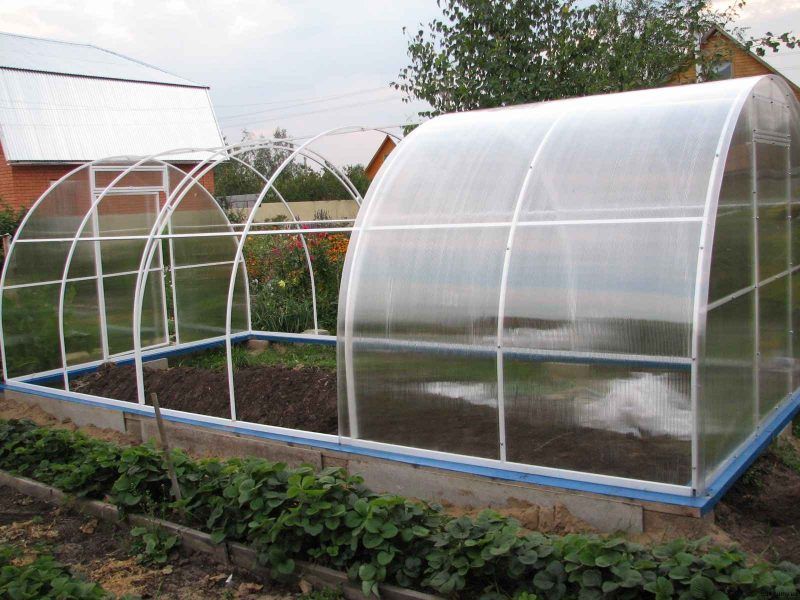
Photo gallery of polycarbonate greenhouses:
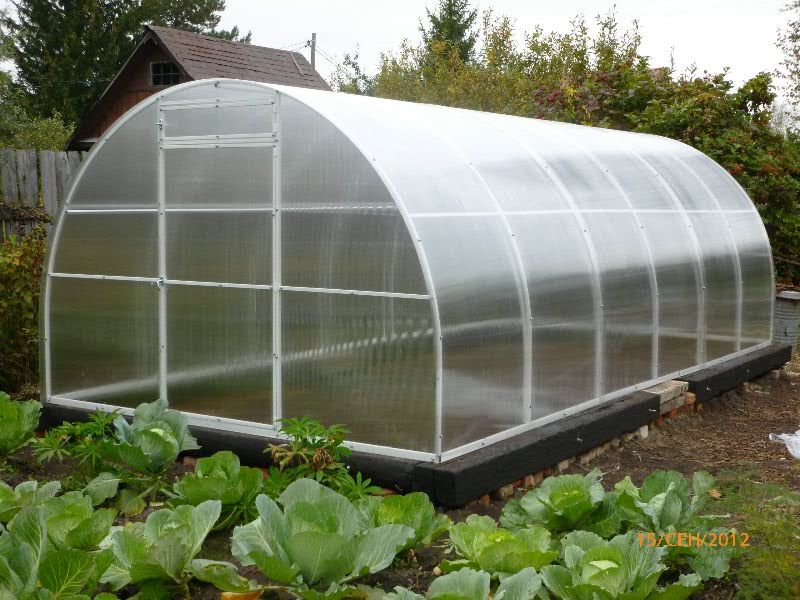
Calculation of the required number of polypropylene pipes
Let's look at an example. We'll perform calculations for a drawing with 7 arcs.
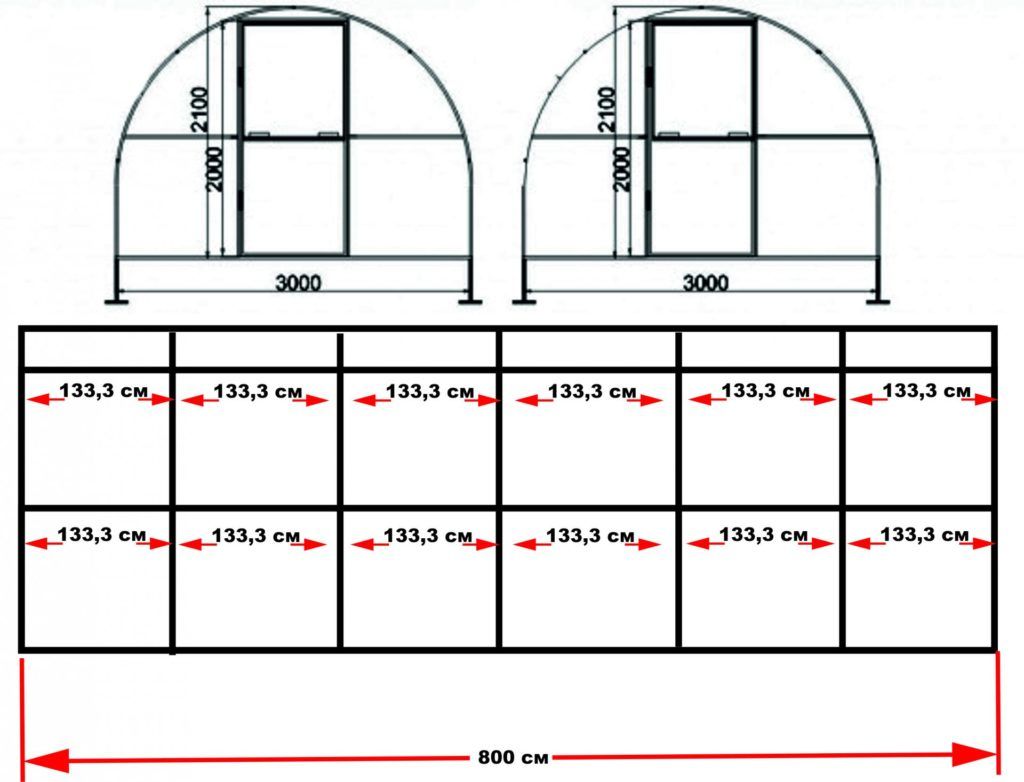
We need to calculate the length of the arc, for this we will need the Pythagorean theorem and Huygens' formula:
- To calculate the length of an arc, its dimensions, width and height are needed.
- In the following diagram, the arc is highlighted in blue, with two red right triangles inside it. In each triangle, one of the sides (AD and BD) forms the unknown value of the hypotenuse, denoted by the letter m.
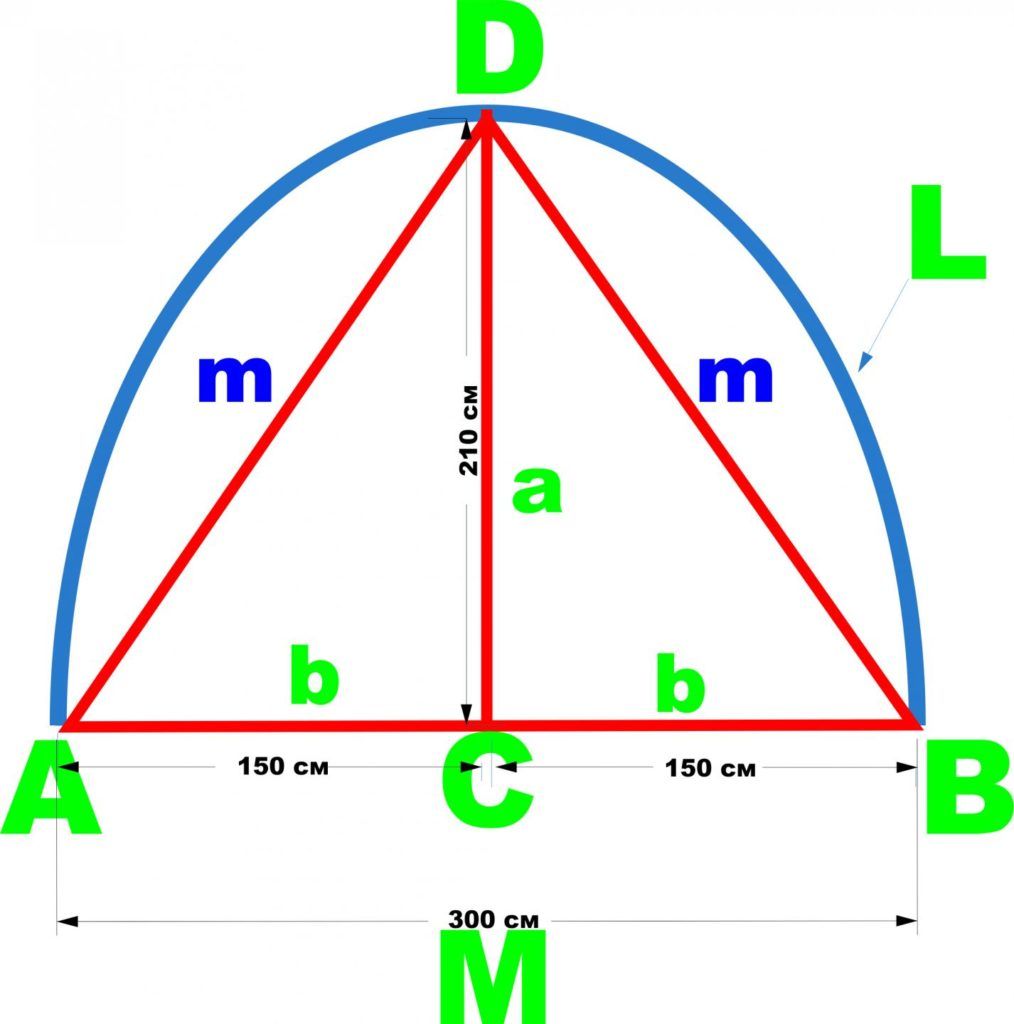
- So, we calculate the length of the hypotenuse m: m = √b² + a² = √210² + 150² = √44100 + 22500 = √66600 = 258.07 (cm).
- Now we substitute the values into Huygens' formula L ≈ 2m + (2m - M) : 3. It turns out: L ≈ 2 x 258.07 + (2 x 258.07 - 300) : 3 = 516.14 + (516.14 - 300) : 3 = 516.14 + 216.14 : 3 - 516.14 + 72.05 = 588.19 (cm).
- Next, we calculate the total length of all the arcs. There are 7 in total. Total: 588.19 x 7 = 4117.33 (cm).
- Our arched structure needs to be reinforced with five cross pipes; these will act as stiffeners. Their total length needs to be calculated: 800 x 5 = 4000 (cm). The total length of polypropylene pipes required is: 4117.33 + 4000 = 8117.33 (cm).
Calculating the required amount of polycarbonate or film for covering
To calculate the required amount of cladding material for an arched structure, you need the length of the arch and the length of the future greenhouse itself. Multiply them together to get the area. This is the amount of material we actually need. The same principle applies to calculating the polycarbonate for the roof and gables. If you choose polyethylene film as the covering, you need to add some extra material. After stretching it, there should be at least 50 cm of excess at the base; these edges should be weighed down with bricks or dug in.
For example, the length of the arc is 588.19 cm, and the greenhouse is exactly 800 cm. In this case, our formula for the required quantity polycarbonate: 588, 19 x 800 = 470522 sq.cm or 47.06 sq.m.
Films We need some extra, so we calculate its quantity like this: (588.19 + 2 x 50) x 800 = 550552 sq.cm or 55.06 sq.m.
We make greenhouse gables from OSB boards or cellular polycarbonate. If you plan to use film for these as well, you'll need more film.
Calculating the foundation for a greenhouse made of polypropylene pipes
Various types of foundations are used for greenhouses made from polypropylene pipes: slab, columnar, strip, and strip-and-pile. If the greenhouse is planned to be portable, a wooden foundation made from beams can also be used.
Let's make a calculation for the concrete foundation needed for a capital structure.
To calculate everything correctly, we will need calculation formulas:
- volume of a cube: V = h³, where h is the length, width, and height of the foundation. It can be used to calculate slab, strip, and partial strip-pile foundations.
- cylinder volume. V = π x R² xh, where π = 3.14 (expresses the ratio of the circumference to its diameter), R is the radius of the circle, and h is the height of the cylinder. This formula is used to calculate the volume of a columnar foundation.
Calculates for different types of foundations:
- Slab foundation with parameters 30x300x800 cm: 0.3 x 3.0 x 8.0 = 7.2 m³
- Strip foundation with two sides 30x20x800 cm and two 30x20x260 cm: 0.3 x 0.2 x 8 - 0.48 m³ and 0.3 x 0.2 x 2.6 = 0.16 m³. Add it up: 0.48 + 0.16 - 0.64 m³.
- A columnar foundation with the following parameters for one column: height 70 cm, diameter 30 cm. 3.14 x 0.3 x 0.7 = 0.6594 m³. We get the total foundation volume: 0.6594 m³ multiplied by the number of columns.
Calculation of the required amount of reinforcement for the foundation
We don't want the foundation to simply crack in a few years, so we're reinforcing it. Before pouring the concrete, we're laying a 3D metal frame made of 8-10 mm thick rebar.
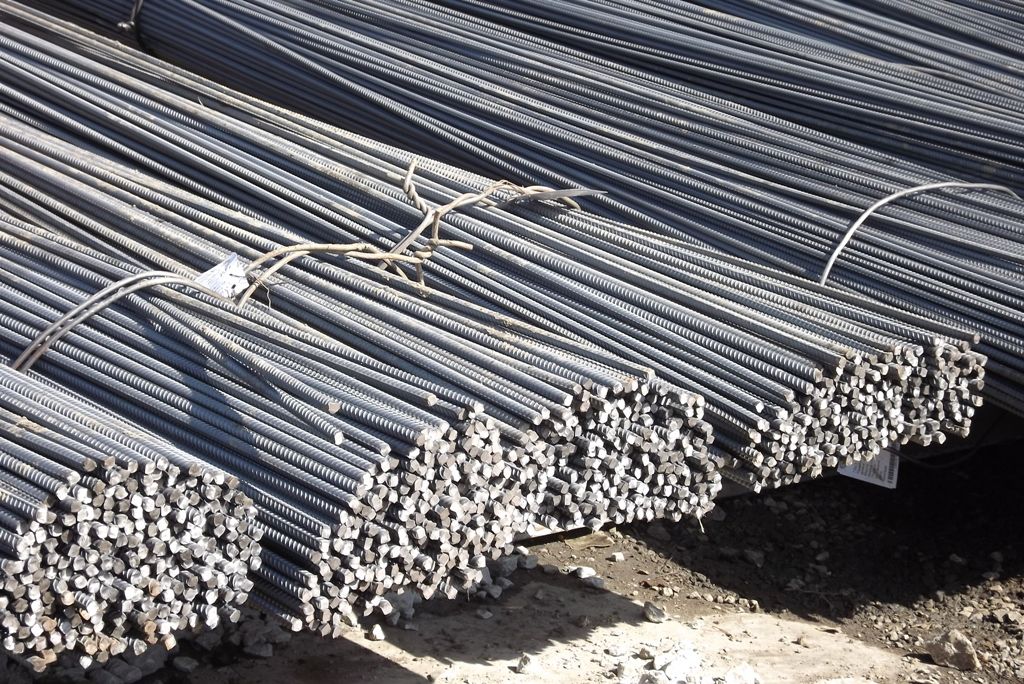
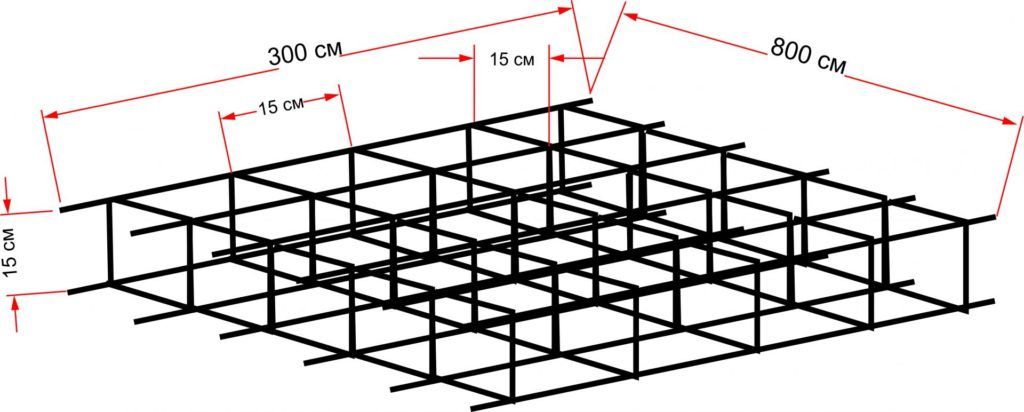
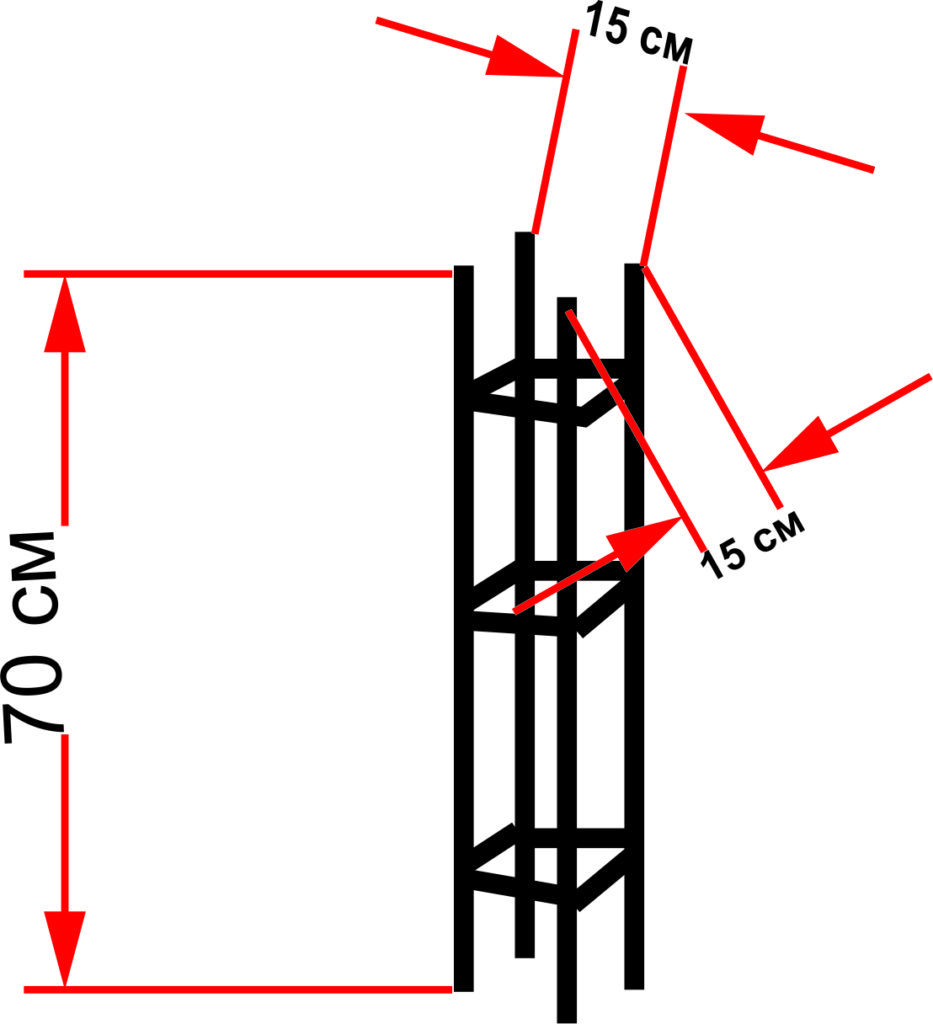
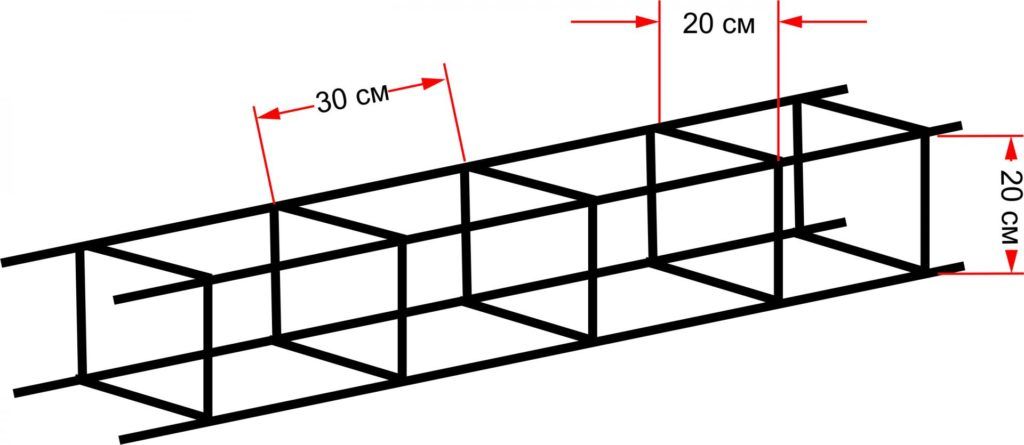
In a finished slab foundation, the cell width is 15x15 cm. If the foundation is a strip foundation, a three-dimensional structure is required, consisting of four horizontal bars connected by square reinforcement structures measuring 20x20x20x20 cm. For a columnar foundation, the same structure is required, but with connecting elements (strapping) measuring 15x15x15x15 cm and 70 cm in length. Let's take a closer look at each type of foundation.
Slab foundation
The reinforcement is in the form of a lattice. To determine the amount of reinforcement, divide the length and width of the base by the distance between the bars in the cell:
- Length: 8 : 0.15 = 53.3 pcs.
- Width: 3 : 0.15 = 20 pcs.
- Total length of reinforcement. Multiply the number of rods by the length and width of the greenhouse. Substitute the values: 53.3 x 3 = 159.9 m, and 20 x 8 = 160 m.
- We add the values: 159.9 + 160 = 319.9 m, rounded up to 320 m.
Columnar foundation
- The length of the reinforcement for the production of vertical frame elements for one column: 0.7 x 4 = 2.8 m.
- The length of the reinforcement for the production of one frame strapping element: 0.15 x 4 = 0.6 m.
- Length for three elements: 0.6 x 3 = 1.8 m.
- Length for making a reinforcement frame for one column: 2.8 + 1.8 = 4.6 m.
Strip foundation
To calculate the total amount of reinforcement, it's best to calculate each side separately. We'll calculate sides that are 800 cm long each:
- Since the volumetric structure consists of four horizontal rods and connecting elements, you need: 800 x 4 = 3200 cm.
- For two sides you need: 3200 x 2 = 6400 cm.
- Now let's calculate how many connecting elements will fit into this length (800 cm). The distance between each of them is 30 cm. Substitute the values: 8 : 0.3 = 26.7.
- For two such sides you need: 26.7 x 2 = 53.4 pcs.
- Now let's find the length of the reinforcement to make one connecting element: 0.2 x 4 = 0.8 m.
- Let's multiply this value by their total quantity: 0.8 x 53.4 = 42.72 m of reinforcement will be required to make connecting elements for two sides 800 cm long.
We calculate the other two sides using the same principle:
- 300 x 4 = 1200 cm is the length of horizontal rods for a side of 300 cm.
- 1200 x 2 = 2400 cm is their total length on both sides.
- 3:0.3 = 10 pieces - this is the number of connecting elements on a side equal to 300 cm.
- 10 x 2 = 20 pieces - this is their total number in two such sides.
- 20 x 0.8 = 16 m is the length of reinforcement bars required to make connecting elements for both sides.
- Now let's calculate the total amount of reinforcement required for the entire foundation perimeter, in meters. Add the resulting values: 64 + 42.72 + 24 + 16 = 146.72 meters of reinforcement needed to strengthen the strip foundation.
What other materials will be needed?
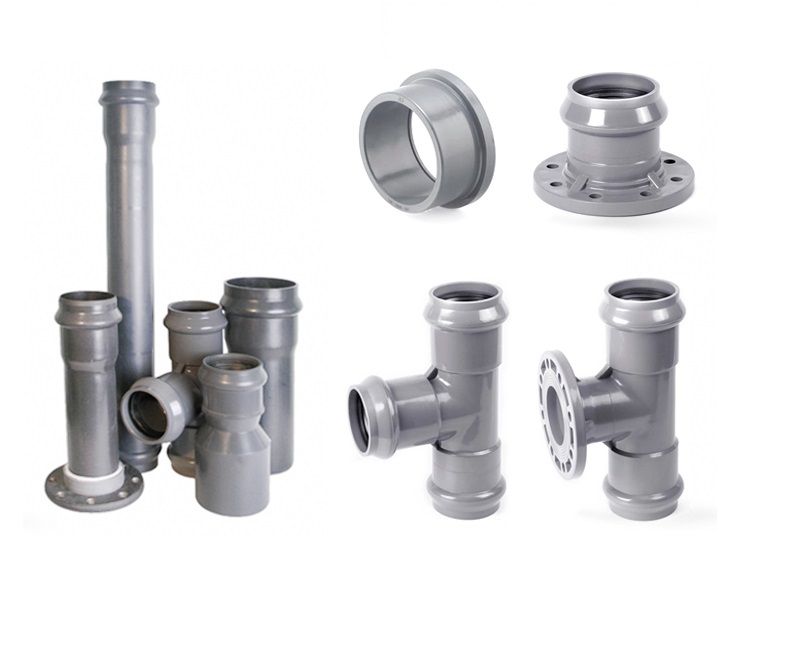
- wire or fittings made of polymeric materials will serve as connecting elements for the frame made of polypropylene pipes;
- reinforcement rods with a diameter of 10 to 12 mm and a length of 70 to 90 cm, to which the greenhouse frame will be attached;
- wooden blocks with a cross-section of 100x50 mm, if you plan to make a light base.
Tools
- garden drill;
- scoop and bayonet shovel;
- measuring tape;
- stakes with cord;
- hammer;
- stapler;
- hacksaw;
- sharp knife;
- screwdriver;
- soldering iron for plastic pipes;
- welding machine;
- concrete mixer;
- construction hose for delivering concrete mix;
- large square;
- plumb line;
- building level;
- electric drill;
- file;
- scissors;
- pencil.
Step-by-step instructions for building a greenhouse from polypropylene pipes yourself
Once the drawings have been completed, all the components for the future structure have been purchased, and the tools have been prepared, you can begin installing the greenhouse. We offer a step-by-step guide for constructing an arched structure on a strip foundation using polycarbonate as a covering material.
It all starts with determining the location and marking it to begin work on creating the foundation:
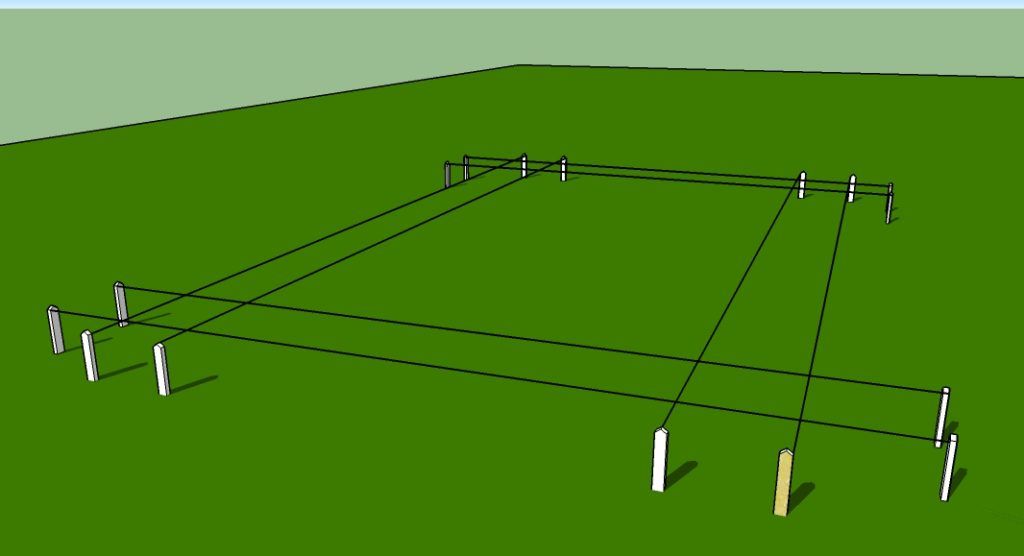
- First, stakes are driven into the ground roughly. Then, precise distances are marked using a tape measure and level. String is stretched between the stakes, crossing each other at a precise 90-degree angle. At this stage, it's important to measure everything carefully, as accuracy will determine how closely the future greenhouse will match the dimensions in the drawing. You'll need 16 stakes and 8 pieces of string.
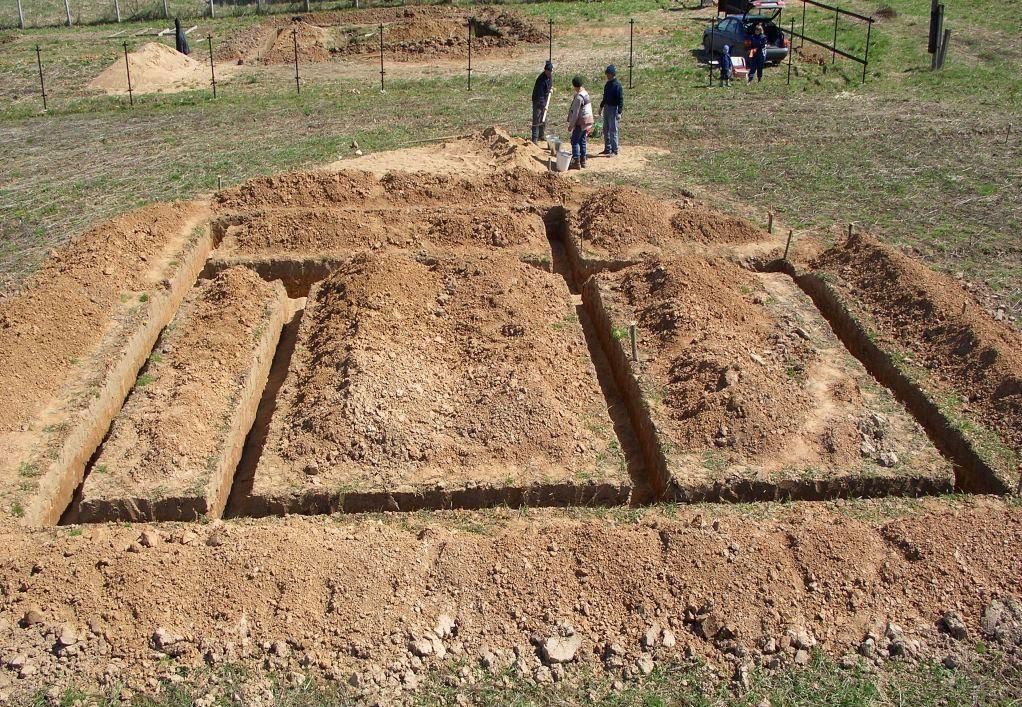
- Using a sharp shovel, remove the top layer of soil. This is also called fertile soil. It will make an excellent filler for future garden beds.
- A level trench about 30 cm deep is dug between the strings. If you feel the trench is too sandy and its walls are about to collapse or have already begun to slide inward, reinforce them with polyethylene or any other insulating material.
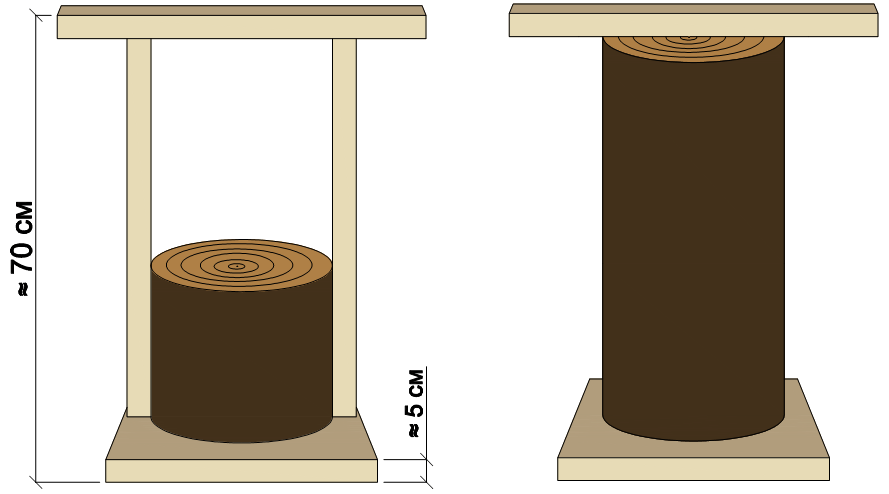
- Once the trench is dug, its bottom needs to be thoroughly compacted. Experienced gardeners have even come up with a special device for this: a light log with a board or block attached to it, with edges extending beyond the cut. If the log is small, a wide, square board slightly smaller than the width of the trench can be attached to its working end to speed up the work. Grasp this "know-how" by holding the board at both ends with both hands and begin compacting the soil, like a jackhammer.
- After preparing the bottom surface, add about 10 cm of sand. It's best if it's slightly damp.
- Next, we pour a 5-centimeter layer of fine gravel.
- An insulating material, such as roofing felt, is laid on top of the gravel around the entire perimeter.
- To prevent the mortar from spreading after pouring, it's necessary to additionally reinforce the trench walls with formwork. Edged boards, thick moisture-resistant plywood, or OSB board are all suitable for this purpose. When installing the formwork, it's important to ensure that the structure is approximately 5-10 cm above ground level.
- Concrete mortar can swell the edges of the formwork if it isn't additionally secured. To achieve this, wooden cross braces are inserted into the interior of the structure, and the outer formwork walls are additionally secured with stops. The interior of the formwork walls is lined with an insulating material, such as film, to prevent the mortar from sticking to the wooden elements.
- The next step requires a welding machine, as we need to reinforce the future concrete foundation so it has the correct shape and will last for many seasons. For this, we need to prepare rebar. Any size is acceptable, but a thickness of 0.8 to 1.2 cm is considered optimal. You can weld a monolithic structure along the entire length of the trench, or you can divide the work into phased production of square rebar elements, which will then only need to be secured to the horizontal guides with clamps.
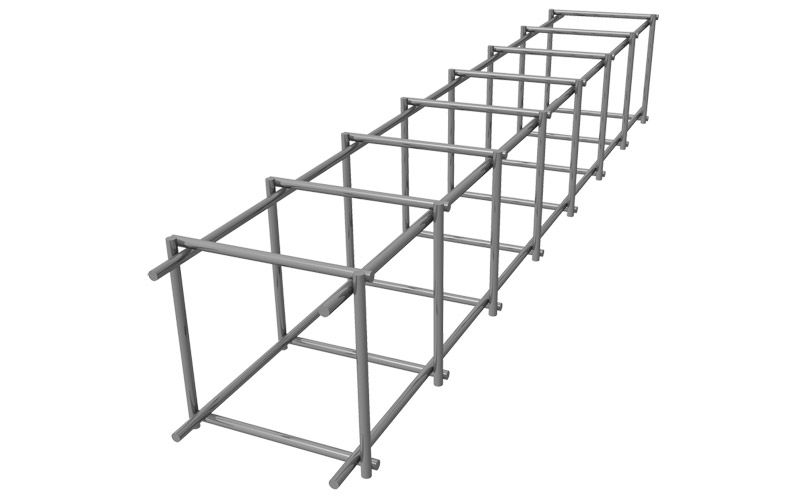
- Once the welding is complete and the rebar frame is fully assembled, it is placed in the trench without touching the bottom. This can be achieved in two ways: by placing it on broken bricks or by driving rebar into the bottom and welding the frame to it. The choice is yours.
- Once the frame is in place, additional 12mm-wide, 80cm-long reinforcement rods are attached to it, extending approximately 40cm above the future foundation. Polypropylene pipe arches will be strung onto these rods later, so be sure to check the drawing beforehand, carefully marking the placement of the greenhouse arches.
- The prepared concrete mix is poured into the formwork. Plan to pour the entire perimeter of the foundation in one day, otherwise the structure may lose its strength. Make sure the concrete is free of bubbles, and if any are detected, break them up to prevent air pockets, which can make the foundation brittle. If you have a special deep vibrator, use it; it will make the job easier. If you don't have one, no problem. Take any available long, thin rod. This could be rebar, pipe, or thin timber. Insert the rod into the concrete where the bubbles are and carefully pull it out.
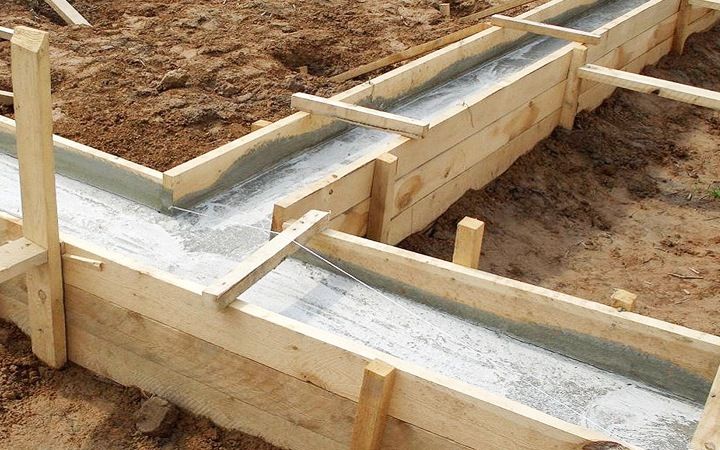
- Once the concrete surface is completely free of bubbles, it must be thoroughly leveled, for example, with a wide trowel. Once maximum smoothness is achieved, the foundation is covered with plastic film over the formwork until it dries completely. This film is used to ensure the concrete dries more evenly and prevents excess moisture from evaporating prematurely.
- It takes approximately 8 days for the concrete to dry completely; during the first two days, it is necessary to periodically moisten it with water.
- Once the concrete has completely hardened, the formwork can be dismantled, and the foundation surface should be cleaned of any debris and dust that has accumulated during the period of inactivity.
- The foundation is ready, we can start making the frame.
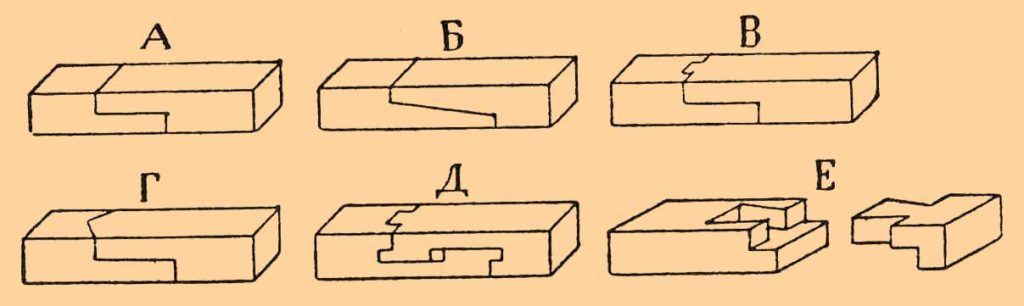
- A wooden base is made for a greenhouse made of polypropylene pipes, to which both the frame elements and the covering material are easily attached. For this, you'll need four 100x50 mm beams, pre-treated with a special mold- and pest-resistant compound. Based on the greenhouse's dimensions, beams of the required length and width are assembled into a rectangle. This can be done using corner brackets and screws, but experienced gardeners recommend inserting the beams end-to-end using decorative cutouts. This method is certainly more involved, but it is more reliable and watertight.
- Holes are drilled around the entire perimeter of the wooden frame so that it can be placed on top of the foundation and the reinforcement protruding from it can easily pass through these holes.
- The concrete foundation is covered with a waterproofing material, such as roofing felt.
- A wooden frame is installed, from which, if the calculations are correct, the reinforcement will protrude.
- Polypropylene pipes are bent into an arc and carefully placed onto the fittings.
- Once all the arches are in place, the structure needs to be reinforced. To do this, polypropylene pipes are bolted to the arches along the entire length of the greenhouse, parallel to the foundation. This is done from the inside to ensure there is no interference when attaching the covering material later.
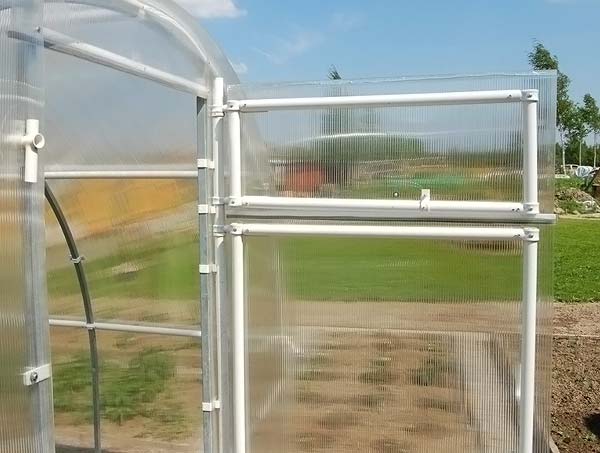
- Pipes are cut to the required dimensions according to the drawing's dimensions, and the door frame is assembled using fittings and fasteners. It is attached to the front of the greenhouse using lightweight hinges.
- The greenhouse door and window are also constructed from polypropylene pipes. They can be either a single structure or installed separately.
- Now let's move on to installing the covering material, in our case polycarbonate. Two things to keep in mind: If you used sheets with a UV-protective layer, ensure it's positioned on the outside of the greenhouse. When drilling holes for screws, it's important to consider the material's properties, such as its deformation due to temperature fluctuations. To prevent the sheet from cracking in hot weather, make the holes slightly larger than the diameter of the screw.
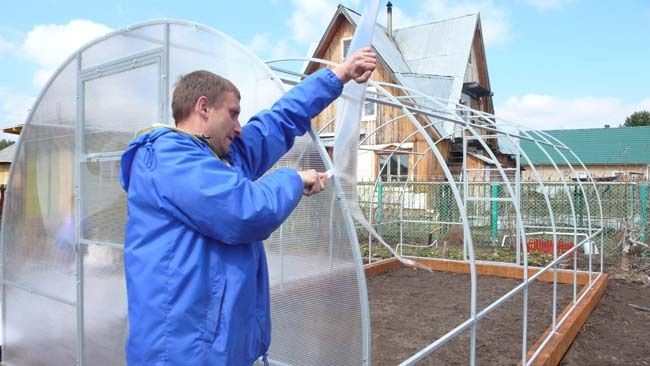
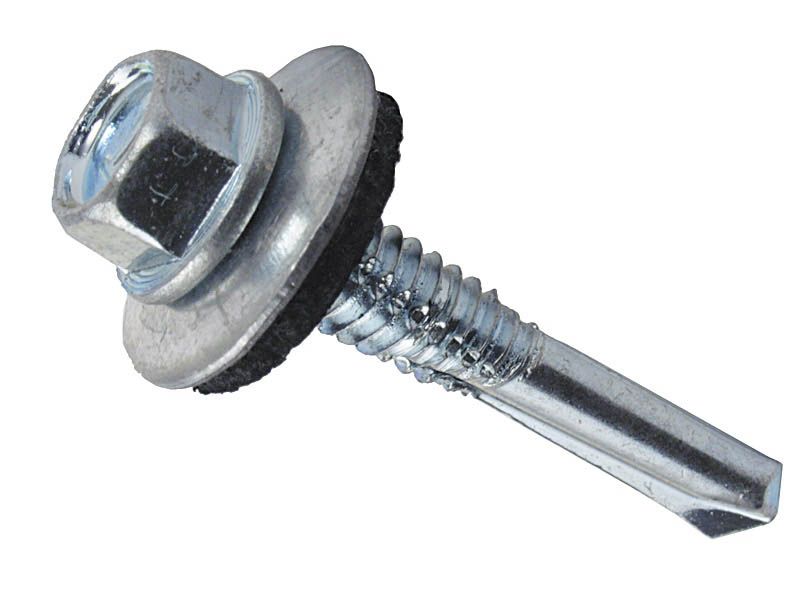
- Polycarbonate is a fairly brittle material when drilled, so it's best to use a special type of screw with a rubber washer. This not only prevents the sheet from cracking at the joint but also provides additional waterproofing for the hole.
Our greenhouse is ready!
Options for ready-made greenhouses
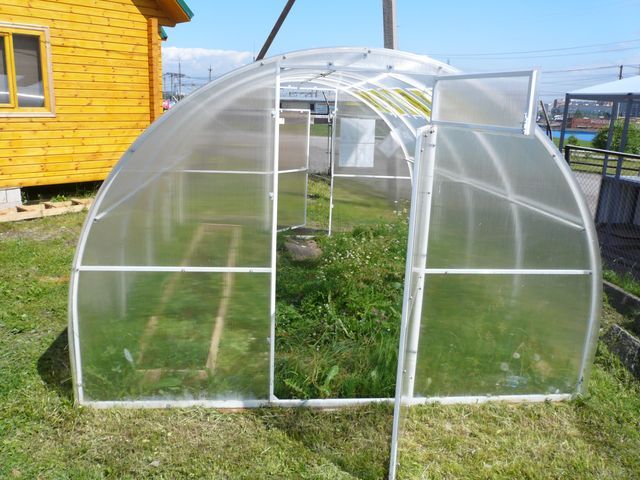
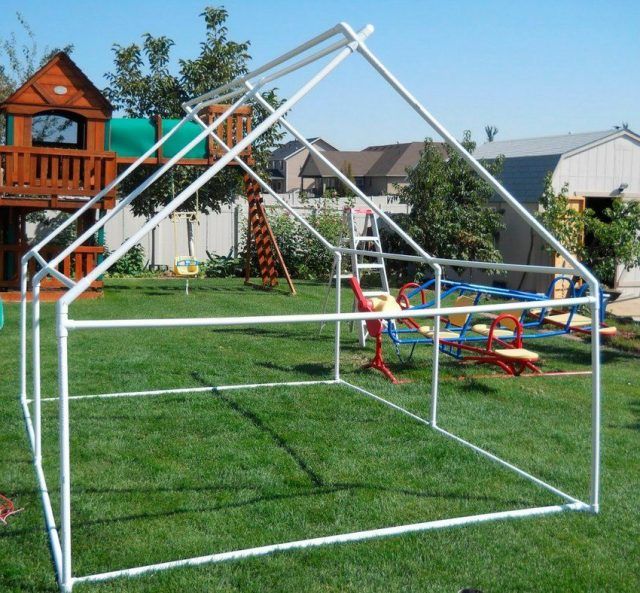
Polypropylene pipes, thanks to fittings and hinges, can take on the most bizarre shapes, opening up unlimited space for the designer's imagination.
In regions with unfavorable weather conditions, greenhouse houses can be additionally reinforced with crossbars made of pipes, which are easily attached to the main frame using connectors.
When drawing a plan for your future greenhouse, use the standard dimensions of materials available in stores as a guide. If a polycarbonate sheet is, for example, 3 meters wide, there's no point in making a greenhouse 3.10 meters high and then having to figure out how to add the missing centimeters without compromising the airtight seal.
A greenhouse without a separate door is only suitable for seasonal growing, as it is virtually impossible to maintain heat during the cold nights at the end of summer.
For more complex designs, support posts can be created from wider, stronger pipes, or even processed wooden beams can be used.
Useful tips for beginners
For those planning to build a greenhouse for the first time, experts have provided some helpful tips:
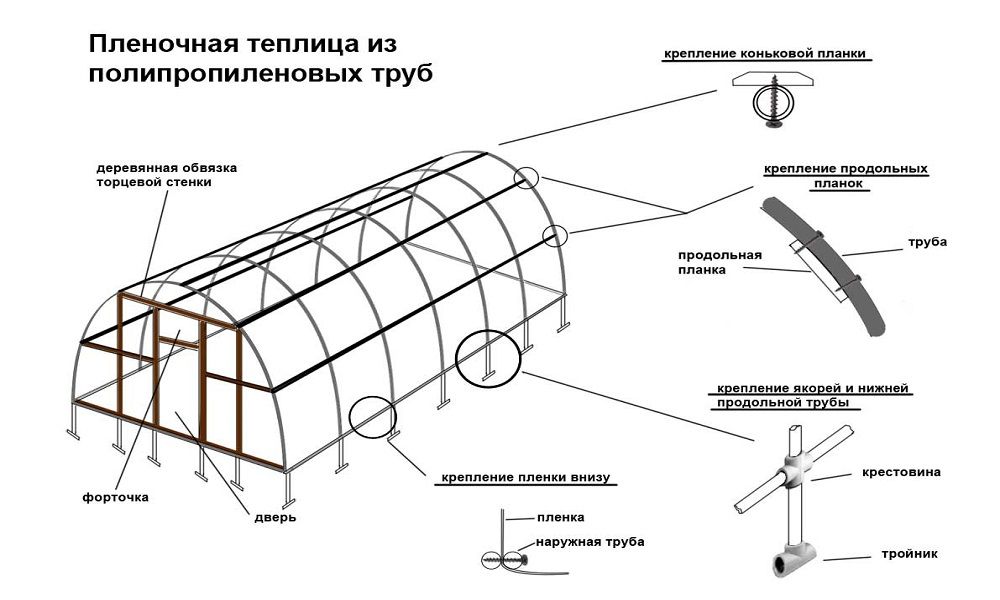
You can download the finished design drawings from our article. Don't go with the easiest option. It will require just as much effort, and the lack of a vent as an additional element of the ventilation system can have a detrimental effect on the plantings. Here's another drawing:
- The optimal location for a greenhouse, and therefore for its beds, is considered to be north-south. This will allow the plants to receive maximum light while minimizing drafts and frost damage.
- Pipes are a very lightweight material. Therefore, all your efforts to painstakingly and securely connect the elements can be wasted in strong gusts of wind if the greenhouse doesn't have a reliable foundation and base.
- When working with polycarbonate, use thermal washers. They will help seal the fastening points and protect the covering material from deformation and cracking that can occur due to temperature fluctuations.
- Don't remove the protective film from the polycarbonate until you're sure the entire structure is fully assembled. This material is easily damaged and scratched, which could ruin the appearance of your structure.
The price of a homemade greenhouse made from polypropylene pipes
In any case, building a greenhouse yourself is much cheaper than buying a ready-made one. Suitable pipes start at 15 rubles per meter, and an average greenhouse will require at least 60 meters. An additional 5% should be added for scrap and any remaining material. Polycarbonate costs start at approximately 2,000 rubles per three-meter sheet.