If you want to learn how to properly grow coleus from seed at home and what you need, read this article. We'll cover all the details. But first, a few words about the plant itself.
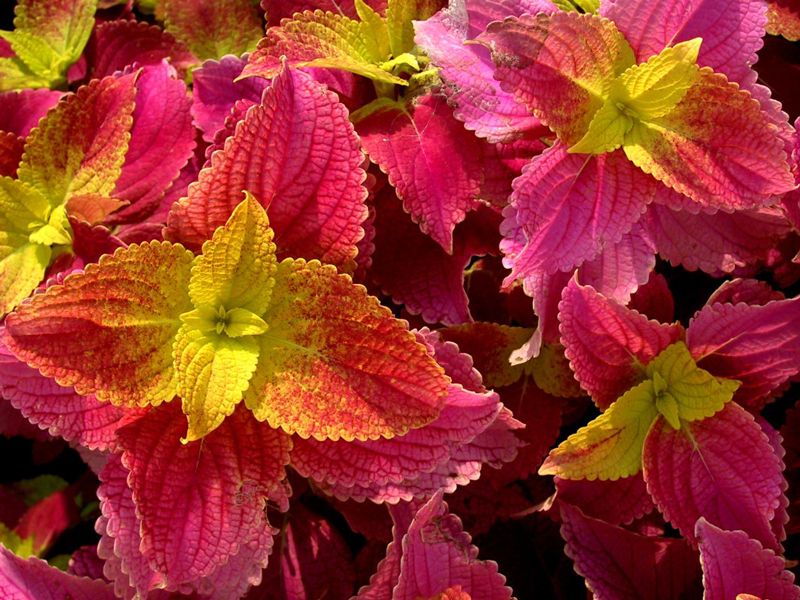
Coleus is often called the ideal garden flower: it's hardy, undemanding, easy to care for, and highly decorative. By combining different varieties with different leaf colors, you can create stunning flowerbeds or borders that are impossible to take your eyes off.
Growing coleus from seeds at home
The flower belongs to the Lamiaceae family, and its closest relatives are mint and nettle. This explains its second name, stinging nettle. In England, the plant is called the poor man's croton or the poor man's croton.
Over 200 species of this perennial plant, including shrubs, grow in the wild. Breeders have added varieties and hybrids with unusually colored leaves, making counting them difficult. The most popular nettles among gardeners and professionals are:
- Coleus Blumei (Solenostemon scutellaria) – a line of cultivars of varying heights. Notable examples include the white-and-green Candidum, the dwarf mosaic-colored Sabr, the red-leaved Wizard Scarlett, and the green-cherry Wizard Pineapple. This species prefers partial shade.
- Vershaffelt is a variety of Blume with very large, up to 20 cm long, raspberry-red leaf blades with a green mosaic border.
- Black dragon in rich purple tones.
- Fantasy with a soft pink center of the leaves.
- A magical sunset that combines many shades of red.
- Dark chocolate of a lilac-brown color, sometimes with a thin green border.
- Freckles with bright yellow-orange spots of irregular shape.
- Saturn is a striking exotic of emerald green color with a dark burgundy border.
- Collins Gold has dissected leaf blades in sunny shades and a green stripe along the central vein.
- Many other varieties of the most varied tones and intensities of tones, with whole and dissected leaves, erect and hanging, meter-high and 10-centimeter dwarfs.
The nettle's flower panicle is rather inconspicuous, faded, and practically gets lost against the background of the luxuriously painted other parts.
Croton 'poor thing' is usually propagated indoors by cuttings or seeds. In both cases, the process is straightforward for gardeners, even if this is their first plant.
Sowing dates
In its native Africa, the plant is a perennial. In our latitudes, it is grown in gardens as an annual, since any propagation method yields excellent results. It is also grown indoors as a perennial, renewing the plant every two years. A natural characteristic of coleus is its degeneration in its third year.
The optimal time is considered to be spring, from March to April. The exact timing is determined by climate conditions and the weather forecast—nettles thrive in warm weather. Seedlings that emerge from seeding during this period will receive ample light. By the time of the seasonal heating outage, which is critical in many regions, they will have grown strong enough to withstand temperatures down to 26–18°C without any problems.
To decorate a garden plot, you can sow seeds for seedlings in winter or fall, but you'll need to provide light for the seedlings and carefully maintain the required temperature. If the "poor man's croton" is growing on a windowsill or balcony, any time will do, but additional lighting will be necessary in the fall and winter.
Often, gardeners coordinate their planting dates with the lunar calendar, trying to plant while the night light is in the growth phase.
Selecting seeds
Gardeners purchase planting material in specialized stores, collect it themselves, or receive it from neighbors and friends.
It is important to remember that the seeds of hybrid varieties are unpredictable; the main decorative feature of coleus—the color of the leaf blades—will be completely unexpected in young plants; parental characteristics will be repeated in isolated cases.
A similar situation occurs when growing seeds that were collected from existing flowers – they are prone to cross-pollination.
Therefore, to obtain "pure-bred" plants, purchased seeds or cuttings are used. Those who enjoy the unexpected readily use seeds of unknown origin and even experiment with cross-pollination.
Necessary soil
Commercially available soil mixtures—universal or for flowering plants—are suitable for germination. Sometimes, a homemade soil mixture is created using the following formula:
- 1 part garden soil;
- 1 part river sand;
- 1 part universal soil for seedlings or peat.
Another option for nutrient substrate:
- 1 part peat;
- 1 part humus; 1 part sand;
- 1 part dry sphagnum.
All components are disinfected and mixed thoroughly. To prevent blackleg, crushed activated charcoal tablets are added. The result is a lush, fertile substrate.
Preparing the pots
Seeds are sown in a common seedling container—wood or plastic. Holes in the bottom are essential for drainage. The container should be 5-6 cm high, allowing for a centimeter-thick layer of drainage.
To protect delicate seedlings from possible diseases, seedling containers are pre-washed and disinfected with steam or a weak solution of potassium permanganate.
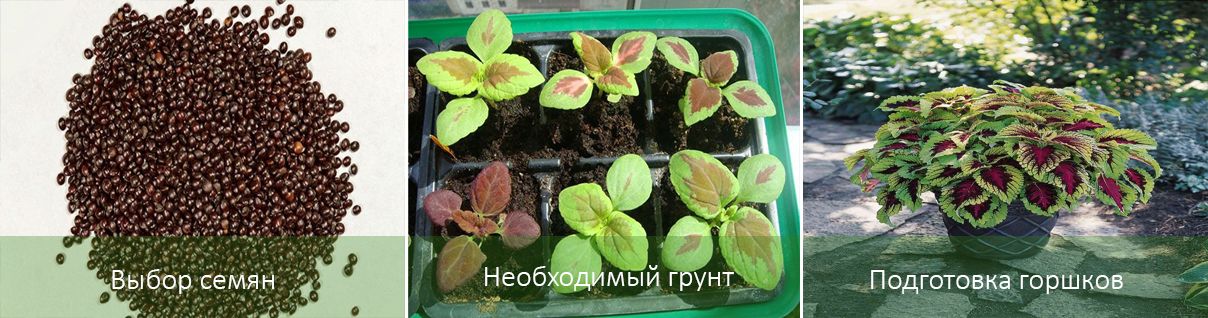
Later, seedlings will need separate small containers, typically disposable cups, fermented milk packaging, or special pressed cardboard containers. If they are to be grown indoors, transplant them directly into permanent pots.
Sowing technology
The seeds of ornamental nettle are small, like poppy seeds, so the process must be carried out carefully.
The following steps are performed step by step:
- If the seeds weren't purchased from a store, treat them with a weak solution of potassium permanganate or another fungicide. Soak them in the solution for 10 minutes, then dry them, making sure to separate them. This procedure is not necessary for store-bought planting material.
- Fill the seedling tray with the substrate, adding an even layer of drainage material—expanded clay, fine pebbles, or broken brick—to the bottom. Don't compact the soil to prevent the seeds from suffering from a lack of air.
- Each seed should be sown separately. A simple match, lightly moistened at the tip, is a good choice for this.
- There's no need to cover the crops. Even the thinnest layer of soil will delay germination.
- Moisten the seedbed with a fine mist spray. This will prevent the seeds from being buried too deep.
- Cover the container with glass or transparent film and place it in a warm, well-lit area. The optimal temperature is 23 to 25°C.
The crops are aired daily for 30 minutes, and water droplets are removed from the film. Additional irrigation is provided if necessary. The first shoots appear after 10-15 days.
Caring for seedlings when growing coleus
Young plants grown from seeds don't require any special care. Water them as needed. Ventilate the room 2-3 times a day to acclimate them to conditions different from those in a greenhouse.
When the seedlings form their first pair of true leaves, they are pricked out. The soil is thoroughly moistened for 24 hours. Each seedling is carefully dug up with a teaspoon and transferred to a prepared cup filled with drainage and nutritious potting mix. The seedling is placed in its new location and topped up with soil. From this point on, the nettle no longer requires a mini-greenhouse. However, it is essential to protect the tender seedlings from drafts.
After picking you will need:
- watering – every 2-3 days so that the soil does not dry out;
- Fertilizing - every 2 weeks with complex fertilizers for flowers or universal fertilizers, diluted three times stronger.
It's important to remember that varietal characteristics—leaf shape and color—don't appear immediately, but only after the second or third pair of true leaves. During this period, young coleus plants begin to acclimate to fresh air, hardening them off.
At the same time, determine the light conditions the young plant needs. Brightly colored leaves indicate a need for bright, diffused light. Green spots or stripes indicate a need for shade, especially during midday.
Seedlings are planted outdoors once the weather has become warm. Despite their undemanding nature, these plants dislike nighttime cold. Choose sunny sites with fertile soil, protected from north winds and drafts.
If the seeding was done in winter, after the first picking, the young nettles are transplanted into larger pots every 25-30 days. This prolonged seedling growth requires fertilization two weeks after each transplant.
Experienced gardeners advise carefully examining the plant's varietal characteristics before planting seeds. Some varieties are recommended for outdoor planting only after they're 4-6 months old.
Top.tomathouse.com recommends: Growing coleus from seeds in peat pellets
This is truly a great invention, making gardeners' lives easier. Seedlings don't require picking, and planting doesn't take much time.
Germination order:
- Take peat tablets with a diameter of 3-5 cm.
- They are placed on a pallet.
- Add water to the tray in small portions until the peat is completely swollen.
- Small indentations are made in the peat columns with a match and one seed is placed in each.
- Cover the tray with a transparent lid.
Further care is carried out in the same way as with the traditional approach: heat, light, regular supply of moisture - every 3-4 days.
If small tablets are unavailable, seeds are planted in larger ones. In this case, seeds are sown 2-3 at a time, and once they sprout, carefully cut the stems with a sharp knife to separate the plants.
Since peat contains few nutrients, seedlings require supplemental feeding. Common, low-concentration complex fertilizers, such as Agricola or Fertika for ornamental foliage plants, are used, diluting them to a concentration half to a third lower than the manufacturer's recommendation. Water the mixture every 10-12 days.
They themselves indicate the timing for transplanting seedlings into pots: thin roots begin to break through the mesh of the tablets.
Carefully cut it with disinfected nail scissors and place it in a cup. Then add soil and moisten it. If the weather is warm by this time,
The only drawback of peat tablets is their high cost. Using them requires a significant financial outlay, especially if you're planning a large-scale planting. But resourceful gardeners have overcome this difficulty. The trick is to use the cellulose husks of ordinary tea bags. They are carefully opened, the metal clip, if present, is removed, and a soil mixture of peat, sand, and fertile soil is added. The substrate is then moistened and the seeds are spread out.
Most gardeners who use this method prefer leftover green tea, as it is guaranteed to be free of dyes that could harm the sprouts.