
Many gardeners want to have greens, vegetables, and berries on their tables all year round, and freshly cut flowers for special occasions. To achieve this, they typically build a winter greenhouse themselves or hire a team. In this article, we'll explain how to do it yourself and provide step-by-step instructions for building a heated winter greenhouse on your property.
Content
Types of winter greenhouse designs
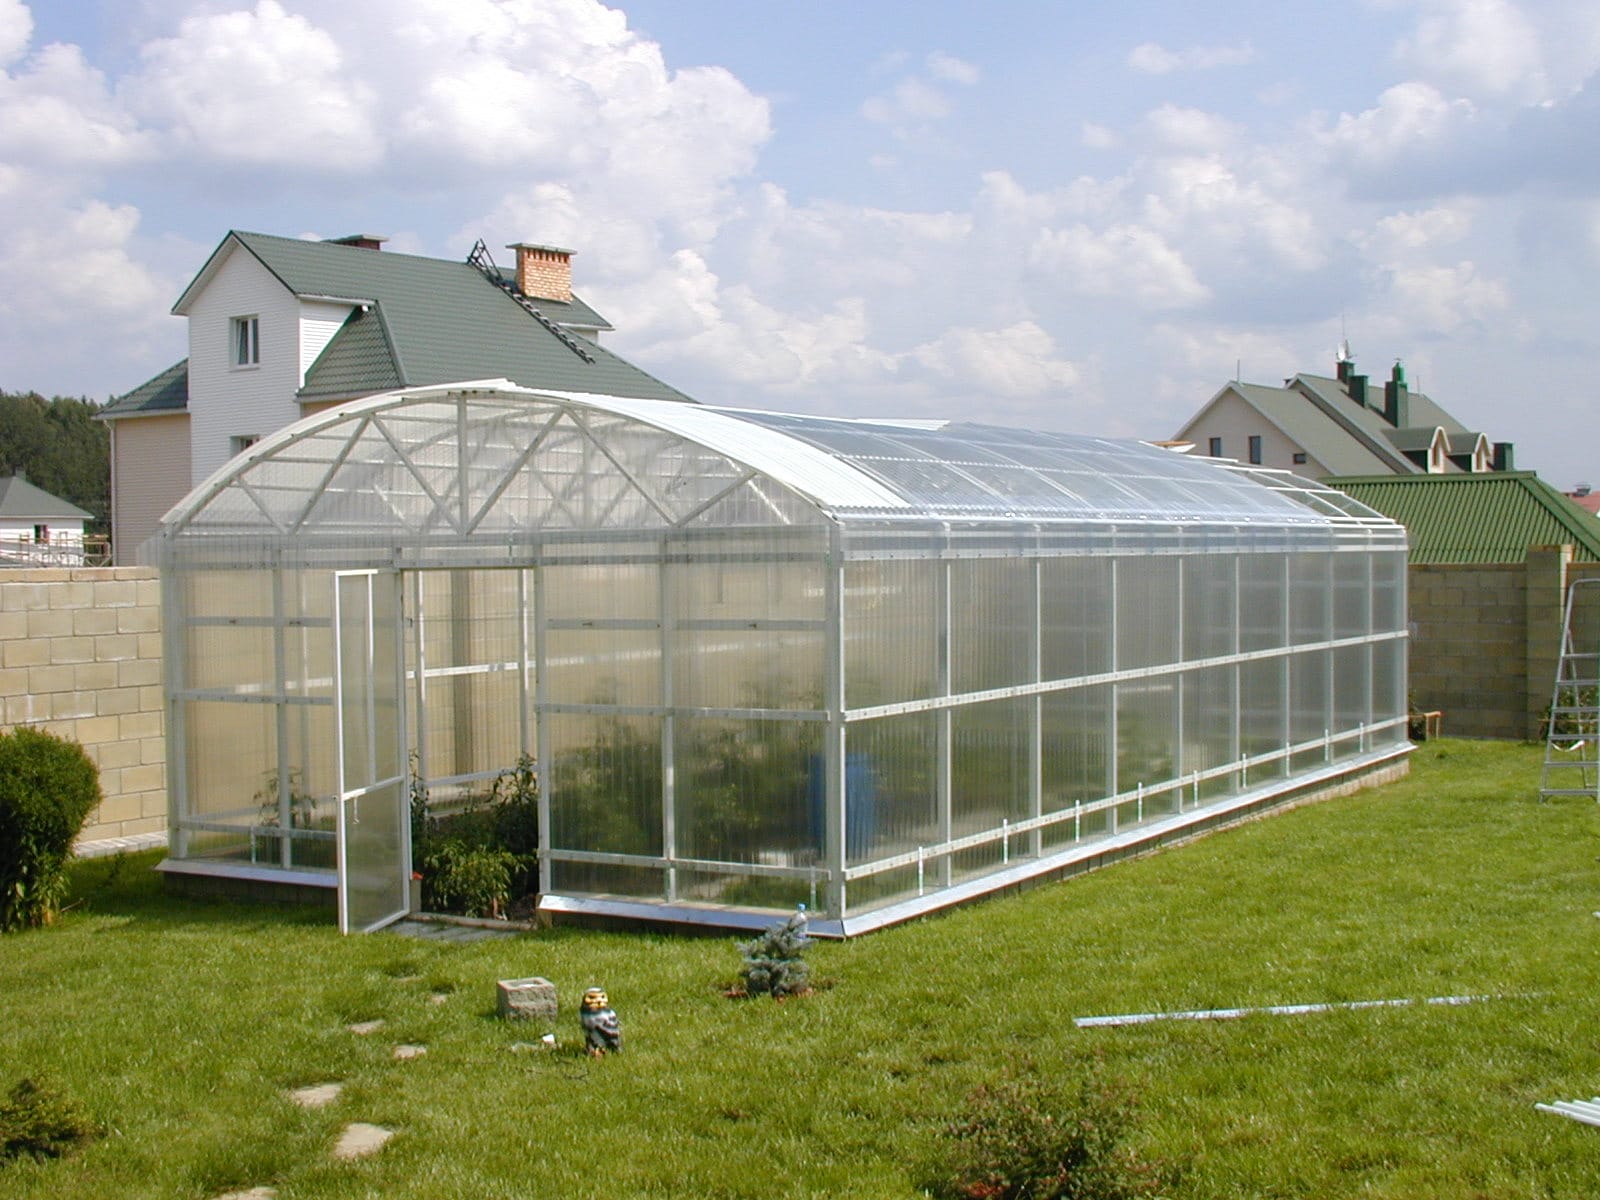
A winter greenhouse (as a hothouse is often mistakenly called, but in reality a hothouse is a small structure, while a greenhouse is more permanent and is built for the winter) comes in two types:
- A semi-permanent greenhouse. This type of greenhouse can be disassembled and reassembled elsewhere. However, it still differs from the summer version. Piles are typically used as the foundation, and the floor is made of wood.
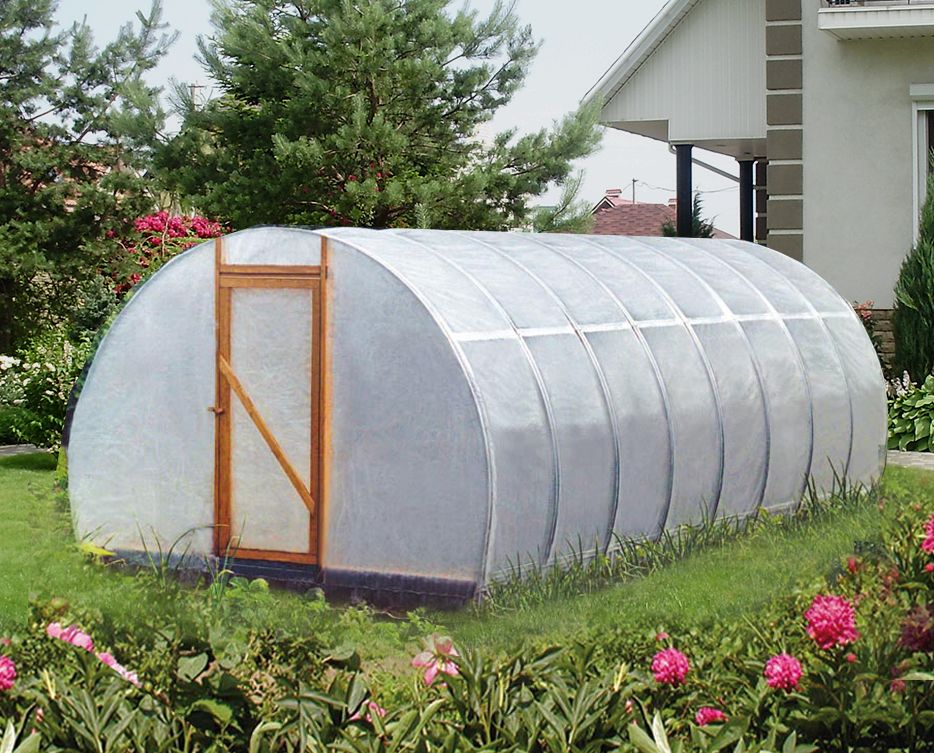
- Permanent. This means the frame can't be assembled and disassembled; the location for this type of greenhouse must be chosen once and for all. It is erected on a foundation, in the center of which a trench is built to collect cold air. This option is more reliable than the previous one.
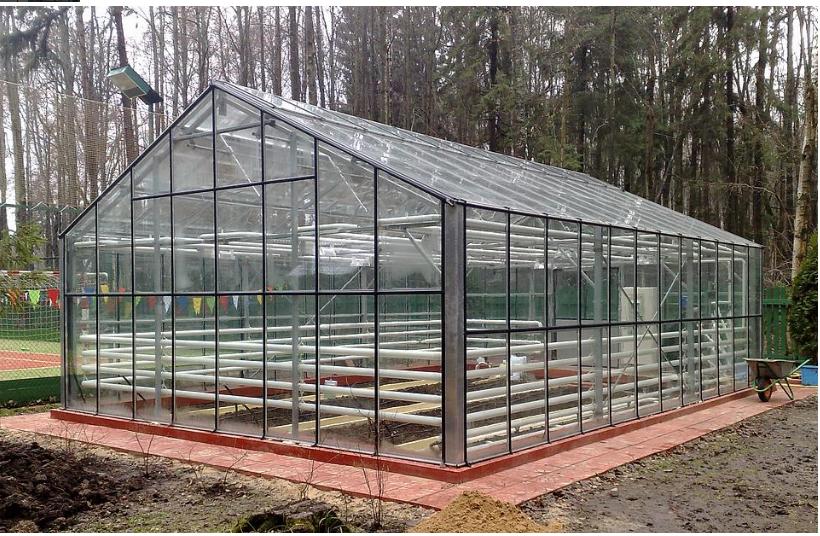
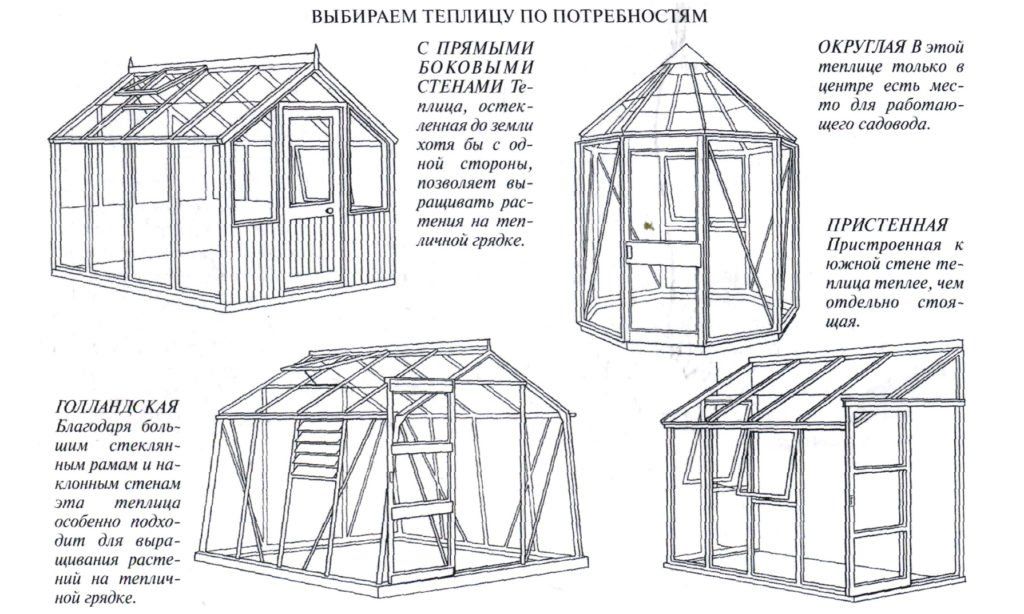
There are different types of structures, which we will consider in the table:
| Photo | Name | Description |
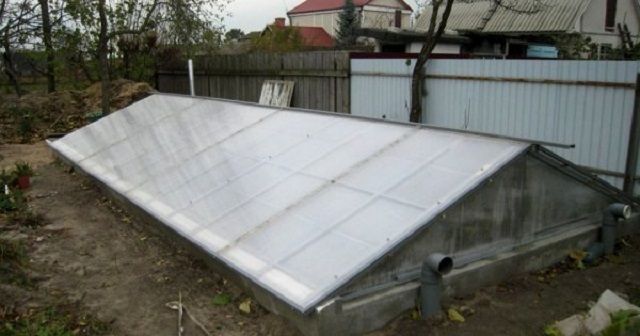  |
Thermos (underground, recessed) | The main part is located underground. This is the most popular option among summer residents and gardeners. Heat is provided by the specific placement. It has proven itself in Siberia, as it is easier to heat in these conditions. |
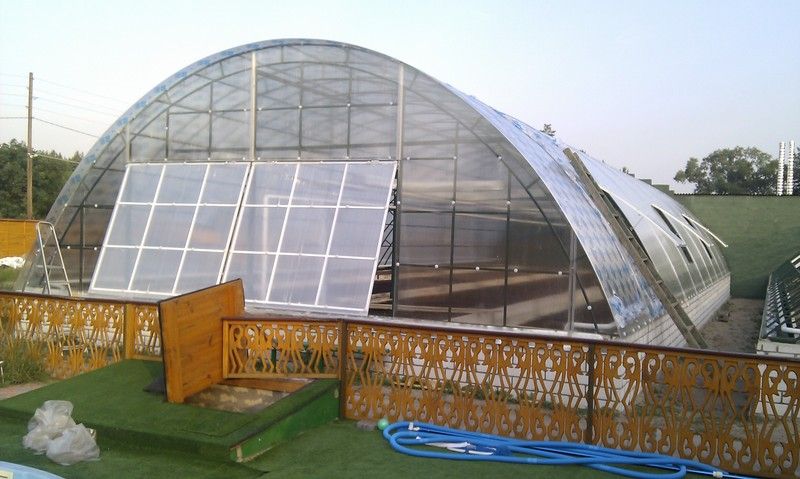 |
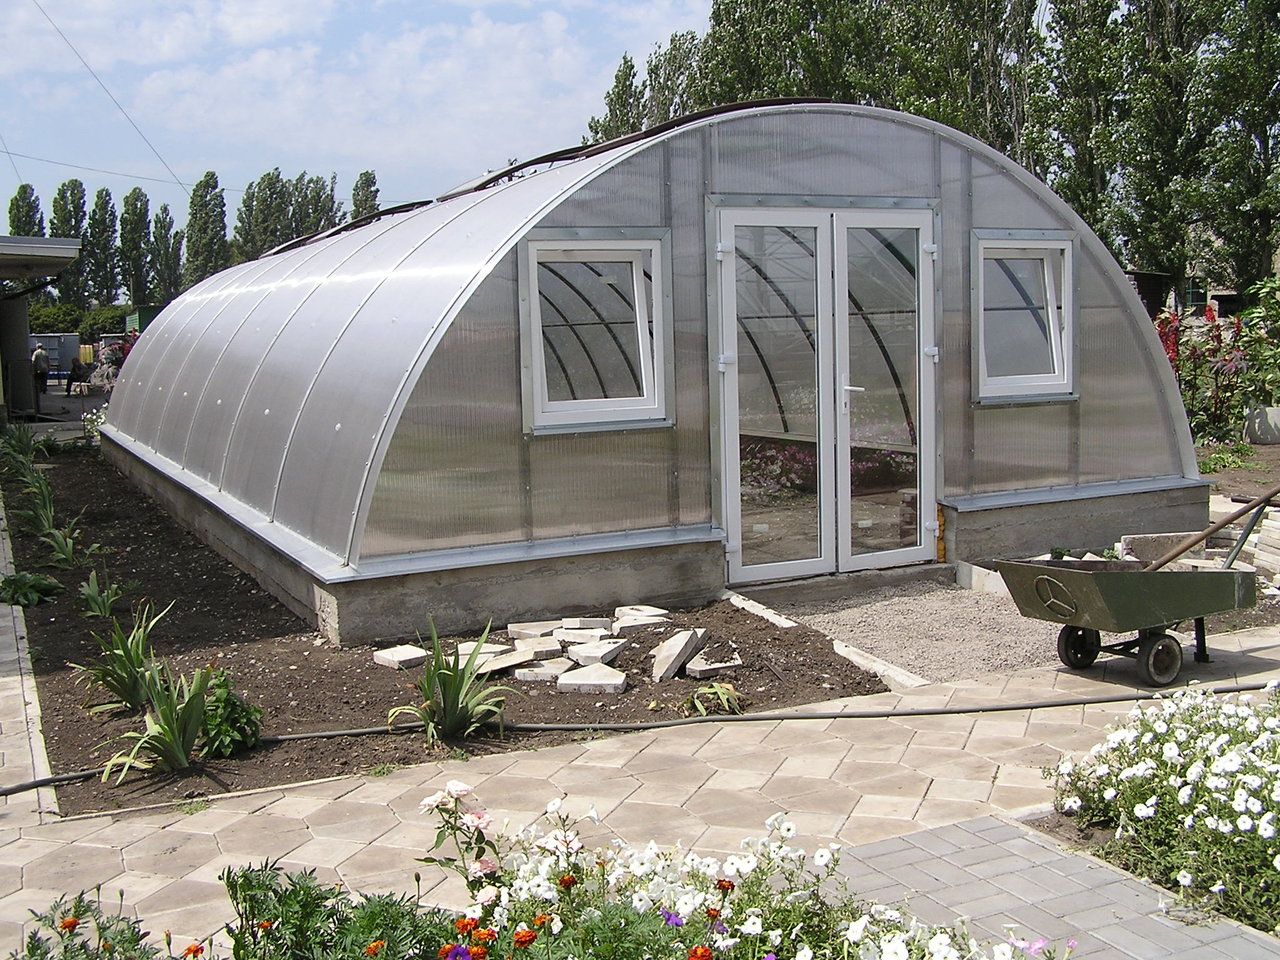
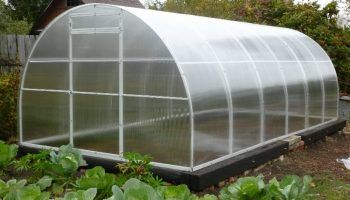
Arched | It's convenient if you're growing plants in the ground. Difficulties arise when constructing the frame and cladding. The main material is polycarbonate. A pre-fabricated structure is usually purchased. |
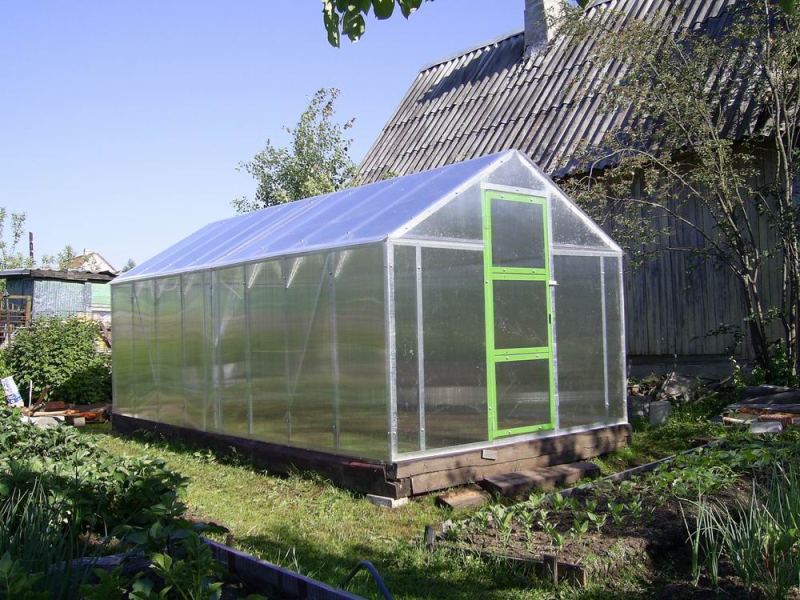 |
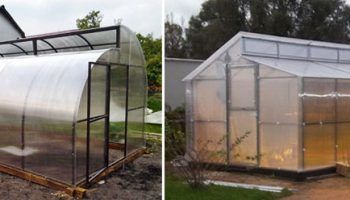
Gable roof | Used for growing crops in boxes. The high ceiling makes working easier. The roof's slope promotes self-cleaning: precipitation doesn't accumulate on it, so it doesn't sag. |
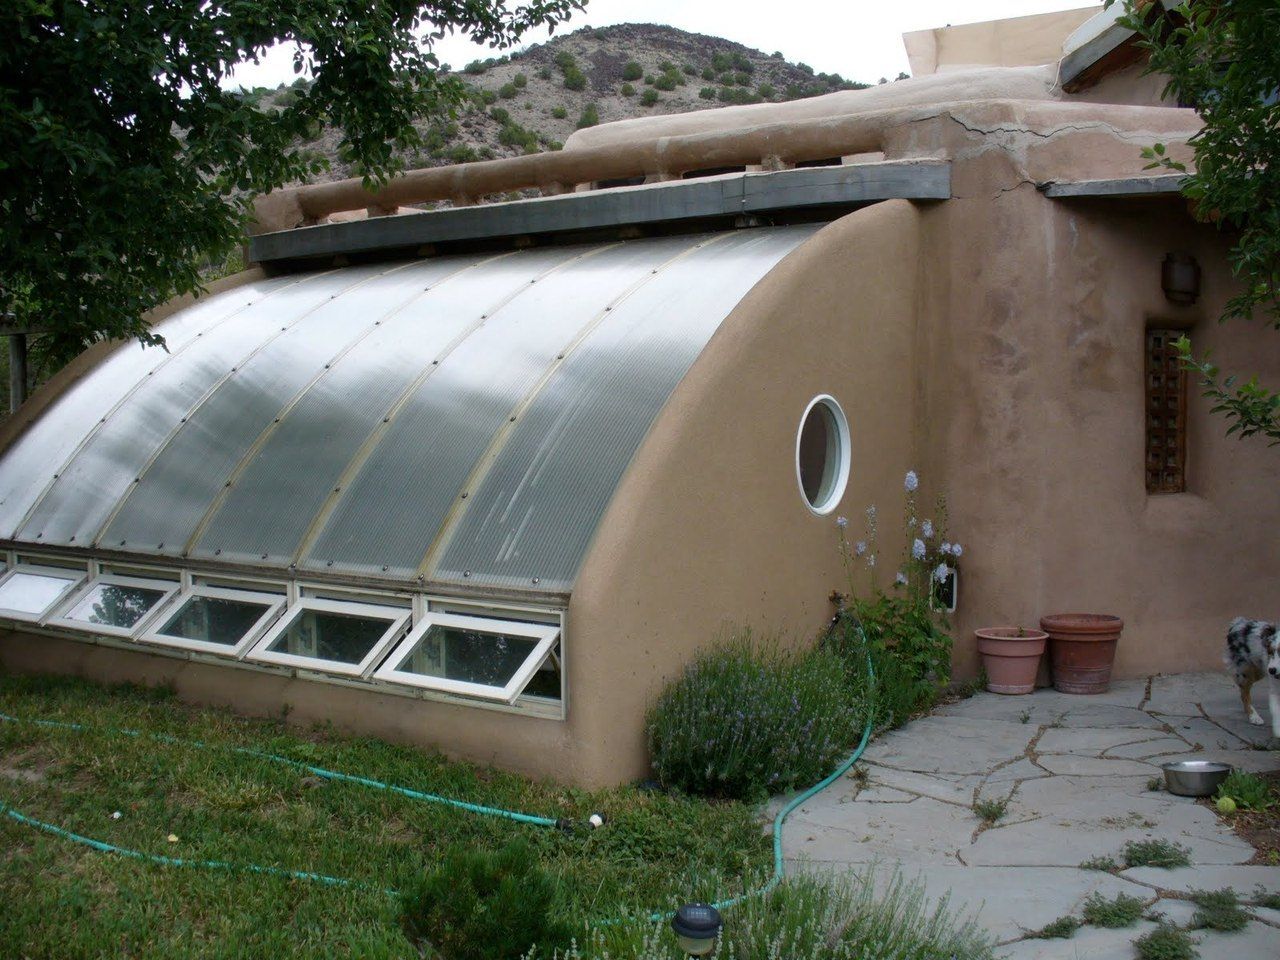 |
As an extension to the house | A winter garden is most often created. The shared wall provides additional warmth. It can be entered from the house, which is very convenient since there is no need to go outside. |
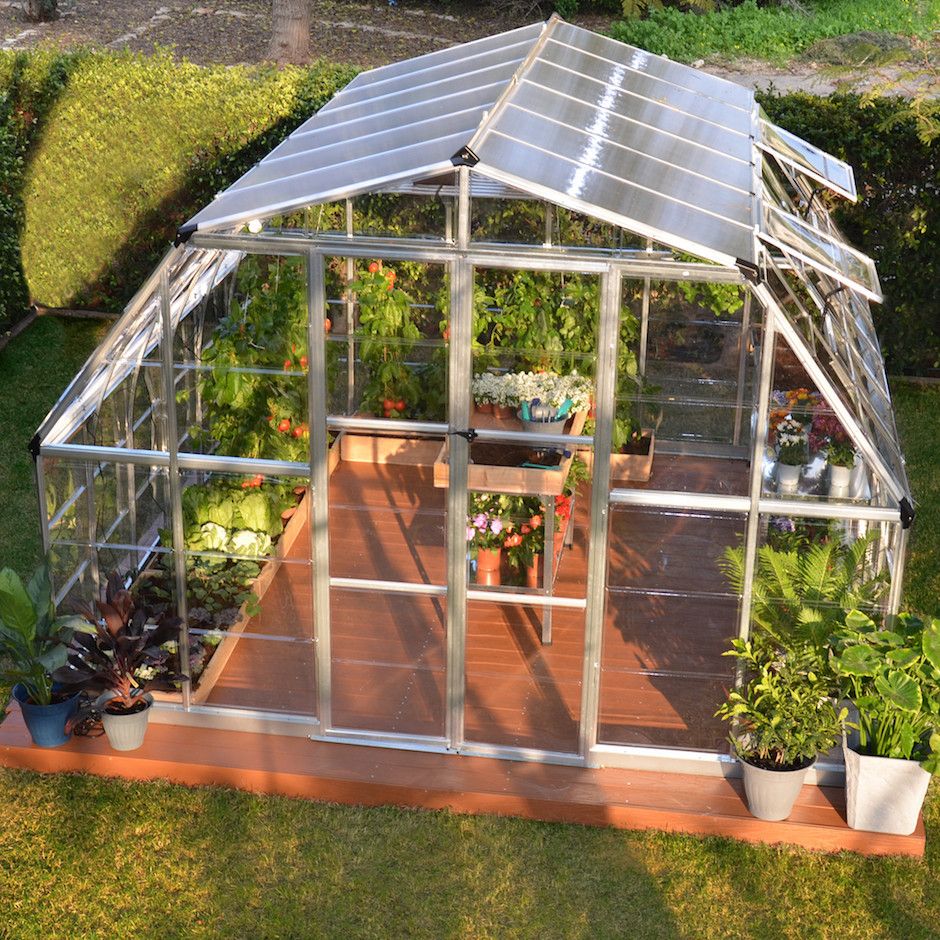 |
With a mansard roof | Flowers are usually grown there. Its unique design allows for multiple tiers. It's heated with a stove, and the transparent walls let in more light. |
When choosing a greenhouse option, consider your preferences, available resources, the plants you'll be growing, etc.
Requirements for winter greenhouses
So, what requirements should our future winter greenhouse meet?
Heating
For a seasonal structure, solar energy is usually sufficient; it accumulates during the day and is expended at night, preventing sudden temperature fluctuations indoors. Cloudy weather is no obstacle. The situation is quite different in winter, as the soil is not heated by the sun during the day, but cools completely and freezes at night.
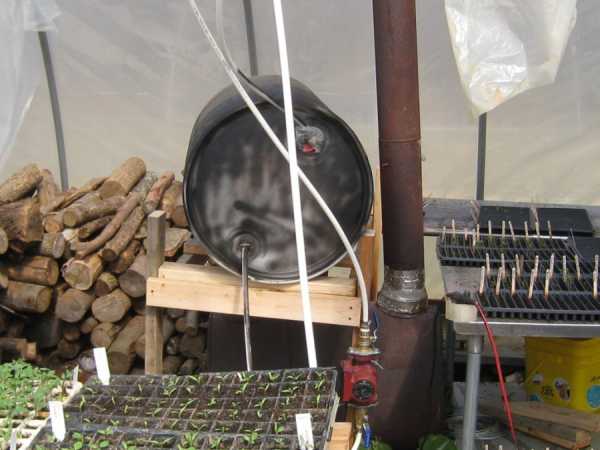
To address this, a greenhouse is built with heating: stove, water, or electric, using different types of heaters (electric, gas). The choice depends on the area and region.
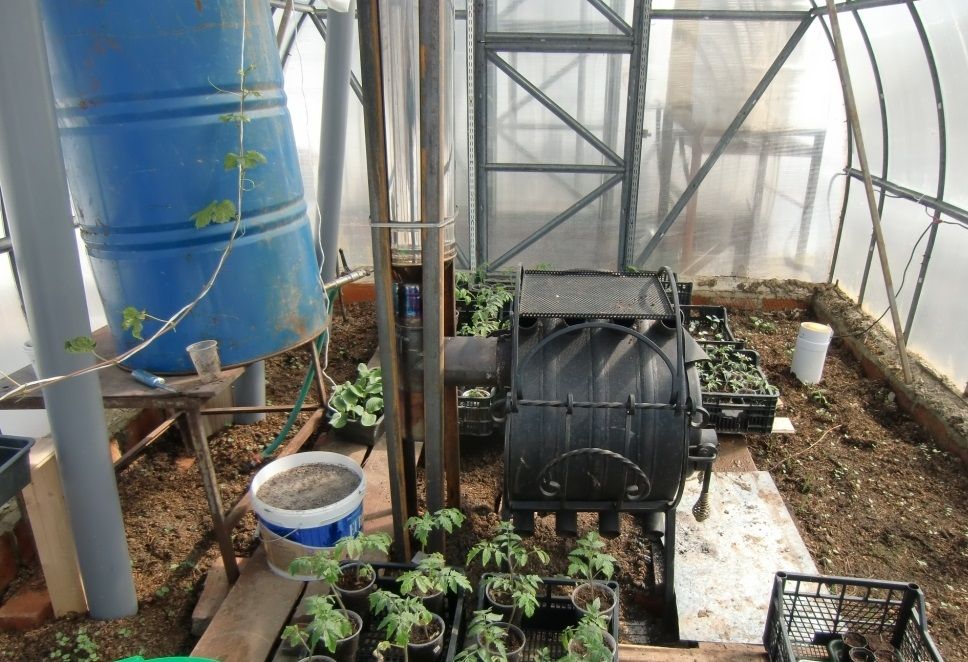
If you have a small greenhouse no more than 20 square meters, a stove will be sufficient. The advantage of this type of heating is the ability to more precisely regulate the room temperature.
Another option for a small greenhouse is to use biofuel. While installing this type of heating system will take much longer, it will pay for itself in the long run due to its energy efficiency.
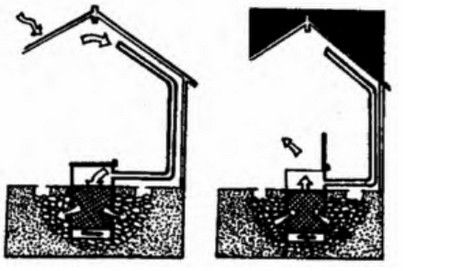
The essence of the method is that biofuel is placed under fertile soil, which warms the soil through natural decomposition processes.
If the greenhouse is larger than 20 square meters, it's best to use hydronic heating (using underground pipes) or electric heating. Electric heating is divided into cable heating (like underfloor heating) and air heating (using fan heaters).
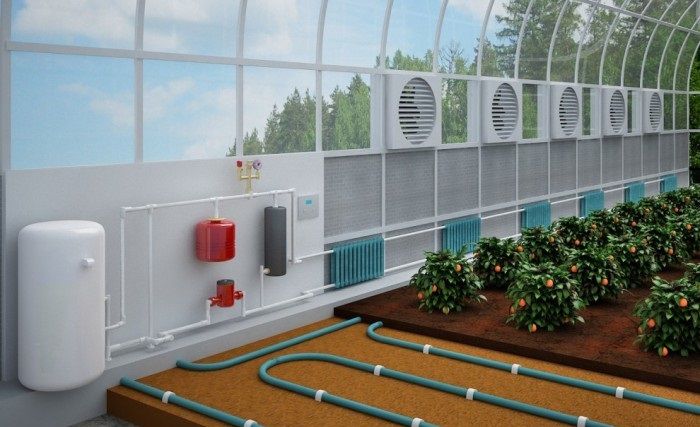
In cold regions, the soil freezes deeply in winter (for example, in the Urals – up to 2 m deep), so it is necessary to provide for warming of the soil and prevent heat from escaping downwards.
Read more in the article about heating greenhouses.
Insulation
Installing heating is important, but it's not enough. It's crucial to properly insulate the greenhouse to reduce heat loss. There are several options:
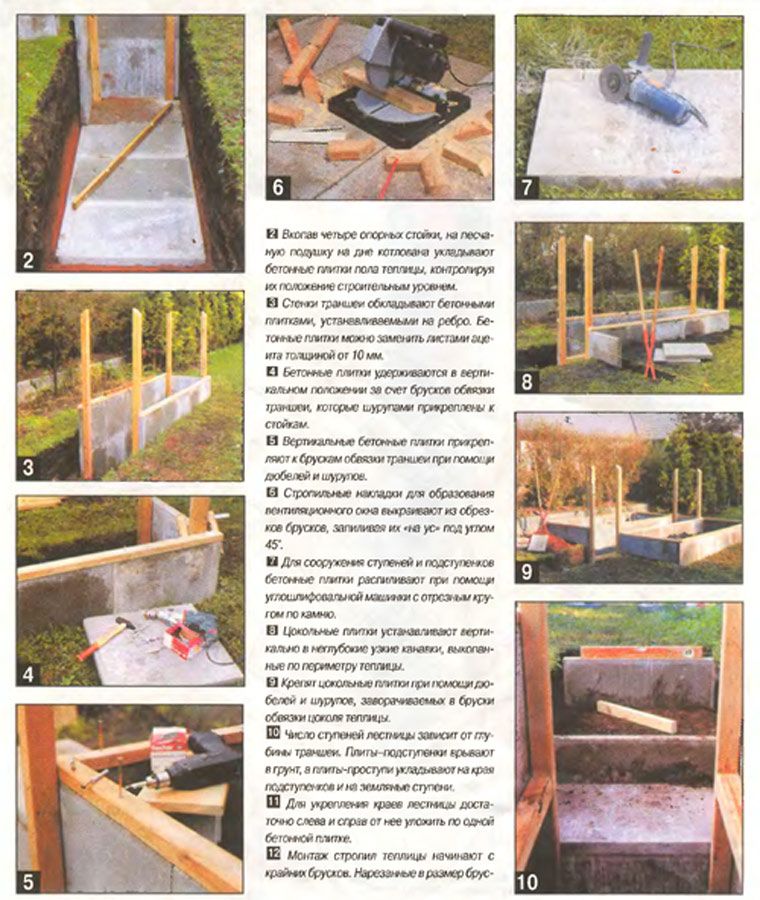
Deepening the greenhouse into the ground
They fall below the freezing depth – up to 2 m (depending on the region).
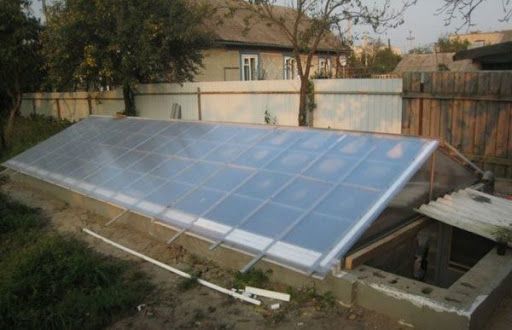
This method is not suitable if groundwater is located close to the surface.
Or, when choosing it, it is necessary to additionally provide drainage.
Special concrete for walls
Concrete must be of high quality and impermeable to moisture, which requires additional funds when erecting it yourself.
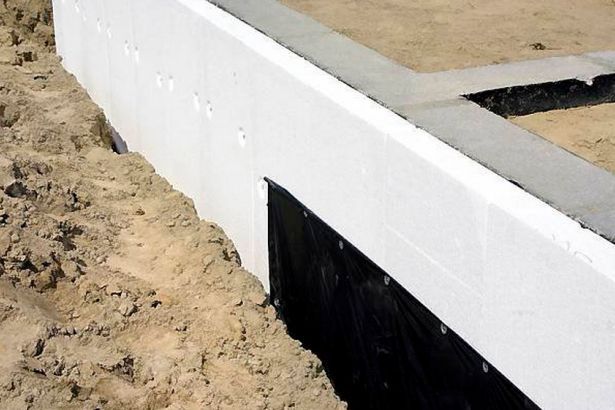
A blank wall
Foam concrete, thermal blocks, or wood are used. Foam plastic, which is easy to install and moisture-resistant, is used as insulation. The walls are sheathed on the outside, a 0.5-meter-thick panel is installed for ground insulation, and the base is protected with foam plastic.
Double glass or thick polycarbonate
The covering must transmit light and retain heat. Glass is laid in 2-3 layers, leaving a gap of 0.1-0.3 cm between layers. Thick polycarbonate is laid in a single layer, while 0.4-0.6 cm thick polycarbonate is laid in a double layer. Stretch film is stretched over the roof and walls if snowfall is rare in the area, as it is short-lived and wears out quickly.
It is also necessary to seal all joints and cracks.
Watering and air humidification
The greenhouse protects plants from external influences, so the water necessary for their development must be added artificially.
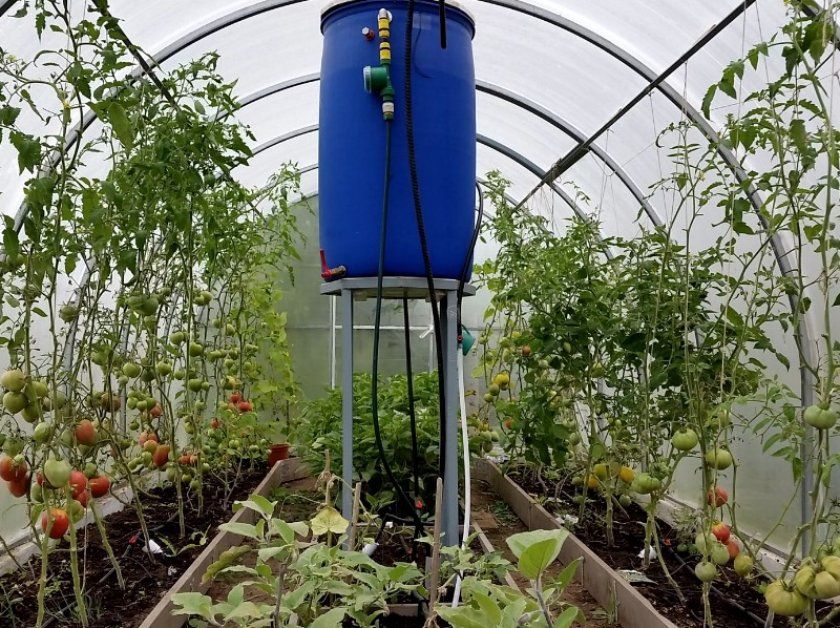
Without sufficient water, there will be no good harvest. There are three methods of watering:
- hose;
- drip;
- sprinkling.
Please note:
- water quality – must meet all drinking water standards, without chemical disinfectants, and the number of bacteria must meet the standard;
- temperature – optimal +20 ℃;
- Watering time - each type of plant has its own requirements.
To ensure proper growth, maintain optimal air humidity. It should be 70%. If this level cannot be achieved through watering and soil moistening, install special humidifiers.
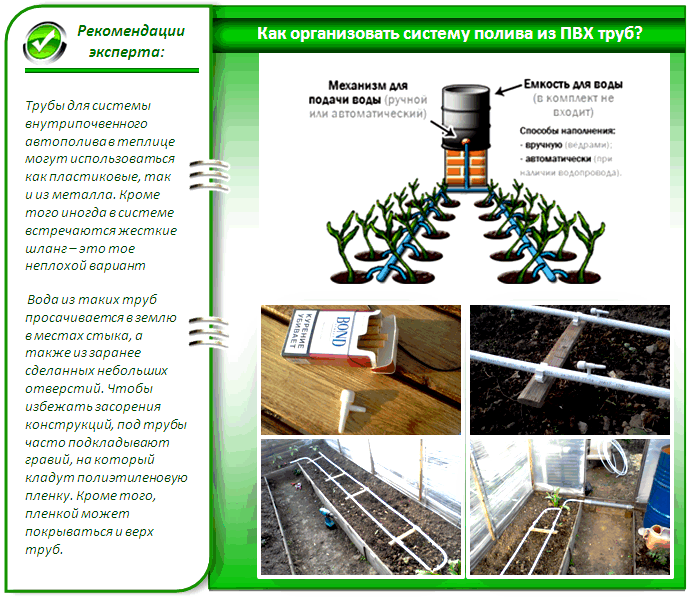
The required water flow rate depends on the greenhouse's area, so plan your water supply in advance. If the source is located far from the structure, pipes will need to be laid at a depth of 1-1.8 meters. Before watering, the water must be heated in special containers—either by sunlight or artificially. At night, heat exchange occurs between the water and the air, further reducing temperature fluctuations.
Ventilation
For plants to grow and develop, they need to have adequate air flow, in addition to the correct level of humidity and temperature.
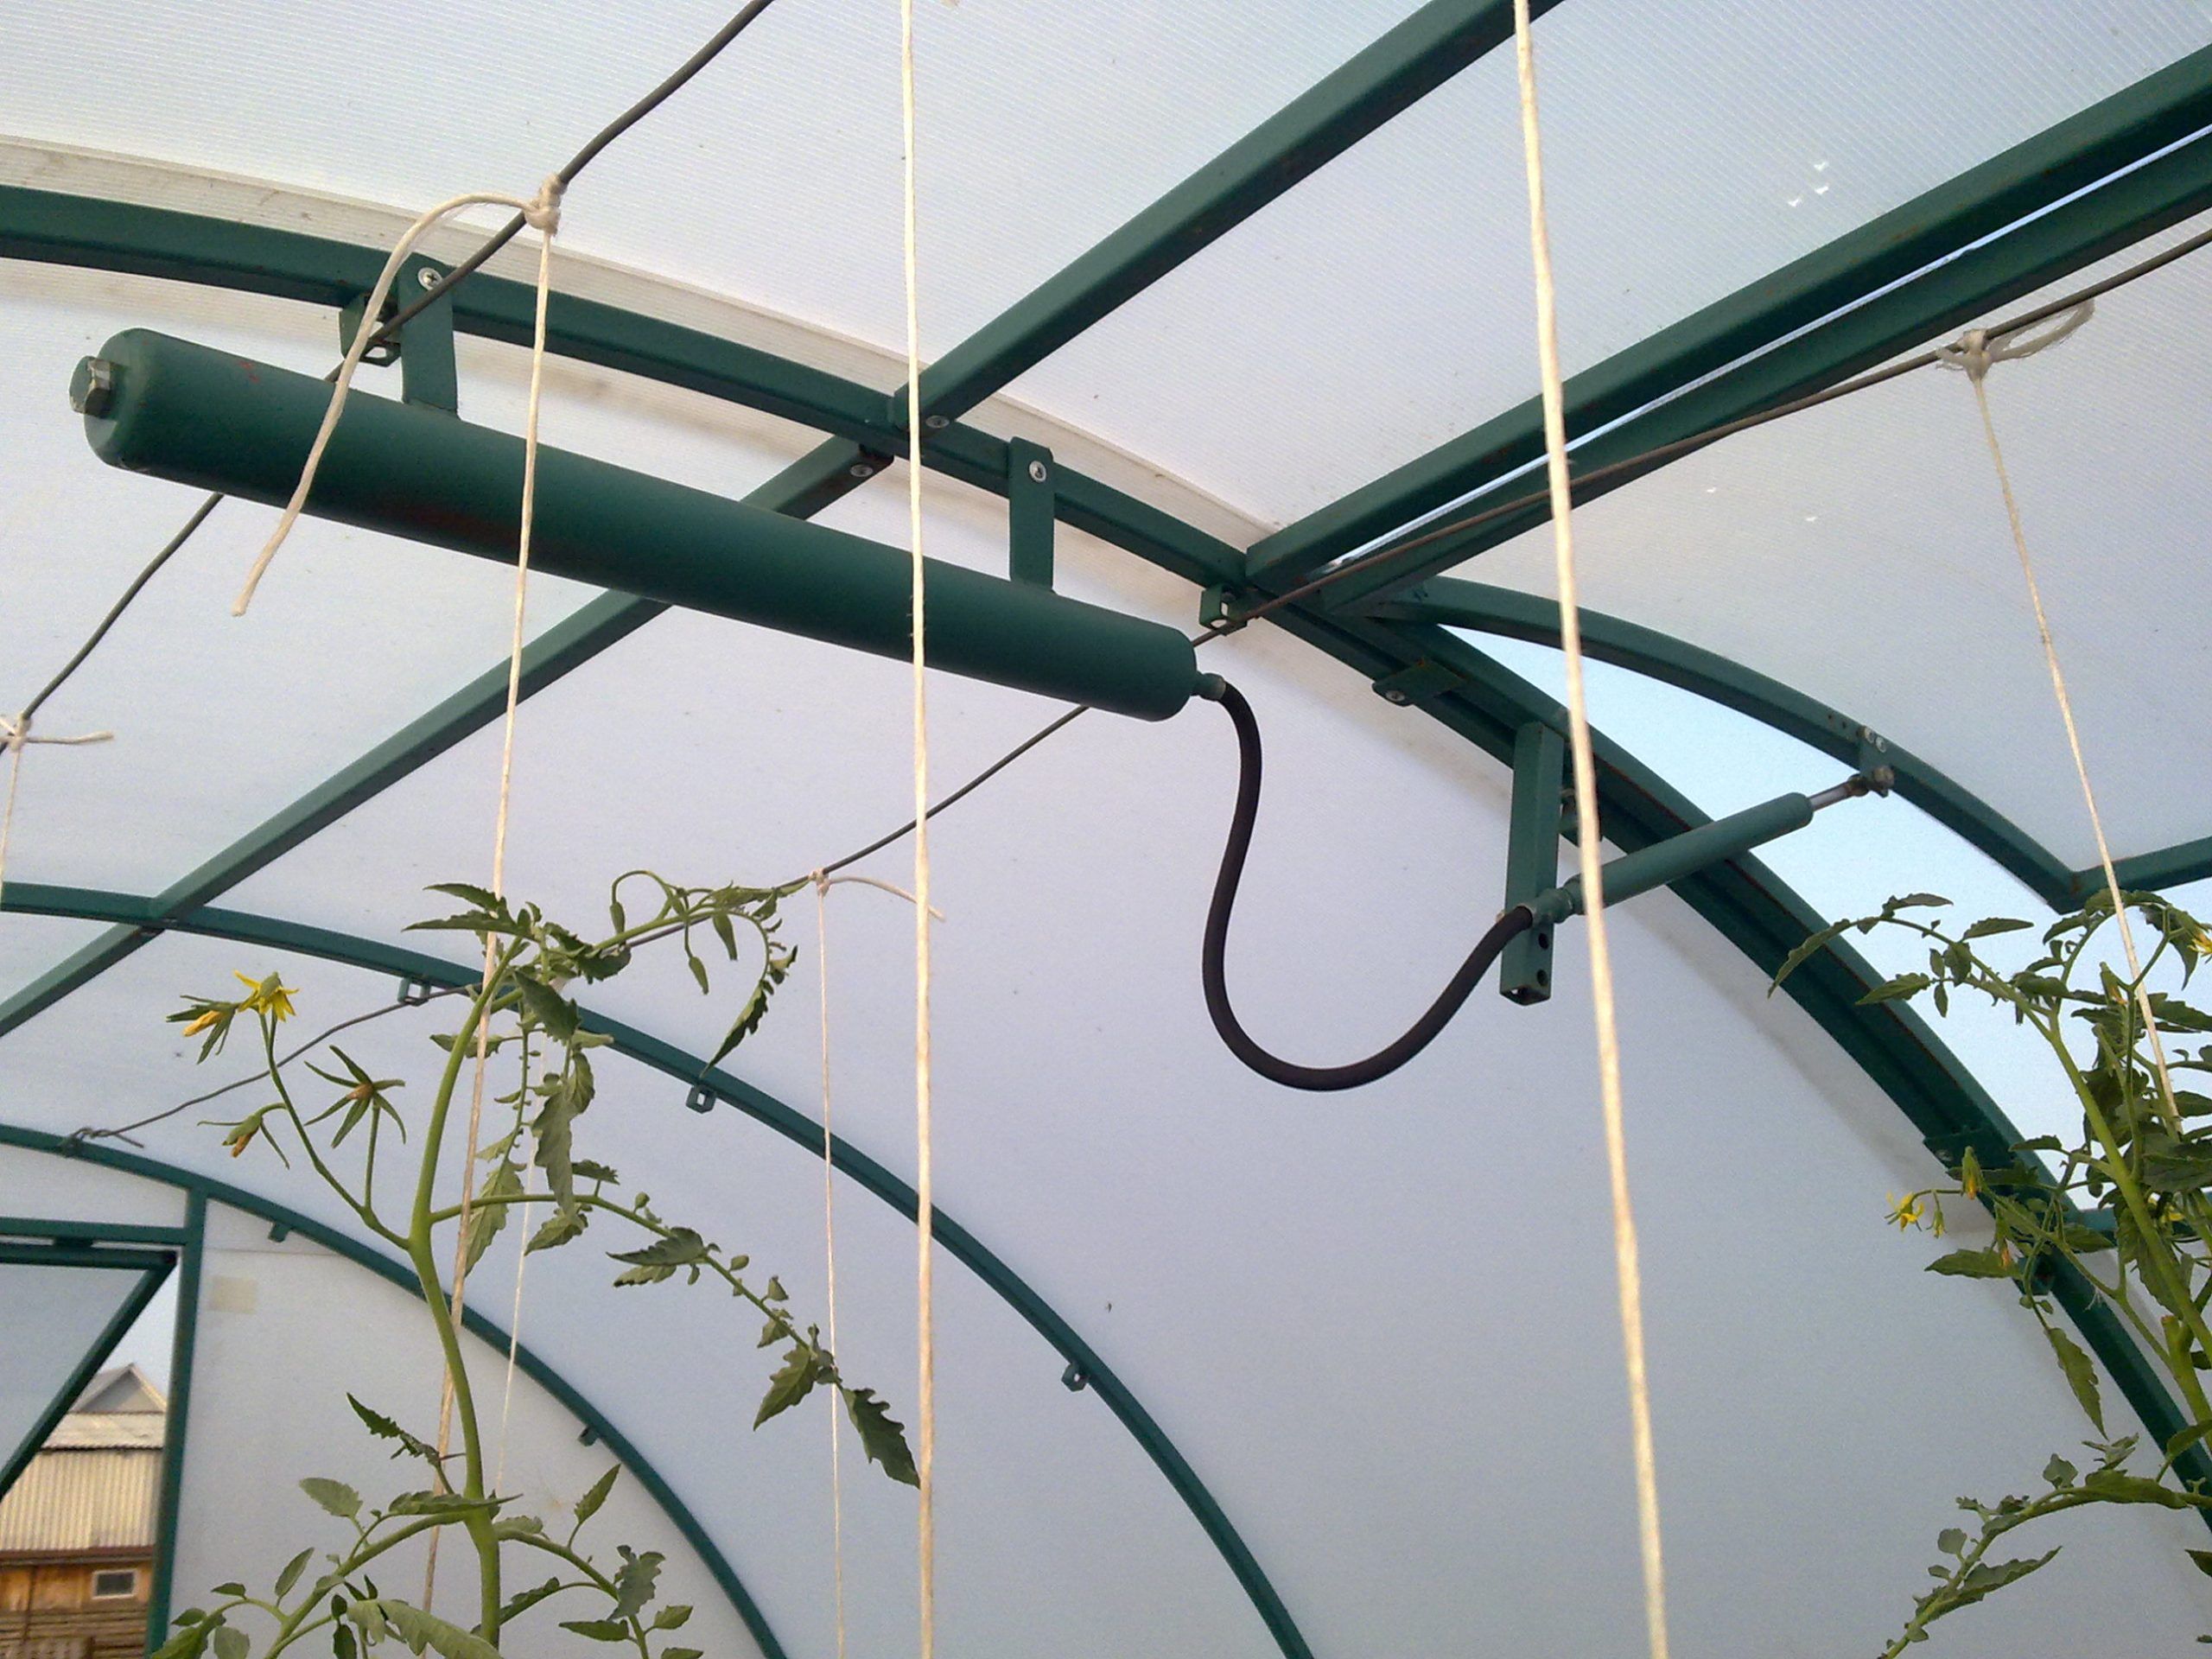
We create the necessary parameters in the room using a ventilation system, which allows:
- maintain the required level of humidity;
- organize normal air circulation;
- improve its composition;
- remove excess heat and moisture.
The ventilation system can be of two types:
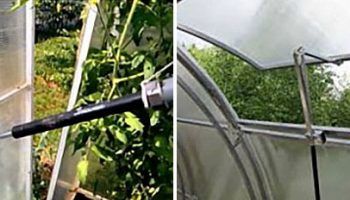
- mechanical – closing and opening windows and doors manually;
- Automatic – can be electric, hydraulic, bimetallic.
Lighting
Plants obtain the energy they need to grow from light. Each species has its own specific needs, but all plants stop growing if daylight hours are less than 10 hours. Natural light is sufficient in summer, but artificial light should be considered in winter.
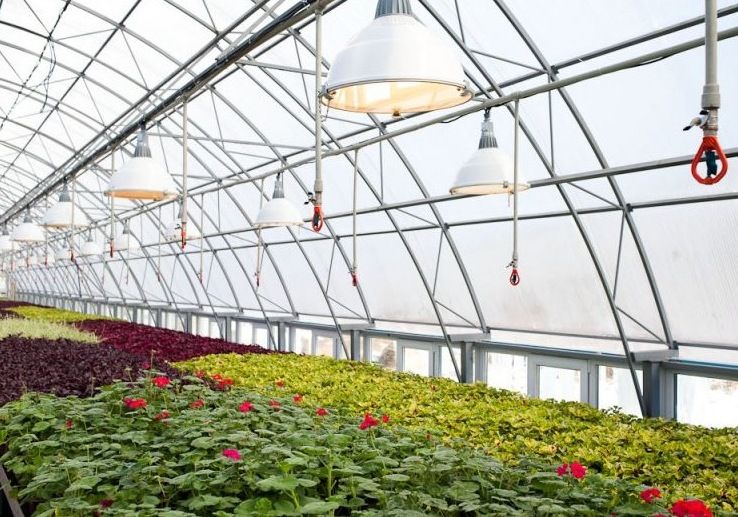
There are many options that vary in cost, color spectrum, and energy consumption:
Incandescent lamps are low-efficiency and produce a poor light spectrum. We use them only for forcing greenery.
- Fluorescent – brightness depends on line voltage. Low light output.
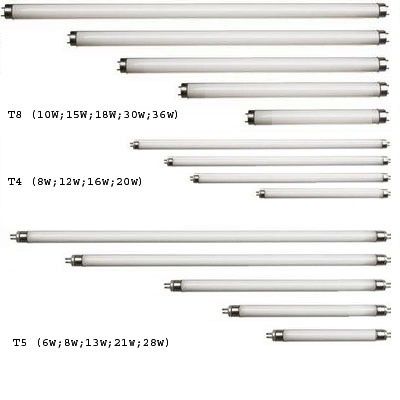
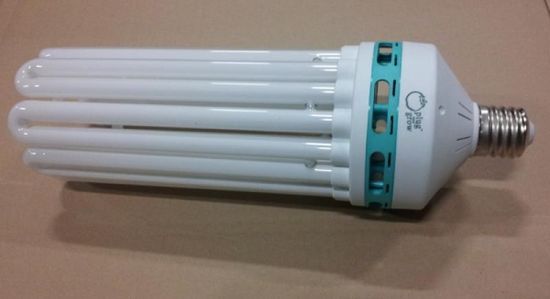
- Energy-efficient – easy to use. Inexpensive, no additional equipment required. Suitable for small greenhouses.
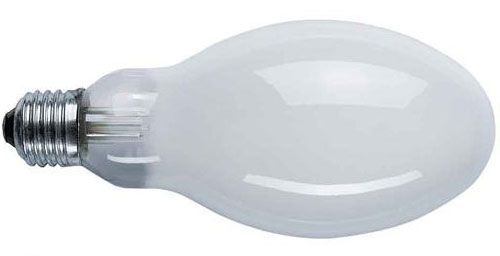
- Mercury lamps offer high light output and low energy consumption. They generate significant heat and emit significant ultraviolet radiation. Their main drawback is that they contain mercury.
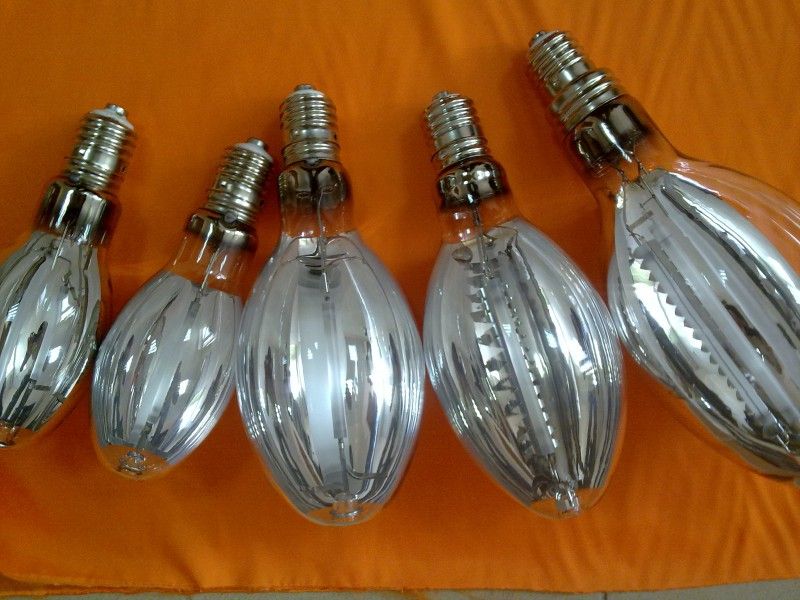
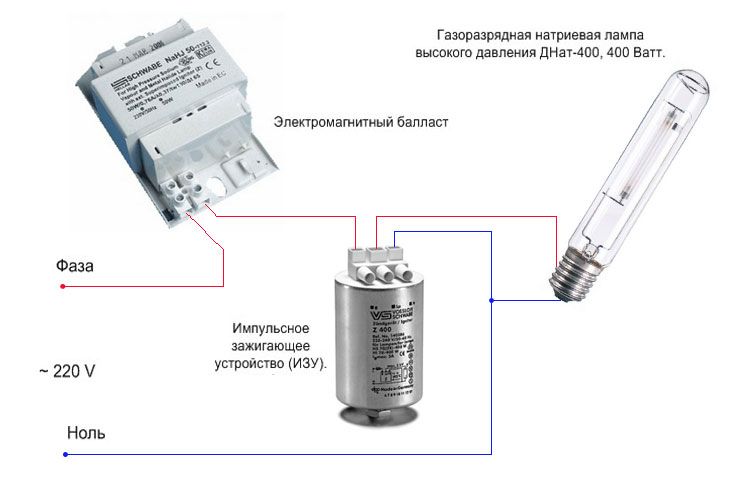
- Sodium lamps are good at simulating sunlight, but they're difficult to connect. They require additional components, making them difficult to install yourself.
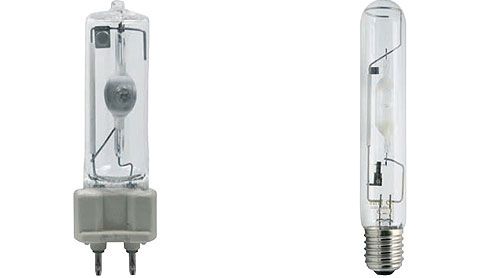
- Metal halide lamps are ideal in terms of spectrum, but they are expensive and not durable.
- LEDs are energy-efficient, environmentally friendly, and safe to use. They are also expensive. We choose domestically produced fixtures for installation, as their spectrum matches our region's needs.
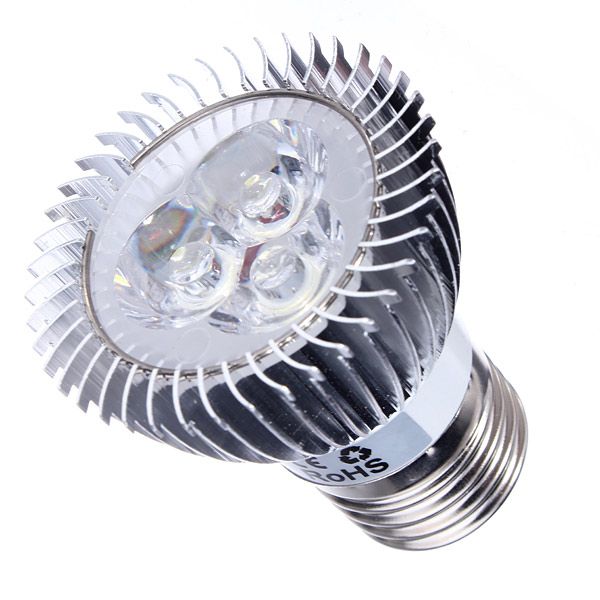
We calculate the number of lamps based on the standard per 1 sq.m. – 100 W.
Stages of building a winter greenhouse
You can build a greenhouse yourself, even using improvised materials. We'll tell you how below. But first, here's a quick overview of what we need to do:
- The choice of location is optimally protected from the wind, so as not to require additional protection and heating.
- Selecting a design. We'll suggest a design below, but you can find one or create your own.
- Determining the type of construction – foundation, frame, sheathing, roof.
- Estimate preparation – we calculate the cost of materials and the overall price to avoid unnecessary problems.
- Decision on the type of ventilation, heating and air tightness.
- Lighting is efficient, safe, and moisture-proof to prevent short circuits.
- Calculating the height of the structure. When growing plants in soil, you can make it low.
- Shelves. We prepare them during the construction stage to ensure ease of use. Plastic or wood are best.
- Interior finishing. We leave wide strips between the beds to accommodate the future needs of the plants.
- Care is especially important during the first year. Ensure the seal is tight and inspect for cracks.
If you need a greenhouse larger than 100 square meters for business, it's best to order a ready-made product. Today, there are a huge number of manufacturers offering turnkey greenhouses with ready-made heating, ventilation, irrigation, and other systems. If you need a small winter greenhouse for personal use, you can easily build it yourself. We'll explain how below.
Let's go through all the points we listed above in more detail.
Choosing a location
So, first, you need to choose the right location for your future winter greenhouse. It should be well-lit and protected from strong winds. An excellent option is to build it as an extension to the same house or garage, but make sure it faces the sun. If you decide to build a freestanding greenhouse, it should be oriented north-south, and the north-facing wall should be left blank and well insulated.
Step-by-step instructions for building a winter greenhouse yourself
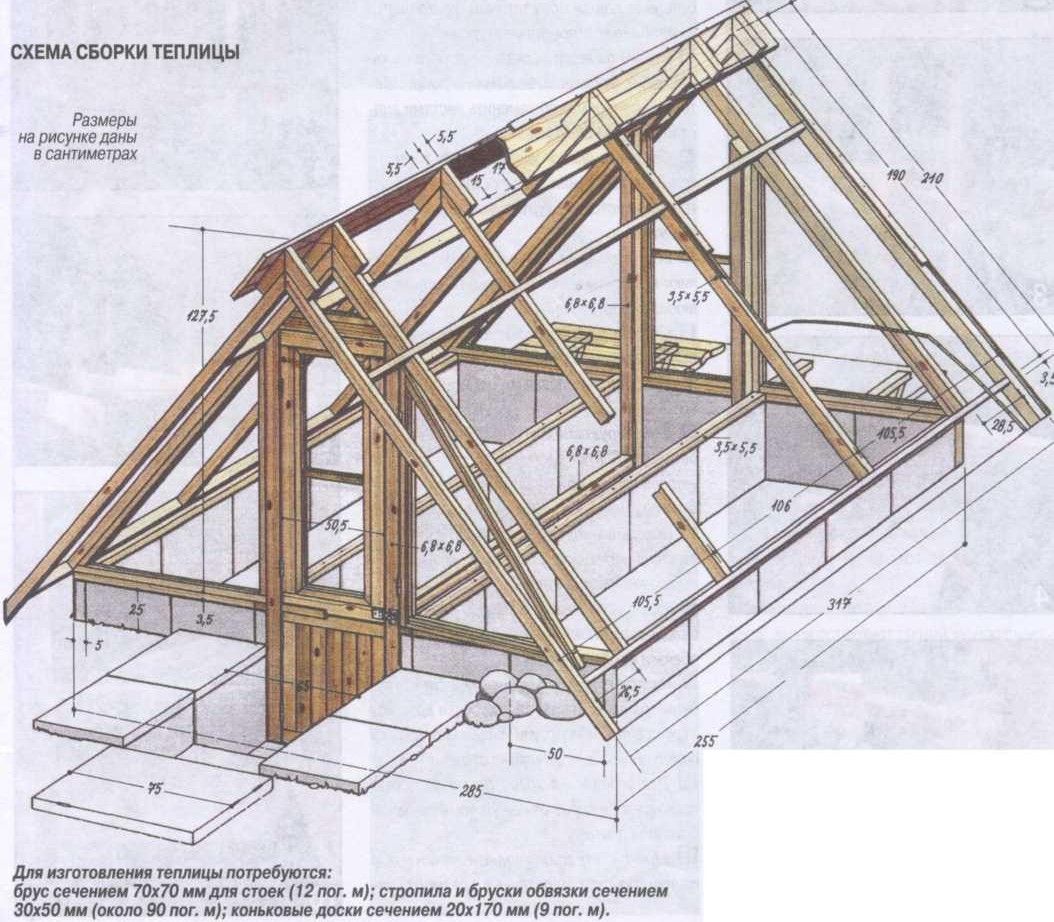
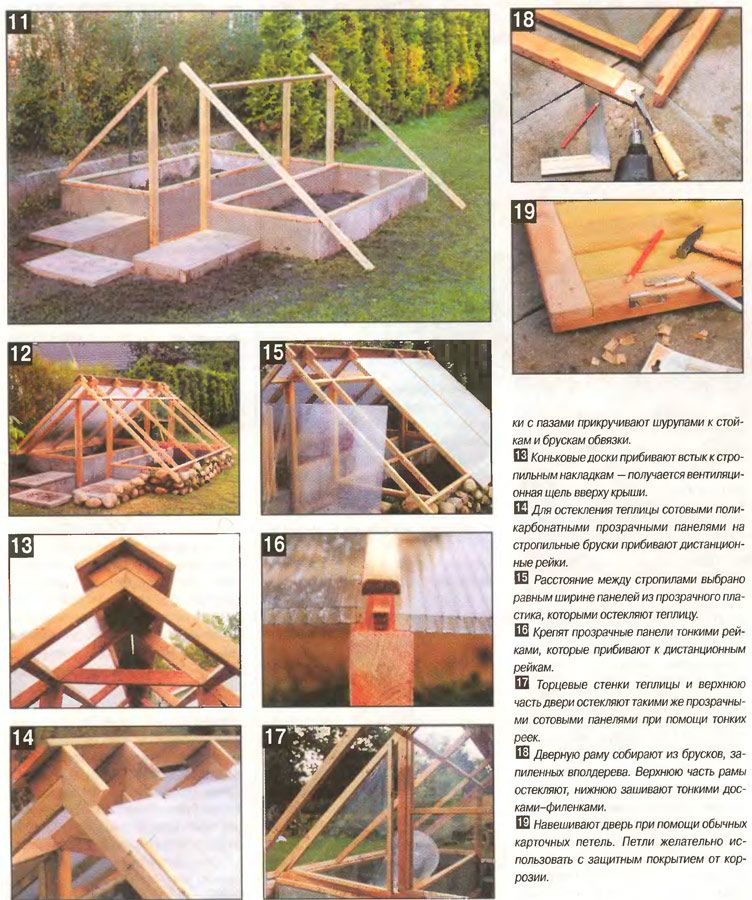
Next, we'll look at one of the simplest, yet most reliable designs, namely a gable-roof greenhouse with foam concrete walls. Of course, we won't forget about the foundation and insulation.
As you can see from the sketch below, we'll cover the south end with two layers of polycarbonate. The vestibule, which will be located on the north side, will provide protection from the wind and serve as a boiler room, storage area, and shelving. The greenhouse slopes will be covered with reinforced polycarbonate. A wooden rafter system will prevent thermal bridges.
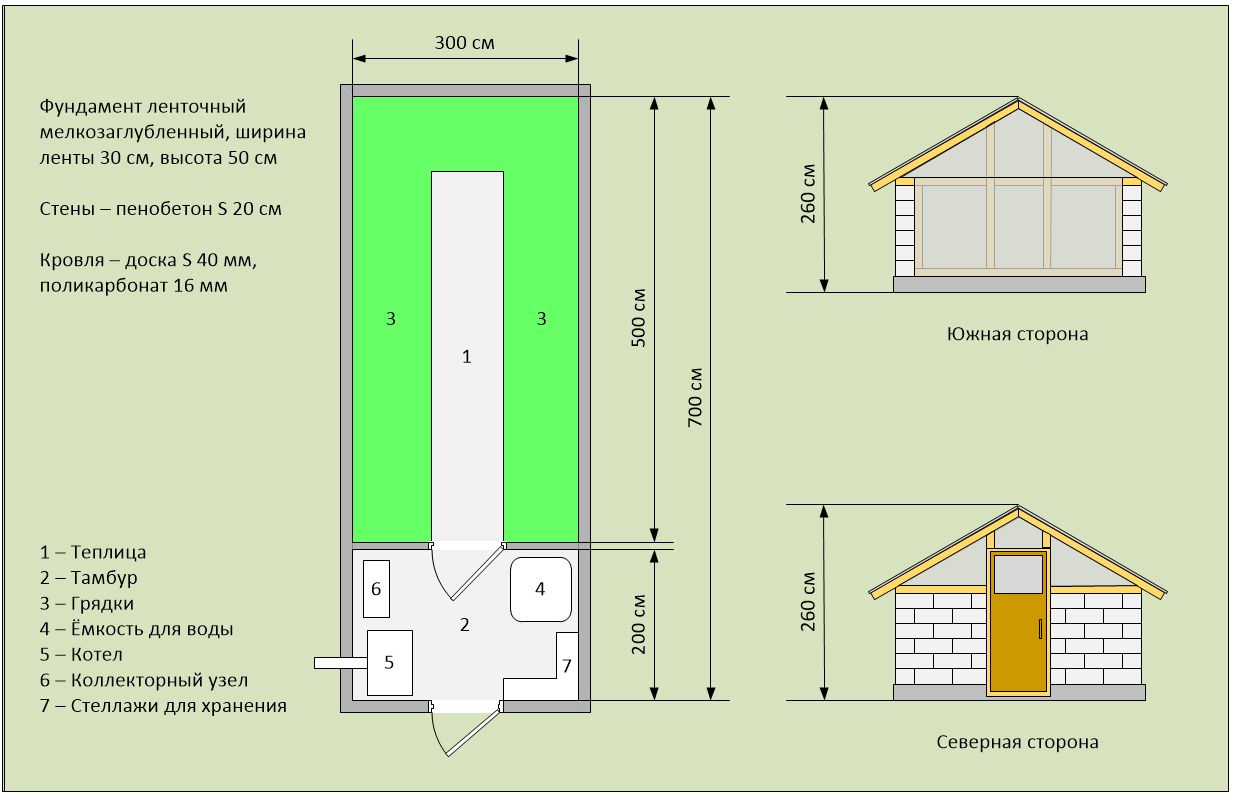
Here's what you'll need to build a greenhouse with the dimensions shown in the sketch:
| concrete grade M200 (for the foundation) | 3.6 m³ |
| reinforcement Ø10 mm | 100 m |
| reinforcement Ø6 mm | 130 m |
| edged board for formwork, 25 mm | 1 m³ |
| foam concrete block 200x300x600 mm | 170 pcs. |
| masonry adhesive (25 kg) | 9 bags |
| polystyrene S 100 mm | 3.3 m³ |
| rafter board 40x150 mm | 0.5 m³ |
| polycarbonate 10 or 16 mm thick | 5 sheets |
| end profile L=2.1 m | 15 pcs. |
| ridge profile L=6 m | 2 pcs. |
| connecting profile L=6 m | 12 pcs. |
| self-tapping screws with thermal washers | 200 pcs. |
Important! It will take you about two months to build a greenhouse like this. This includes about a month of building the foundation and drying it. The temperature must remain above zero during this time, at least 15°C (59°F) and ideally no more than 23°C (73°F).
DIY winter greenhouse foundation step by step
We will build a shallow strip foundation made of reinforced concrete. The foundation should extend not only around the perimeter of the greenhouse, but also at the location of the main partition separating the vestibule and the greenhouse.
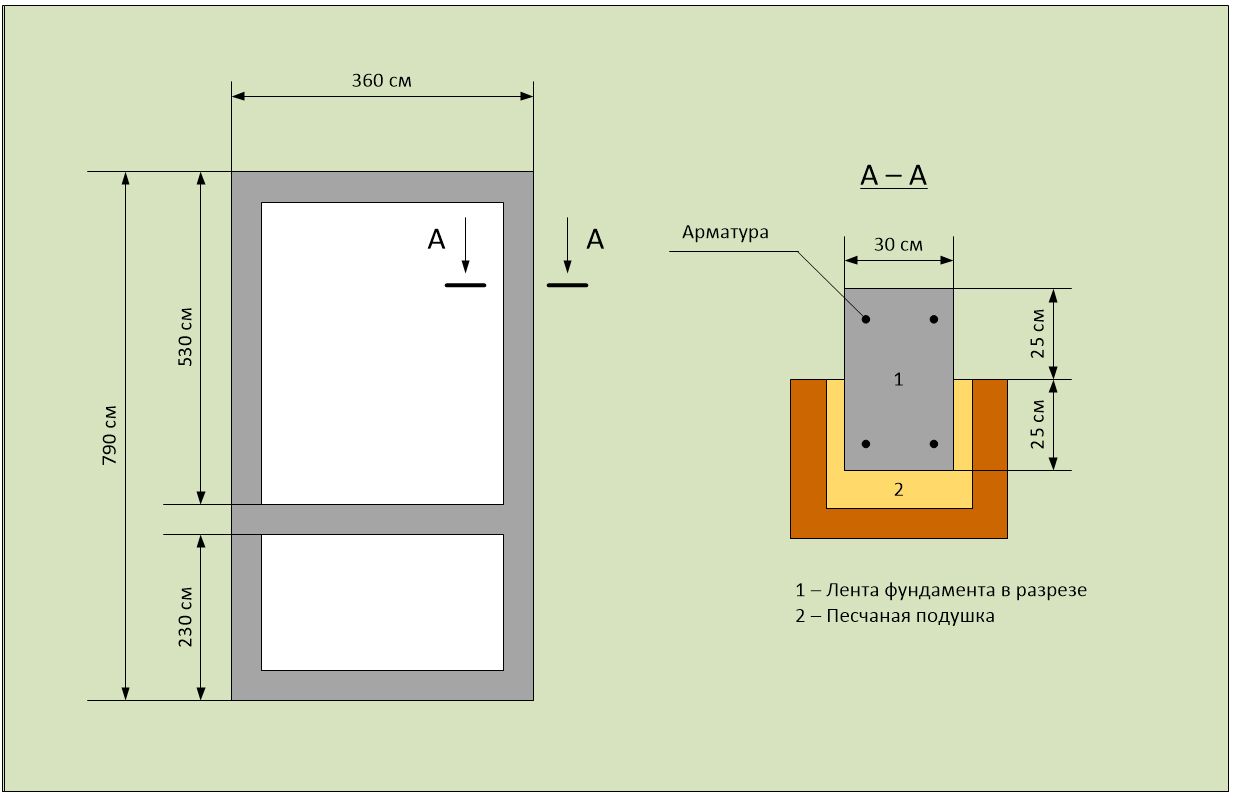
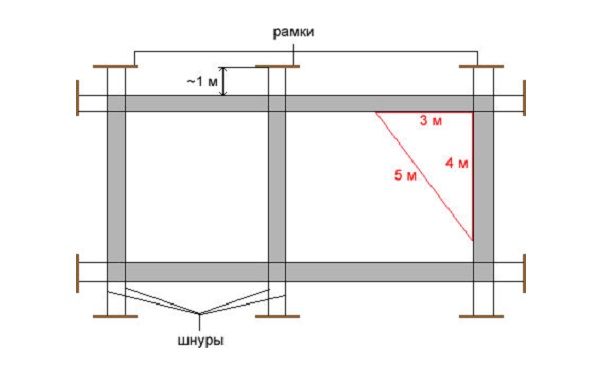
The first thing to do is to clear the area, level it, and mark it out with pegs and string.
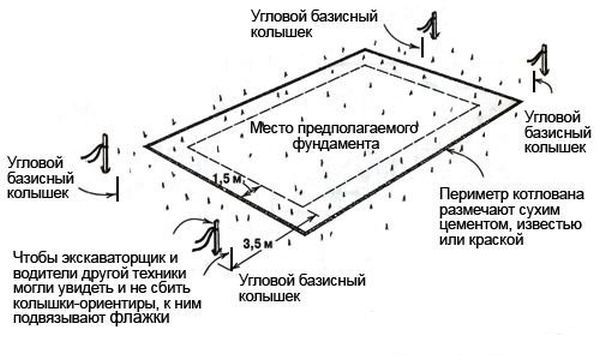
Now we can begin marking out the foundation. We'll install planks and boards at the corners of the future greenhouse. We'll attach twine to them and stretch it around the perimeter of the foundation. We'll check that the corners are perpendicular and the diagonals are equal. Using the twine, we'll mark out the outer and inner contours of the foundation.
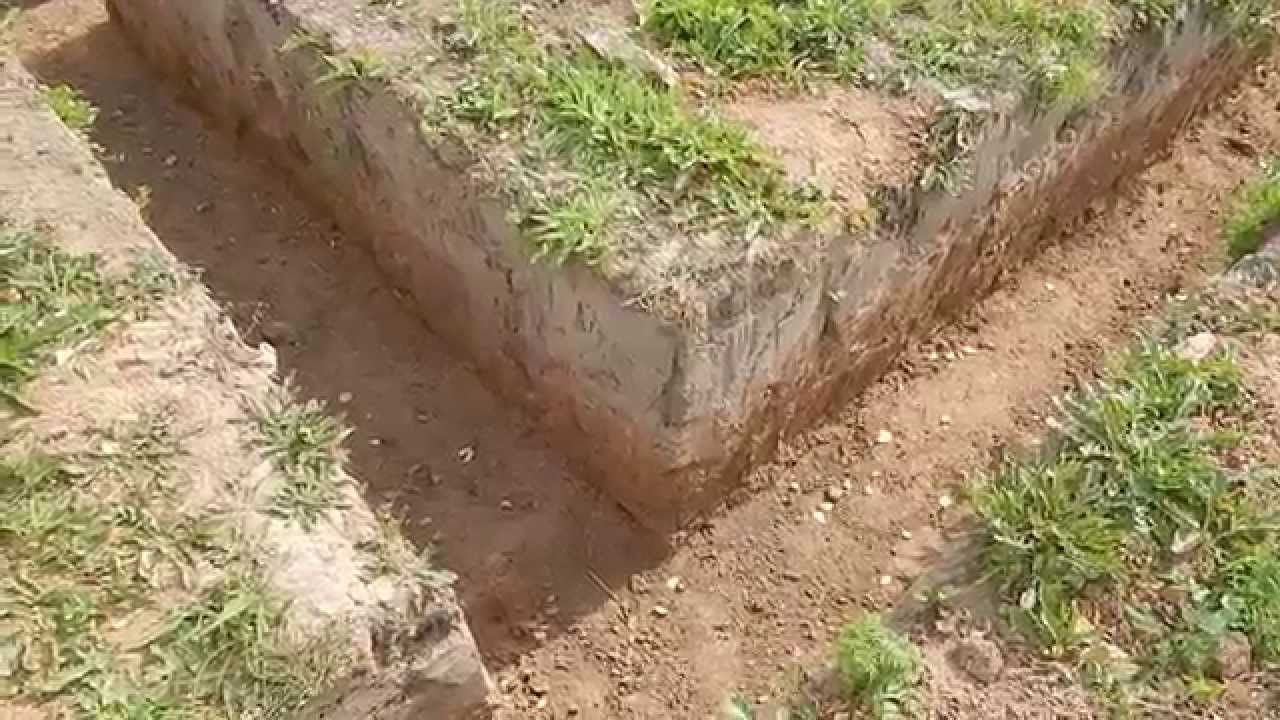
We dig a trench 50 cm deep along the prepared markings. We fill the bottom with a mixture of sand and crushed stone or just sand, compact it, and remember to water it periodically.
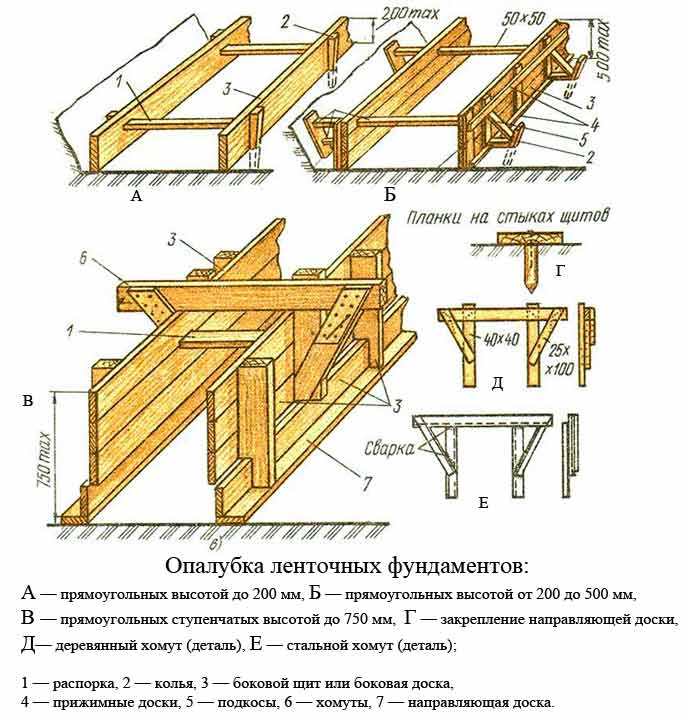
Next, we'll work on the formwork. It's made from 25mm-thick edged lumber. If your soil is fairly dense, the formwork can be installed just above ground level; if it's soft, it can be placed at the bottom of the trench. The diagram below shows how to secure it.
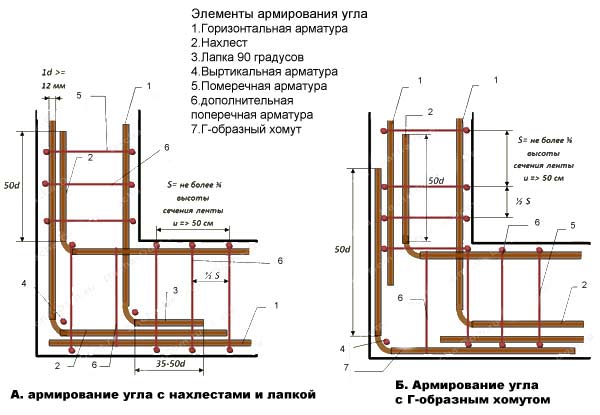
The foundation must be reinforced, as failure to do so can cause the foam concrete masonry to crack due to seasonal ground movement. For the longitudinal reinforcement of the strip, we use grade 10-A-III (A400) rebar (GOST 5781-82), and for the transverse ties, we use grade 6-AI (A240) rebar (GOST 5781-82). We tie the rebar at intersections with annealed wire. We pay particular attention to the reinforcement of the corners.
Having completed all the previous steps, we begin pouring the foundation with concrete. For our size, we'll need 3.6 cubic meters. Mixing this amount by hand would be difficult, and it's also worth keeping in mind that pouring it layer by layer will reduce the foundation's strength. Therefore, it makes sense to save money and order ready-mixed concrete grade M200. We pour it into the prepared formwork, punch it with a rod or vibrating hose, and level the surface.
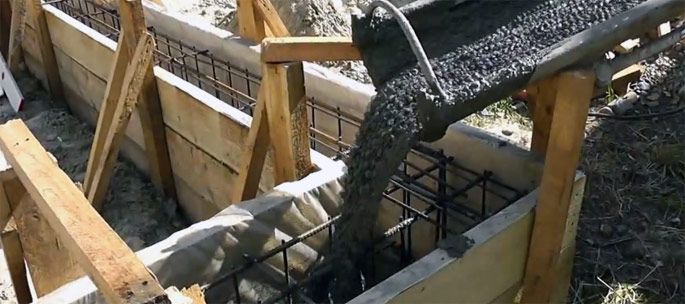
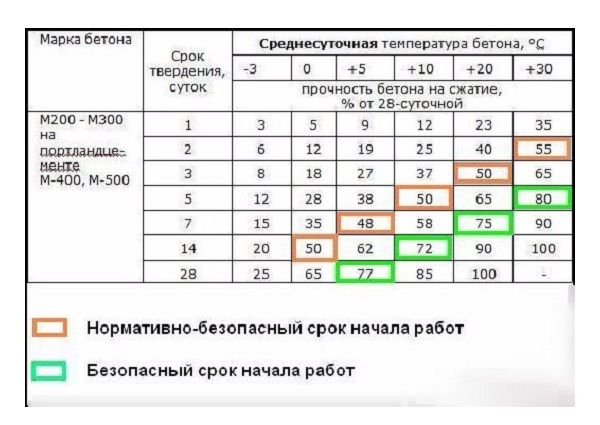
The curing time of concrete depends on temperature. Optimal conditions, as we've already mentioned, are between 15 and 23°C. In this case, it will take a month. If the temperature is above 18°C, it can cure in as little as two weeks (up to 21 days in this case). During the entire curing period, cover the concrete with plastic film to maintain constant humidity. If the top layer becomes too dry, add moisture.
Important! Remove the formwork after a week. The boards can be reused later, so don't throw them away.
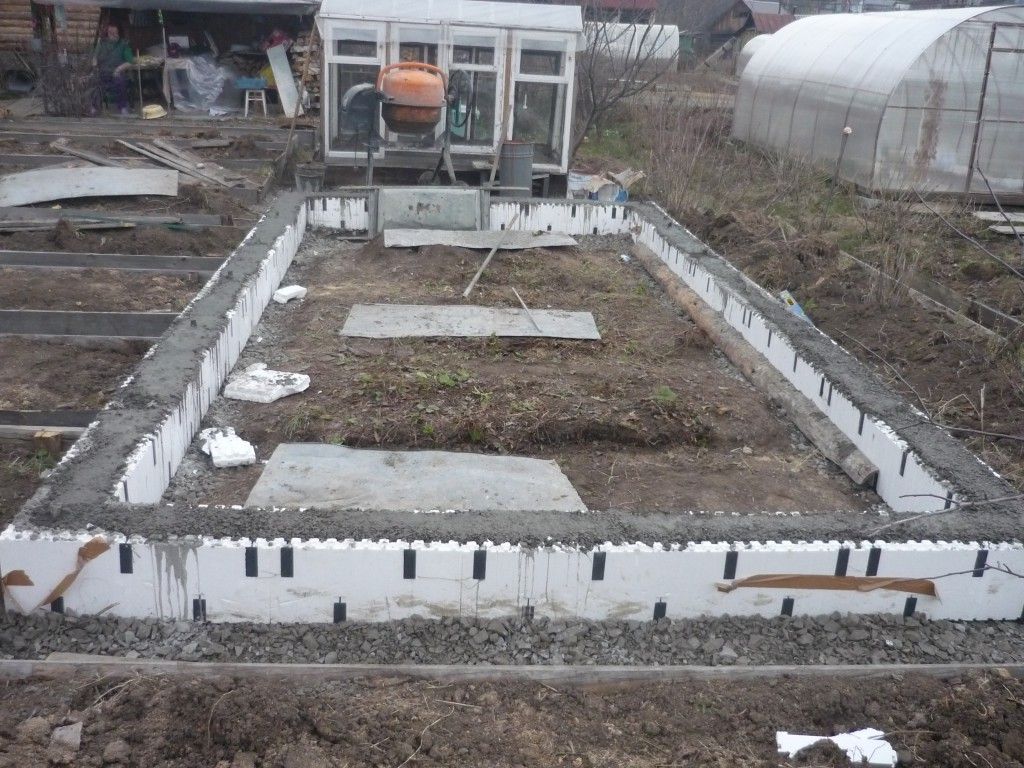
Let's consider walls made of foam concrete blocks.
DIY foam concrete walls for a winter greenhouse: step-by-step instructions
For laying foam concrete blocks, we use a special adhesive that allows for minimal joint thickness, thereby reducing heat loss. They can also be laid with cement mortar, but in this case, be sure to include additional insulation and plastering of the walls.
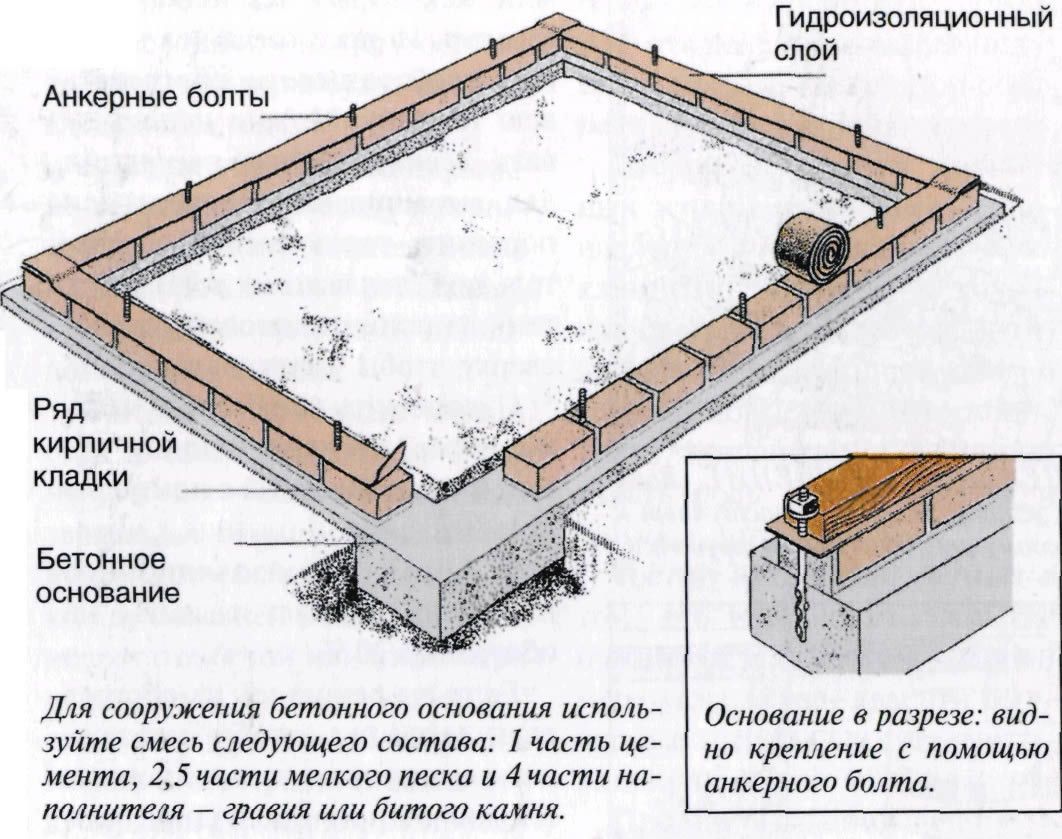
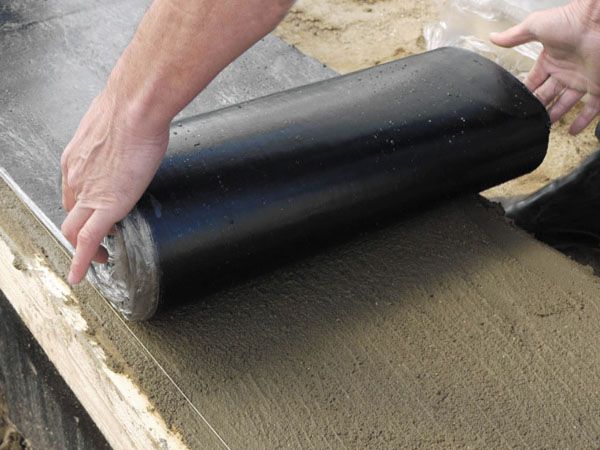
We apply waterproofing using rolled materials (roofing felt, glassine, bikrost, or similar materials). We spread a thin layer of cement and sand mortar (1:4 ratio) on the dried foundation. We lay the rolled waterproofing, overlapping the joints, and level the surface using a straightedge and level.
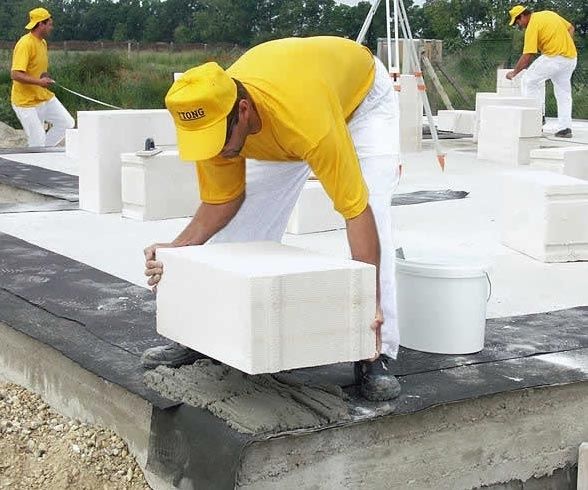
We lay the first row of foam blocks on a cement-sand mortar over the waterproofing. We apply the mortar with a trowel, leaving some extra space, then install the blocks and remove any excess mortar.
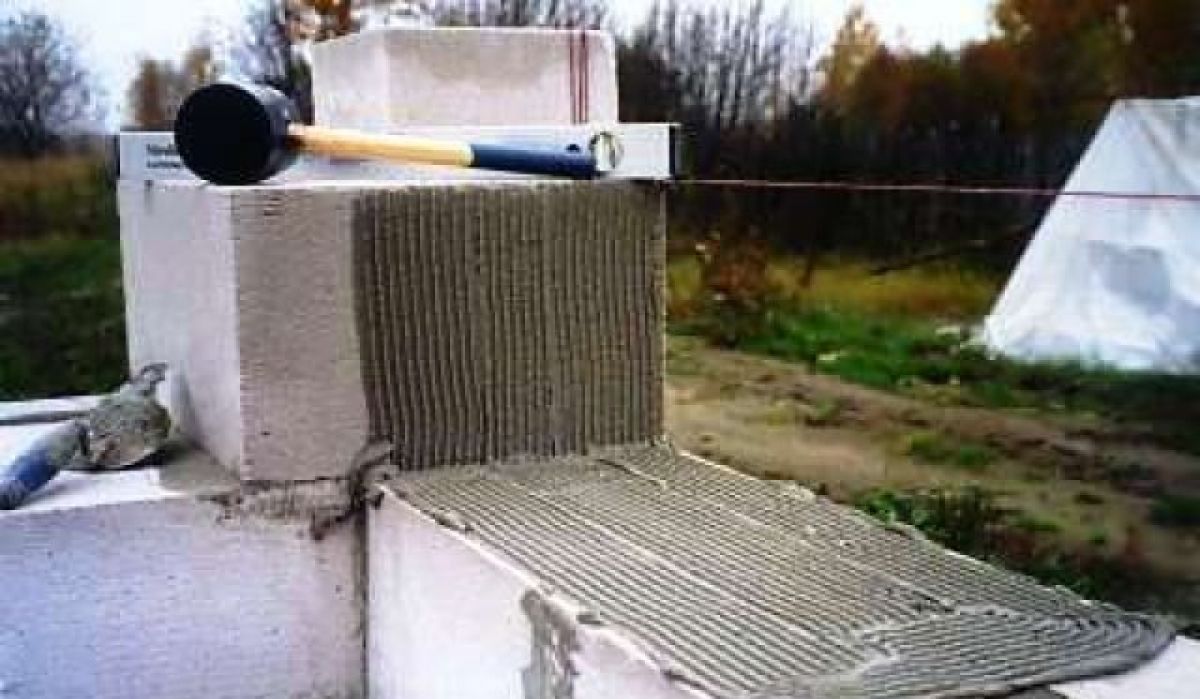
All subsequent rows are laid using a special adhesive. Apply it with a notched trowel to all joining surfaces, both horizontal and vertical. Fit the blocks tightly together using light taps with a rubber mallet. Lay the rows with a 1/2 block overlap.
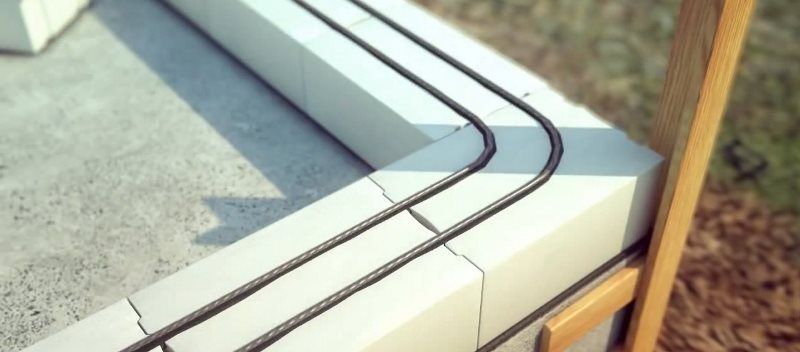
We reinforce the masonry with welded masonry mesh every 2-3 rows. With a block height of 30 cm and a calculated wall height of 150 cm, there are 5 rows of masonry, so we can lay the reinforcing mesh between the third and fourth rows. We apply adhesive over the mesh, and then install the block on top. We can also reinforce the masonry with rebar placed in grooves cut into the blocks.
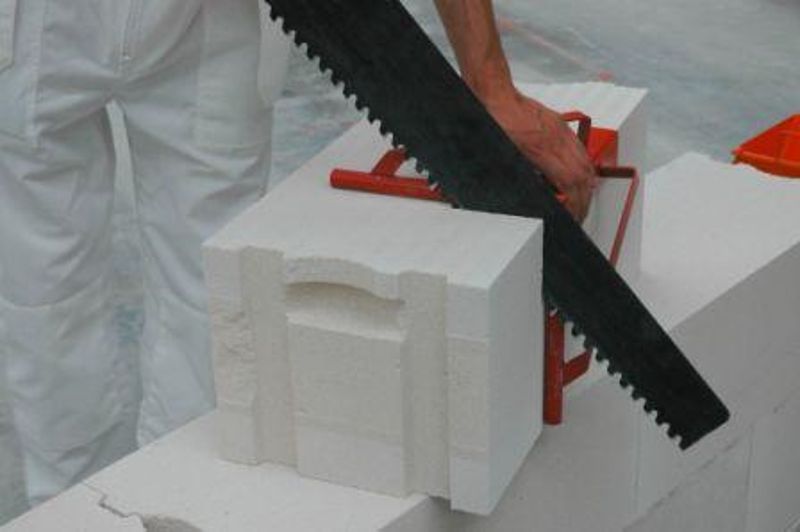
We cut the door frame blocks to size. For example, using a special saw and a template—the blocks are quite easy to cut.
We insulate the walls from the outside with polystyrene sheets.
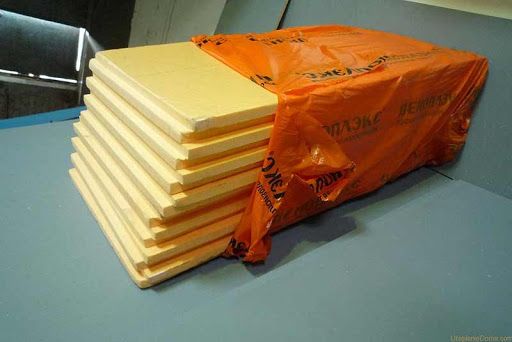
The thickness of the insulation depends on the region and ranges from 30 to 150 mm.
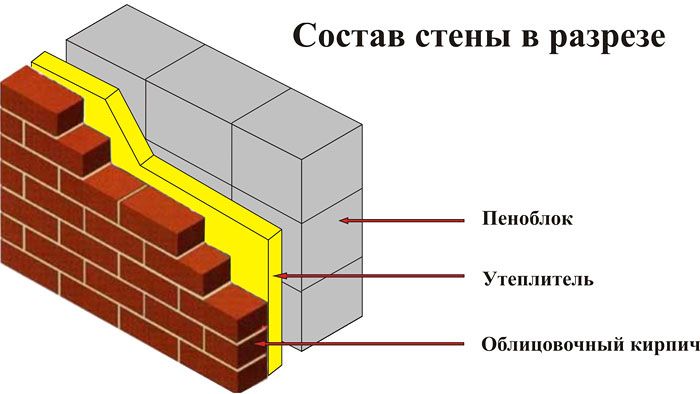
Table of insulation thicknesses for foam concrete greenhouse walls, depending on the region:
| Region | Polystyrene thickness, mm |
| South (Krasnodar, Astrakhan) | 30-40 |
| Volga region (Volgograd, Saratov) | 40-50 |
| Volga region (Ulyanovsk, Kazan, Nizhny Novgorod, Izhevsk) | 50-60 |
| Center (Moscow, Yaroslavl, Voronezh) | 60-70 |
| Northwestern Federal District (Saint Petersburg) | 60-70 |
| DV (Khabarovsk, Vladivostok) | 70-80 |
| Ural (Orenburg, Ufa, Yekaterinburg, Perm) | 70-90 |
| Siberian Federal District (Irkutsk, Novosibirsk, Krasnoyarsk, Tyumen) | 80-100 |
The greenhouse walls can be finished with any moisture-resistant material, such as decorative brick, siding, or facade plaster. This finish will not only improve the appearance but also provide additional thermal insulation and wind protection.
Important! Polystyrene can be replaced with foam or polyurethane. Mineral wool should not be used due to high humidity in the room.
DIY greenhouse roofing step by step
We use 40x100mm wood boards for the posts, frame, and rafters. The rafters are installed at 50-70 cm intervals (depending on the snow load).
We are making the southern wall. We lay the bottom trim board on the foundation over the waterproofing and secure it to the foundation with anchor bolts. We attach the side timber posts to the aerated concrete masonry with anchors. We secure the intermediate posts and the top trim with corners and screws.
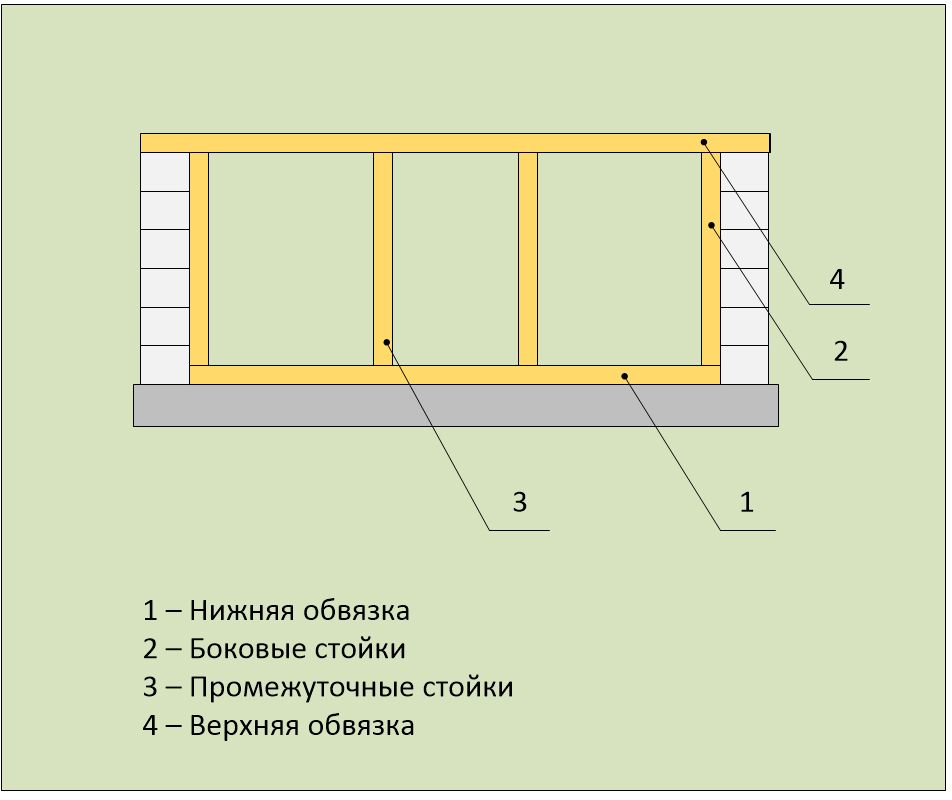
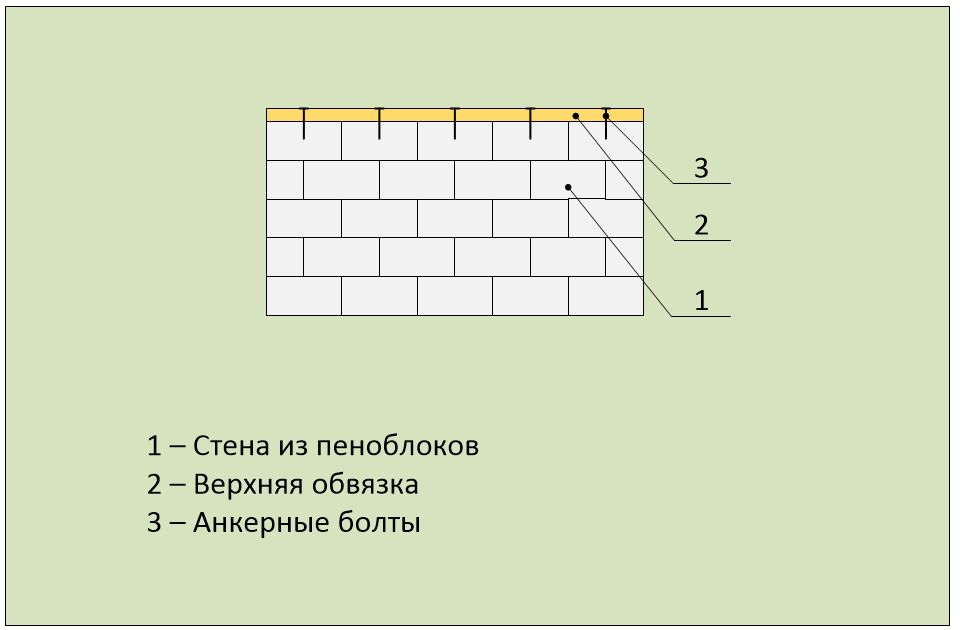
We make the top trimWe lay the top plate along the perimeter of the blockwork, securing it with anchors. The spacing between the plates is 60 cm. The top plate is needed to distribute the roof's weight across the entire wall; placing the rafters directly on the blocks creates deflections, causing the foam concrete to crumble.
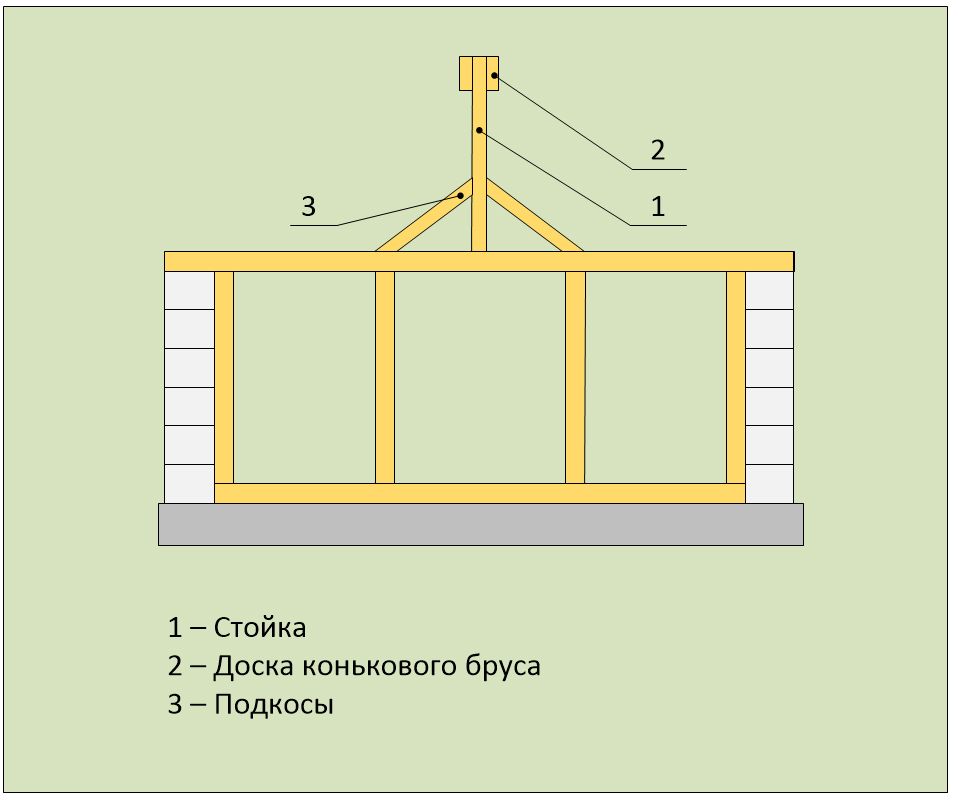
To secure the rafters, we attach the ridge beam.To do this, we install posts strictly in the center of the upper frame of the transverse walls, securing them with brackets and screws, and then additionally install braces. We assemble the ridge beam from two 40x100 mm boards, securing them to both sides of the posts.
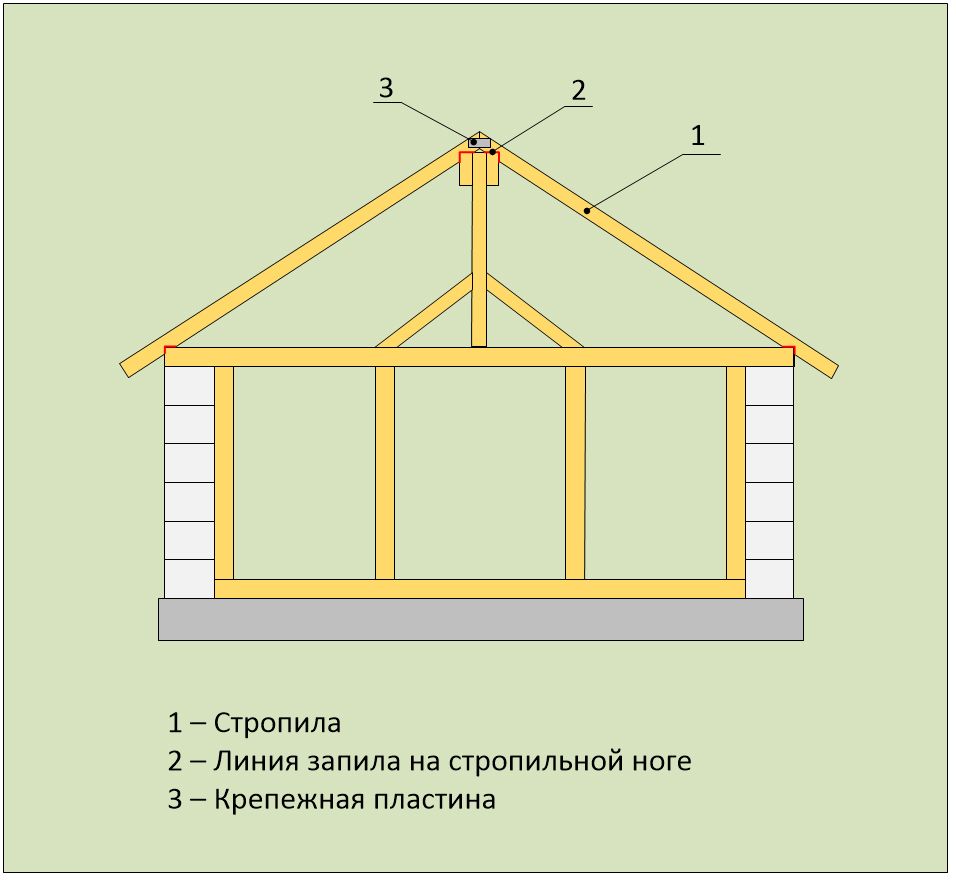
Rafters We make it from a 40x100 mm board. We place the board against the ridge beam and the top plate of the longitudinal wall, marking the notch with a pencil. We make the notch, try the rafter in place, and saw off the excess. We connect the rafters in pairs using metal plates at the ridge, and also secure them to the ridge beam and top plate with brackets and screws.
Polycarbonate 10-25 mm thick can be attached in one layer, this is enough for good thermal insulation.
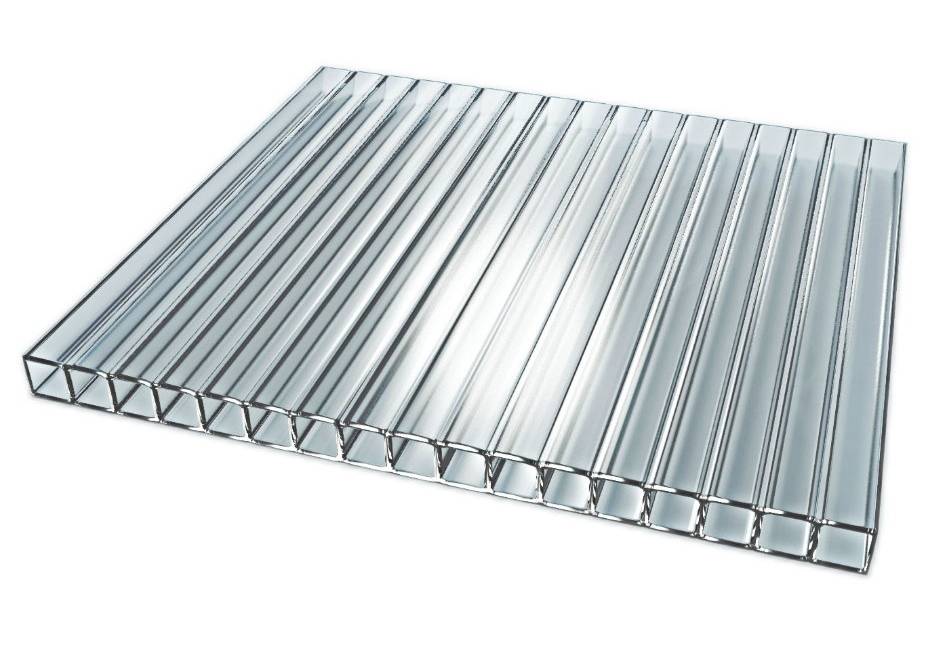
We begin the sheathing work on the south-facing end wall. We cut the polycarbonate to the wall size so that the stiffeners are vertical.
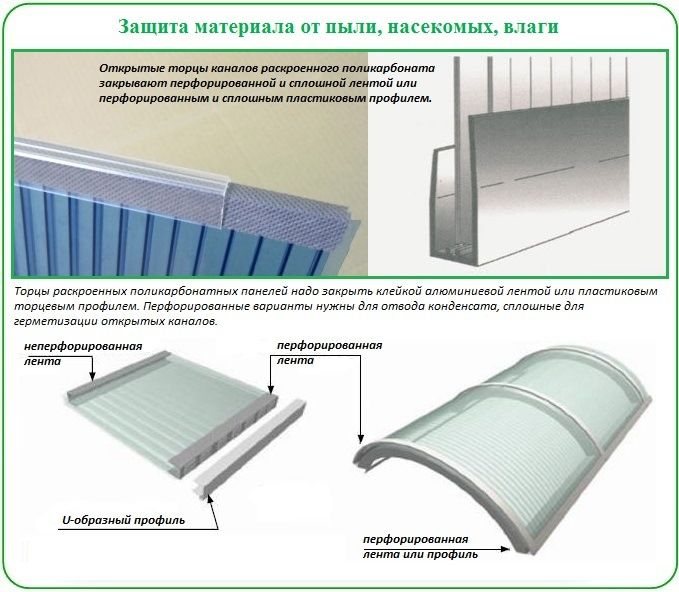
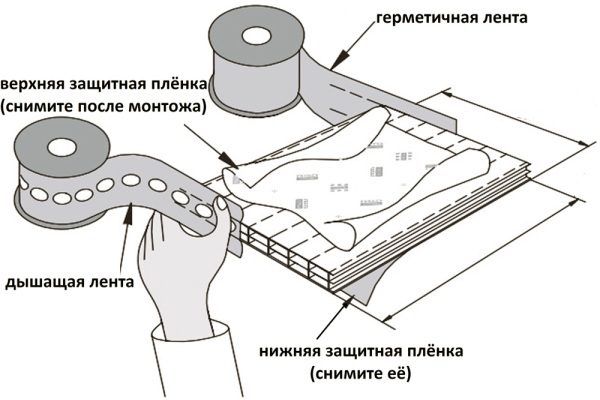
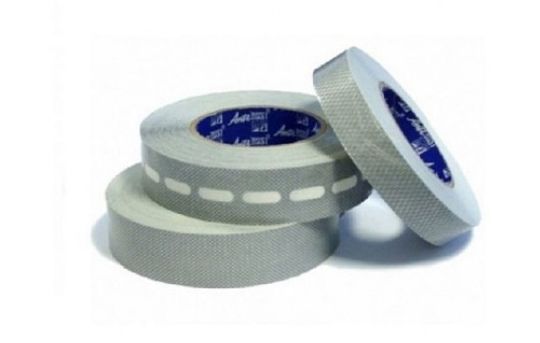
We seal the top edges of the polycarbonate with special aluminum adhesive tape. For the bottom edges, we use perforated tape.
We cover the cut edges with end capping. We secure the polycarbonate using self-tapping screws and thermal washers. We cover the top of the north wall and the wall between the vestibule and the greenhouse in the same manner.
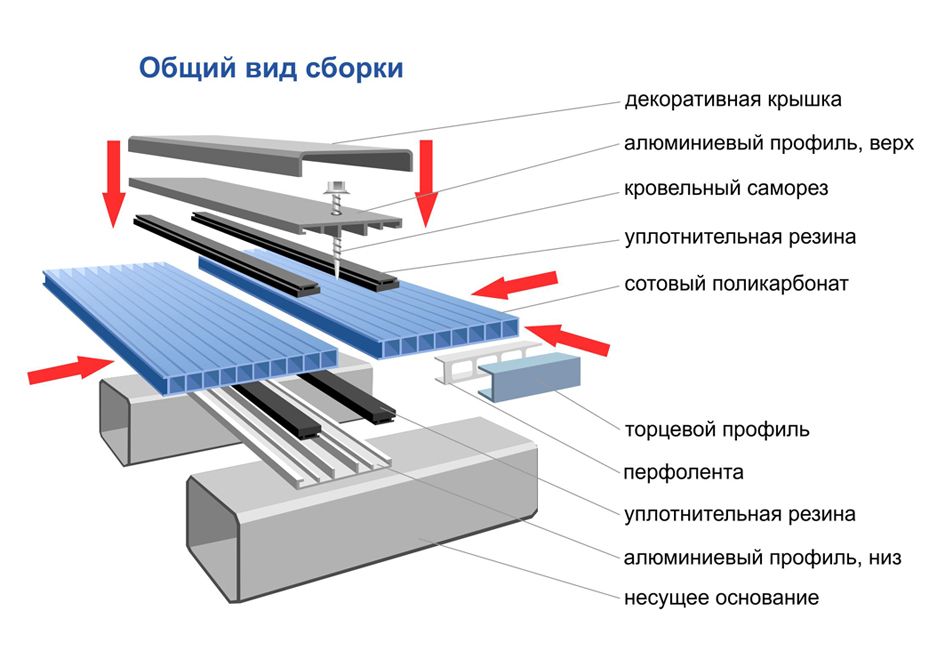
To connect the sheets on the greenhouse slopes, we use connecting profiles. A solid profile is suitable for 10 mm polycarbonate, while a split aluminum profile with a seal is suitable for 16 mm and 25 mm polycarbonate. We attach the covering through the profile to avoid damaging the integrity of the polycarbonate.
The bottom ends of the sheets are finished with perforated tape and end profiles. At the top, the slopes are connected using a ridge profile.
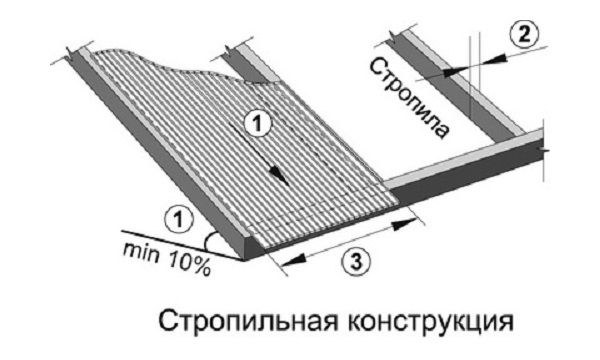
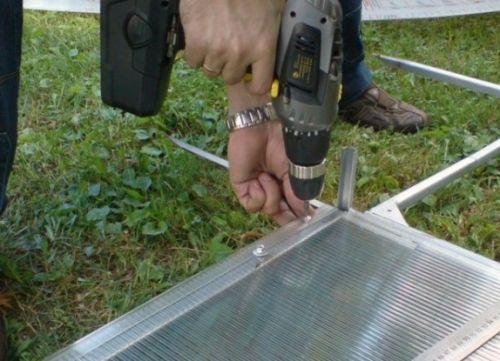
Important! After installation is complete, seal all gaps between the frame boards and the foam blocks with foam or frost-resistant sealant.
Final finishing of the greenhouse
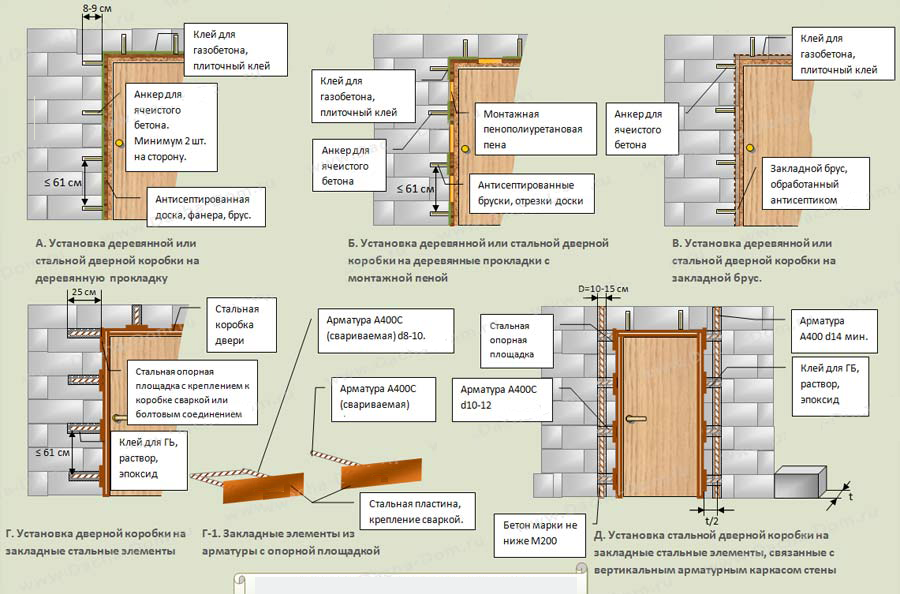
Our winter greenhouse design has two doors, one leading from the outside to the vestibule, and the other from the vestibule to the greenhouse. The one opening to the outside should be insulated with polystyrene or similar materials. The other door can even be made transparent, for example, polycarbonate on a wooden frame. The door frame is secured with anchors at least 10 cm long. The door is hung on hinges and equipped with a latch or lock.
Click on the image to enlarge it:
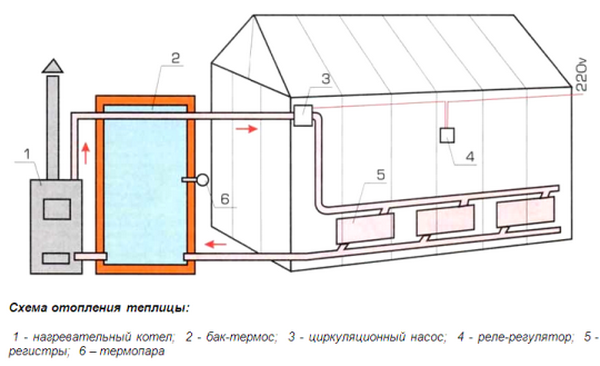
After all this work, we'll install the heating system in the greenhouse. In our case, this will be a boiler and a radiator system. We'll install the boiler in the vestibule, and the chimney will be routed through the main wall. We'll place radiators or large-gauge pipe registers around the perimeter of the walls—this is quite sufficient for a greenhouse of this size.
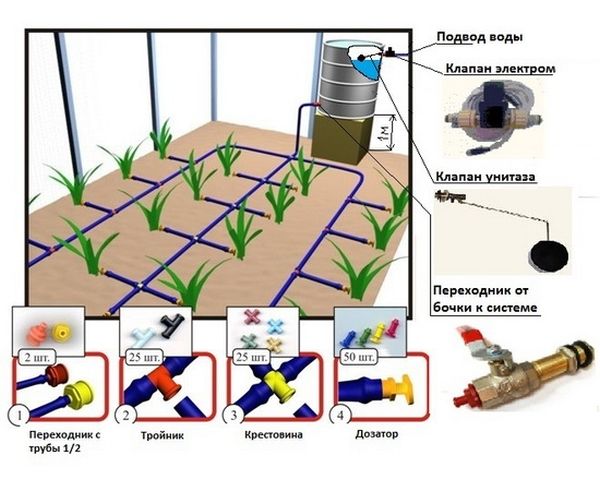
A drip irrigation system is ideal for this type of greenhouse. The tank is placed in the vestibule and equipped with a heating system. Drip irrigation hoses are connected to the plants. Perforated hoses are suitable for the beds, and a drip system is suitable for the shelving.
We place the lamps near the ceiling, keeping in mind that some types get very hot and can damage the polycarbonate (see the section above for lighting selection). Using reflector-mounted fixtures will increase the amount of light reaching the plants. Wiring is installed in plastic or metal corrugated conduit and suspended from the greenhouse structure.
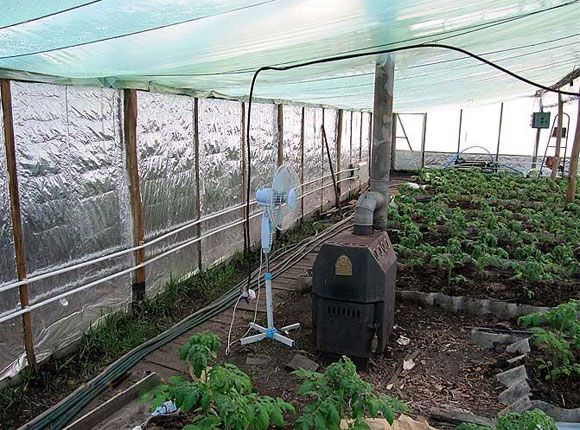
For direct use of the winter greenhouse (growing plants), we set up beds or racks. When establishing beds in cold climates, biological, electric, or hydronic soil heating technologies are used. In southern regions, effective soil heating can even be achieved using sunlight. For this purpose, the main walls of the greenhouse are covered with foil or other reflective material, increasing the amount of light reaching the plants and soil by 50%.
The best winter greenhouse designs
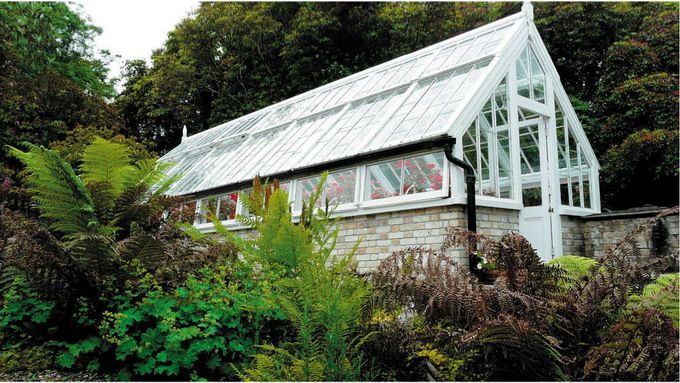
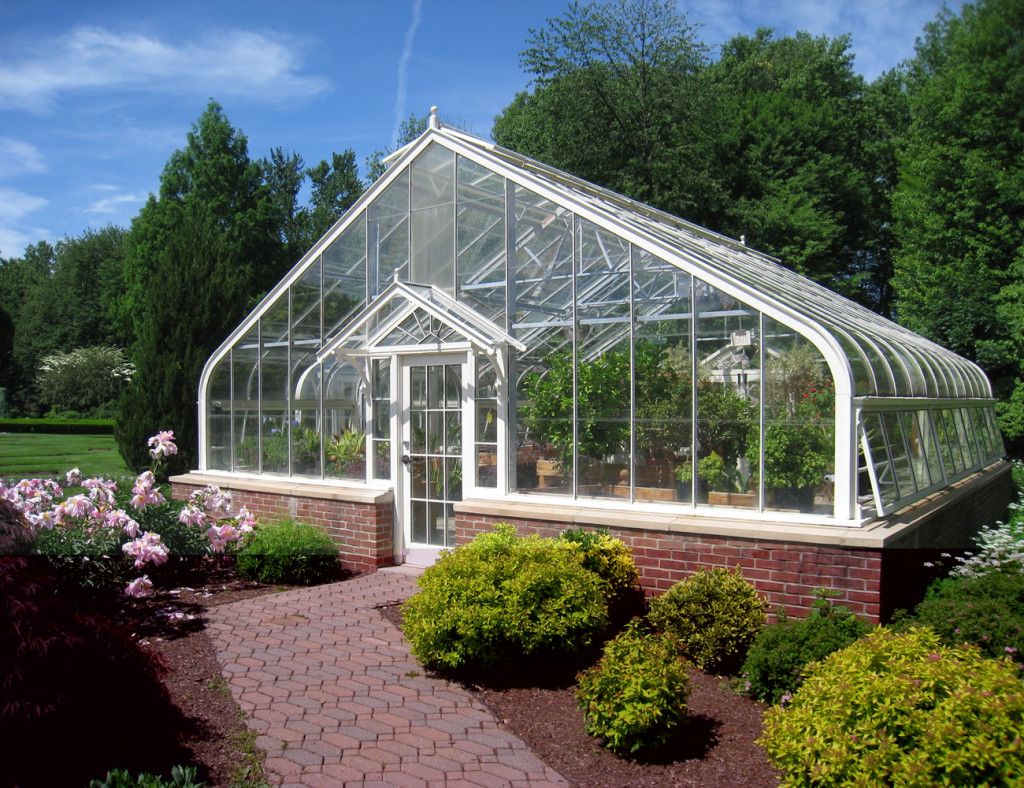
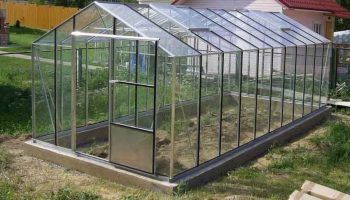
- The white frame and glass look very beautiful. This greenhouse can accommodate a variety of plants, even shrubs and small trees. The brick foundation provides a sturdy structure, and the gable roof prevents snow accumulation. The glass allows excellent light transmission.
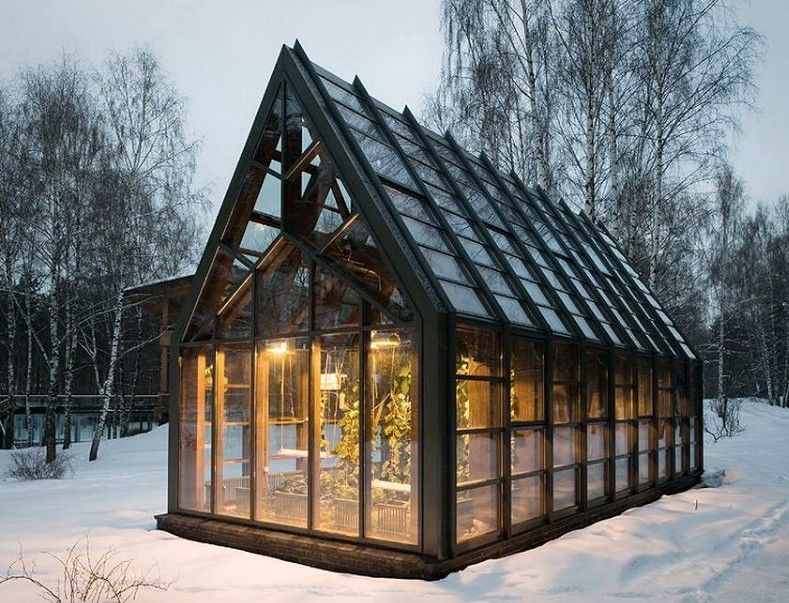
- A greenhouse made of metal and glass, resembling a small hut. The interior is finished in wood. Thanks to the use of hydronic heating, it can be used even in winter. The roof has a sharp shape, making the structure resistant to precipitation.
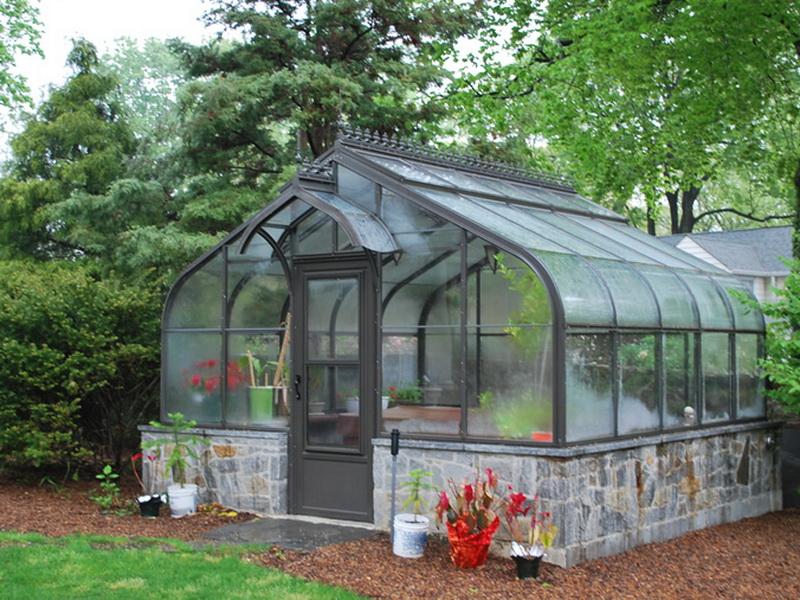
- Stone foundation and metal frame.
Adviсe
The first stage is building a winter greenhouse. The second is harvesting a high-quality crop. This is no easy task, so it's important to consider professional advice. This advice will be helpful from the very beginning of the construction project:
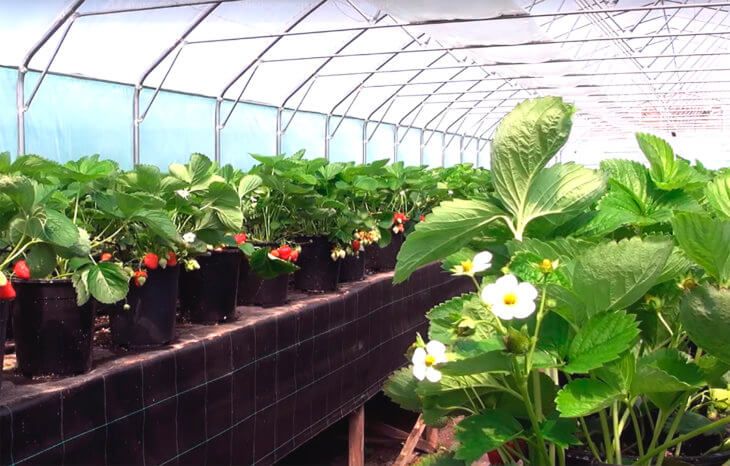
- Growing strawberries (a demanding berry) requires excellent artificial lighting and containers. Avoid planting strawberries in the ground, as sudden temperature fluctuations can kill them.
- For cucumbers, we build a greenhouse on a solid foundation or deepen it into the ground. Read the article on how to build a greenhouse or hotbed for cucumbers yourself.
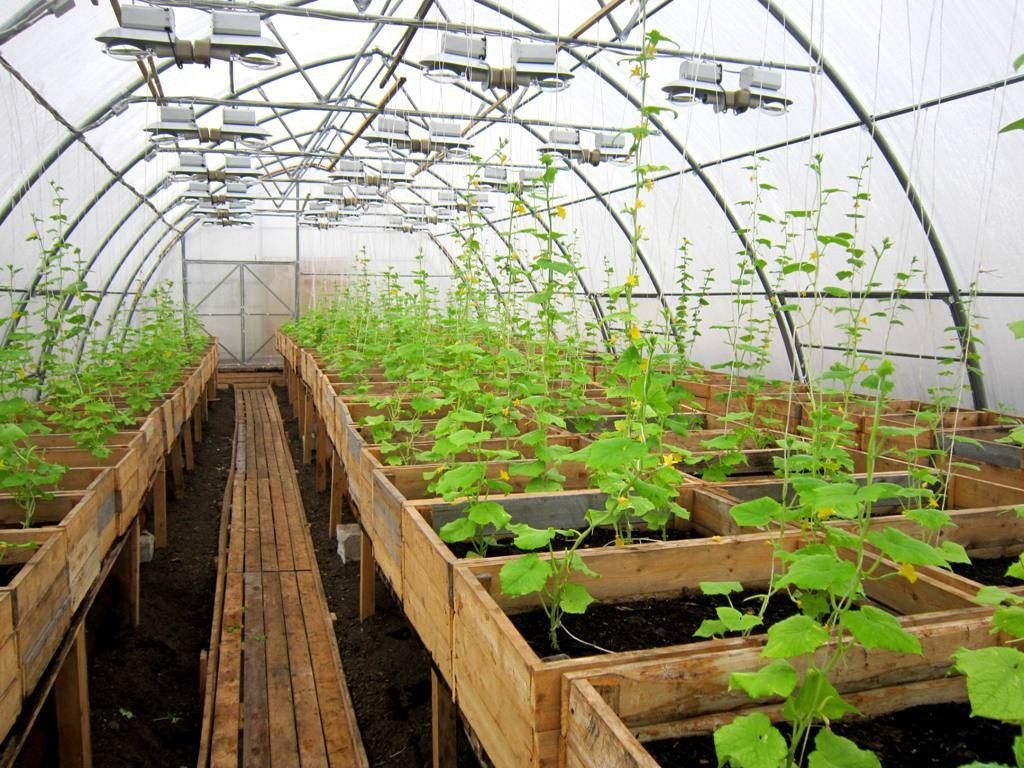
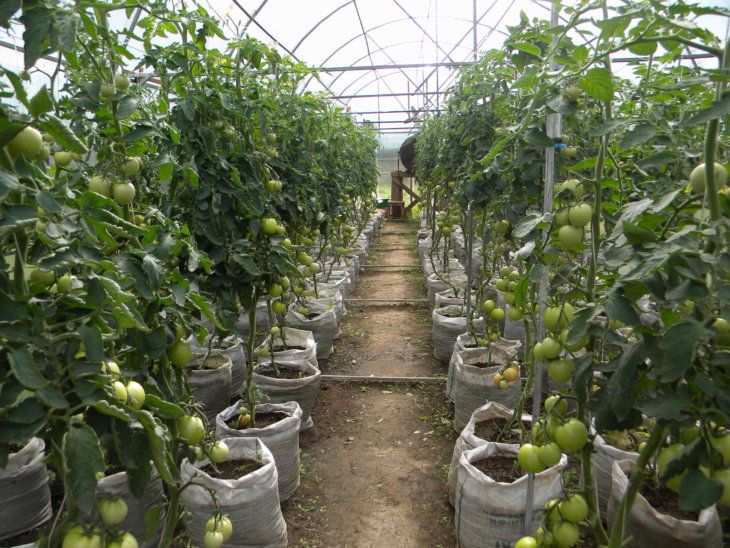
- In temperate climates, tomatoes are planted in the winter-spring or summer-fall period. Cucumbers are usually their predecessors.
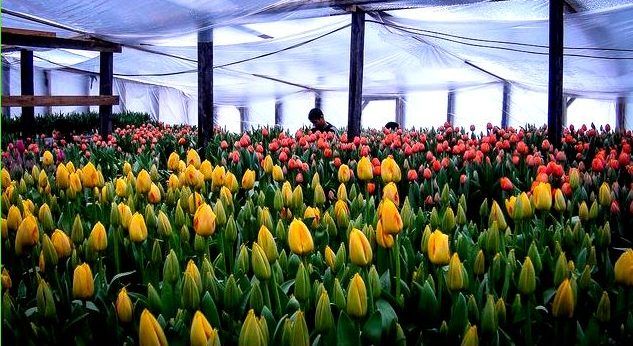
- If the greenhouse is intended for flowers, then do not forget to install devices for regulating humidity.
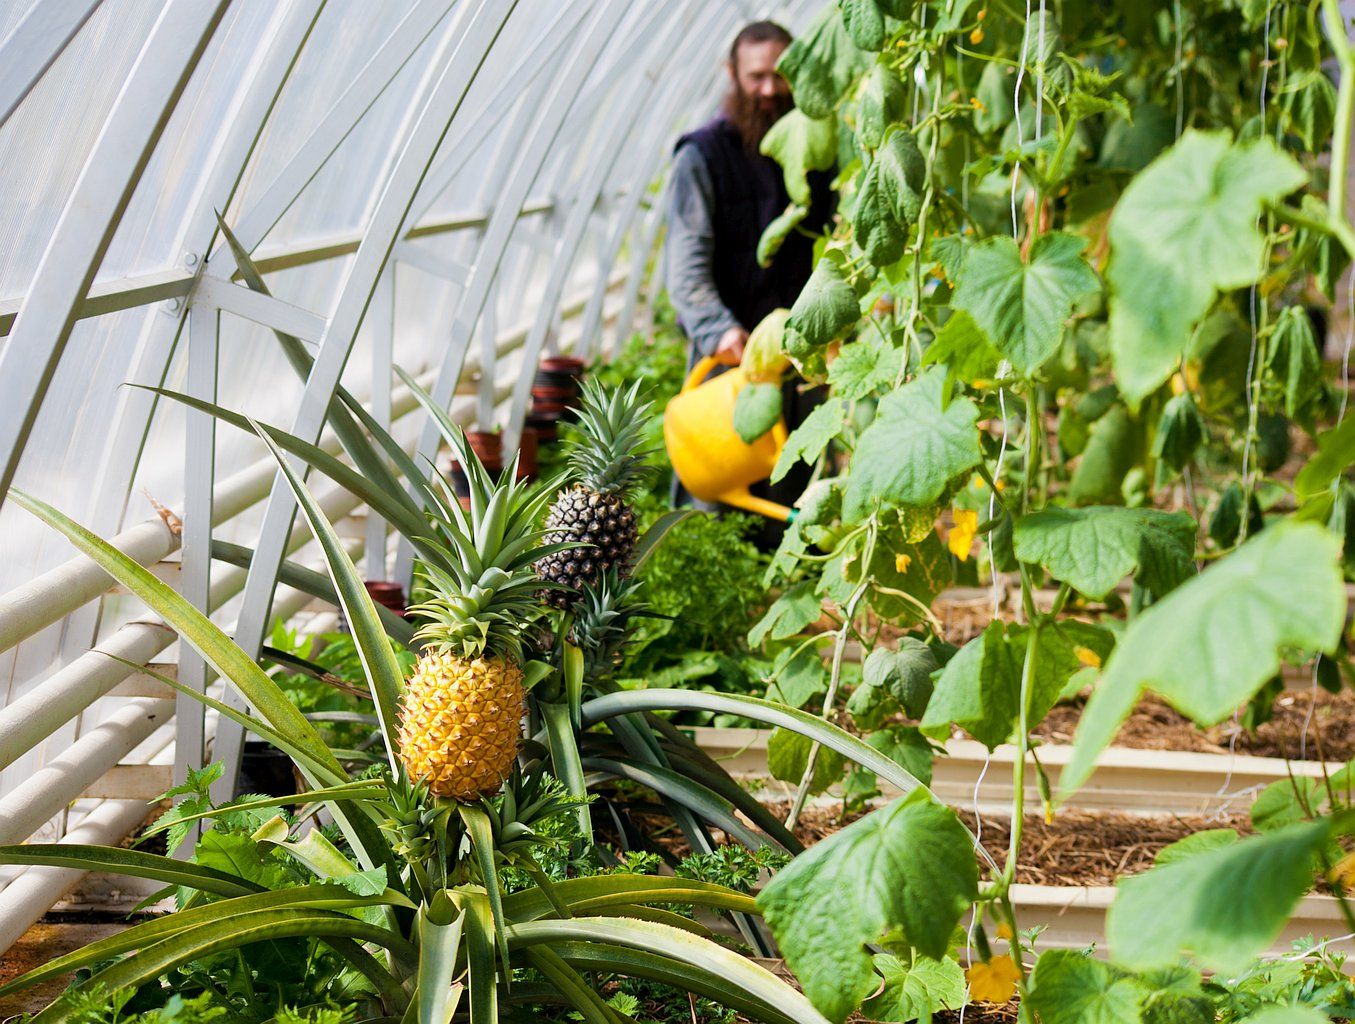
- Growing exotic plants requires more effort, so we need high-quality heating and lighting systems. It's best to hire specialists to help create the best possible conditions.
- For gardening and growing different crops, we define zones and focus on the needs of each vegetable, etc.
Success in harvesting depends on the greenhouse arrangement and proper use.
4 videos on building a winter greenhouse yourself

I appreciated the variety of sources the author used to support his claims.