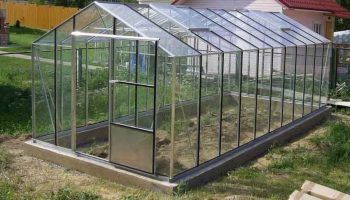
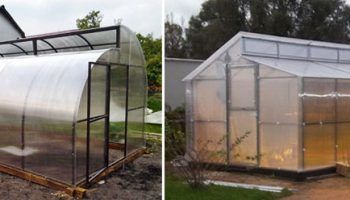
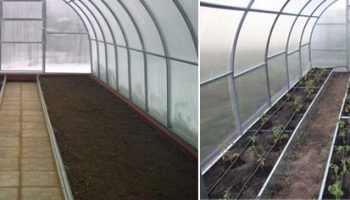
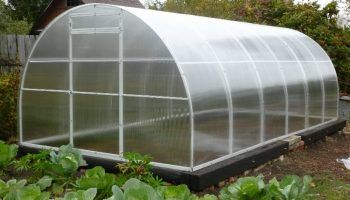
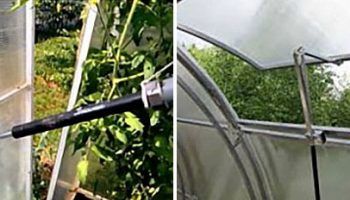
In this article, we'll look at how to build a greenhouse or hothouse from scrap materials yourself. We'll offer eight projects with step-by-step instructions and photos. Which one you choose is up to you, based on your needs.
Content
- 1 DIY greenhouse made from branches
- 2 DIY greenhouse made from plastic bottles
- 3 DIY Greenhouse or Hotbed from Earthbags
- 4 DIY Greenhouse from Wooden Pallets
- 5 DIY greenhouse made from window frames
- 6 DIY Steel Mesh Greenhouse: Step-by-Step Instructions
- 7 DIY greenhouse made from agrofibre and reinforcement
- 8 DIY greenhouse made from stretch film
DIY greenhouse made from branches
Hazel or rowan are best for the frame of such a greenhouse, but birch, aspen, and willow are also suitable. Two- or three-year-old branches are best; they can be freshly cut or left over from previous gardening.
Preparation of materials
Experts recommend preparing for the work in advance. To do this, in late winter or early spring, cut branches about three meters long with a cut diameter of 2 to 2.5 cm. The key is to do this before the tree recovers from the winter and the intensive flow of sap through the trunk and branches begins.
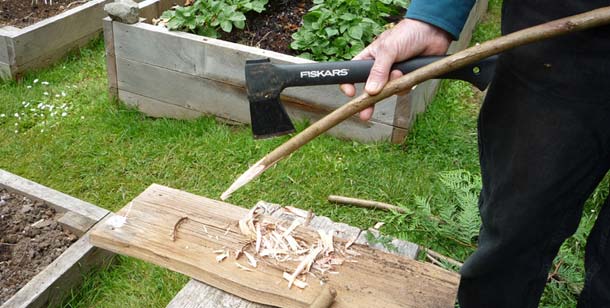
After the branches are cut, the bark should be peeled, knots and splinters removed, and the wood treated with a preservative to extend the life of the finished greenhouse.
Step-by-step instructions for building a greenhouse from dry branches
It's best to choose a clear, windless day for the work. Wooden beams measuring 60 x 40 cm and rebar with a cross-section of 16 to 18 mm can serve as vertical supports.
| Illustration | Steps |
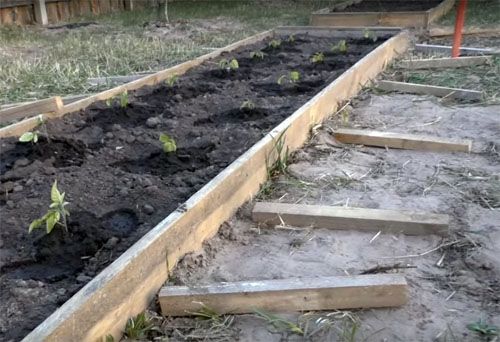 |
Mark out the layout of the future greenhouse. The optimal width is 1.2-1.4 m, and the length depends on the area of the plot; choose it yourself. |
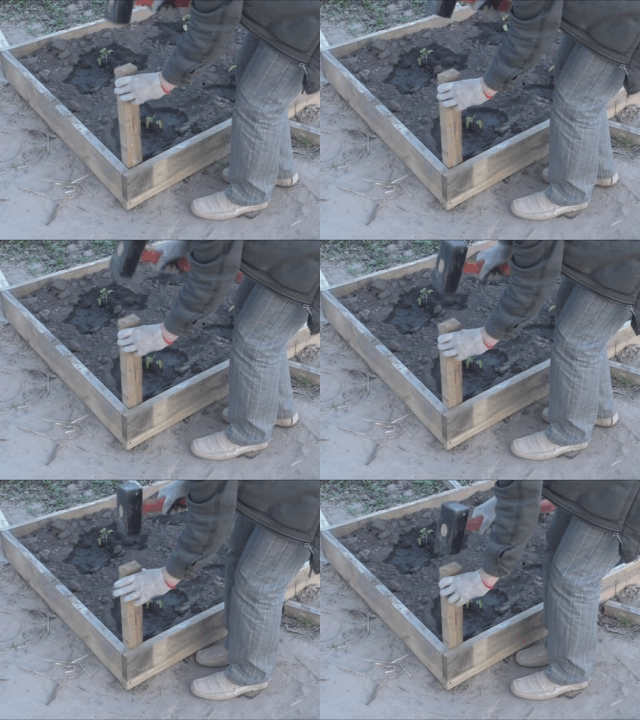 |
Wooden blanks for the support must be dug into the ground to a depth of at least 30 cm on both sides of the future greenhouse at a distance of about 1 m from each other. |
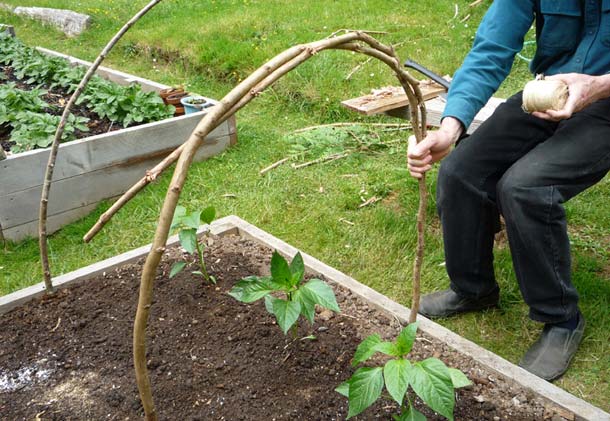 |
Attach branch blanks to them using special clamps or thick wire (three to five branches are attached to each support). You can choose any material for fastening, as long as it's durable enough to withstand temperature fluctuations and rot. |
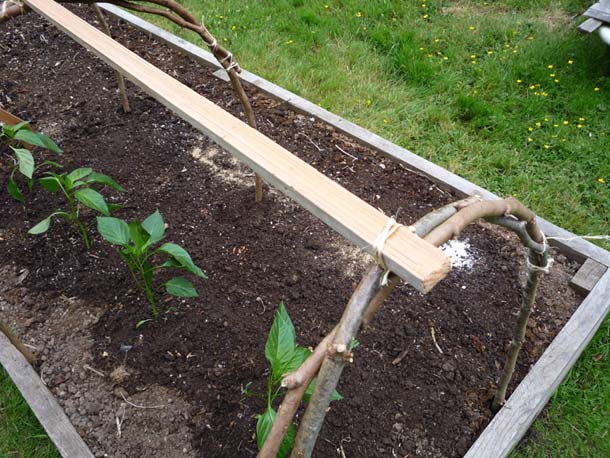 |
To secure the structure, you can tie the top of the structure together with wire in several places, and weave several long branches along the top for stability. If you have enough branches, you can also weave branches along the sides of the resulting arch, securing them with wire. |
|
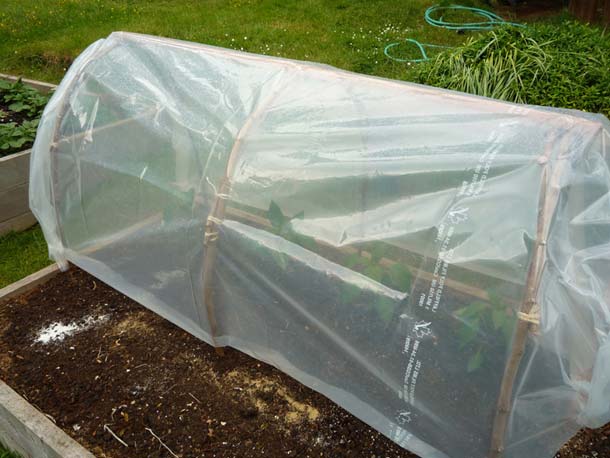
Once the improvised branch arch is ready, it should be covered with a special material, such as durable polyethylene film. Film with a thickness of 150-200 microns is best. Before covering, however, it's best to treat the branches with an antiseptic to prevent mold. |
To fix the film, you can use special clips.
A few hours of productive work, and the branch greenhouse is ready. All you have to do is ensure the film isn't damaged during use, and the frame doesn't crack or become attacked by pests or diseases. In this case, damaged branches are carefully removed from the structure and replaced with new ones, and the film is either patched to last until the end of the season, or replaced entirely.
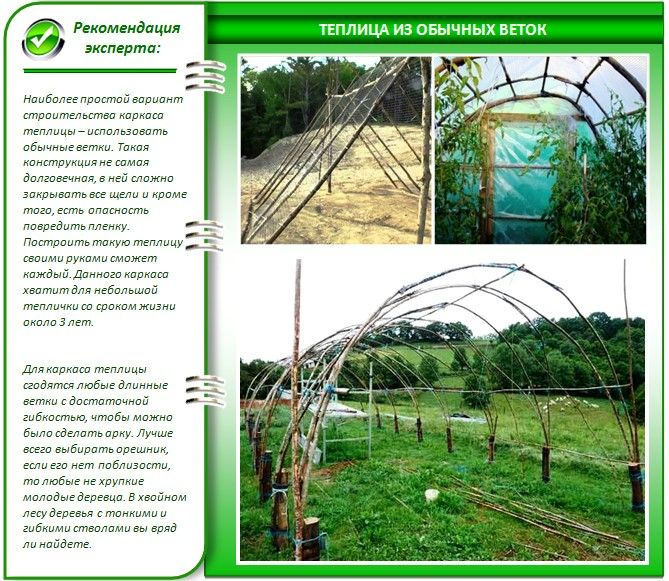
In the photo below, you can see how you can build an entire greenhouse from dry branches, not just a hotbed:
Advantages of a greenhouse made from dry branches
- cheap;
- fast;
- light repair;
- long service life (up to 3 years).
Disadvantages of a greenhouse made of dry branches
The only possible drawback is the flimsiness of such a greenhouse; if strong winds often blow in your region, you will need to use more supports and make the arch lower.
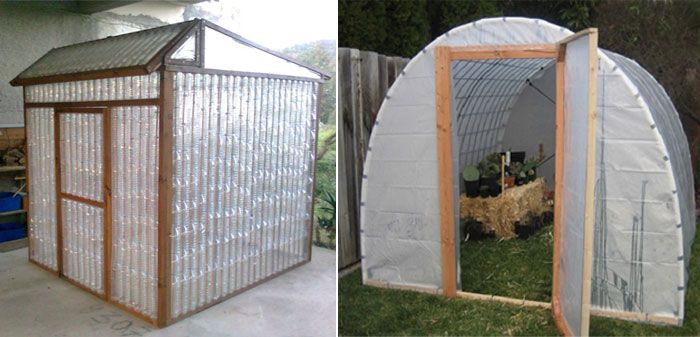
DIY greenhouse made from plastic bottles
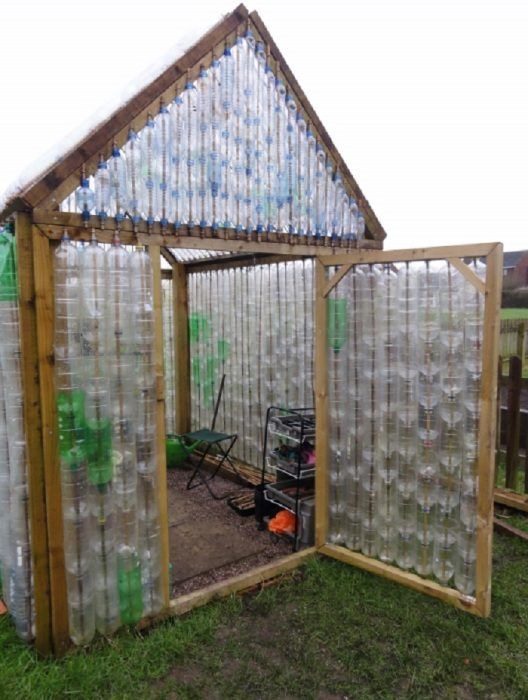
You can build a decent greenhouse out of plastic bottles, but due to their light weight, it will require a fairly sturdy frame. Wooden beams or edged lumber are ideal for this.
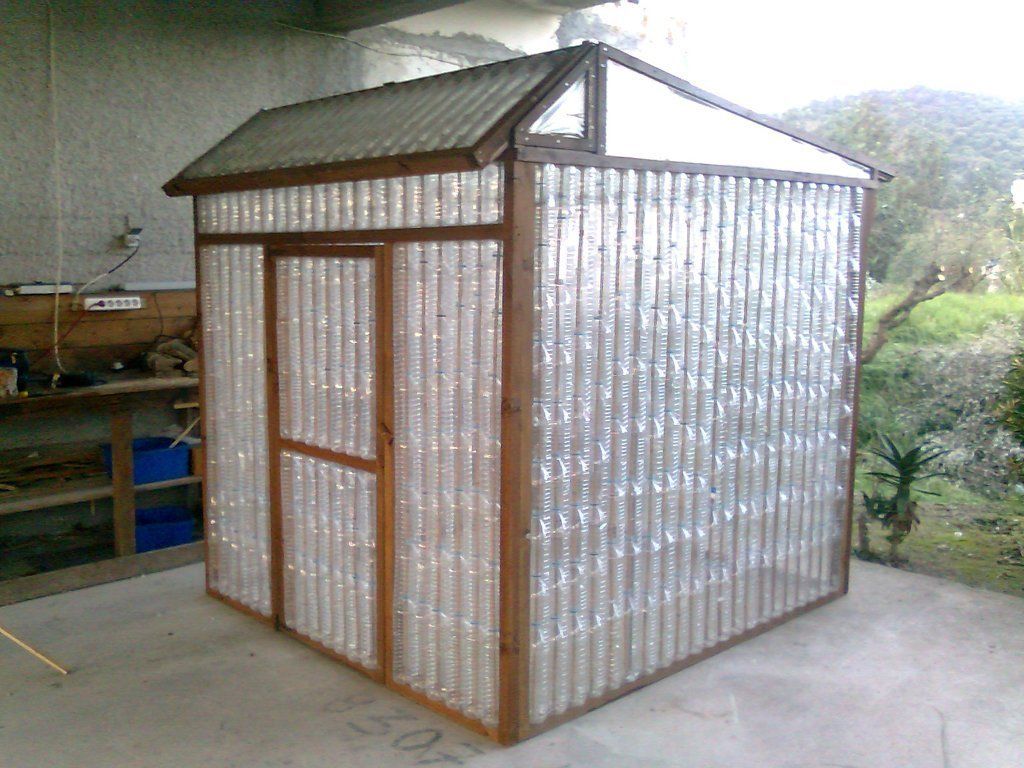
Before starting work, you need to choose a location for the greenhouse; its future size will be determined based on this. A southern or southeastern exposure with good light is best. The soil should be prepared in advance by adding fertilizer or mixing it with highly organic soil from another part of the garden.
Choosing Plastic Bottles: Tips for Beginners
You can use a variety of bottles to build a greenhouse. One-and-a-half-liter bottles will be more useful, while five-liter bottles will be a more durable construction material. Bottles should be clear or lightly tinted.
When choosing bottles, make sure the plastic is undamaged. Avoid thin-walled materials. It's best to choose bottles that have previously been used in food production; they're more likely to meet GOST standards.
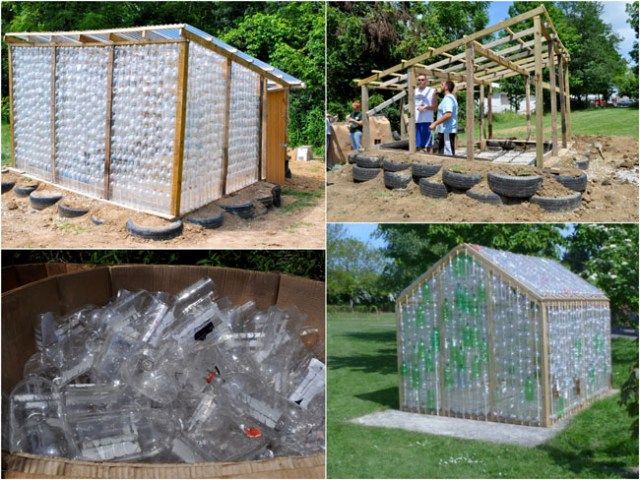
It's quite difficult to collect the required number of bottles, even with the help of all your friends and family, but you can buy additional bottles at specialty stores. Calculate the costs in advance.
Calculation of the required amount of material
Bottles of different sizes have different dimensions. The smallest 1.5-liter bottle is 32 cm high and about 9.5 cm in diameter. Knowing these dimensions, it's easy to calculate how many containers you'll need for a 4 x 2.5 x 2 m greenhouse:
- 1.5 liter bottle – from 700 to 750 pieces (depending on the exact size).
- 2 liter bottle – about 600 pieces.
- For the frame you will need 4 edged boards measuring 20x200x6000 mm.
- For the main guides, you should prepare 15 bars: 12 pieces measuring 50x50x3000 mm and 3 pieces measuring 20x20x6000 mm.
- To lay out the trench you will need roofing felt, at least 10 meters.
- For fastening: nylon thread or fishing line, thin slats, nails, screws and staples.
Prepare the necessary tools: hammer, screwdriver, level, scissors and tape measure.
Step-by-step instructions for building a greenhouse from plastic bottles
| Illustration | Steps |
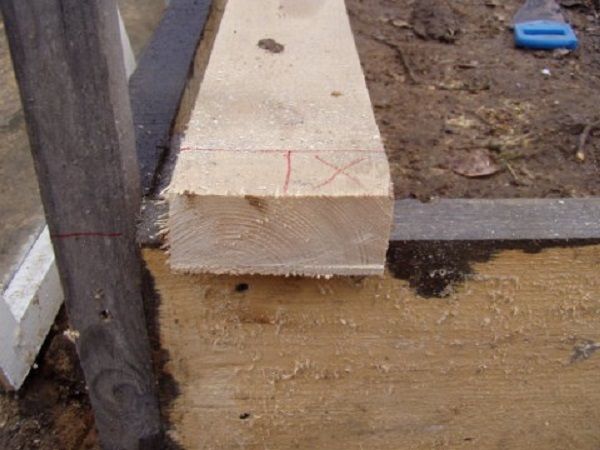 |
Preparing the foundation. The bottle greenhouse structure itself is lightweight enough that it doesn't require a reinforced strip foundation. A timber, foam block, or brick foundation will suffice. We offer a timber-based construction plan. |
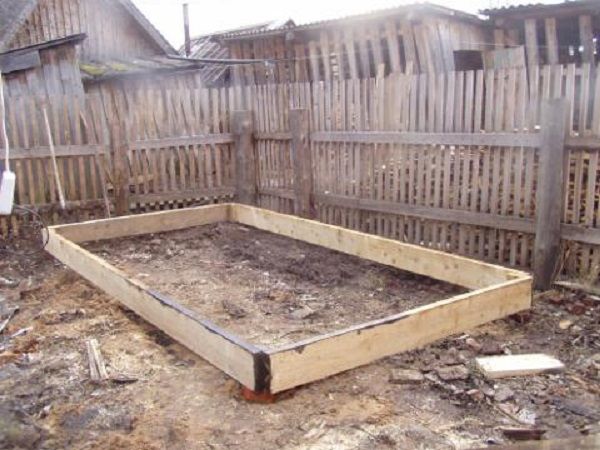 |
We transfer the design drawing from the sheet to the ground and mark the foundation of the future greenhouse. We dig a shallow trench (approximately 10 cm) 20 cm wide around the entire perimeter. |
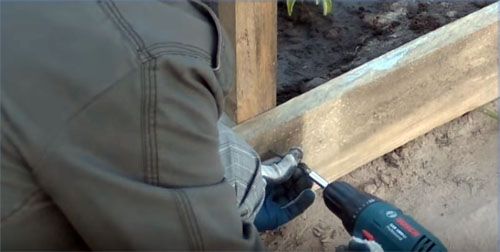 |
We'll make the frame from pre-cut timber, cut to the size of the greenhouse base. You'll have four pieces—two long and two short—that we'll nail together to form a rectangular base. |
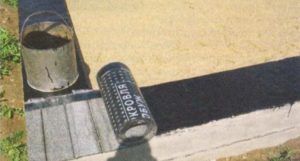 |
We line the bottom of the trench with roofing felt, on top of which we place a blank made of timber. |
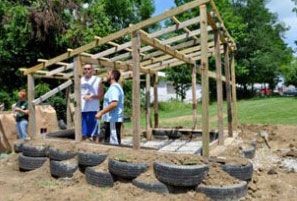 |
We cut vertical support posts from 50 x 50 cm lumber, measuring the desired height on them. We attach these posts to the wooden base using galvanized brackets and screws. |
 |
We fasten the support posts together with a horizontal guide on all four walls of the frame; an opening for the doorway should be provided on one of the sides. |
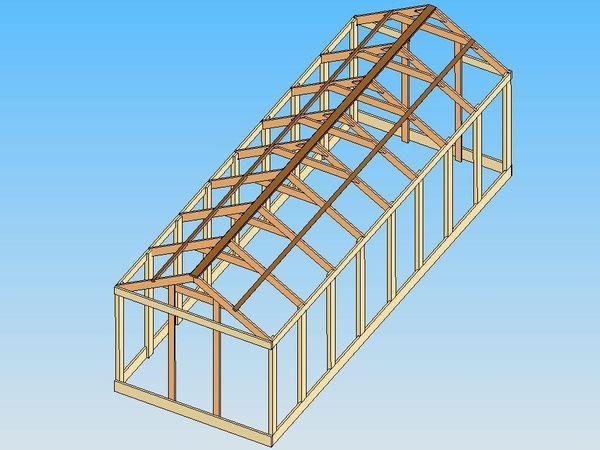 |
Next, we move on to assembling the roof. To do this, we prepare four gable blanks and one long one, join them end-to-end at an angle, and secure them with steel angles. We further reinforce the resulting structure with two horizontal and four vertical guides. |
 |
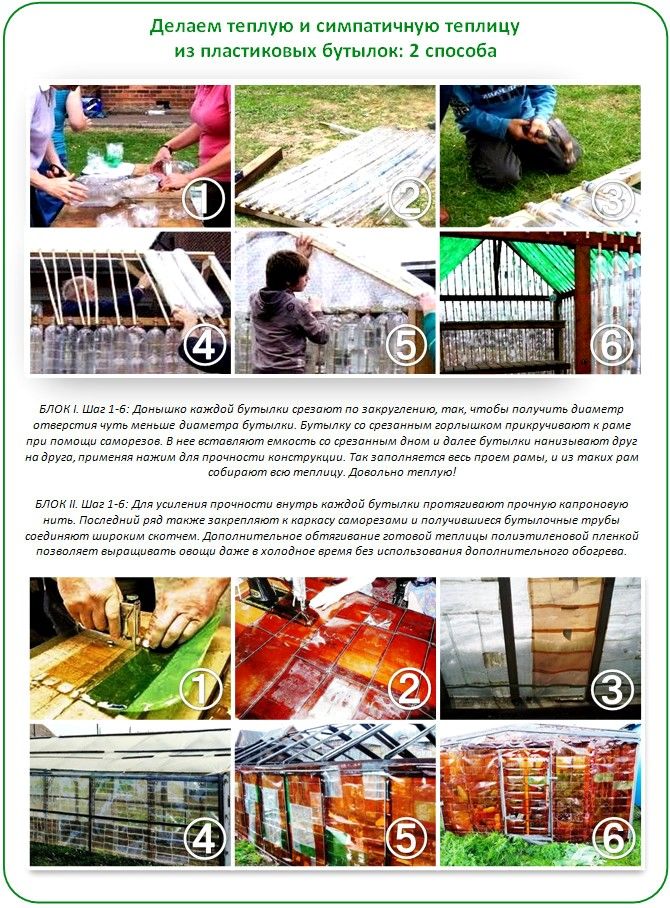
Cut the bottom off each bottle, preferably so that no expansion space remains, which is usually molded to provide stability. This will ensure a tighter fit between the bottles. |
 |
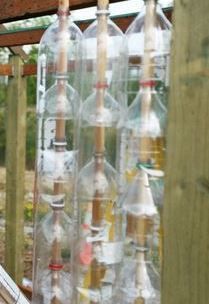
We string the bottles one on top of the other. Once we reach the desired height, we secure them tightly to the support post using nylon thread, fishing line, or a slat. |
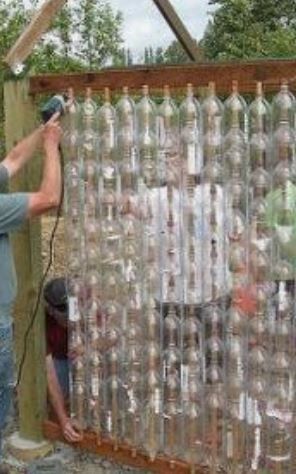 |
Next, we continue assembling vertical columns of bottles, stringing them on nylon thread. This creates a kind of "beads" of plastic bottles. We attach the lower end of the thread to the wooden base, and after the last desired bottle is inserted, we secure the upper end to the roof frame using a pre-hammered nail. It's important that the thread be pulled tight and the bottles fit snugly together. We repeat this process around the entire perimeter of the structure. |
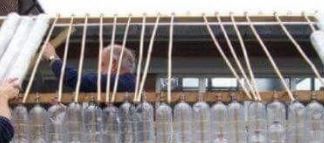 |
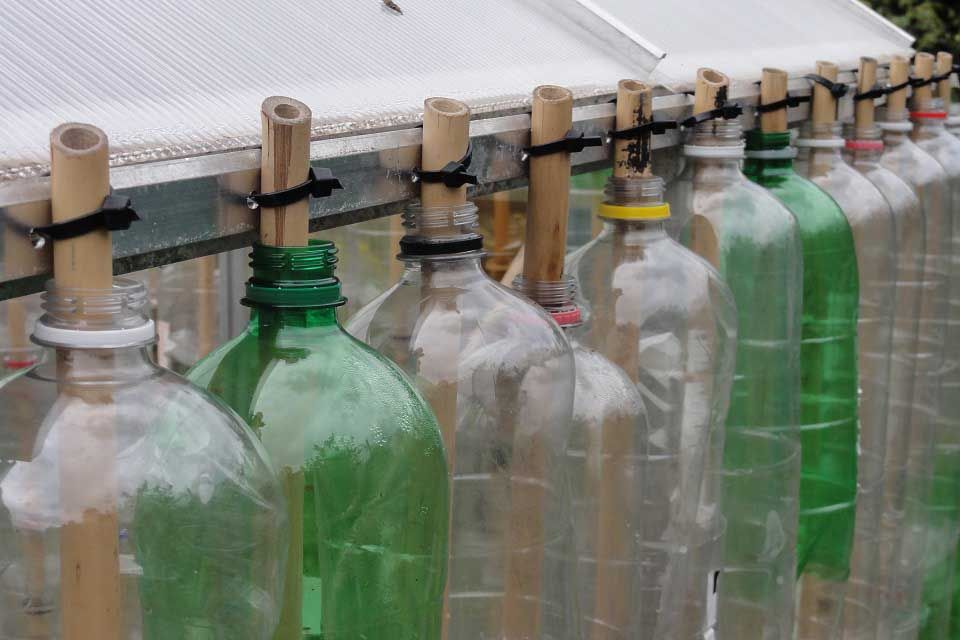
For the roof, instead of fishing line or thread, it's better to use thin slats that fit easily into the neck of the bottle. We install the roof using the same pattern. Afterward, cover it with a thick protective film. For the door, it is necessary to construct a wooden frame in advance, and it is best to knock together the door leaf from edged boards and hang it on stainless steel hinges. |
Advantages of a greenhouse made from plastic bottles
- the walls and roof let in enough light;
- high tightness with proper assembly of the structure;
- resistance to temperature changes;
- high thermal insulation qualities;
- quick installation;
- cheap;
- long service life (up to 7 years).
In such a greenhouse, you can start growing crops as early as March, and by the end of November, many people's favorite greens (dill, parsley, and the like) will thrive in it.
Disadvantages of a greenhouse made from plastic bottles
The main drawback of this type of greenhouse is the unreliability of the connecting joints. Even the strongest thread or fishing line will break over time. A more cost-effective option is to use thin slats instead of fishing line.
In addition, plastic bottles are not very resistant to mechanical damage, so you need to be very careful when swinging garden tools in this greenhouse.
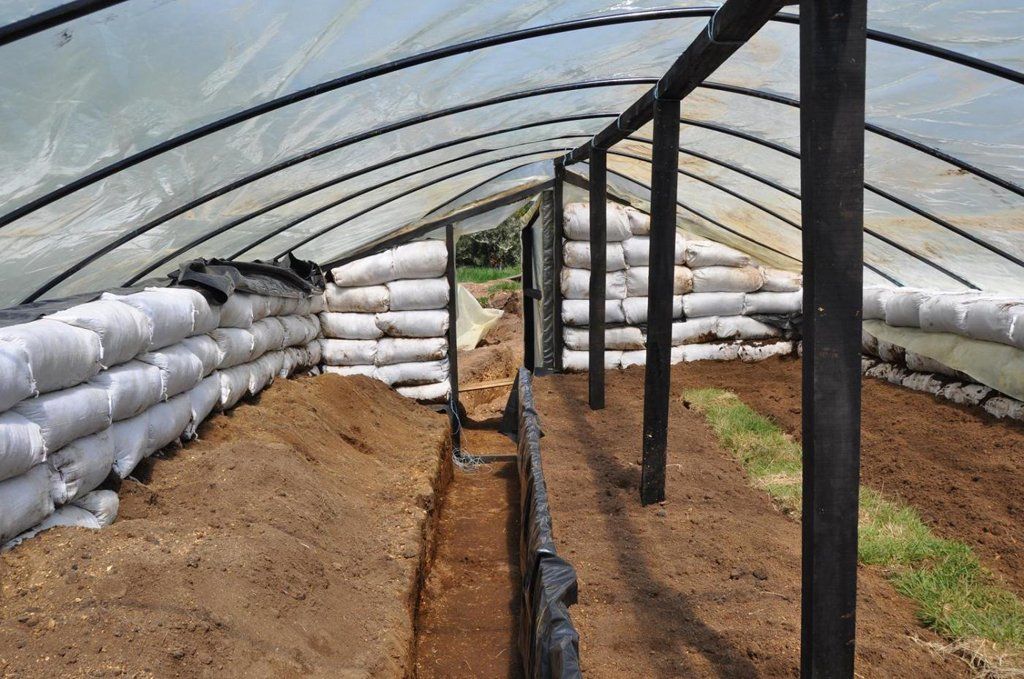
DIY Greenhouse or Hotbed from Earthbags
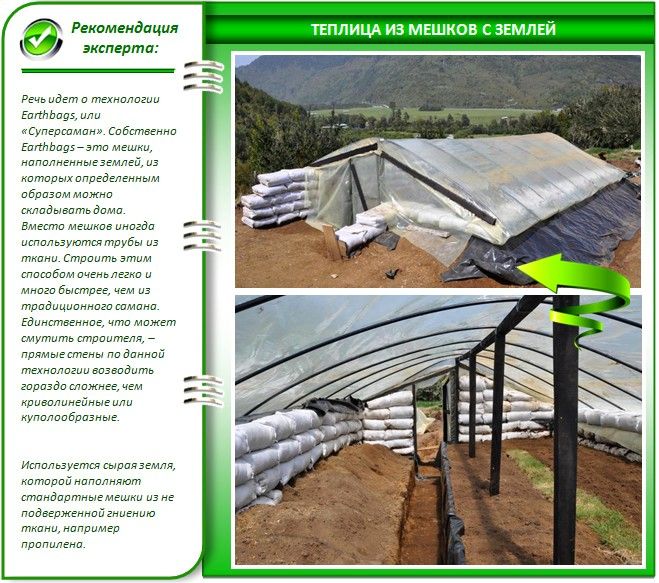
This type of greenhouse is suitable for growing heat-loving crops that don't require much light, such as cucumbers. Light will only penetrate through the transparent roof.
Also read how to do it DIY greenhouses and hotbeds for cucumbers.
Step-by-step instructions for building a greenhouse from earthbags
This option is ideal for those with a lot of excess soil left over after completing construction or, for example, digging a pond. All you need are 50-kg thick polypropylene bags. Filled with moist soil, they will serve as bricks for the walls. The number of bags you need depends on the height and area of the structure being built.
A load-bearing foundation will be needed for the greenhouse. Fine crushed rock is suitable for this; it's packed tightly into bags, which are then laid around the perimeter of the foundation. For added strength, the first row should be 2-3 bags wide, and then one or two bags can be added to the subsequent rows.
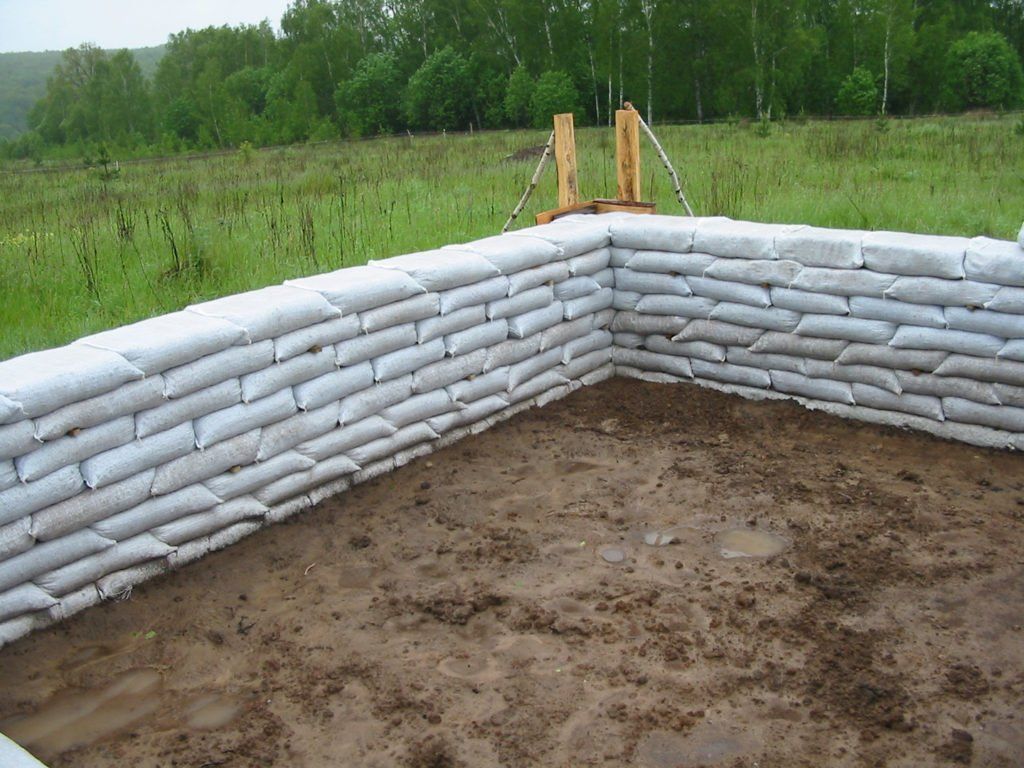
Sometimes it is recommended to deepen the foundation of the walls a little by digging bags of earth or crushed stone half a meter into the ground and sprinkling sand on the sides.
If you're concerned about the structural integrity, you can reinforce the makeshift walls with vertical support beams or steel reinforcement. At the corners of the resulting structure, drive beams into the ground, slightly higher than the wall, and secure them with guides to which the roof structure will be attached. The roof can be made of rebar, rods, or slats, and covered with a thick plastic sheeting.
If your greenhouse is wide enough, then in the center of the structure from the inside you need to make additional reinforcement for the roof by digging several support beams into the ground.
Advantages of a soil bag greenhouse
This type of greenhouse has a number of advantages:
- cheap;
- Just;
- reliable;
- durability in operation.
Disadvantages of a soil bag greenhouse
The disadvantages include limited lighting and a not very attractive appearance.
DIY Greenhouse from Wooden Pallets
Many gardeners have a huge stockpile of Euro pallets, which can be adapted for building a small greenhouse. They can be used disassembled into individual planks. Considering that a Euro pallet is 1200 x 800 mm, after disassembling it, we'll have 11 planks and 9 beams of the optimal size for construction. The rest is up to the quantity and your imagination.
Step-by-step instructions for building a greenhouse from wooden pallets
We offer a greenhouse with a gable roof measuring 4 x 2.5 x 2 m. It will require no more than 15 pallets.
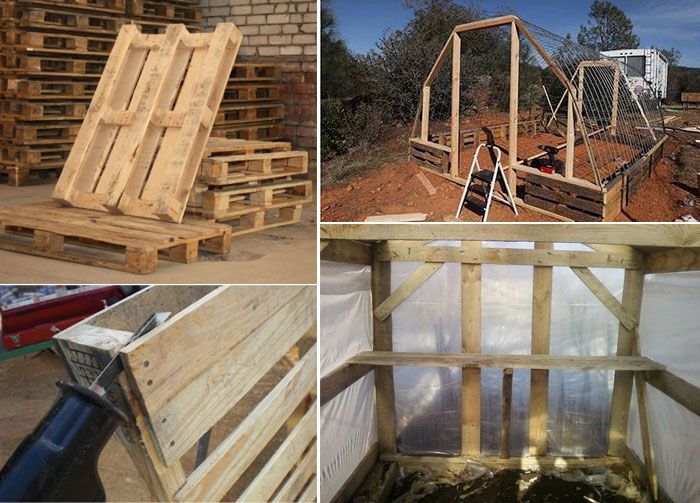
We construct the base and side walls from the longest boards, fastening them together with brackets and planks. We add rigidity to the walls with guide boards. To ensure structural stability, we backfill the outside of the wall with soil or slightly "sink" the walls into the ground.
We construct the roof structure from wide planks, overlapping them with screws and battens. We cover the roof with a durable plastic sheeting, securing it in place with a nail gun.
Advantages of a greenhouse made from wooden pallets
- ease and speed of installation;
- strength;
- cheap.
This greenhouse will last for several seasons; the boards can be additionally treated with an antiseptic. Easy assembly allows for easy dismantling and storage during the winter.
DIY greenhouse made from window frames
This method of greenhouse construction is extremely popular among gardeners. Old frames are typically found in abundance on every third garden plot.
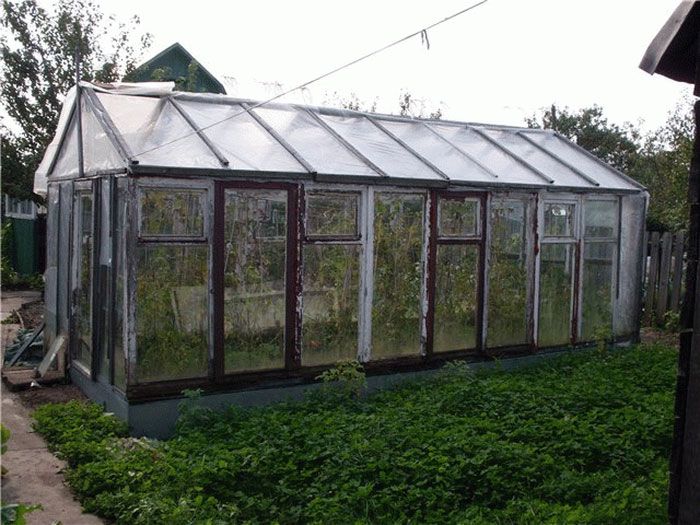
This readily available material is ideal for building greenhouses of varying complexity and size, as well as hotbeds. The lack of several panes of glass can be compensated for with thick, transparent film. This greenhouse will be bright, and if properly sealed, it can be left on site overwintering, with plantings possible from March until late fall.
Read the article on how to do it DIY greenhouses and hotbeds from window frames.
Step-by-step instructions for building a greenhouse from window frames
Large frames with three or two leaves are used for side walls, while single-leaf designs are better for end walls. All photos can be viewed in larger sizes by clicking on them.
| Illustration | Steps |
|
It's important to keep in mind that the structure will be quite heavy and massive, so it's important to plan for a foundation in advance. In some cases, a solid concrete strip foundation is required, but most often, a foundation made of planks and driven slightly into the ground is sufficient. |
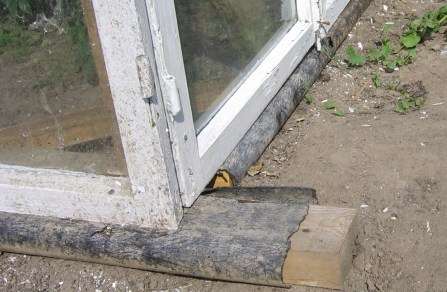 |
Waterproof the foundation with roofing felt. |
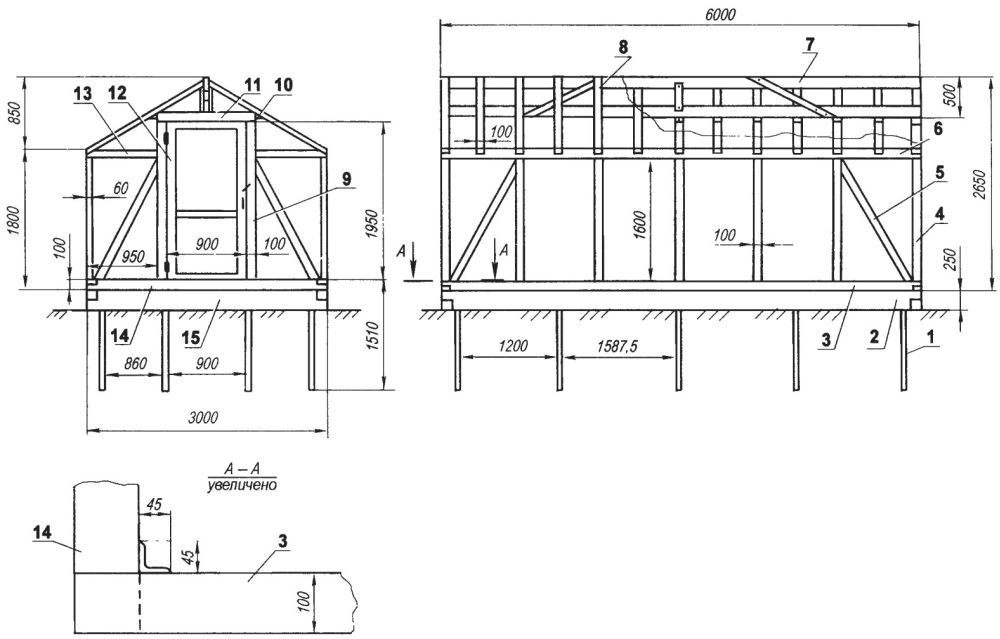 |
Before starting work, you need to make a drawing, having first measured the dimensions of the frames that you will use. |
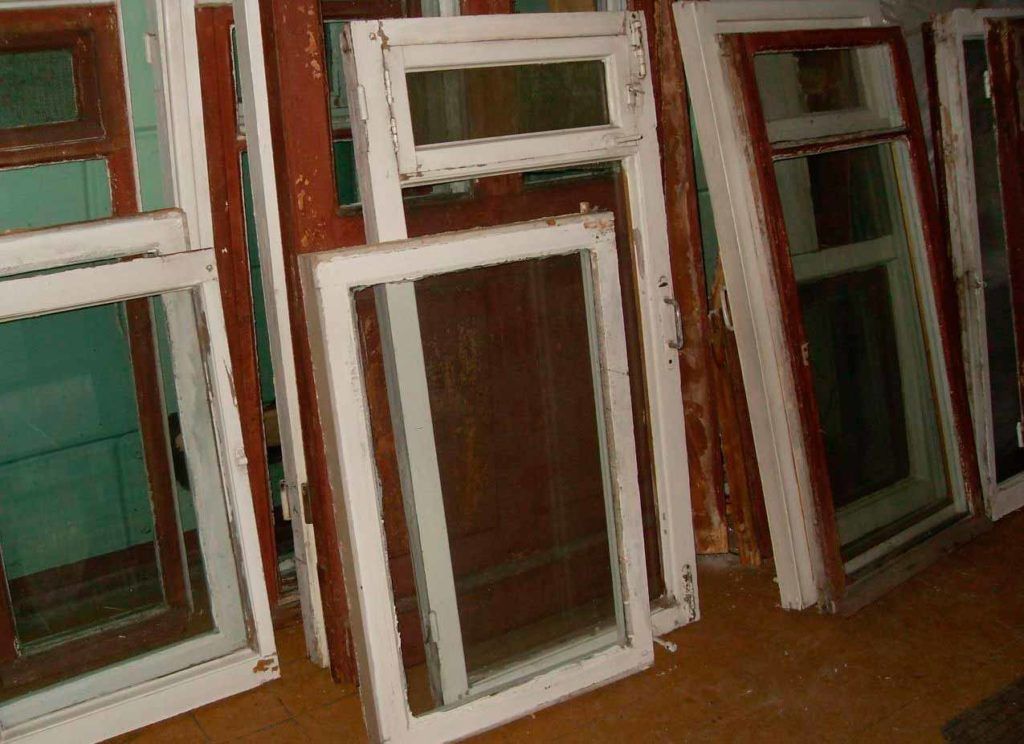 |
It is better to thoroughly sand old frames in advance and treat them with a special compound against rot, mold and pests. |
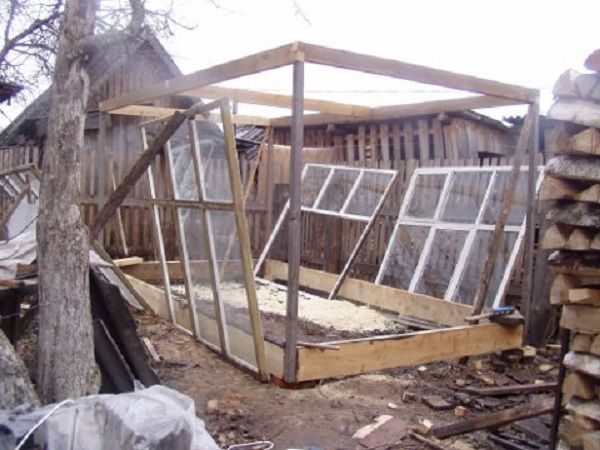 |
Next, you'll need to build the frame of the future greenhouse. To do this, attach vertical supports of the desired height to the foundation. The spacing between them (the pitch) depends on the length of the greenhouse and the size of the frames. |
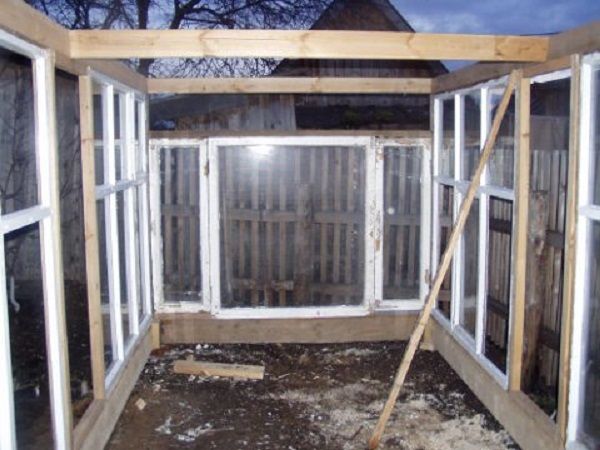 |
Attach the frames to the outside of the framing. Ensure that all vents open to the outside. If the frames are insufficient, the space between them can be compensated for with thick reinforced film. If there is a significant difference in the height of the window frames, it can be compensated for with boards of the appropriate size at the base of the roof. Fill seams and cracks with foam or sealant. |
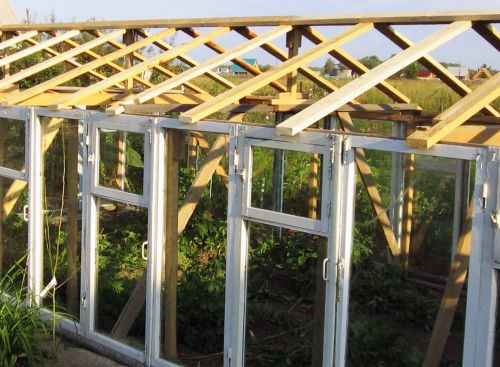 |
Build a roof out of wooden slats. Putting glass on top is not recommended, as it will break under the weight of the snow. |
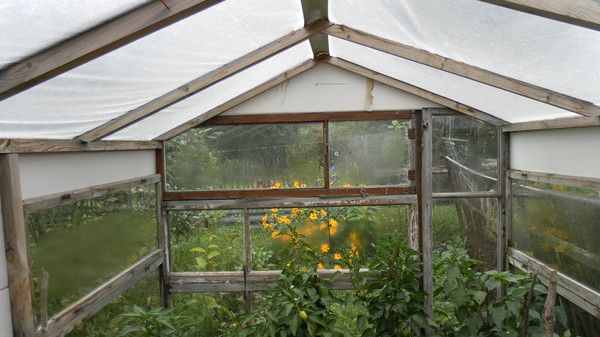 |
Install the door. Cover the roof with film or polycarbonate. |
Advantages of a greenhouse made from window frames
This type of greenhouse has a number of visible advantages:
- decent appearance;
- cheap;
- frost resistance;
- high light transmittance;
- high strength;
- excellent thermal insulation.
Disadvantages of a greenhouse made from window frames
Among the disadvantages of the greenhouse, one can note the difficulty of creating a support and foundation for those who have never done anything like this before, as well as the fragility of the glass, which is very easy to damage, but quite difficult to replace.
DIY Steel Mesh Greenhouse: Step-by-Step Instructions
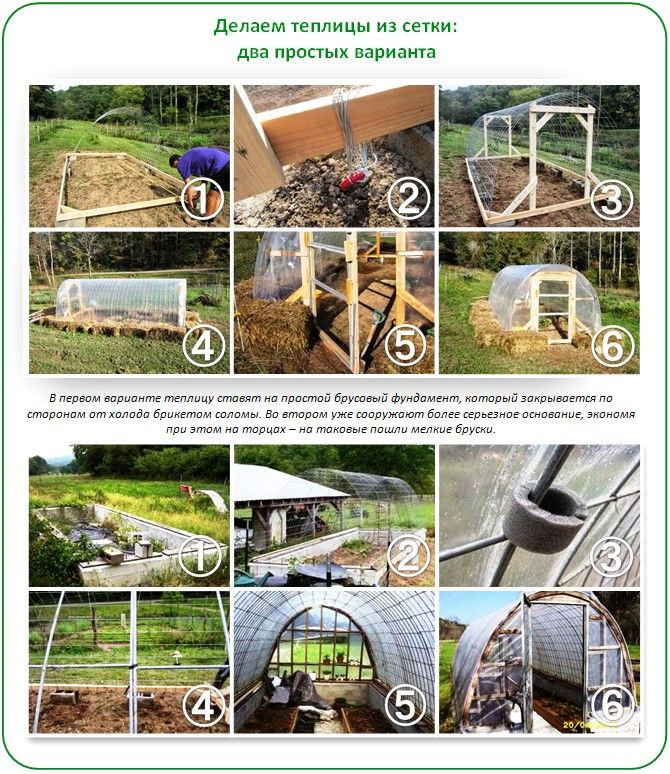
This structure does not require a foundation; its support will be a wooden box of the required size, knocked together from edged boards, which should first be treated with a rot and pest control agent.
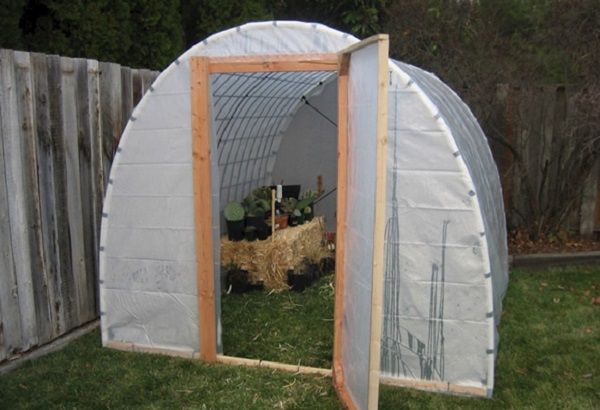
If the ground surface is fairly level and the area is not prone to quicksand, then the foundation can be made up of several posts driven into the ground at a distance of one meter from each other.
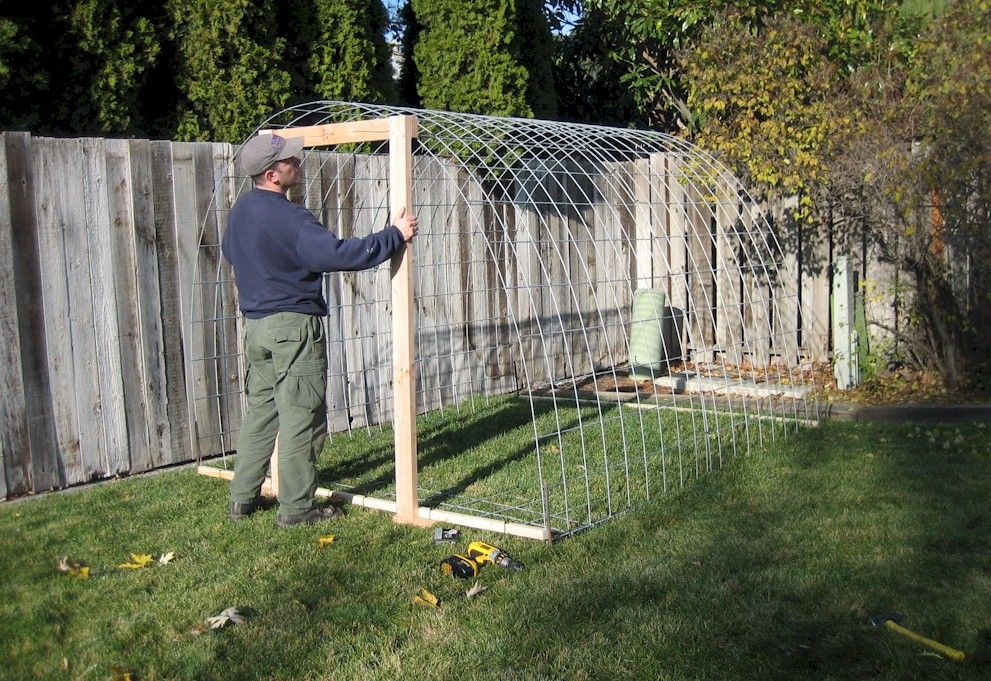
To stabilize the roof, T-shaped supports are dug into the center of the passage. The end walls can be lined with flexible pipes to provide additional rigidity to the future greenhouse.
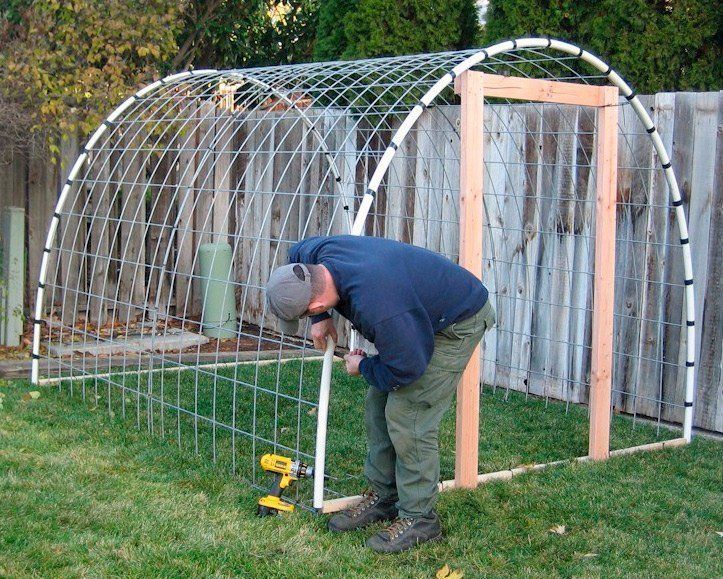
Two pieces of mesh are laid overlapping each other on the finished frame. They are fastened together with thick wire or special staples, and the edges of the mesh are secured in the same manner to the timber supports or plank base.
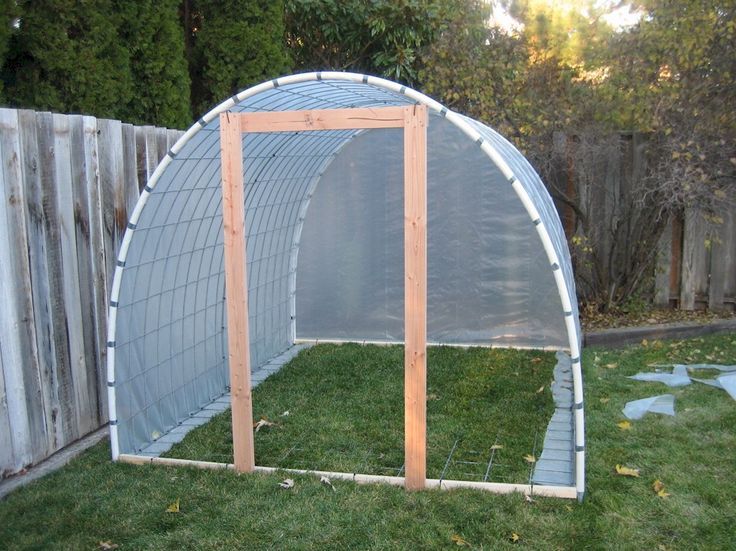
The finished greenhouse is covered with a thick film on top, tied together in several places with thick twine to protect it from the wind and secured to the base of the structure. The film is folded over the ends of the walls to form an arch and secured to the existing roof and side walls with tape.
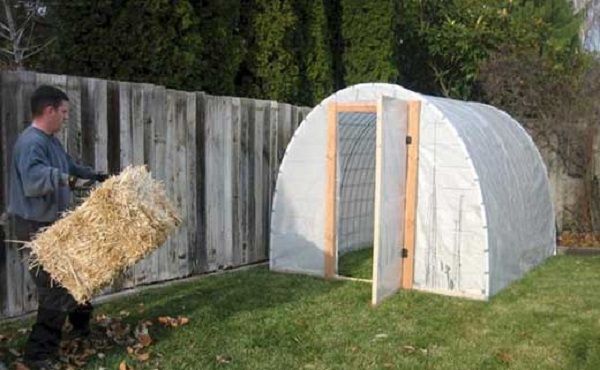
A wooden frame is prefabricated and installed for the door, which can also be covered with film. If you don't want to bother with additional construction, you can cut a small opening in the film at the end and glue a few magnets to close the door like a mosquito net.
In several places, you need to cut out ventilation windows that will be held in place with tape or masking tape.
Advantages of a steel mesh greenhouse
The advantages of this greenhouse include:
- ease of assembly;
- cheapness of construction;
- good light transmittance;
- high thermal insulation.
DIY greenhouse made from agrofibre and reinforcement
This type of greenhouse is most often found in garden plots. Its construction does not require any special skill or significant material costs.
Step-by-step instructions for building a greenhouse using Sanbond and rebar
You can use reinforcement or plastic arches as a material at hand, and agrofibre (spunbond) or thick film will serve as a covering material.
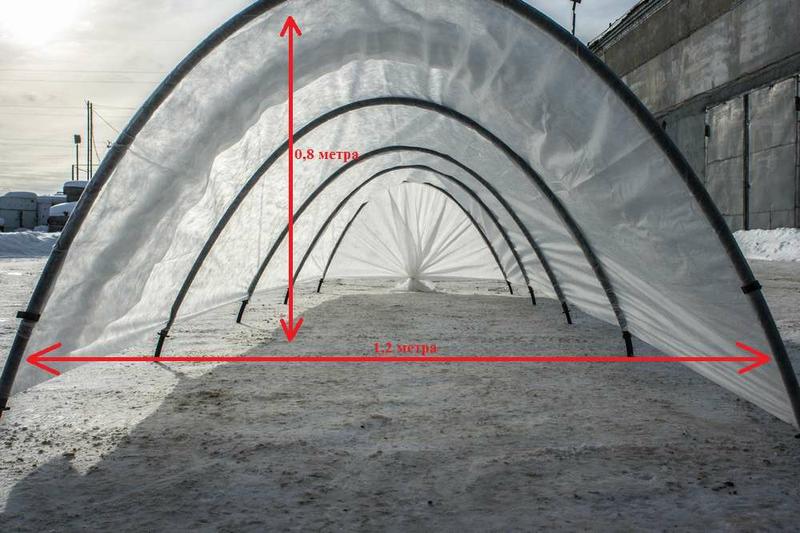
This option is convenient because it does not require the construction of a foundation, and the greenhouse can be of absolutely any size depending on the area of the site.
If you choose to use reinforcement for the work, then for a greenhouse 80 cm wide, it is better to use six-meter rods, which can be easily cut in half.
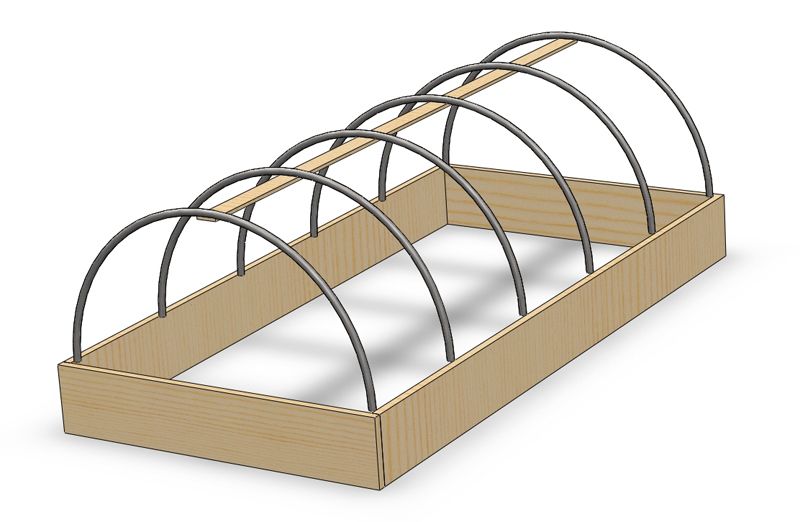
The rods are formed into arcs, which are dug into the ground every 1-1.5 meters. This method is the simplest, but less reliable.
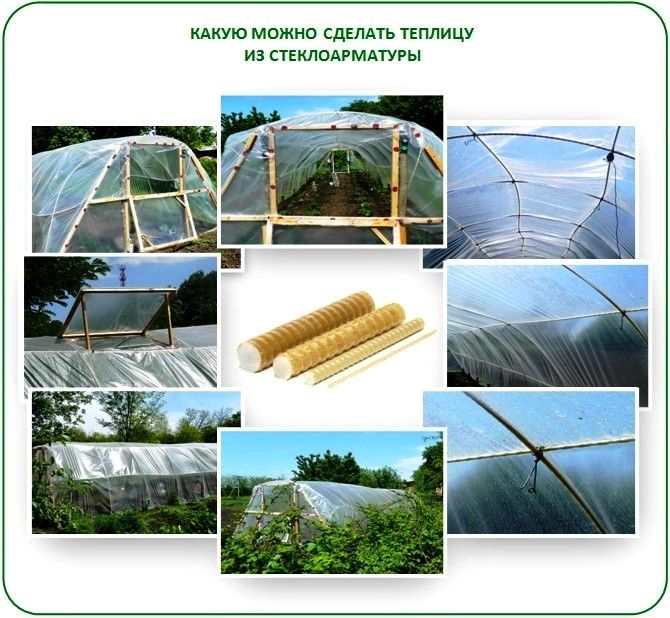
Experienced gardeners recommend going further and fitting each arch with a hose casing. Typically, there are always hoses unused for various reasons. The hose is trimmed so that it falls about 10 cm short of the end of the arch.
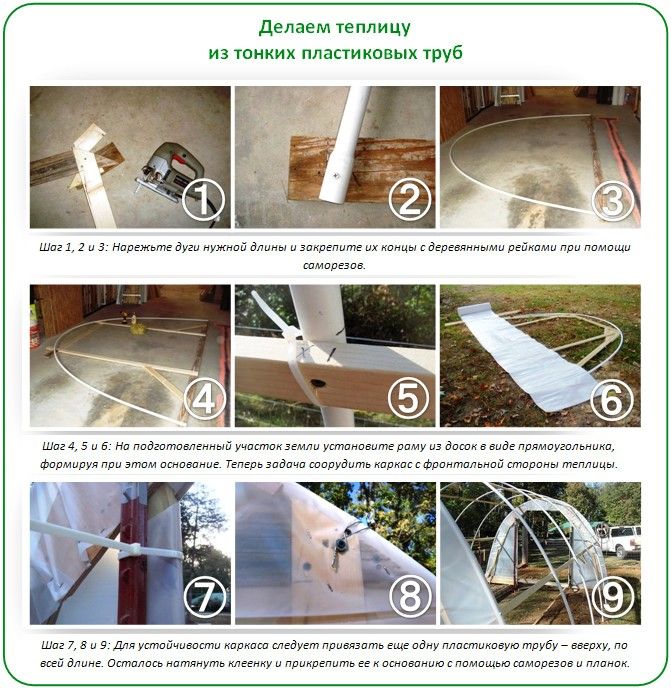
Next, the pipe trimmings are driven into the ground. If these are not available, holes can be drilled in the timber beforehand to accommodate the rebar arches. These pieces are driven into the ground at intervals of 20 cm.
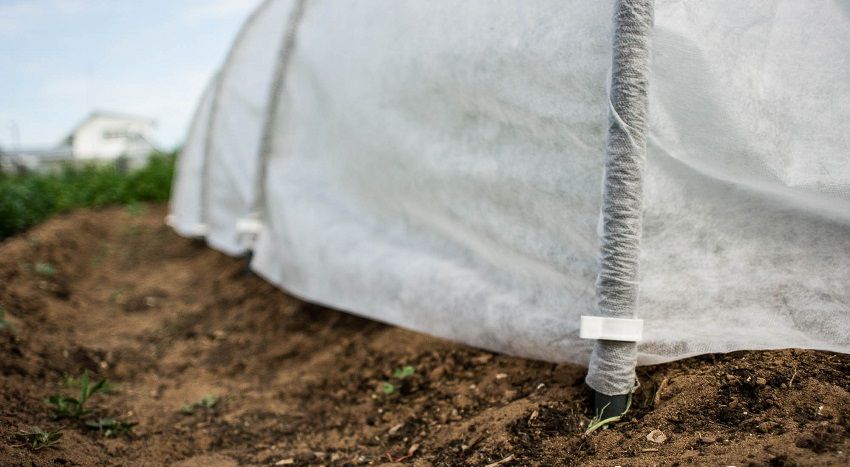
The resulting structure of secured arches is covered with film or spunbond. If you have a sewing machine and some free time, you can take measurements in advance and stitch the covering to create pockets for the arches.
Pegs are driven in at a short distance from the ends of the greenhouse, and the covering material is pulled together at the sides with a thick rope and secured to the pegs using special clips.
You can leave the ends of the film loose and hold it on the ground with a few bricks.
DIY greenhouse made from stretch film
Another low-cost way to build a greenhouse is to construct a wooden frame and cover it with stretch film, the required amount of which is calculated based on the frame's dimensions.
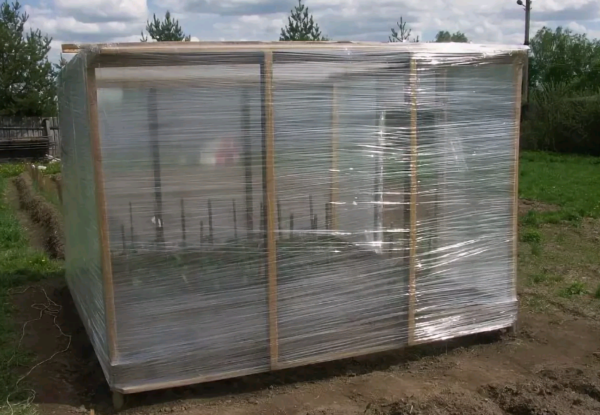
This type of greenhouse doesn't require a foundation, and several layers of film allow sufficient light to pass through and retain heat well. The key is to pre-treat the wooden elements to prevent rot and mold, and sand any areas that could damage the film.
Step-by-step instructions for building a greenhouse from stretch film
- A wooden frame, fastened with steel corners, can be used as the base for the future greenhouse.
- Load-bearing supports made of timber are attached to it with self-tapping screws, connected at the top by a tie beam.
- Adjacent beams that form an angle are additionally fastened with inclined sections of timber.
- Next, the frame for the gable roof is constructed. To provide rigidity, it is reinforced in several places with additional beams.
- The roof is attached to the upper beams of the walls using corners and screws.
- Once the greenhouse frame is ready, the film wrapping begins. This is done from the bottom to prevent rainwater from seeping in. The film is wrapped in several layers to prevent premature damage from ultraviolet radiation.
- A frame for the door is built in advance in one of the end walls; it can also be wrapped with film or covered with slats.