Tomatoes are annual, self-pollinating plants of the Solanaceae family. They have a strong root system and propagate by seeds, cuttings, and lateral shoots. The fruits are cylindrical or round, ranging in size from small (50g) to large (800g).
This plant is grown even in an apartment: on a balcony or windowsillWith proper care, you'll get a bountiful harvest: 8-9 kg per bush. Simply follow the step-by-step recommendations.
Dear readers, we would like to draw your attention to the fact that sometimes we are found by the search query “Growing Balcony Miracle Tomatoes"In this article, we write generally about tomatoes on the balcony, but we have a separate article about this variety, which we recommend reading.
Content
Features of growing on an open and closed balcony
The best option is a balcony facing southeast or southwest. These are the best conditions for proper seedling development and fruit ripening. A north-facing balcony is unsuitable due to insufficient light. Conversely, a south-facing balcony will receive too much sun, which will cause the seedlings to burn.
An open balcony is a good solution during the warmer months, before the first frosts. Minimum temperatures are +8…+10°C. Tomatoes don't like drafts; gusts of wind slow growth. Therefore, it's necessary to bring the plants into a warmer environment or provide a screen or drawer curtains to block the air. Lightweight plywood frames are also suitable. Tomatoes shouldn't be brought onto this type of balcony until April or May. When temperatures drop, remember to cover them with non-woven fabric.
A closed (glazed) loggia is suitable even for winter planting. However, the loggia should be insulated to maintain a comfortable temperature and humidity. Plants should be positioned so that windows can be opened for ventilation.
For any type of balcony, carefully consider the arrangement of pots to ensure access to each plant. Heavy tubs are best placed on the floor along a wall or close to the railing. Trailing tomatoes in pots are hung at a low height for easy watering. Larger plants are secured to store-bought plastic trellises or homemade ones made from wooden slats and rope.
| Air temperature | Daytime | Night time |
| Before flowering | +22…+25 °С | +13…+15 °С |
| During the fruiting period | +25…+28 °С | +15…+16 °С |
| Soil temperature | +17…+20 °С | |
Regulation is achieved through ventilation. It's also essential to open windows 2-3 hours after watering. During the flowering period, maintaining humidity below 65% is crucial.
Selecting a variety
For small balconies or windowsills, choose low-growing and dwarf tomatoes (Malysh, Dubok). They produce juicy fruits and a large number of them.
Here are some more reasons to choose these varieties:
- For planting you need a small container: 3-3.5 liters.
- A small root system better absorbs nutrients from the soil.
- Easy to care for, as the bushes do not require tying.
- Early ripening period. The first harvest is collected in 80-95 days.
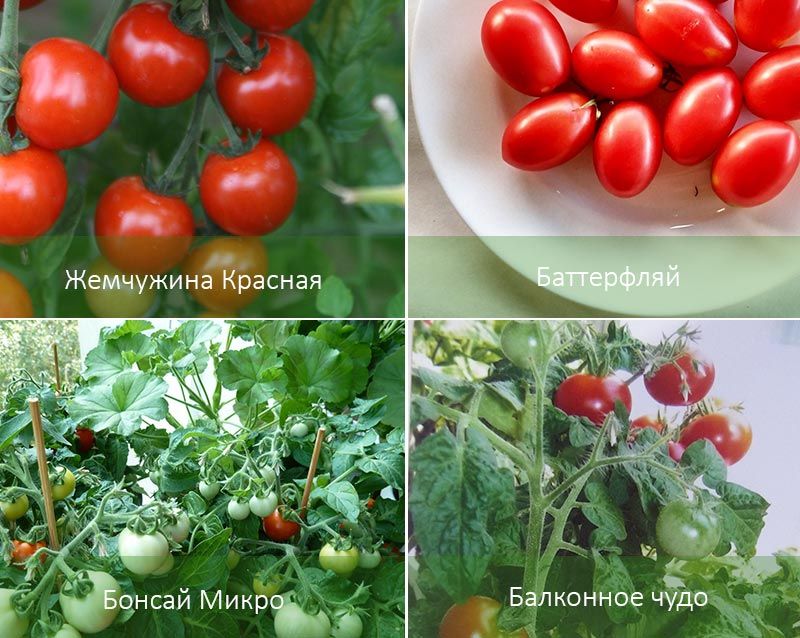
Many varieties stop growing after the fruit clusters have formed. If you want to grow bushes for window decoration, cherry tomatoes, no taller than 40 cm, are ideal. The fruits are small, weighing 15-70 g. They are used for beautifully garnishing dishes or salads. The yield per bush is 1-2 kg. Representatives: Mikron, Bonsai.
Standard varieties with thick, upright stems around which the crown develops are often chosen. They are highly productive, with up to 20 fruits per branch.
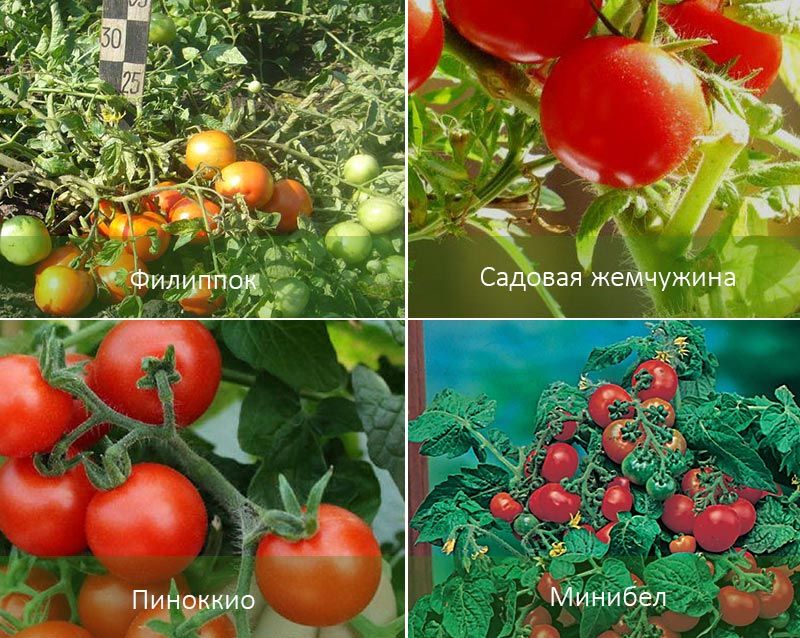
To obtain a large harvest, choose tall varieties with large, spreading crowns. Examples include: 'Citizen' and 'Sadovaya Zhemchuzhina'.
If there is plenty of space, bushes with larger fruits are grown: Bull's heart or White filling.
Read the article to learn about the best cherry tomato varieties for indoor growing.Cherry tomatoes at home.
General characteristics of some varieties:
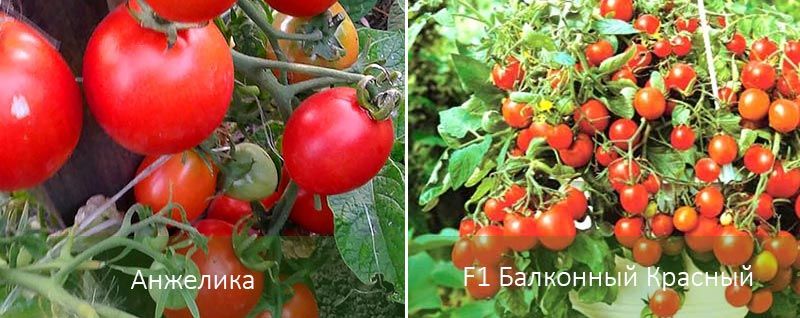
| Name of the variety | Bush height (cm) and ripening time (days) | Shape, color, taste, weight of the fruit | Care Features |
| Bonsai micro | 15. 80. |
Round, red, sweet. | Compact and unpretentious. |
| Garden pearl | 15-20.
85-93. |
Red with a raspberry hue, sweet. | It needs to be tied up. |
| F1 Balcony Red | 30.
85. |
Bright red, sweet. | Easy to care for. |
| Pinocchio | 30. 95-100. |
Red, spherical, sweet. | Ideal for growing on a windowsill. |
| Balcony duet | 35.
76. |
Red, sweet. | The bush does not take up much space. |
| Balcony miracle | 35-45.
90. |
Bright red, juicy, sweet. |
Easy to care for. Does not require tying. |
| Angelica | 50-70. 80-95. |
Rich red, sweet. | They don't require much in the way of shaping. They do require disease treatment. |
| Red Pearl | 50.
85-100. |
Bright red, sweet, fleshy. | Does not require pinching. |
| Butterfly | 150.
110-120. |
Raspberry red, sweet. | It needs to be tied up. |
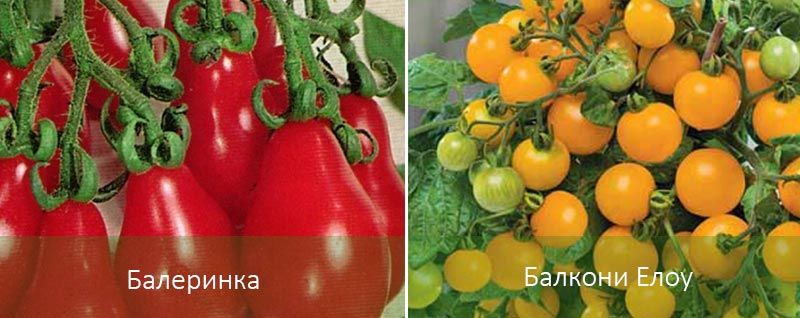
| Ballerina | 150-180.
100-105. |
Bright pink, sweet. | Does not require tying. |
| Bonsai | 30. 85. |
Round, red, sweet with a hint of sourness. | Unpretentious in care. |
| Minibell | 40.
82. |
Unpretentious to light and soil. | |
| Filipok | 40.
94. |
Does not require garter. | |
| Balconies Yellow | 45.
100-110. |
Round, yellow, sweet with a hint of sourness. | Compact bush. |
Instructions for planting tomatoes on a balcony
Before planting seeds, it's important to choose the right soil. You can buy a universal substrate for seedlings or tomatoes. It contains the necessary nutrients and is free of any bacteria. Or you can prepare your own soil from peat or sawdust, humus, and soil, using one part of each.
Such soil must be disinfected, and there are a number of ways to do this:
- In the oven - 10 minutes at 200 °C.
- Microwave for 8-10 minutes at 850W. Afterward, apply a bacterial fertilizer, such as Gamair or Alirin.
- Water with a hot solution of manganese: 5 g per 1 liter of water.
- Another method involves soaking the root ball in a double boiler for 1.5 to 2 hours. Place the root ball on a layer of cheesecloth, place it in a sieve, and steam it over boiling water.
Preparing seeds for sowing
When first starting out, it's best to purchase seedlings from different brands and varieties to find the right one. When purchasing, pay attention to the expiration date; expired seeds may not germinate. If the seeds are in sealed bags, they've already been treated for diseases and are ready to sow. Check the seeds for germination by placing them in water. Good seeds will sink to the bottom of the container, while unusable ones will float.
If the planting material was taken from friends or purchased in unpackaged bags, it must be disinfected.
This can be done in several ways:
- Using potassium permanganate - soak 1 g in 100 ml of water for 15 minutes.
- Soda solution - 0.5 g per 100 ml, leave for 24 hours.
- Special preparations: Fitosporin. 1 drop of liquid and 0.5 teaspoon of powder per 100 ml of water. Disinfect in the solution for 15 minutes.
After this, you can sow the seeds in the ground or pre-germinate them. Wrap the seeds in damp cheesecloth and place them in a warm place. When sprouts appear, transfer them to the ground and cover with plastic or glass. Water regularly with warm water; keep the soil moist.
You can also soak the seeds in growth stimulants for 4-6 hours. Epin-Extra accelerates germination and protects against diseases and pests.
Growing seedlings
The best time to sow is in late February or early March. If you plant in October, you can harvest the crop in winter.
Prepared seeds are divided into two disposable cups or bowls. Plastic bottles can be used; simply cut off the top. Drainage holes are not necessary in temporary containers; the small seedlings will absorb the moisture completely. Planting deeper than 2 cm is not recommended. Cover the top with soil and water.
Ventilation is essential. The covering material is removed for 5-10 minutes daily, increasing the time as the seedlings grow.
Prevention of fungal diseases can be achieved by treating the plant with a solution of milk and water: 50 g per 0.5 l.
Pricking out occurs after three true leaves appear. Of the two plants in the pot, the stronger one is selected and the other is pinched. During subsequent transplanting, the weaker shoots are discarded.
Transplantation into containers for further cultivation
If the seeds were initially sown in a small container, gradually increase the container's size. First, transplant into a plastic cup, then into a permanent 3-3.5-liter pot.
First, select pots, wooden, and plastic boxes. Add a drainage layer to the bottom. You can use broken tiles or store-bought expanded clay. This will prevent water stagnation and root rot. At this stage, drainage holes are essential.
The seedlings should be repotted when they reach a height of 10-12 cm, usually about a month after sowing. The soil should be slightly moistened to avoid damaging the root system during transplanting. To encourage better root branching, the longest root should be pricked out. Fill the pot to three-quarters of its capacity, not to the top. More soil can be added later.
When planting in long boxes, the distance between bushes should be at least 25 cm.
It is better not to disturb young plants for the first week after transplanting; this will help them take root.
Caring for tomatoes
After planting in permanent containers, the plants are tied to trellises, poles, and cuttings. This prevents the bushes from settling or breaking under the weight of the fruit.
For standard varieties, garter is required.
An important requirement is sufficient light. In rainy weather, additional illumination with a lamp can be provided. Fluorescent lamps are commonly used, suspended 30 cm from the tallest plant. They are used for two hours in the morning and the same amount in the evening. The best way to simulate the sun is with three lamps: one with cool and two with warm light.
Unlike their outdoor-grown counterparts, balcony tomatoes are less susceptible to pests. However, they still require careful care and monitoring.
One of the most dangerous diseases is late blight. It affects leaves, fruits, and stems, causing dark spots. It's important to monitor the plants closely and isolate the affected plant at the first sign of disease. Preventative measures include fertilizing with a copper solution: 1 teaspoon per 10 liters of water. Another method is to add 0.5 g of potassium permanganate and 0.5 tablespoon of crushed garlic to half a liter of water.
Features of watering
Watering is somewhat individual and depends on the indoor microclimate on the balcony. However, it's best to do it in the morning. It's important to maintain a balance: don't let the soil dry out, but don't overwater.
The seeds are watered regularly with warm water, the soil should remain moist.
Seedlings don't require frequent watering; once a week is sufficient. The water must be settled and at room temperature. If the weather is hot, reduce the interval between waterings to 2-3 days. At first, it's best to simply mist with a spray bottle to avoid washing away the top layer of soil. When transplanting into permanent pots, water slowly and carefully at the roots to ensure all soil layers are wet.
Fertilizing
A prerequisite for a successful harvest is supplementation with mineral and organic complex fertilizers. For example, Izumrud, Krepysh, and Humate +7.
Natural remedies include ash, banana peels, eggshells, and onion skins. Chicken manure diluted 1:100 can be carefully sprinkled on the plants.
Fertilization should be done in several stages:
- The first feeding is 2 weeks after the sprouts appear.
- The second one in 10 days.
- The third time, a week before transplanting the seedlings into larger pots. Fertilize every 10-12 days during flowering and fruit ripening.
All fertilizers should be applied to moist soil. It's important to strictly follow the instructions on the packaging, and for young plants, reduce the recommended amount by half.
It's important not to overdo it with nitrogen, which affects the vigorous development of foliage and crowns. Excess nitrogen slows flowering and prevents fruit set. Fruit flavor deteriorates and shelf life decreases.
Bush formation
As the tomatoes grow, it's time to shape the bush and remove side shoots. This ensures better light access and full development of the tomatoes. The bush becomes neat and well-groomed. Side shoots are removed manually by pinching, leaving a 0.5-1 cm shoot.
Do not use garden tools or scissors to avoid introducing infection.
Dwarf varieties stop growing after 4-5 fruit clusters appear, and there's no need to remove any more shoots. However, with indeterminate varieties, even after 8-9 clusters appear, the procedure must be repeated. Cherry varieties may not produce side shoots at all.
Pollination
For balcony tomatoes, regular ventilation is sufficient for pollination. However, a lack of fruit set indicates improper temperature and humidity conditions.
| Humidity | % |
| Air | 70 |
| Soil | 60-65 |
Another way to stimulate pollination is to shake the upper flower clusters. You can also try transferring pollen from one flower to another with a toothbrush or paintbrush. Ready-made pollen preparations, such as "Ovary," can also be helpful.
If the air temperature is above +33...35 °C, it is necessary to ventilate and water every evening, otherwise the ovaries will not form.
Harvesting
To ensure better ripening, excess flowers growing near the fruit clusters are removed.
Tomatoes are harvested as they ripen; leaving ripe ones on the vine is undesirable. This significantly inhibits the formation of subsequent ovaries. It's best to harvest them when the fruit is just beginning to turn pink. If the tomatoes taste sour, they need to sit in the sun for a couple more days.
When cold weather sets in, unripe tomatoes are removed from the vines and stored in a warm place until fully ripe. If there's room, the plant can be placed on a windowsill.
Top.tomathouse.com informs: the possibility of planting tomatoes in plastic bottles and the use of hydroponics
The idea of growing tomatoes root-up originated in Japan, where people are looking for ways to grow vegetables without having a large plot of land. Tomato plants are planted in buckets or plastic bottles with the roots facing upward. The tomatoes grow in this unique way and don't take up much space.
To plant the plant, you'll need a 2-3 liter plastic bottle with the bottom cut off. This should be done at a point where the container doesn't narrow or widen. Use a screwdriver or drill to drill 2-3 holes in the cut-off portion and reinsert it into the bottle, but upside down. Make a few holes around the perimeter to thread a rope through it and hang it later. Disassemble everything.
Insert one grown sprout with a small lump of soil through the cut hole and carefully remove the leaves through the neck. To prevent the soil from leaking out at first, you can wrap the hole around the sprout with a napkin, thin paper, or make a plug out of foam rubber.
Fill with soil, leaving a gap equal to the cut-off portion, which is then reinserted, aligning the hanging holes. Secure the rope and hang the container with the seedling.
An even simpler method involves using a bucket (3-5 liters). Make a small hole in the bottom. To prevent soil from spilling out, take a piece of natural fabric and cut a hole in it. Push the sprout through both holes, leaf side down, and fill it with soil. Hang the bucket on a hook purchased at a hardware store.
Hydroponics allows you to grow vegetables even without a plot of land. All you need is the appropriate equipment, which can be purchased online or made yourself. A specialized substrate is used instead of soil. To speed up ripening, a watering system is required. The plants need to be tied and pollinated with a brush.
Common mistakes when growing tomatoes on a balcony
When all conditions are met, the bushes develop properly, ovaries form, and the fruits ripen. If something is done incorrectly, the plant will inevitably signal a problem.
Here are some common mistakes:
- If you sow seeds too early, the seedlings may die because they do not receive the required amount of sunlight.
- Excessive watering may result in severe stem elongation, root rot, and fungal infection.
- Insufficient light negatively impacts growth and development. Stems become thin, leaves turn pale, and disease resistance decreases.
- Too hot air and low humidity will make the bushes wilted and the foliage yellow.
- A lack of nutrients in the soil leads to improper formation or death of ovaries, and a sickly appearance of the plant.
- Cramped pots or close planting in boxes can lead to root entanglement and nutrient deficiencies. Fruit will not ripen properly due to excessive shade.
Careful study of the growing process and strict adherence to all conditions will help minimize errors. The plant will look neat, make a beautiful window decoration, and reward you with a bountiful and delicious harvest of organic tomatoes.