There are many common tomato varieties that are easy to grow at home. These tomatoes are resistant to pests and adverse weather conditions, and they will produce a bountiful harvest.
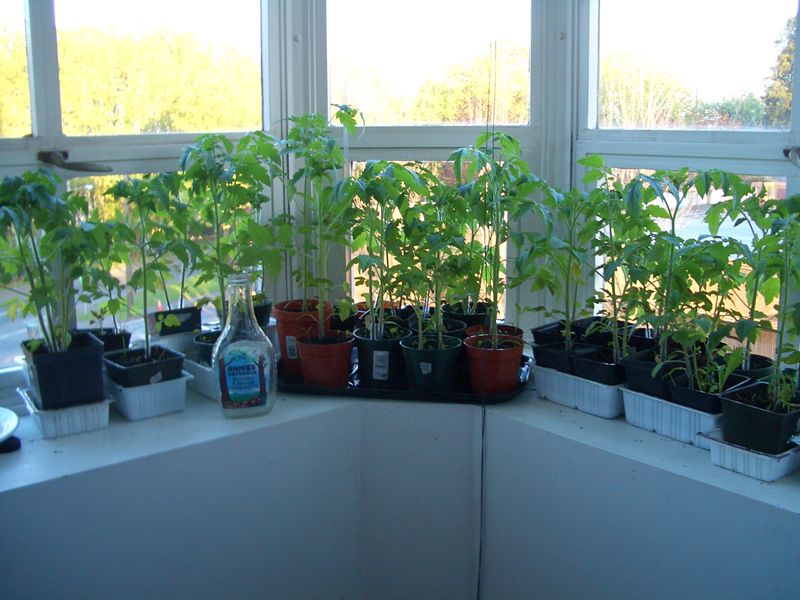
The growing process is no more difficult than for tomatoes from the garden; it's just important to choose the right variety, which will pamper the owner with fresh fruits even in winter.
Content
- 1 The pros and cons of growing tomatoes on a windowsill
- 2 Special varieties
- 3 Sowing dates
- 4 Selecting a location
- 5 Features of cultivation
- 6 What kind of soil should I plant in?
- 7 Pre-sowing seed preparation
- 8 Direct landing
- 9 Picking
- 10 Transplanting seedlings into a larger pot
- 11 Caring for tomatoes on the windowsill: basic rules and growing conditions
- 12 Diseases and pests
- 13 Top.tomathouse.com recommends: using hydroponics when growing tomatoes at home
The pros and cons of growing tomatoes on a windowsill
The main advantage is the ability to grow the crop year-round and know the precise ripening time. This allows for planting for a specific date or holiday. The main difficulty lies in selecting the right hybrid. The disadvantages include the relatively small planting volumes due to limited windowsill space, resulting in modest yields.
Special varieties
The hybrid selection method is based on constant trial and error, determined by the individual climatic conditions of each room. These low-growing and dwarf varieties will thrive on a small windowsill.
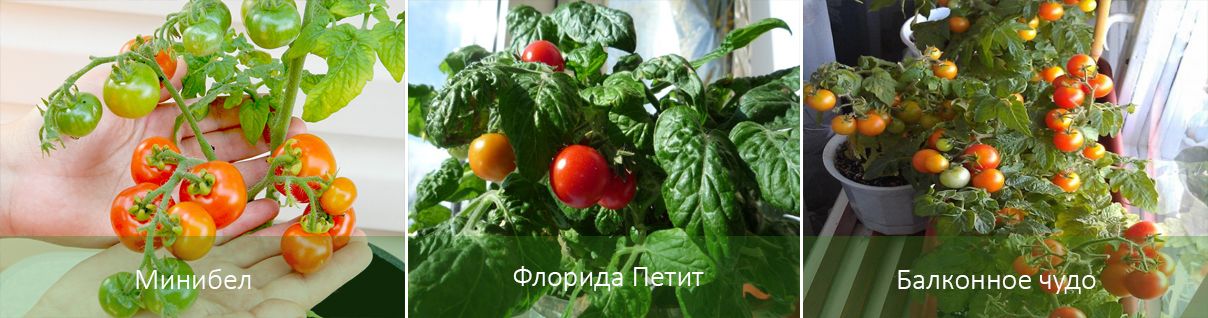
Minibell
It is represented by a bush reaching a height of no more than 30 cm. Its fruits, collected in small clusters of 8 specimens, weigh up to 40 g each.
Florida Petit
A low-growing variety with small tomatoes, clustered in clusters of 15-20. They are very sweet, with individual tomatoes weighing up to 40 g.
Balcony miracle
The most common domestic variety. Its pink tomatoes ripen 2.5-3 months after planting. The fruits are small, weighing 20-30 grams each.
Learn more about the Balcony Miracle tomato variety, as well as other cherry tomatoes:
Balcony red
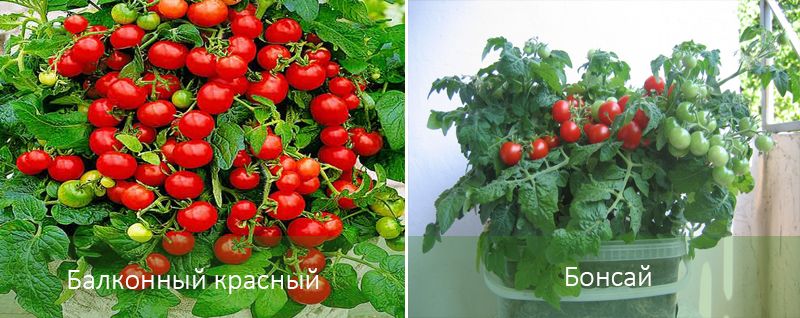
It forms a very fruitful bush, growing up to 30 cm. The mini tomatoes are bright red and will bloom within three months of planting. Remarkably, the fruits of this variety exude a strong aroma.
Bonsai
It will produce 500-600 grams of tomatoes each time it ripens. The bush of this low-growing variety does not grow taller than 30 cm. This variety does not require insects to transfer pollen, as it is self-pollinating.
Bonsai micro
Considered the smallest of the cherry tomatoes, the average bush size is only 15 cm. It is often hung in a basket and is used primarily for ornamental purposes.
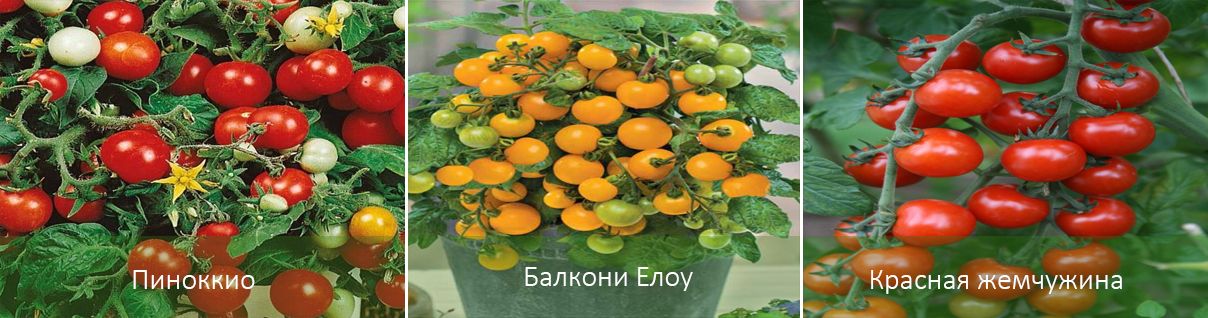
Pinocchio
It will produce its first harvest within three months of planting. This hybrid produces small, aromatic tomatoes.
Read more about the Pinocchio tomato variety in the articlePinocchio Tomato: Variety Description, Planting, and Care
Balconies Yellow
It grows up to half a meter in height. The fruits are small, mostly yellow, and appear in just 3.5 to 4 months. They are round in shape and sweet in taste.
The pearl is red or yellow
Renowned for its decorative qualities, it grows up to 0.5 m and produces small red tomatoes. A single specimen can weigh up to 50 g and has a sweet taste.
Native
Produces fruits weighing 180 grams each, with a distinctive raspberry hue. It's renowned for its undemanding nature—it tolerates cool temperatures and is an early-ripening variety.
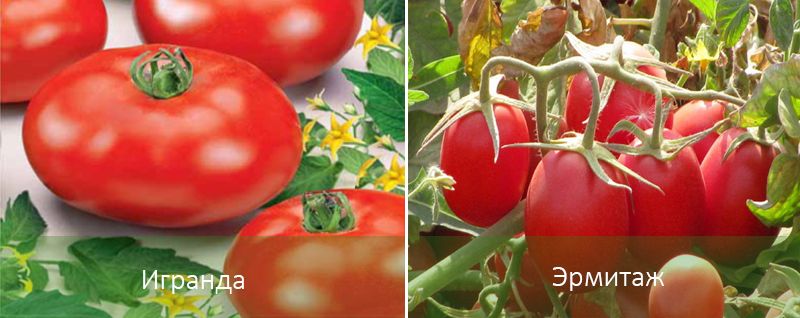
Igranda
Produces round tomatoes weighing up to 150 grams each. This variety easily tolerates sudden changes in weather and temperature conditions.
The Hermitage
It's best planted in the northwestern regions. Tomatoes grow up to 100 g there.
Russian troika
It grows in bushes up to 60 cm tall. It is notable for its large, aromatic fruits, weighing up to 300 g. It is recommended to start with 2-3 varieties for comparison, and then plant those that best suit the apartment's climate.
Sowing dates
For tomatoes, sowing times are divided into:
- Summer-autumn. Fruit from seedlings grown no later than August will ripen as early as November or December.
- Winter-spring. Tomatoes will ripen in early to mid-spring, but you should start growing seedlings in winter. November and early December are ideal.
More details about planting seedlings and favorable datesLunar calendar for sowing seeds for seedlings in 2022 in a table (planting seedlings)For information on planting after April, see the articles by month.
Selecting a location
Sun-loving plants will begin to drop buds if they don't get enough light, so it's best to place them on a balcony or windowsill facing south. Strong sunlight can be harmful to young plants, so in the afternoon—the period of greatest sun exposure—it's best to shade the plant or move it to an east- or west-facing location. Supplemental light is also recommended for tomatoes, preferably fluorescent lamps. Place the artificial light source at least 30 cm away from the plant. Insufficient light in the morning and evening should be compensated for, keeping in mind that tomatoes require approximately 15 hours of daylight per day.
Features of cultivation
Future yields directly depend on how the plant is cared for. While there are nuances that vary depending on the variety, the basic principles are quite similar.
What kind of soil should I plant in?
Loose, fertile soil is ideal for tomatoes, as it allows sufficient moisture and air to pass through. It should be composed of black soil, humus, peat, and sand in a ratio of 2:2:1. Alternatively, you can mix equal parts compost and forest soil, or simply buy soil from the store. However, before planting the seeds, you should disinfect the soil by heating it or watering it with a solution of manganese and phytosporin.
Pre-sowing seed preparation
The procedure includes:
- Soak;
- Germination;
- Hardening.
Soaking is done to kill pathogens. This process takes 30 minutes. It is then recommended to rinse the seeds in filtered water.
Germination is done in a damp gauze cloth or cotton pad. The material is then covered with plastic and placed in a warm place for 2-3 days until germination occurs.
The hardening procedure is applicable to seeds that have sprouted but not yet germinated. It increases the plant's resistance to temperature fluctuations. The sequence of actions is:
- Wrap the seeds in cheesecloth;
- Place in a container;
- Tie the bag without cutting off the oxygen completely;
- Keep in the refrigerator overnight and take it out during the day;
- Repeat the operation 4-5 times.
Direct landing
Step-by-step procedure for sowing at home:
- Fill the container with soil;
- Draw furrows or make small holes, up to 2 cm deep;
- Place the seeds keeping a distance of 2-3 cm;
- Cover the crops with soil;
- Moisten with a spray bottle;
- Cover with film;
- Leave in a warm, dark place;
- Move to a bright place and remove the film from the container when the seeds sprout.
Picking
After 3-4 weeks from sowing, the tomatoes should begin to develop their first leaves, and in order to provide the root system with enough space, the plant needs to be transplanted into a larger container.
Transplanting seedlings into a larger pot
The final transplant is carried out a few weeks after the initial picking. By this time, the plant should already have dozens of leaves. To facilitate the transplant, water it generously the day before.
Caring for tomatoes on the windowsill: basic rules and growing conditions
To ensure the fruit ripens on time, the plant needs watering, feeding, and regular ventilation; these will have a beneficial effect on the bush's development.
Temperature and humidity
The ideal daytime temperature range is 22°C to 26°C, and 15°C to 16°C at night. The recommended humidity level is 65%. In winter, pots containing shrubs should be moved away from windows, as cold air coming from the window can damage them.
In cases of extreme dryness, misting is acceptable. However, at low temperatures, excessive moisture can promote a number of diseases. Spraying is necessary only for foliar feeding and pest and disease control.
Fertilizing and watering
Avoid getting liquid on the stems when watering. Watering should be done twice every 10 days. Settled and filtered water is ideal. During flowering, watering should be suspended until the ovaries appear. Mineral fertilizers should be applied for the first time no sooner than 20 days after transplanting. The best option is potassium humate, diluted according to the manufacturer's recommendations. Fertilizing should be done only on the second day after watering, and should be done once every two weeks. Both root and foliar feeding are acceptable for mature plants, but these fertilizers are contraindicated for young, tender seedlings.
Formation (pinching) and garter
Thanks to their stable trunks and lack of branching, homegrown tomato varieties don't require staking. In rare cases, this does happen, and the following steps are recommended:
- Carefully drive the stake into the soil without damaging the root;
- Tie up the branches.
It's important to remove shoots that form in the leaf axils. Otherwise, the bush will grow foliage but won't produce a rich harvest. After fruit sets, pinch off the top of the plant and trim off the withered lower leaves.
Diseases and pests
The most effective way to combat insect pests and plant diseases is timely prevention. Regular inspection of the plant and immediate action when the first symptoms are detected will also significantly facilitate treatment. Plants respond effectively to treatment only in the early stages of the disease's development; after that, it becomes virtually impossible to cure.
| Disease/pest | Cause/manifestations | Prevention/corrective measures |
| Late blight | It spreads primarily by airborne transmission. The leaves of infected plants become covered with dark brown spots, which then spread to the stems and fruit, ultimately destroying the entire crop. | As a preventative measure, soak seeds in a manganese solution before germination. Young plants can be treated with Bordeaux mixture. |
| Blackleg | The fungal disease is caused by overcrowding and insufficient light. The first symptoms are blackening of the stem, followed by deformation of the entire plant, which collapses onto the soil and eventually dies. | Adding ash and sand to the soil is an excellent disease preventative. If the disease has already developed, fungicides should be applied. |
| Septoria | Spreads exclusively by soil. Affected tomato leaves become spotted, covered with black dots, and then dry out. | A solution of potassium permanganate can disinfect the soil as a preventative measure. Treatment with Bordeaux mixture is suitable for treatment. |
| Brown spot | This disease is caused by excessively wet soil. Leaves become covered with brown spots, and normal development of the bush and its fruits is disrupted. | Treatment with specialized chemicals. |
| Whitefly | The insect pest resembles small scales. When attached to a leaf, it poses a threat as a carrier of disease. | Fertilizing the soil will increase resistance, while the pest and its larvae should be controlled with a soap solution or dandelion infusion. |
| Thrips | The activity of these pests leads to the drying out of buds and leaves and their subsequent death. | Regular watering and insecticide treatment will help eliminate thrips. |
Top.tomathouse.com recommends: using hydroponics when growing tomatoes at home
If you surround a plant's roots with a nutrient solution, thereby creating an artificial environment, it will grow successfully without soil. This method is also applicable to tomatoes, as they have a shallow root system. A hydroponic solution can be easily purchased at the store, or you can make it yourself using various fertilizers. Then, fill a large container with it, and then insert a smaller container into it. Prepare a mixture using the following ingredients:
- Crushed stone;
- Gravel;
- Sand;
- Expanded clay;
- Moss;
- Mineral wool;
- Coconut flakes.
Disinfect and fill the inner container with the mixture, plant the plant in it.