In the 1990s, potato growing was a means of survival for many. Now, those familiar with agronomy are turning it into a profitable business.
Content
- 1 Planting potatoes according to the rules
- 2 Selection and preparation of planting material
- 3 Potato planting dates according to the 2023 Lunar calendar, depending on the variety and region
- 4 Choosing a landing site
- 5 Basic principles of planting potatoes
- 6 Classic planting methods
- 7 Top.tomathouse.com recommends: Growing potatoes for the lazy
- 8 How to grow potatoes from seedlings
- 9 Conclusion
Planting potatoes according to the rules
Our ancestors knew one way to plant potatoes: by digging holes with a shovel. With the development of modern plant breeding, there are countless planting methods. This is because potato yield depends on the planting method. Of course, fertilization, vegetable variety, and rainfall shouldn't be overlooked.
The basic principles are the same for any method. In the fall, prepare the plot by digging and fertilizing it. In the spring, you can loosen the soil without digging, but by raking and breaking up large clods.
Long before planting, the tubers are sorted by size. For germination, the prepared planting material is placed in boxes with ventilation holes and placed in a warm, bright place.
Before planting, furrows are made (or holes are dug) and the area is fertilized. The sprouted tubers are placed in the prepared area, covered with soil. Once the bushes have formed, they are hilled to increase yield and to combat the Colorado potato beetle.
Potato planting begins closer to May. Well-warmed soil promotes rapid growth and development of tubers. To double the harvest, potatoes are planted in late July in southern regions. Early varieties are chosen, allowing for harvesting before the first frost.
Selection and preparation of planting material
According to folk wisdom, potatoes should be planted as soon as the bird cherry blossoms. Everything needs to be prepared for planting. It's recommended to replant this vegetable every four years, replacing it with a new variety.
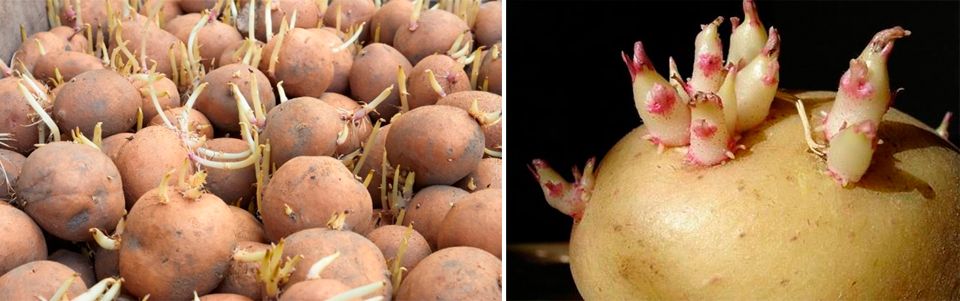
Seeds are purchased a month before planting. Experienced agronomists recommend buying them at specialized stores and exhibitions. They are more expensive than at markets, but the risk of acquiring diseases and infections along with the tubers is significantly lower. Elite potatoes are considered the best; they are purchased in stores. They are quite expensive and are used for propagation for the following year. The "babies" of elite potatoes are called first-generation potatoes.
The harvest from its tubers is suitable for both food and seed. After growing elite potatoes, it's recommended to replace the variety after 5-6 years, and here's why. Tubers of the third, fourth (and so on) generations are susceptible to disease and spoilage. The more generations separate the elite potatoes from the reproductive ones, the greater the risk of the latter being infected with all sorts of infections.
When purchasing, pay attention to the number of eyes—a large number of them promises a high yield. Buy potatoes unsprouted, otherwise the sprouts will break during transportation. Rot and damage are also unacceptable.
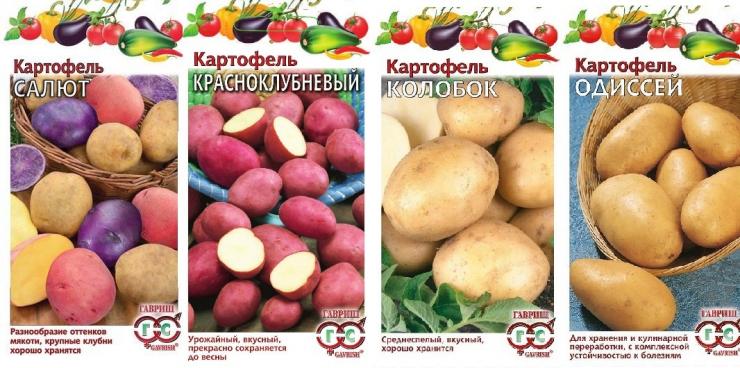
When purchasing, the resistance of varieties to diseases and pests is assessed. The following varieties have high disease immunity:
- nematode: Sante, Zhukovsky early, Odyssey, Amadeus;
- late blight: Lina, Temp, Nikulinsky, Luck;
- scab: Destkoselsky, Bryansk novelty;
- cancer diseases: Gatchina, Lukyanovsky, Andretta.
The varieties Lasunka, Ogonyok, Granat, and Kristall are resistant to the Colorado potato beetle.
Potato planting dates according to the 2023 Lunar calendar, depending on the variety and region
In addition to the factors listed above, the successful development of potatoes is influenced by the climatic conditions of a particular area.
To ensure the plant develops properly, it's important to time its planting. For example, in southern areas, soil temperatures need to reach 8 degrees Celsius, while in northern regions, temperatures of 12 degrees Celsius are needed.
Potatoes are also selected based on the planting region and weather conditions. For example, late-ripening varieties are not suitable for Siberia and the Leningrad region, as they won't have time to mature before the early frosts.
Early varieties are ready to be planted in April, mid-season varieties after May 15th. Late varieties are grown closer to winter and take four months to fully ripen.
Due to the peculiarities of weather and climate conditions, recommendations for planting different varieties are as follows:
| Region | Potato | Favorable days | Unfavorable days |
| Southern | Early | March: 1-3 (until 18:16), 8 (from 17:43 pm) - 17 (until 17:24 pm), 23 (from 21:41) - 25, 28 (from 13:21) - 30 (for germination). April: 7 (from 09:29) - 13 (for germination), 21-22 (until 13:11), 24 (from 21:58)-27 (until 9:29). |
March: 6,7,8,20,21,22 April: 5,6, 19, 20 |
| Average | May: 2 (from 09:09 a.m.)-4 (until 17:31 p.m.), 7-10, 13 (from 07:39 a.m.)-15 (until 10:56 a.m.), 17 (from 15:26 p.m.)-19 (until 21:46 p.m.). | May: 5,6,19,20. | |
| Late | June: 5 (from 06:40)-7 (until 11:41), 9 (from 13:14)-11 (until 16:19), 13 (from 21:30)-15, 19 (from 07:37)-20, 26-28 (until 11:55). | June: 3,4,17,18. | |
| Moscow region | Average | April: 7 (from 09:29) - 13 (for germination), 21-22 (until 13:11), 24 (from 21:58)-27 (until 9:29). May: 2 (from 09:09)-4 (to 17:31), 7-10, 13 (from 07:39)-15 (to 10:56), 17 (from 15:26)-19 (to 21:46), 29 (from 17:00) 50m.)-31. |
April: 5,6, 19, 20 |
| Central Russia and Leningrad Oblast | Average | May: 2 (from 09:09)-4 (to 17:31), 7-10, 13 (from 07:39)-15 (to 10:56), 17 (from 15:26)-19 (to 21:46), 29 (from 17:00) 50m.)-31. | May: 5,6,19,20. |
| Urals, Siberia | Average | May: 7-10, 13 (from 07:39 a.m.)-15 (until 10:56 a.m.), 17 (from 15:26 p.m.)-19 (until 21:46 p.m.), 29 (from 17:50 p.m.)-31. June: 5 (from 06:40)-7 (until 11:41), 9 (from 13:14)-11 (until 16:19), 13 (from 21:30)-15, 19 (from 07:37)-20, 26-28 (until 11:55). |
May: 5,6,19,20. June: 3,4,17,18. |
Another point: when determining planting days according to the lunar calendar, keep in mind that potatoes for food are planted a few days after the new moon, while those for seeds are planted shortly before the full moon. You can learn about these days in the articleLunar calendar for gardeners and vegetable growers for 2023.
Choosing a landing site
Once gardeners have chosen the potato variety and planting method, they select a location for the potato beds. The vegetable prefers light soil with a slight sand content. It thrives in former peatlands and black soil.
Clay soil will hinder potato growth. This problem can be solved by adding sand to the soil, fertilizing it with manure, and planting the potatoes on raised beds. Acidity can be reduced by adding wood ash or lime.
In the fall, the plot is dug over to the depth of a spade, weed roots and plant debris are removed, and the soil is fertilized with manure and compost, but not leveled. This is done to retain spring moisture and improve aeration. If the plot is clayey, it's best to dig trenches in the fall to drain spring water. In the spring, the garden is dug again, turning the soil over. After a winter with little snow, it's sufficient to loosen the plot to retain moisture.
Basic principles of planting potatoes
To reap a bountiful harvest and avoid any problems, follow these simple rules:
- The soil must be well-warmed. A cold bed will slow down the growth of seedlings, the tubers will develop slowly, and will also be susceptible to infection.
- Do not delay planting seeds, otherwise the water obtained from the winter snow will evaporate and will not reach the plants.
- Sorted and sprouted seeds should be planted. Potatoes should be free of rot, dampness, and cracks.
- Breeders have developed specific varieties for each region with its own climate. This is worth considering.
- You can determine the soil's composition and acidity as follows. Wet a clump of soil and squeeze it in your hand. If it doesn't crumble, the soil is clayey. Acidity is determined by the plants. Thistle and bindweed grow in neutral soil. Plantain and buttercup prefer acidic soils.
- Avoid planting potatoes in the same area for several years in a row. This depletes the soil and leaves the tubers susceptible to diseases and pests. Choose a planting site where beets, sunflowers, beans, pumpkins, and cucumbers were previously grown.
- With proper care, you can harvest 500-600 kg from one hundred square meters. But if you hear stories of a 20 kg harvest from a single bush, it means the plants were treated with massive doses of fertilizer. Clearly, such vegetables are not suitable for human or animal consumption.
- Sometimes, to conserve seed, it's necessary to cut the potato. To prevent accidentally transferring infection from a diseased potato to a healthy one, periodically dip the knife in a disinfectant solution of potassium permanganate. Potatoes are cut lengthwise, not crosswise, as the most vigorous sprouts usually gather at the top of the tuber.
- The ideal size for seed potatoes is the size of a chicken egg, and here's why. Small tubers contain little nutrition, and the yield will be poor. And if you use large potatoes for planting, you'll waste a lot of tubers.
Classic planting methods
There are many ways to plant potatoes. Each method has its advantages and disadvantages. After a detailed analysis of each, gardeners choose the one that best suits their soil type and yield.
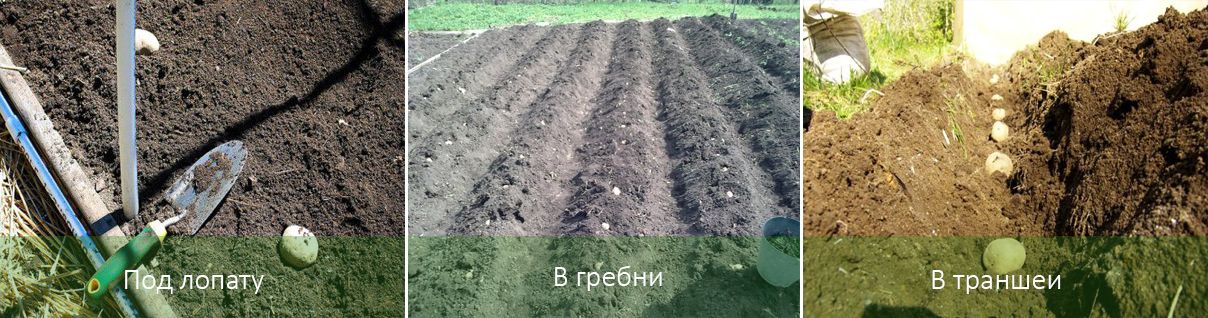
To understand how to plant potatoes correctly, you should understand each of them in detail.
Under the shovel
With the old-fashioned method, the warmed plot is loosened with a pitchfork or rake. Ropes and pegs are used to mark out the area for the future plants. The width between the beds is 65-75 cm, and the distance between the holes is approximately 30 cm. Two people are sufficient for the job: one digs, the other drops the potatoes into the holes. Fertilizer or compost is added to each hole and then filled with soil from the next hole. Before the seedlings bloom, they are hilled twice. Disadvantages of this method: weeding can damage the root system; the dense planting makes it difficult to loosen the soil around the bushes, and they attract a large number of pests. Planting and hilling the plants with this method is physically demanding.
In the ridges
There are places where groundwater, due to its proximity, erodes crops. In such areas and on soils with a clay content, potatoes are planted this way. Tractors create high ridges, 15 cm high and approximately 60-70 cm wide. Potato tubers are planted on the tops of these ridges, spaced 25-30 cm apart. Here, too, there's a risk of damaging roots during excavation work, and you'll also have to deal with Colorado potato beetles. However, the advantage of this method is that the moisture dries faster on the ridges, preventing the tubers from rotting. Another advantage is that the labor is mechanized, not manual.
In the trench
Preparation begins in the fall. Unlike the previous method, trenches are dug to conserve moisture. A hole is dug a shovel blade wide and the same depth, approximately 40 cm. The row spacing is two shovel blades, or 80 cm. Straw is laid in the hole in the fall, then pressed down with manure, fertilizer, and onion peels (to repel wireworms). In the spring, sprouted tubers are laid on top of the prepared compost, covered with soil. This keeps them warm and moist, reduces the need for additional watering, and absorbs the necessary fertilizer from the compost, resulting in a high yield. A disadvantage is the hassle of preparing the trench in the fall. And if the summer is rainy, the tubers may rot.
American technology
This deep-planting method uses a 22x22x22 pattern. A 22-cm-deep hole is dug 22 cm apart from adjacent holes. The potato planted in this hole produces a long underground stem, from which new potatoes form along its entire length. However, this method is best suited for light, loose sandy loam. Potatoes will rot in loamy soil.
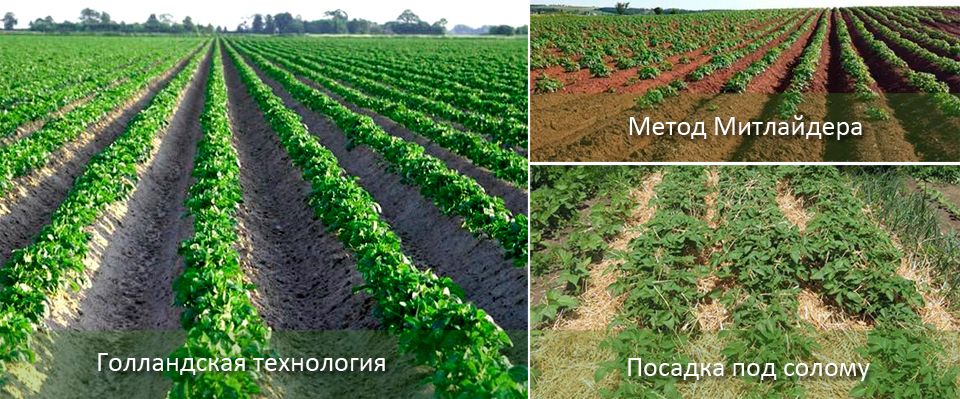
Dutch technology
This method involves planting potatoes in raised beds. Potatoes are planted in pits with fertilizer. When hilling the plants, soil is raked in from between the rows. Wide spacing between the beds prevents damage to the root system. Fertilize the growing plants, and loosen the soil around them.
Mittlider method
According to the scientist's technique, tubers are planted according to the following scheme. Narrow beds, approximately 35 cm wide, are marked out on the plot with stakes and ropes. Rows are spaced approximately 90-100 cm apart. The finished beds are dug and left in place for several years. Then, earthen borders are formed. The soil bed inside is fertilized with ash, compost, and chicken manure. Sprouted tubers are planted in two rows, staggered, 30 cm apart. Until flowering, they are watered twice and fertilized without weeding. The main advantage of this method is that potato plants do not require tilling. This growing method is suitable for small areas, and the plants produce a good harvest. The only drawback is the time required to prepare the beds.
Planting under straw
Our ancestors knew how to plant potatoes properly back in the 19th century. In this case, the plot is prepared in the fall, covered with several layers of straw. Over the winter, the straw rots into compost. In the spring, potatoes are planted in the nutrient-rich mixture, spacing the rows 70 cm apart. Instead of weeding, a layer of straw is added each time. This method is advantageous because there is no need to weed or hill the plants, and potato pests are virtually eliminated. The compost provides additional warmth to the tubers, and, having no contact with the soil, they are dug up clean in the fall.
Growing potatoes under agrofibre or cardboard
This option is similar to the "straw" option, but instead of straw, a special material or cardboard is used. A sheet is laid over a dug and fertilized area, and holes are cut over the holes, into which the tubers and sprouts are planted. Agrofibre traps weed seeds. The area requires no weeding, watering, or fertilizing, as all the nutrients necessary for development are contained within the sheeting. The only drawback is the cost of purchasing the material.
Top.tomathouse.com recommends: Growing potatoes for the lazy
How to plant potatoes without much effort? In bags, barrels, and boxes. This tip will be a real godsend for gardeners.
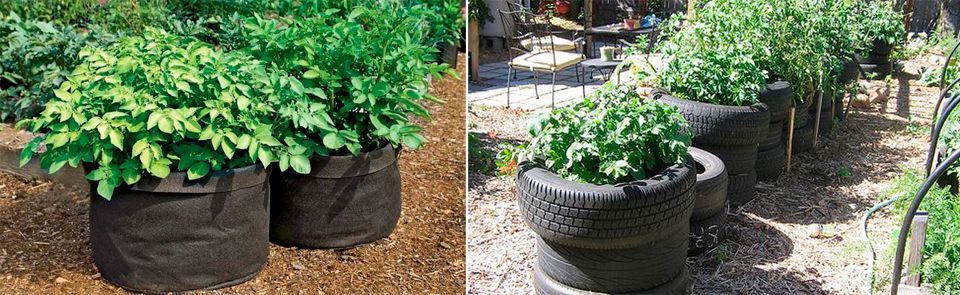
This method is ideal for small plots of land.
- Drainage is filled into the bag, and soil is added. Sprouted potatoes are placed on top, covered with equal parts of a soil mixture and compost. As soon as the first sprouts appear, top up the nutrient mixture, completely covering them. The soil mixture is added to the growing potatoes several times. This method requires constant watering and fertilizing, as the soil in the bag dries out quickly.
- When planting in barrels, the same technique is used, except holes are drilled around the container for ventilation and the bottom is removed. Experienced experimenters claim that this method can yield almost a sack of potatoes.
- When growing vegetables in boxes, the structure must be expanded as the plants grow. The bottom box is placed on bricks for better ventilation. The bottom is lined with paper, filled with expanded clay, topped with fertile soil, and then the potatoes are laid out, covered with potting mix. Seedlings peeking above the box will signal the owner when it's time to add another box on top, adding soil. This continues until budding. The advantages of this "lazy option" are that there's no need to weed or hill the plants, and harvesting is possible even without a large plot. The disadvantages include frequent watering.
How to grow potatoes from seedlings
Gardeners typically use suitable-sized tubers left over from the previous season to plant potatoes. They plant them immediately and wait for them to sprout. However, sometimes it's helpful to renew the seed stock. The easiest way to do this is by growing potatoes from seedlings directly from the tuber. This method of growing potatoes yields a bountiful harvest of early-ripening potatoes. We'll tell you how.
The seedling method for growing garden crops is most often used for tomatoes, peppers, cucumbers, and the like. Potatoes can also be grown this way. It's not particularly popular, however, as it requires some effort on the part of the gardener. However, if you set your mind to it, you'll be rewarded with a harvest that ripens quickly and has excellent flavor. You can harvest the first tubers as early as late June.
Processing tubers before planting
Preparations should begin as early as early February. You'll need several tubers of your favorite varieties. They should be uniform in shape, free of damage and defects.
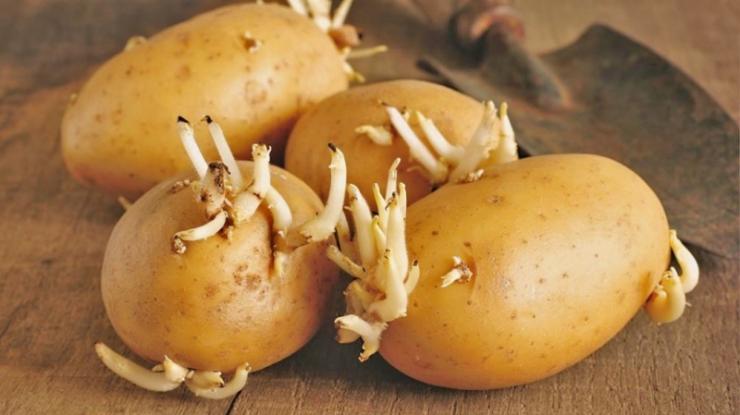
The first step is to soak the selected potatoes for 30 minutes in a special disinfectant solution, which is prepared according to the following recipe:
- Water – 10 l,
- Potassium permanganate - 4 g,
- Copper sulfate - 6 g,
- Boric acid – 2 g,
- Potassium sulfate – 30 g.
All ingredients are mixed and added to warm water for better dissolution. The tubers are then placed into the resulting substrate.
After soaking for half an hour, remove the potatoes, dry them, and place them in a well-lit area for three weeks. Every seven days, treat the tubers with:
- During the first week, spray the potatoes with a mixture of 2.5 liters of water and 1 glass of ash.
- In the second week, treatment is carried out with a solution of 0.5 l of superphosphate and 2.5 l of water.
- In the third week, the tubers are sprayed with an infusion of chicken manure at a rate of 1:20.
These measures help strengthen the potato's immunity, increase its endurance, and prepare it for germination.
Planting potato seedlings
Planting should begin in early March. Prepare a separate container for each tuber. Large sour cream cups, cut-down 1.5-liter bottles, or juice or milk cartons can be used. If you have pots from houseplants, you can use them. The main thing is that the tuber fits comfortably and can be removed without damage. Cover the potatoes with soil and leave them for another month.
In the last week of April, you can begin planting the seedlings in their permanent location. To do this, dig shallow holes, add a handful of ash, compost, and 1 teaspoon of superphosphate, dig the soil again, and place the tuber inside. For the first week after planting, keep the seedlings covered, such as with spunbond.
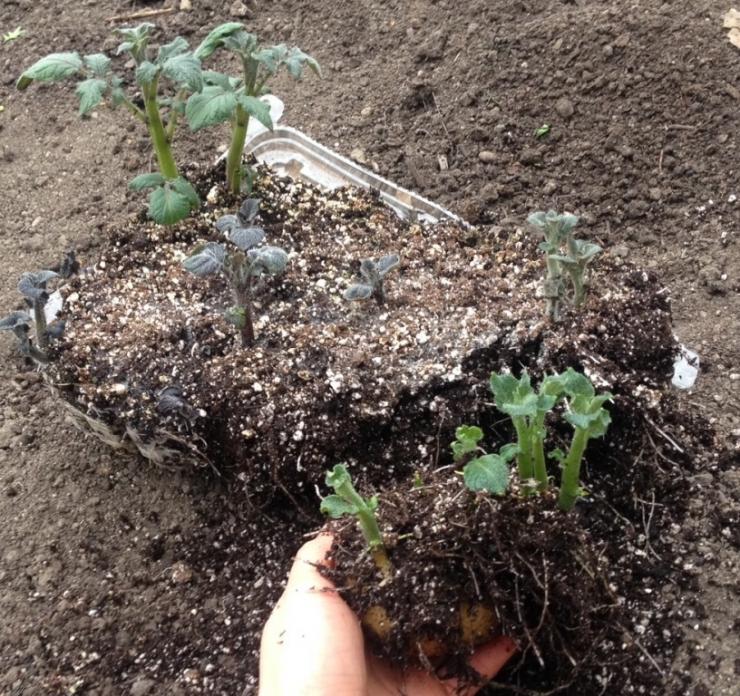
To prevent aphids, spray the emerging seedlings with a solution of Fitoverm (1 ml per 1 liter of water). Repeat treatment after 10 days.
After another month, the plantings need to be hilled up, after which everything should be left to develop, as with the classic growing method.
Potato harvest from seedlings
The newly grown potato tubers don't look as vigorous as the others. Already in the first month of summer, their tops begin to yellow and wither. This means the potatoes in the ground are ripe, and it's time to dig them up. The resulting harvest may not impress the most demanding gardeners, but if you plant them next season, you'll be amazed by the quality of the tubers you harvest.
Growing potatoes from seeds
Specialty stores offer a huge selection of potato varieties. Of course, the easiest way is to sow ready-made tubers and wait for a harvest. But with just a little extra effort, you can grow a harvest of unrivaled quality from seeds.
It's best to choose early (Triumph, Farmer, etc.) or mid-early (Deva, etc.) varieties that are resistant to fungi and viruses. A quicker growth period reduces the risk of disease.
How to sow seeds correctly
You can begin sowing seeds in the second half of March. It's advisable to work with each variety separately to check their quality later.
At the first stage, each variety is placed in its own container with water and placed in a warm place, such as near a radiator. After about 7 days, you'll notice tiny sprouts appearing.
To plant the seeds, you'll need to purchase a universal potting soil. Carefully plant the seeds in a prepared box or cups, so as not to damage the fragile seedlings. Keep the distance between the seedlings so they aren't too close together. Don't crowd the potatoes; it's best to use a second box if you have a lot of seeds left. Afterwards, water the soil and cover it with plastic wrap.
Make sure the soil is always sufficiently moist, ventilate the seedlings so that condensation does not accumulate inside, but avoid drafts.
How seedlings grow
The seedlings gain strength very quickly. By the end of April, the stems have elongated and leaves have appeared. At this stage, it's important to ensure that the seedlings don't become intertwined. If the seedlings are growing too close together, thinning is necessary.
How to plant potato seedlings in the ground
Around the first days of June, you can begin planting the seedlings in the permanent bed. Depending on the condition of the bushes and weather conditions, this can be done a little earlier or later.
Prepare holes for each plant in advance, fertilizing the soil with a pinch of ash and superphosphate. If you haven't previously hardened off the shoots, you'll need to shade them for the first week. Maintain a distance between the plants during planting, allowing for future hilling.
Care in the ground
Potatoes grown from seed don't require any special care. They need watering, hilling, and loosening the soil. Some gardeners recommend pinching off finished blooms. Two treatments per season are recommended. The first application is best with a humate, and the second application is most effective with a complex mineral fertilizer. This treatment not only strengthens the potato's immune system but also prevents pests, including the Colorado potato beetle.
Harvest
You can begin harvesting as early as mid-September. Taking notes will help you determine which plant yielded the best potatoes. Some tubers can be saved for storage, while the smaller potatoes can be used for sowing next season. Tubers grown from this type of seed will later yield a much larger harvest than in the first year.
Conclusion
As a rule, of all the methods, agronomists choose the one that produces a high-quality harvest and is suitable for a specific area.
Armed with knowledge of the best potato planting practices, choosing a variety that thrives in both soil and climate, and with proper care and attention, you'll be rewarded with a bountiful autumn harvest. All you need to do is follow a few simple rules and love working the land.